8、SpringBoot整合之SpringBoot整合MongoDB
SpringBoot整合MongoDB
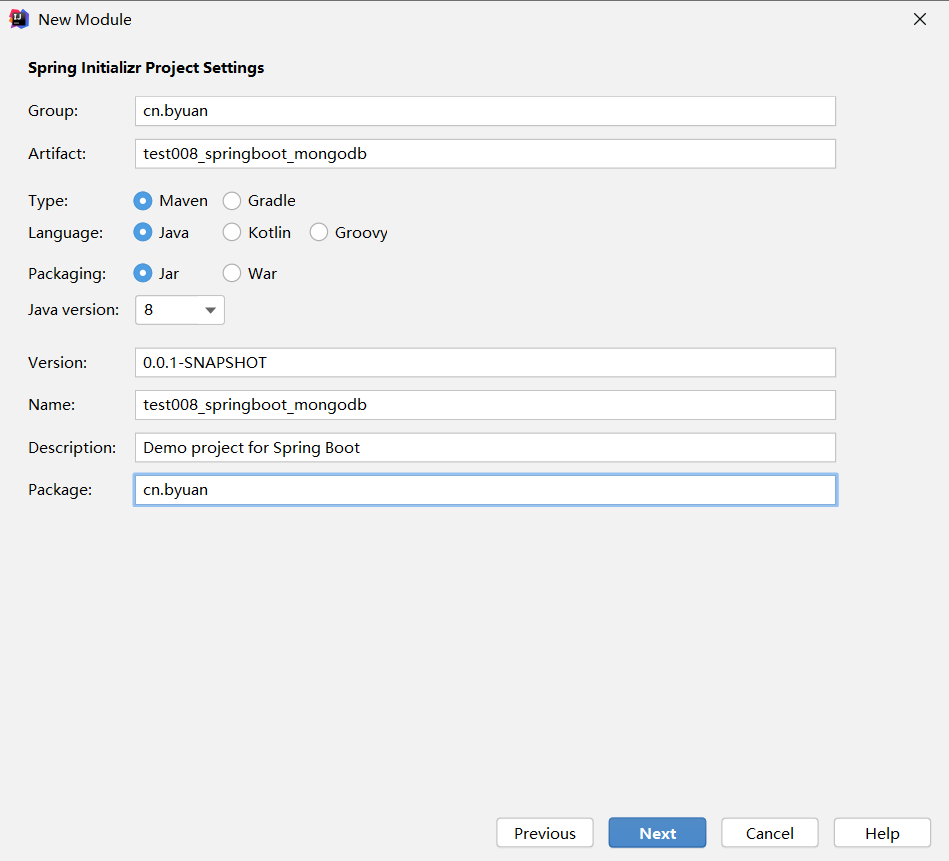
一、创建项目,选择依赖
仅选择Spring Web、Spring Data MongoDB即可


二、引入相关依赖(非必要)
这里只是为了实体类的创建方便而引入lombok
<!-- 引入lombok -->

<dependency>

    <groupId>org.projectlombok</groupId>

    <artifactId>lombok</artifactId>

</dependency>
三、如果是第一次使用MongoDB,首先先创建用户
> use admin

switched to db admin

> db.createUser({user:"zlfeng", pwd:"123456", roles:[{role:"readWriteAnyDatabase", db:"admin"}]});

Successfully added user: {

	"user" : "zlfeng",

	"roles" : [

		{

			"role" : "readWriteAnyDatabase",

			"db" : "admin"

		}

	]

}
MongoDB权限介绍
| 权限 | 说明 |
|---|---|
| read | 允许用户读取指定数据库 |
| readWrite | 允许用户读写指定数据库 |
| dbAdmin | 允许用户在指定数据库中执行管理函数,如索引创建、删除、查看统计或访问system.profile |
| userAdmin | 允许用户向system.users集合写入,可以在指定数据库中创建、删除和管理用户 |
| clusterAdmin | 必须在admin数据库中定义,赋予用户所有分片和复制集相关函数的管理权限 |
| readAnyDatabase | 必须在admin数据库中定义,赋予用户所有数据库的读权限 |
| readWriteAnyDatabase | 必须在admin数据库中定义,赋予用户所有数据库的读写权限 |
| userAdminAnyDatabase | 必须在admin数据库中定义,赋予用户所有数据库的userAdmin权限 |
| dbAdminAnyDatabase | 必须在admin数据库中定义,赋予用户所有数据库的dbAdmin权限 |
| root | 必须在admin数据库中定义,超级账号,超级权限 |
四、定义核心配置文件
# 登录用户所在的数据库

spring.data.mongodb.authentication-database=admin

# 数据库的ip地址

spring.data.mongodb.host=192.168.133.142

# MongoDB端口号

spring.data.mongodb.port=27017

# 用户账号

spring.data.mongodb.username=zlfeng

# 用户密码

spring.data.mongodb.password=123456

# 指定使用的数据库

# 不必预先创建,不存在该数据库会自动创建

spring.data.mongodb.database=db_student
五、创建实体类
package cn.byuan.entity;

import lombok.AllArgsConstructor;

import lombok.Data;

import lombok.NoArgsConstructor;

import lombok.experimental.Accessors;

import org.springframework.data.annotation.Id;

import java.io.Serializable;

import java.util.Date;

@NoArgsConstructor

@AllArgsConstructor

@Accessors(chain = true)

@Data

public class Student implements Serializable {

    @Id// 必须指定id列

    private String studentId;

    private String studentName;

    private Integer studentAge;

    private Double studentScore;

    private Date studentBirthday;

}
六、创建dao层,这里的dao层有两种写法
(一)dao层写法一
1. 编码部分
package cn.byuan.dao;

import cn.byuan.entity.Student;

import org.springframework.data.mongodb.repository.MongoRepository;

/*

* dao层写法一

* 这里的用法其实和SpringDataJPA相似, 可根据需要来自定义方法

*

* 这种写法不需要写实现类

*

* MongoRepository<行对应的对象类型, 主键列类型>

* */

public interface StudentDaoTypeOne extends MongoRepository<Student, String> {

//    可根据需求自己定义方法, 无需对方法进行实现

    Student getAllByStudentName(String studentName);

}

2.测试部分
在进行测试之前,我们先查询一下数据库,此时不存在db_student的库

开始测试
package cn.byuan;

import cn.byuan.dao.StudentDaoTypeOne;

import cn.byuan.entity.Student;

import org.junit.jupiter.api.Test;

import org.springframework.beans.factory.annotation.Autowired;

import org.springframework.boot.test.context.SpringBootTest;

import java.util.Date;

import java.util.List;

@SpringBootTest

class StudentDaoTypeOneTests {

    @Autowired

    private StudentDaoTypeOne studentDaoTypeOne;

    @Test

    void addOneStudent(){

//        插入10行

        for (Integer count = 0; count < 10; count++) {

            Student student = new Student()

                    .setStudentId("student_"+count) //如果自己不去设置id则系统会分配给一个id

                    .setStudentName("Godfery"+count)

                    .setStudentAge(count)

                    .setStudentScore(98.5-count)

                    .setStudentBirthday(new Date());

            studentDaoTypeOne.save(student);

        }

    }

    @Test

    void deleteOneStudentByStudentId(){

//        删除id为student_0的学生

        studentDaoTypeOne.deleteById("student_0");

    }

    @Test

    void updateOneStudent(){

//        修改姓名为Godfery1的Student年龄为22

        Student student = studentDaoTypeOne.getAllByStudentName("Godfery1");

        student.setStudentAge(22);

        studentDaoTypeOne.save(student);

    }

    @Test

    void getOneStudentByStudentId(){

        System.out.println(studentDaoTypeOne.findById("student_1"));

    }

    @Test

    void getAllStudent(){

        List<Student> studentList = studentDaoTypeOne.findAll();

        studentList.forEach(System.out::println);

    }

}

我们先来查看一下数据库

进入数据库查看一下数据

(二)dao层写法二
1.编码部分
接口部分
package cn.byuan.dao;

import cn.byuan.entity.Student;

import java.util.List;

/*

* dao层写法二

*

* 写法二需要进行实现

* */

public interface StudentDaoTypeTwo {

//    增加一位学生

    void addOneStudent(Student student);

//    根据id删除一位学生

    void deleteOneStudentByStudentId(String studentId);

//    修改一位学生的信息

    void updateOneStudent(Student student);

//    根据主键id获取一名学生

    Student getOneStudentByStudentId(String studentId);

//    获取全部学生

    List<Student> getAllStudent();

}
实现类
package cn.byuan.dao.imp;

import cn.byuan.dao.StudentDaoTypeTwo;

import cn.byuan.entity.Student;

import org.springframework.beans.factory.annotation.Autowired;

import org.springframework.data.mongodb.core.MongoTemplate;

import org.springframework.stereotype.Repository;

import java.util.List;

@Repository

public class StudentDaoTypeTwoImp implements StudentDaoTypeTwo {

//    使用MongoTemplate模板类实现数据库操作

    @Autowired

    private MongoTemplate mongoTemplate;

//    增加一位学生

    public void addOneStudent(Student student){

        mongoTemplate.save(student);

    }

//    根据id删除一位学生

    public void deleteOneStudentByStudentId(String studentId){

        Student student = mongoTemplate.findById(studentId, Student.class);

        if(student != null){

            mongoTemplate.remove(student);

        }

    }

//    修改一位学生的信息

    public void updateOneStudent(Student student){

        mongoTemplate.save(student);

    }

//    根据主键id获取一名学生

    public Student getOneStudentByStudentId(String studentId){

        return mongoTemplate.findById(studentId, Student.class);

    }

//    获取全部学生

    public List<Student> getAllStudent(){

        return mongoTemplate.findAll(Student.class);

    }

}
2.测试部分
package cn.byuan;

import cn.byuan.dao.StudentDaoTypeOne;

import cn.byuan.dao.StudentDaoTypeTwo;

import cn.byuan.entity.Student;

import org.junit.jupiter.api.Test;

import org.springframework.beans.factory.annotation.Autowired;

import org.springframework.boot.test.context.SpringBootTest;

import java.util.Date;

import java.util.List;

@SpringBootTest

class StudentDaoTypeTwoTests {

    @Autowired

    private StudentDaoTypeTwo studentDaoTypeTwo;

    @Test

    void addOneStudent(){

//        插入10行

        for (Integer count = 0; count < 10; count++) {

            Student student = new Student()

                    .setStudentId("study_"+count) //如果自己不去设置id则系统会分配给一个id

                    .setStudentName("Echo"+count)

                    .setStudentAge(count)

                    .setStudentScore(98.5-count)

                    .setStudentBirthday(new Date());

            studentDaoTypeTwo.addOneStudent(student);

        }

    }

    @Test

    void deleteOneStudentByStudentId(){

//        删除id为study_0的学生

        studentDaoTypeTwo.deleteOneStudentByStudentId("study_0");

    }

    @Test

    void updateOneStudent(){

//        修改id为study_1的Student年龄为21

        Student student = studentDaoTypeTwo.getOneStudentByStudentId("study_1");

        student.setStudentAge(21);

        studentDaoTypeTwo.updateOneStudent(student);

    }

    @Test

    void getOneStudentByStudentId(){

        System.out.println(studentDaoTypeTwo.getOneStudentByStudentId("study_1"));

    }

    @Test

    void getAllStudent(){

        List<Student> studentList = studentDaoTypeTwo.getAllStudent();

        studentList.forEach(System.out::println);

    }

}

进入数据库查看一下数据

源码地址:https://github.com/byuan98/springboot-integration/tree/master/test008_springboot_mongodb
8、SpringBoot整合之SpringBoot整合MongoDB的更多相关文章
- springboot+jpa+mysql+swagger整合
Springboot+jpa+MySQL+swagger整合 创建一个springboot web项目 <dependencies> <dependency> < ...
- java框架之SpringBoot(12)-消息及整合RabbitMQ
前言 概述 大多数应用中,可通过消息服务中间件来提升系统异步通信.扩展解耦的能力. 消息服务中两个重要概念:消息代理(message broker)和目的地(destination).当消息发送者发送 ...
- java框架之SpringBoot(13)-检索及整合Elasticsearch
ElasticSearch介绍 简介 我们的应用经常需要使用检索功能,开源的 Elasticsearch 是目前全文搜索引擎的首选.它可以快速的存储.搜索和分析海量数据.SpringBoot 通过整合 ...
- Springboot 2.0.4 整合Mybatis出现异常Property 'sqlSessionFactory' or 'sqlSessionTemplate' are required
在使用Springboot 2.0.4 整合Mybatis的时候出现异常Property 'sqlSessionFactory' or 'sqlSessionTemplate' are require ...
- SpringBoot Druid整合,SpringBoot 集成Druid
SpringBoot Druid整合,SpringBoot 集成Druid ================================ ©Copyright 蕃薯耀 2018年4月8日 http ...
- SpringBoot+SpringMVC+MyBatis快速整合搭建
作为开发人员,大家都知道,SpringBoot是基于Spring4.0设计的,不仅继承了Spring框架原有的优秀特性,而且还通过简化配置来进一步简化了Spring应用的整个搭建和开发过程.另外Spr ...
- SpringBoot:4.SpringBoot整合Mybatis实现数据库访问
在公司项目开发中,使用Mybatis居多.在 SpringBoot:3.SpringBoot使用Spring-data-jpa实现数据库访问 中,这种jpa风格的把sql语句和java代码放到一起,总 ...
- SpringBoot与PageHelper的整合示例详解
SpringBoot与PageHelper的整合示例详解 1.PageHelper简介 PageHelper官网地址: https://pagehelper.github.io/ 摘要: com.gi ...
- SpringBoot学习- 4、整合JWT
SpringBoot学习足迹 1.Json web token(JWT)是为了网络应用环境间传递声明而执行的一种基于JSON的开发标准(RFC 7519),该token被设计为紧凑且安全的,特别适用于 ...
- SpringBoot学习- 3、整合MyBatis
SpringBoot学习足迹 1.下载安装一个Mysql数据库及管理工具,同类工具很多,随便找一个都可以,我在windows下做测试项目习惯使用的是haosql 它内部集成了MySql-Front管理 ...
随机推荐
- Linux服务之Samba服务篇
Samba服务 桑巴Smb是基于cs架构 作用:用于跨平台进行文件共享 优点:兼容性好,较为安全(具备身份验证) 缺点:仅限内网环境使用 应用:一般在办公环境下使用 rz 也是一种可以在Windows ...
- STM32标准外设库中USE_STDPERIPH_DRIVER, STM32F10X_MD的含义
在项目中使用stm32标准外设库(STM32F10x Standard Peripherals Library)的时候,我们会在项目的选项中预定义两个宏定义:USE_STDPERIPH_DRIVER, ...
- Nginx下配置Https 配置文件(vue)
#user nobody; worker_processes 1; #error_log logs/error.log; #error_log logs/error.log notice; #erro ...
- Day30 BigInteger和BigDecimal
BigInteger与BigDecimal BigInteger类 Integer类作为int的包装类,能存储的最大整型值为2 31-1,Long类也是有限的, 最大为2 63-1.如果要表示再大的整 ...
- golang快速入门(五)初尝web服务
提示:本系列文章适合对Go有持续冲动的读者 初探golang web服务 golang web开发是其一项重要且有竞争力的应用,本小结来看看再golang中怎么创建一个简单的web服务. 在不适用we ...
- VMware vRealize Suite 8.4 发布 - 多云环境的云计算管理解决方案
VMware vRealize Suite 8.4.0, Release Date: 2021-04-15 概述 VMware vRealize Suite 是一种多云环境的云计算管理解决方案,为 I ...
- 项目中添加lib依赖
Project Structure-->Artifacts
- Go语言设计模式之函数式选项模式
Go语言设计模式之函数式选项模式 本文主要介绍了Go语言中函数式选项模式及该设计模式在实际编程中的应用. 为什么需要函数式选项模式? 最近看go-micro/options.go源码的时候,发现了一段 ...
- 关于LSTM核心思想的部分理解
具体资料可以查阅网上,这里提到一些难理解的点.别人讲过的知识点我就不重复了. LSTM 的关键就是细胞状态,按照水平线从左向右运行,如同履带,在整个链上运行. 根据时间t-1,t,t+1,我们可以看出 ...
- DelayQueue延迟队列原理剖析
DelayQueue延迟队列原理剖析 介绍 DelayQueue队列是一个延迟队列,DelayQueue中存放的元素必须实现Delayed接口的元素,实现接口后相当于是每个元素都有个过期时间,当队列进 ...
