WebFlux02 SpringBoot WebFlux项目骨架搭建
1 环境搭建
1.1 版本说明
jdk -> 1.8
maven -3.5
springboot -> 2.0.3
开发工具 -> IDEA
1.2 创建项目
利用 IDEA 或者 start.spring.io 创建一个SpringBoot项目
1.2.1 选择依赖
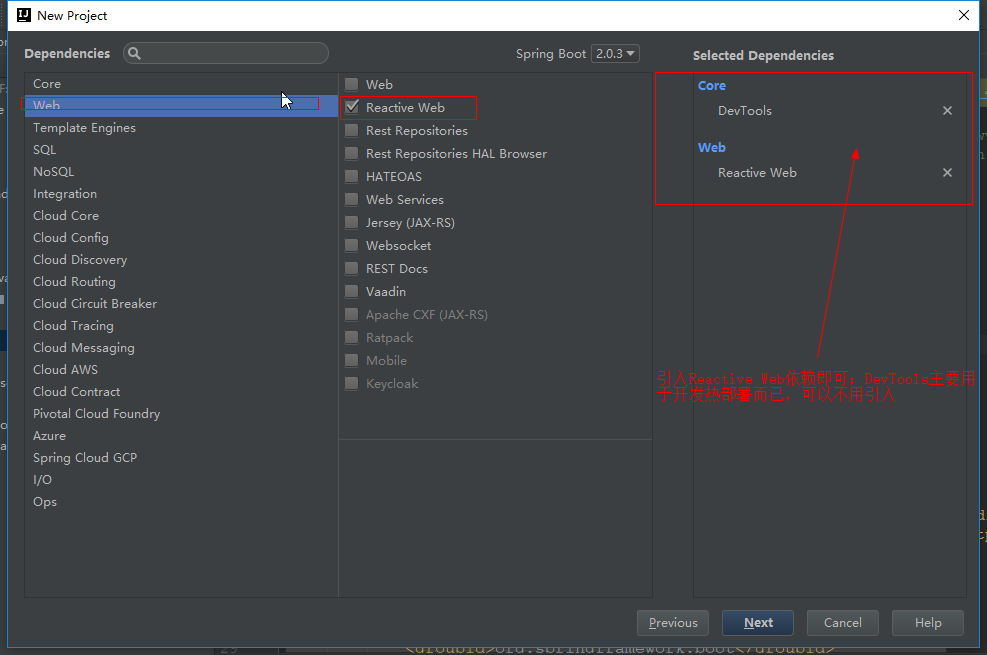
1.2.2 pom.xml 依赖
<?xml version="1.0" encoding="UTF-8"?>

<project xmlns="http://maven.apache.org/POM/4.0.0" xmlns:xsi="http://www.w3.org/2001/XMLSchema-instance"

    xsi:schemaLocation="http://maven.apache.org/POM/4.0.0 http://maven.apache.org/xsd/maven-4.0.0.xsd">

    <modelVersion>4.0.</modelVersion>

    <groupId>cn.xiangxu</groupId>

    <artifactId>test_demo</artifactId>

    <version>0.0.-SNAPSHOT</version>

    <packaging>jar</packaging>

    <name>test_demo</name>

    <description>Demo project for Spring Boot</description>

    <parent>

        <groupId>org.springframework.boot</groupId>

        <artifactId>spring-boot-starter-parent</artifactId>

        <version>2.0..RELEASE</version>

        <relativePath/> <!-- lookup parent from repository -->

    </parent>

    <properties>

        <project.build.sourceEncoding>UTF-</project.build.sourceEncoding>

        <project.reporting.outputEncoding>UTF-</project.reporting.outputEncoding>

        <java.version>1.8</java.version>

    </properties>

    <dependencies>

        <dependency>

            <groupId>org.springframework.boot</groupId>

            <artifactId>spring-boot-starter-webflux</artifactId>

        </dependency>

        <dependency>

            <groupId>org.springframework.boot</groupId>

            <artifactId>spring-boot-devtools</artifactId>

            <!--<scope>runtime</scope>-->

            <optional>true</optional>

        </dependency>

        <dependency>

            <groupId>org.springframework.boot</groupId>

            <artifactId>spring-boot-starter-test</artifactId>

            <scope>test</scope>

        </dependency>

        <dependency>

            <groupId>io.projectreactor</groupId>

            <artifactId>reactor-test</artifactId>

            <scope>test</scope>

        </dependency>

    </dependencies>

    <build>

        <plugins>

            <plugin>

                <groupId>org.springframework.boot</groupId>

                <artifactId>spring-boot-maven-plugin</artifactId>

                <configuration>

                    <fork>true</fork>

                </configuration>

            </plugin>

        </plugins>

    </build>

</project>
2 开发步骤
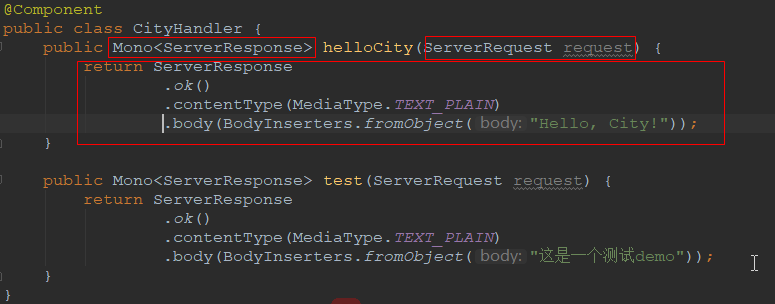
2.1 处理器类
相当于SpringMVC中的service类,主要就是根据不同的请求url执行不同的业务逻辑
技巧01:编写的处理器类必须被容器所管理
package cn.xiangxu.test_demo.handler;

import org.springframework.http.MediaType;

import org.springframework.stereotype.Component;

import org.springframework.web.reactive.function.BodyInserters;

import org.springframework.web.reactive.function.server.ServerRequest;

import org.springframework.web.reactive.function.server.ServerResponse;

import reactor.core.publisher.Mono;

/**

 * @author 王杨帅

 * @create 2018-06-26 9:58

 * @desc 相当于springMVC的controller类

 **/

@Component

public class StudentHandler {

    public Mono<ServerResponse> helloStudent(ServerRequest serverRequest) {

        return ServerResponse // 响应对象封装

                .ok() // 响应码

                .contentType(MediaType.TEXT_PLAIN) // 响应类型

                .body(BodyInserters.fromObject("这是学生控制类")); // 响应体

    }

}
StudentHandler.java
2.2 路由器类
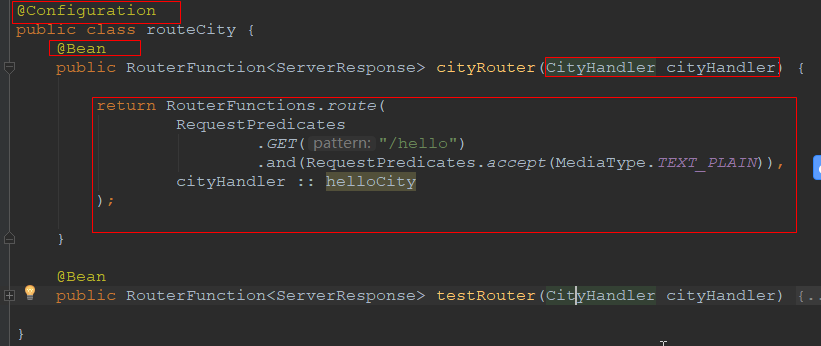
相当于DispatherServlet,主要就是将不同的请求url和对应的处理器类进行匹配
技巧01:路由器类相当于一个Java配置类,所以必须添加 @Configuration 注解,并且路由器类中的路由方法返回的对象必须被容器管理,所以必须添加@Bean注解
技巧02:RouterFunctions的route方法接收两个参数,并返回 RouterFunctions 类型
》参数一 :请求断言
》参数二 :处理函数接口【可用lambda表达式代替】
package cn.xiangxu.test_demo.router;

import cn.xiangxu.test_demo.handler.StudentHandler;

import org.springframework.context.annotation.Bean;

import org.springframework.context.annotation.Configuration;

import org.springframework.http.MediaType;

import org.springframework.web.reactive.function.server.RequestPredicates;

import org.springframework.web.reactive.function.server.RouterFunction;

import org.springframework.web.reactive.function.server.RouterFunctions;

import org.springframework.web.reactive.function.server.ServerResponse;

/**

 * @author 王杨帅

 * @create 2018-06-26 10:02

 * @desc

 **/

@Configuration

public class StudentRouter {

    @Bean

    public RouterFunction<ServerResponse> routerHelloStudent(StudentHandler studentHandler) {

        return RouterFunctions

                .route( // 路由匹配:将请求url路由到对应的处理器

                        RequestPredicates

                            .GET("/student/hello") // 请求url

                            .and(RequestPredicates.accept(MediaType.TEXT_PLAIN)), // 接收的请求数据类型

                        studentHandler::helloStudent // 处理请求的处理方法

                );

        /*

        代码解释:如果请求是/student/hello时就会调用StudentHandler处理器类中的helloStudent方法进行业务逻辑处理

         */

    }

}
StudentRouter.java
2.3 启动项目
2.3.1 IDEA启动
直接运行启动类就可以啦
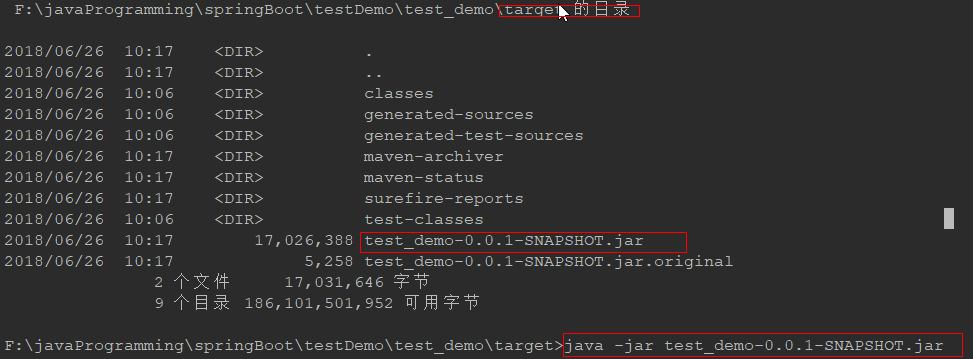
2.3.2 打包部署启动
》打包项目
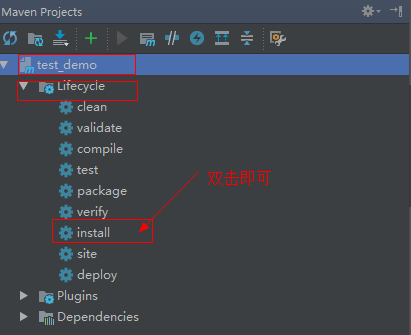
》运行项目
进入到项目根目录下的target文件夹后通过 java -jar xxx.jar 就可以运行项目啦
技巧01:SpringBoot WebFlux 默认集成的是 Netty
2.3.3 前端访问

WebFlux02 SpringBoot WebFlux项目骨架搭建的更多相关文章
- Maven项目骨架搭建
1. 如何使用Maven的archetype快速生成一个新项目 2. Maven之自定义archetype生成项目骨架(一) 3. 使用maven3 创建自定义的archetype 4. 使用mave ...
- SpringBoot→Maven项目快速搭建
使用软件 :SpringToolSuite4 打开软件后在Package Explorer 栏中点击右键 Spring starter project 等待反应 填写完毕之后点击next fi ...
- springboot web项目创建及自动配置分析(thymeleaf+flyway)
@ 目录 源码分析 webjars thymeleaf thymeleaf语法 springmvc 启动配置原理 集成flyway插件 springboot 创建web项目只需要引入对应的web-st ...
- 快速搭建react项目骨架(按需加载、redux、axios、项目级目录等等)
一.前言 最近整理了一下项目骨架,顺便自定义了一个脚手架,方便日后使用.我会从头开始,步骤一步步写明白,如果还有不清楚的可以评论区留言.先大致介绍一下这个骨架,我们采用 create-react-ap ...
- 手把手教你从零开始搭建SpringBoot后端项目框架
原料 新鲜的IntelliJ IDEA.一双手.以及电脑一台. 搭建框架 新建项目 打开IDE,点击File -> New Project.在左侧的列表中的选择Maven项目,点击Next. 填 ...
- SpringBoot学习(一)—— web项目基础搭建
首先我们在浏览器打开这个网站 https://start.spring.io/ 打开后可以看到以下页面 在这里我们可以快速搭建一个SpringBoot基础项目,填写和选择完相应的信息后,我们点击那个绿 ...
- eclipse搭建springboot的项目
记录一次自己搭建springboot的经历 springboot项目创建 这里借用别的博主分享的方法 https://blog.csdn.net/mousede/article/details/812 ...
- WebFlux03 SpringBoot WebFlux实现CRUD
1 准备 基于SpringBoot2.0搭建WebFlux项目,详情请参见三少另外一篇博文 2 工程结构 <?xml version="1.0" encoding=" ...
- Angular企业级开发(5)-项目框架搭建
1.AngularJS Seed项目目录结构 AngularJS官方网站提供了一个angular-phonecat项目,另外一个就是Angular-Seed项目.所以大多数团队会基于Angular-S ...
随机推荐
- 狗狗有关的知识tips
<h5>tips1</h5>狗狗脑袋里最关心的事:一是食物,二是性.想教育狗,就要顺应狗狗的想法,而不是一味地以暴力相待.<h5>tips2</h5>” ...
- web应用程序安全攻防---sql注入和xss跨站脚本攻击
kali视频学习请看 http://www.cnblogs.com/lidong20179210/p/8909569.html 博文主要内容包括两种常见的web攻击 sql注入 XSS跨站脚本攻击 代 ...
- LA3218 Find the Border
题意 PDF 分析 虽然只找外轮廓,但是时间复杂度不比PSLG优秀,所以可以当做联系PSLG的题做. PSLG框架 找出所有交点 交点按序连边 把边按极角序排序 逆时针找圈 然后何以会顺时针找出无限区 ...
- YY一下十年后的自己(转)
每到年底总是我最焦虑的时候,年龄越大情况越明显.可能越长大越是对 时光的流逝 更有感触,有感触之后就会胡思乱想.所以随手开始写下这篇文章. 人无远虑必有近忧.那么同学呀,你听说过安利么. 一直都有做总 ...
- next.js 简单使用
1. 介绍 一个react.js 服务器端渲染开源项目(不只是服务器端渲染,直接也可以生成纯静态站点) 类似的解决方案有好多,比如react.js 自身的服务器渲染方案(但是使用起来就是比较怪异) g ...
- weblogic控制台的启动与禁用
在一些安全漏洞扫描中,经常会扫描发现,使用weblogic管理控制台,会有个中危的漏洞. http://192.168.10.46:7001/console/login/LoginForm.jsp W ...
- js生成1~100随机数
(function (min,max){ var range = max - min; var rand = Math.random(); var num = min + Math.round(ran ...
- php无wsdl webservice服务用法
服务端: <?php class test { function add($a,$b) { return $a+$b; } } function getUserInfo($name) { ret ...
- svn服务器端回退版本 (转)
由于误操作,不小心将错误的代码提交到了svn上,于是想在服务器上撤销本次提交,经过尝试,发现进行以下步骤的操作即可彻底删除本次提交: 1.首先找到本次提交后生成的版本号,例如为r224. 2.登录到s ...
- Delphi AES加密(转)
(**************************************************************) (* Advanced Encryption Standard (AE ...
