ToggleButton控件,Switch控件
(一)
1.效果图

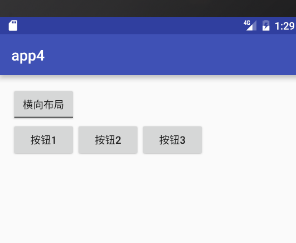
2. activity_main.xml
 <?xml version="1.0" encoding="utf-8"?>

 <LinearLayout xmlns:android="http://schemas.android.com/apk/res/android"

     xmlns:tools="http://schemas.android.com/tools"

     android:layout_width="match_parent"

     android:layout_height="match_parent"

     android:paddingBottom="@dimen/activity_vertical_margin"

     android:paddingLeft="@dimen/activity_horizontal_margin"

     android:paddingRight="@dimen/activity_horizontal_margin"

     android:paddingTop="@dimen/activity_vertical_margin"

     tools:context="com.example.app4.MainActivity"

     android:orientation="vertical">

     <ToggleButton

         android:id="@+id/tb_button"

         android:textOn="纵向布局"

         android:textOff="横向布局"

         android:checked="true"

         android:layout_width="wrap_content"

         android:layout_height="wrap_content" />

     <LinearLayout

         android:id="@+id/ll"

         android:orientation="vertical"

         android:layout_width="wrap_content"

         android:layout_height="wrap_content">

         <Button

             android:text="按钮1"

             android:layout_width="wrap_content"

             android:layout_height="wrap_content" />

         <Button

             android:text="按钮2"

             android:layout_width="wrap_content"

             android:layout_height="wrap_content" />

         <Button

             android:text="按钮3"

             android:layout_width="wrap_content"

             android:layout_height="wrap_content" />

     </LinearLayout>

 </LinearLayout>
3.MainActivity.java
 package com.example.app4;

 import android.support.v7.app.AppCompatActivity;

 import android.os.Bundle;

 import android.widget.CompoundButton;

 import android.widget.LinearLayout;

 import android.widget.ToggleButton;

 public class MainActivity extends AppCompatActivity {

     private ToggleButton toggleButton;

     private LinearLayout linearLayout;

     @Override

     protected void onCreate(Bundle savedInstanceState) {

         super.onCreate(savedInstanceState);

         setContentView(R.layout.activity_main);

         toggleButton = (ToggleButton) findViewById(R.id.tb_button);

         linearLayout = (LinearLayout) findViewById(R.id.ll);

         toggleButton.setOnCheckedChangeListener(new CompoundButton.OnCheckedChangeListener() {

             @Override

             public void onCheckedChanged(CompoundButton buttonView, boolean isChecked) {

                 if (isChecked){

                     //设置纵向布局

                     linearLayout.setOrientation(LinearLayout.VERTICAL);

                     toggleButton.setChecked(true);

                 }else {

                     //设置纵向布局

                     linearLayout.setOrientation(LinearLayout.HORIZONTAL);

                     toggleButton.setChecked(false);

                 }

             }

         });

     }

 }
(二)
1.效果图
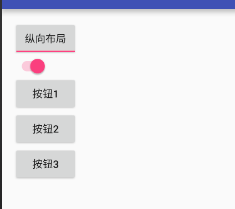
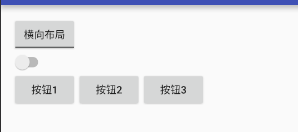
2.activity_main.xml
 <?xml version="1.0" encoding="utf-8"?>

 <LinearLayout xmlns:android="http://schemas.android.com/apk/res/android"

     xmlns:tools="http://schemas.android.com/tools"

     android:layout_width="match_parent"

     android:layout_height="match_parent"

     android:paddingBottom="@dimen/activity_vertical_margin"

     android:paddingLeft="@dimen/activity_horizontal_margin"

     android:paddingRight="@dimen/activity_horizontal_margin"

     android:paddingTop="@dimen/activity_vertical_margin"

     tools:context="com.example.app4.MainActivity"

     android:orientation="vertical">

     <ToggleButton

         android:id="@+id/tb_button"

         android:textOn="纵向布局"

         android:textOff="横向布局"

         android:checked="true"

         android:layout_width="wrap_content"

         android:layout_height="wrap_content" />

     <Switch

         android:id="@+id/sw"

         android:checked="true"

         android:layout_width="wrap_content"

         android:layout_height="wrap_content" />

     <LinearLayout

         android:id="@+id/ll"

         android:orientation="vertical"

         android:layout_width="wrap_content"

         android:layout_height="wrap_content">

         <Button

             android:text="按钮1"

             android:layout_width="wrap_content"

             android:layout_height="wrap_content" />

         <Button

             android:text="按钮2"

             android:layout_width="wrap_content"

             android:layout_height="wrap_content" />

         <Button

             android:text="按钮3"

             android:layout_width="wrap_content"

             android:layout_height="wrap_content" />

     </LinearLayout>

 </LinearLayout>
3.MainActivity.java
 package com.example.app4;

 import android.support.v7.app.AppCompatActivity;

 import android.os.Bundle;

 import android.widget.CompoundButton;

 import android.widget.LinearLayout;

 import android.widget.Switch;

 import android.widget.ToggleButton;

 public class MainActivity extends AppCompatActivity {

     private ToggleButton toggleButton;

     private LinearLayout linearLayout;

     private Switch aSwitch;

     @Override

     protected void onCreate(Bundle savedInstanceState) {

         super.onCreate(savedInstanceState);

         setContentView(R.layout.activity_main);

         toggleButton = (ToggleButton) findViewById(R.id.tb_button);

         linearLayout = (LinearLayout) findViewById(R.id.ll);

         aSwitch = (Switch) findViewById(R.id.sw);

         MyListener myListener = new MyListener();

         toggleButton.setOnCheckedChangeListener(myListener);

         aSwitch.setOnCheckedChangeListener(myListener);

         /*toggleButton.setOnCheckedChangeListener(new CompoundButton.OnCheckedChangeListener() {

             @Override

             public void onCheckedChanged(CompoundButton buttonView, boolean isChecked) {

                 if (isChecked){

                     //设置纵向布局

                     linearLayout.setOrientation(LinearLayout.VERTICAL);

                     toggleButton.setChecked(true);

                 }else {

                     //设置纵向布局

                     linearLayout.setOrientation(LinearLayout.HORIZONTAL);

                     toggleButton.setChecked(false);

                 }

             }

         });*/

     }

     class  MyListener implements CompoundButton.OnCheckedChangeListener{

         @Override

         public void onCheckedChanged(CompoundButton buttonView, boolean isChecked) {

             if (isChecked){

                 //设置纵向布局

                 linearLayout.setOrientation(LinearLayout.VERTICAL);

                 toggleButton.setChecked(true);

                 aSwitch.setChecked(true);

             }else {

                 //设置纵向布局

                 linearLayout.setOrientation(LinearLayout.HORIZONTAL);

                 toggleButton.setChecked(false);

                 aSwitch.setChecked(false);

             }

         }

     }

 }
ToggleButton控件,Switch控件的更多相关文章
- Switch控件详解
Switch控件详解 原生效果 5.x 4.x 布局 <Switch android:id="@+id/setting_switch" android:layout_widt ...
- 在tableviewcell里面嵌入switch控件以及如何获取switch控件数据
主要是通过cell.accessoryView来添加switch控件- (UITableViewCell *)tableView:(UITableView *)tableView cellForRow ...
- ToggleButton开关状态按钮控件
ToggleButton开关状态按钮控件 一.简介 1. 2.ToggleButton类结构 父类是CompoundButton,引包的时候注意下 二.ToggleButton开关状态按钮控件使用方法 ...
- Android Studio中Switch控件有关 textOn 和 textOff 用法
•属性 textOn:控件打开时显示的文字 textOff:控件关闭时显示的文字 showText:设置是否显示开关上的文字(API 21及以上) •用法 <?xml version=" ...
- 【原创】自己动手写控件----XSmartNote控件
一.前面的话 在上一篇博文自己动手写工具----XSmartNote [Beta 3.0]中,用到了若干个自定义控件,其中包含用于显示Note内容的简单的Label扩展控件,用于展示标签内容的labe ...
- WPF进阶技巧和实战03-控件(1-控件及内容控件)
所有控件都继承自System.Windows.Controls.Control类,这个类添加一些基本结构: 设置控件内容对齐方式 (HorizontalContentAlignment,Vertica ...
- winform用户控件、动态创建添加控件、timer控件、控件联动
用户控件: 相当于自定义的一个panel 里面可以放各种其他控件,并可以在后台一下调用整个此自定义控件. 使用方法:在项目上右键.添加.用户控件,之后用户控件的编辑与普通容器控件类似.如果要在后台往窗 ...
- paip.gui控件tabs控件加载内容的原理以及easyui最佳实现
paip.gui控件tabs控件加载内容的原理以及easyui最佳实现 //////////////tabs控件的加载 同form窗体一样,俩个方式 两个方式:一个是url,简单的文本可以使用这个,不 ...
- zw版【转发·台湾nvp系列Delphi例程】Delphi 使用 HALCON库件COM控件数据格式转换
zw版[转发·台湾nvp系列Delphi例程]Delphi 使用 HALCON库件COM控件数据格式转换 Delphi 使用 HALCON库件COM控件数据格式转换,与IHObjectX接口有关 va ...
随机推荐
- shell编程 if 注意事项
read -n 1 -p "Let's go(y or n):" if [ "$REPLY"x = "y"x -o "$REPLY ...
- springMvc4+hibernate4+activiti5.15(Maven)
首先创建activiti表 方式1.用代码创建 package createtable; import org.activiti.engine.ProcessEngineConfiguration; ...
- PHP等比例生成缩略图
/** * 生成缩略图 * $imgSrc 图片源路径 * $resize_width 图片宽度 * $resize_height 图片高度 * $dstimg 缩略图路径 * $isCut 是否剪切 ...
- 【hdu1251-统计难题】Trie
http://acm.hust.edu.cn/vjudge/problem/16379 题意:给定多个单词,多次询问符合某前缀的单词有多少个. 题解:tire.数组开了5*10^6才A,不然就RE. ...
- 在DirectX11下用Stencil Buffer绘制可视化Depth Complexity
这是一道在<Introduction to 3D Game Programming with DirectX 11>上的练习题. 要求把某个像素点上的Depth Complexity(深度 ...
- 用 C# 代码如何实现让你的电脑关机,重启,注销,锁定,休眠,睡眠
简介 本文讲述了用 C# 代码如何实现让你的电脑关机,重启,注销,锁定,休眠,睡眠. 如何实现 首先,使用 using 语句添加我们需要的命名空间: using System.Diagnostics; ...
- LeetCode 5:Given an input string, reverse the string word by word.
problem: Given an input string, reverse the string word by word. For example: Given s = "the sk ...
- mysql五-1:单表查询
一 介绍 本节内容: 查询语法 关键字的执行优先级 简单查询 单条件查询:WHERE 分组查询:GROUP BY HAVING 查询排序:ORDER BY 限制查询的记录数:LIMIT 使用聚合函数查 ...
- windows使用celery遇到的错误
https://www.jianshu.com/p/e5539d96641c 按照这个教程一步步执行到最后报错了. 运行task_dispatcher.py的时候 ValueError: not en ...
- git应用基础配置
1.注册github账号.注册的时候会要求输入用户名和email这是配置git必须的要素 2.在使用git的时候首先需要把注册时候配合的用户名和密码填在git仓库的配置文件里,如下 harvey@ha ...