自动化部署--shell脚本--3
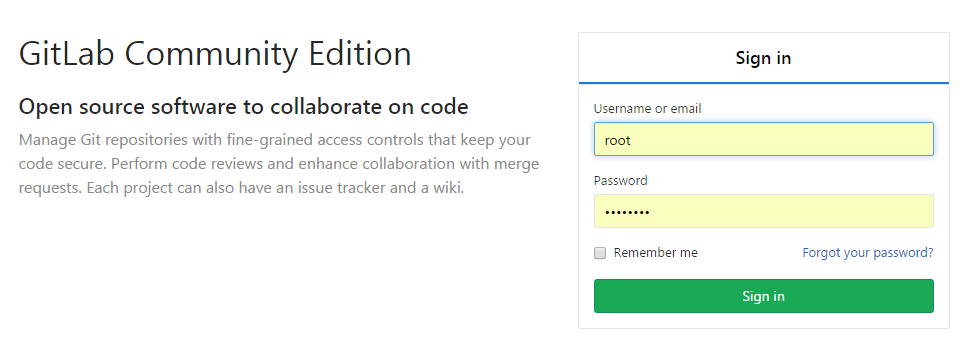
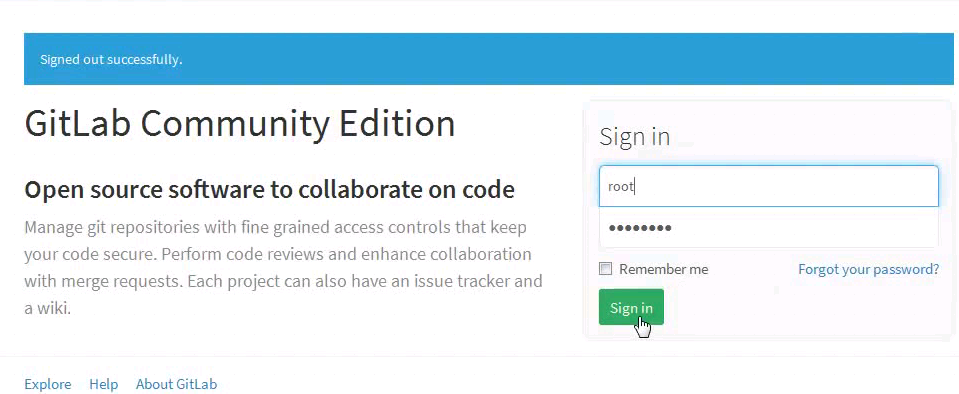
登录gitlab
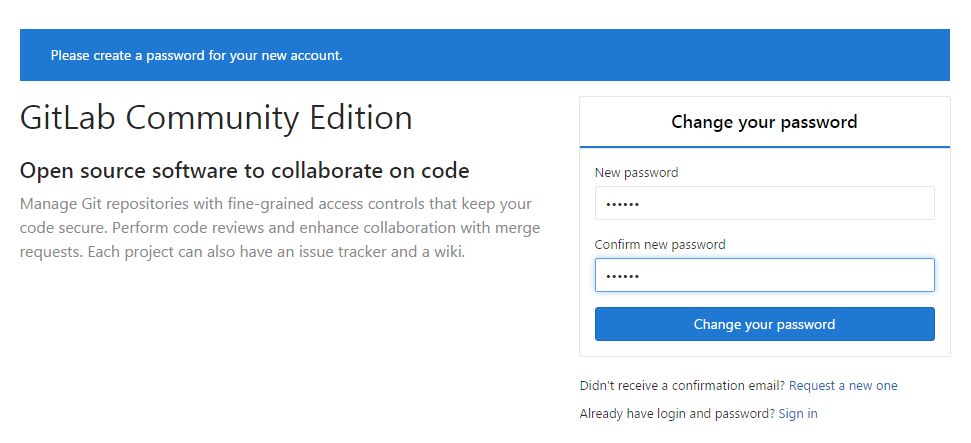
第一次登录gitlab,需要为root用户修改密码,root用户也是gitlab的超级管理员。
http://192.168.58.11
设置密码是gitlab
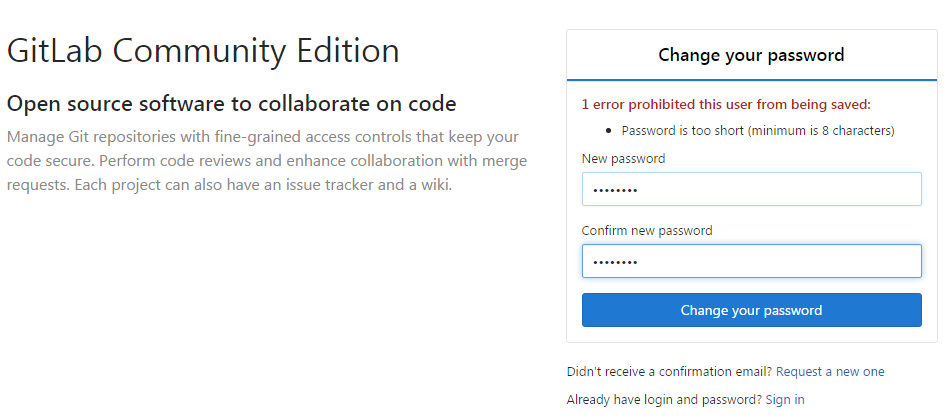
密码不够长,重新设置下,设置密码是12345678,生产中注意密码复杂点
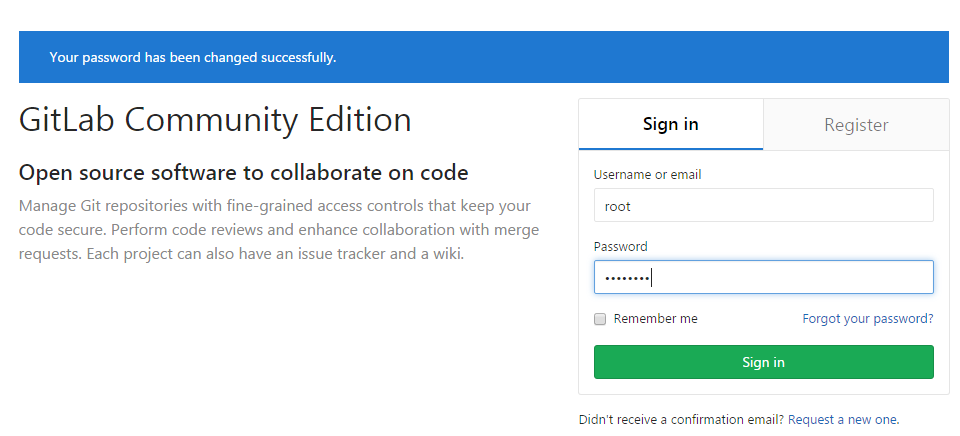
管理gitlab
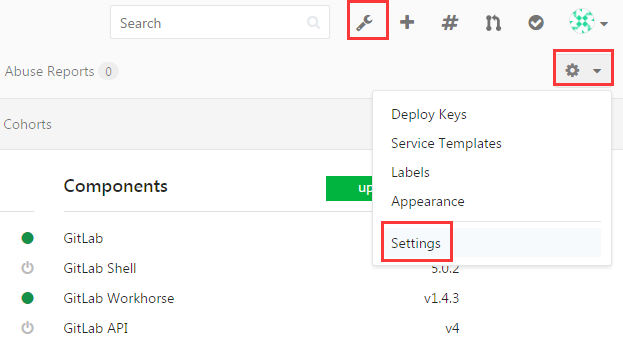
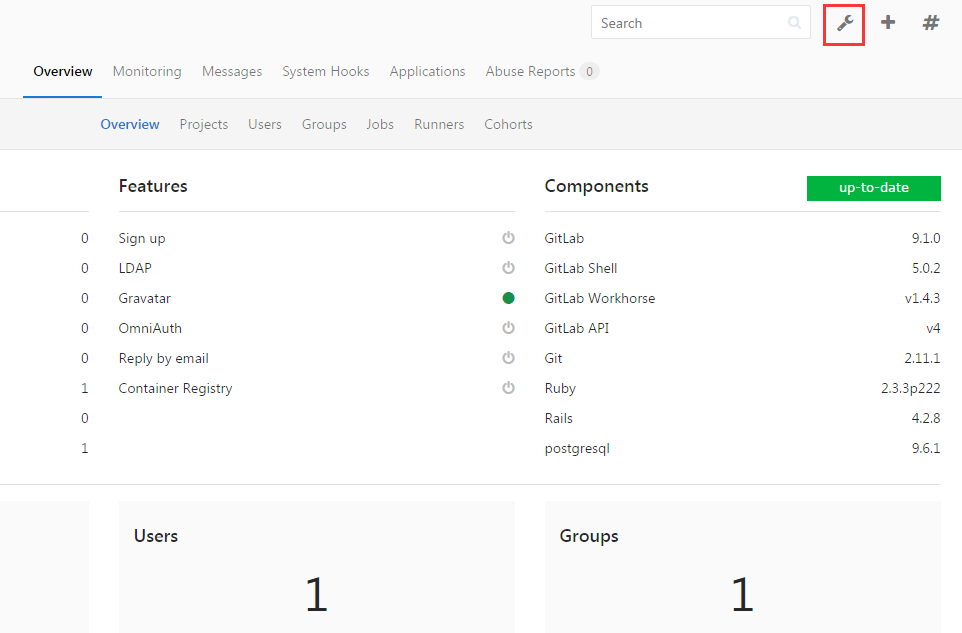
使用root用户和刚才创建的密码登录后,你就可以探索gitlab的奥秘了,可以点击图中红框的按钮进入管理区域。
登录成功界面

gitlab日常管理的话,其实很少,就是每天进行备份
每小时备份也可以,假如更新频繁的话
拉到下面

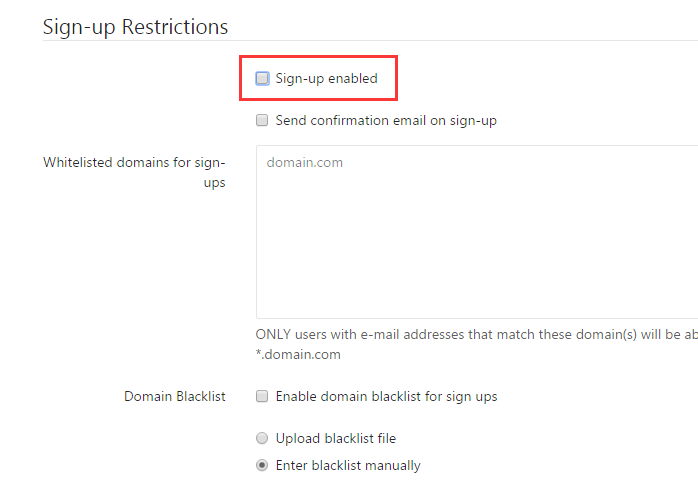
找到下面位置,去掉勾,保存
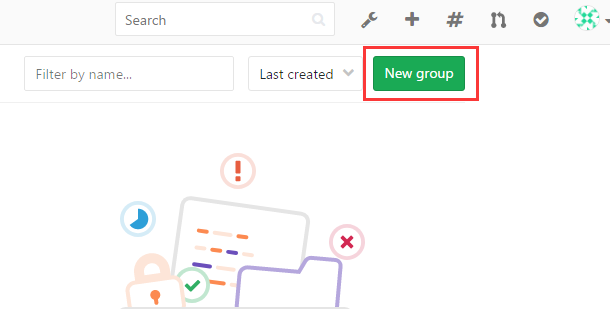
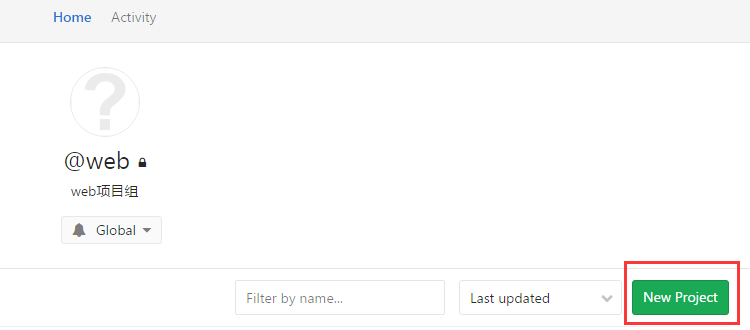
填写如下

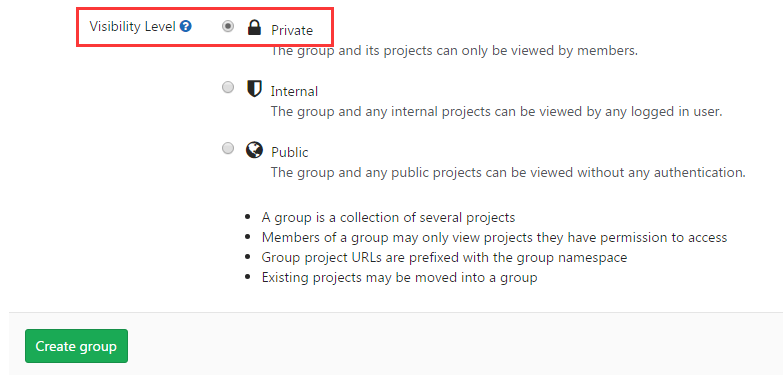
创建成功

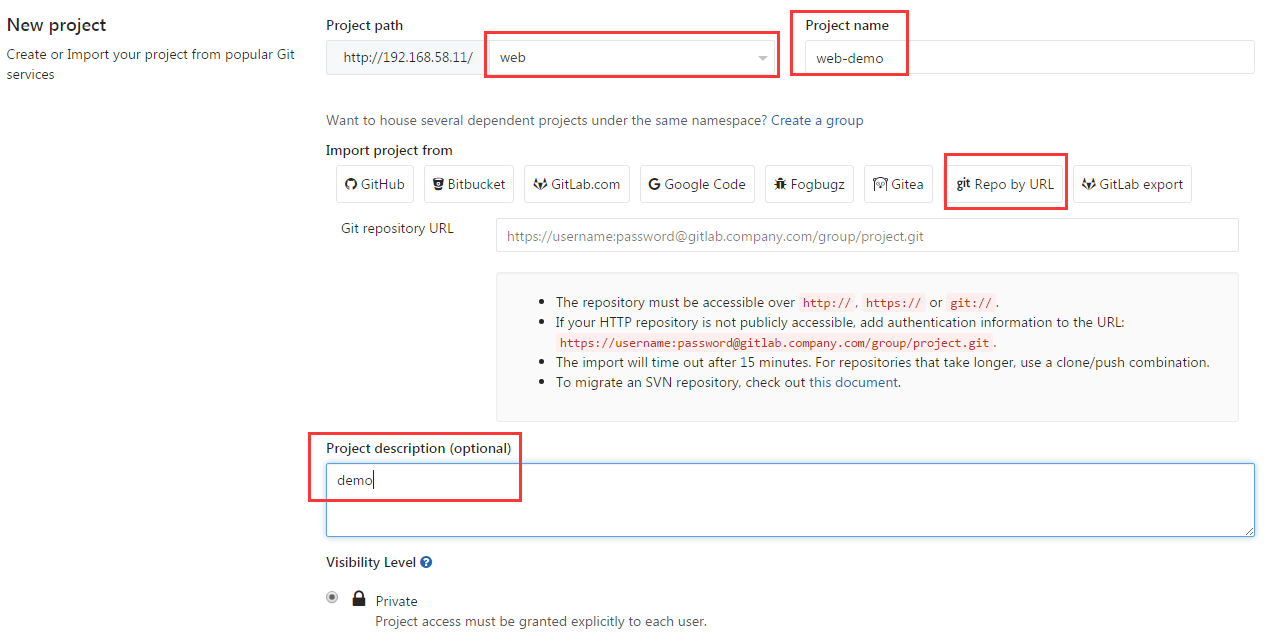
这里就可以从下拉列表选择了
项目描述
Import project from 这里可以看到它还可以从其它平台导入
可以从github迁移过来
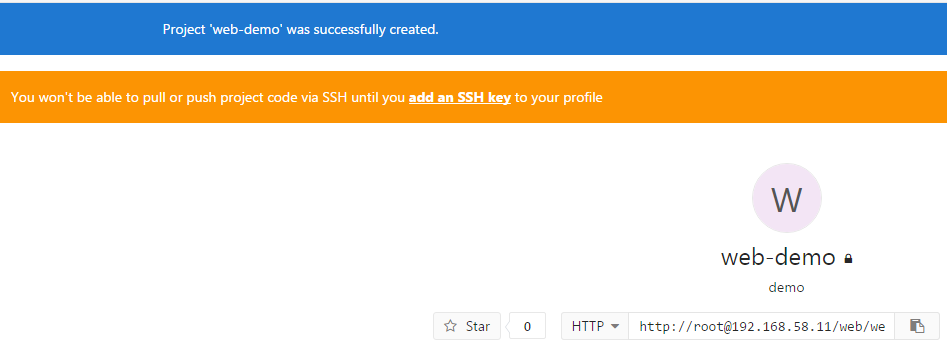

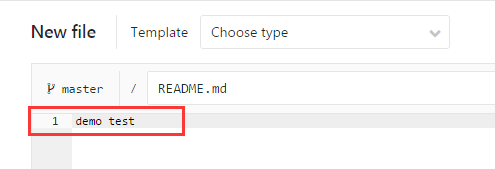
提交


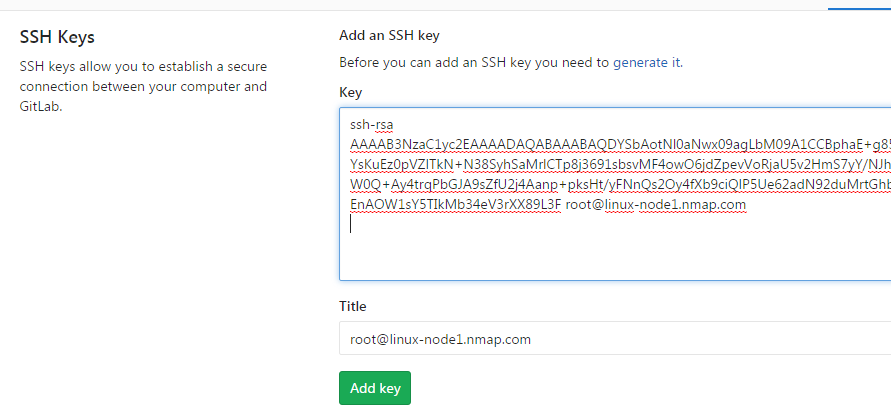
[root@linux-node1 ~]# cd .ssh/

[root@linux-node1 .ssh]# ll

total 12

-rw------- 1 root root 1675 Apr  5 03:38 id_rsa

-rw-r--r-- 1 root root  407 Apr  5 03:38 id_rsa.pub

-rw-r--r-- 1 root root  175 Apr  4 17:23 known_hosts

[root@linux-node1 .ssh]# cat id_rsa.pub

ssh-rsa

AAAAB3NzaC1yc2EAAAADAQABAAABAQDYSbAotNl0aNwx09agLbM09A1CCBphaE+g85mQMEnunzg3HSxm6wuFWcDCkK8szqTkMuxneEQOLNwQYsKuEz0pVZlTkN+N38SyhSaMrlCTp8

j3691sbsvMF4owO6jdZpevVoRjaU5v2HmS7yY/NJh7x1F8TTcfgLQt2rwL6ln02lV1glP1crGmpt95bcKBbnwU4o8W0Q+Ay4trqPbGJA9sZfU2j4Aanp+pksHt/yFNnQs2Oy4fXb9c

iQlP5Ue62adN92duMrtGhbo+WevJeEVpqyPbptP906toykpsERb+6GaJwWy/GtMj/b8lwEnAOW1sY5TIkMb34eV3rXX89L3F root@linux-node1.nmap.com

[root@linux-node1 .ssh]#

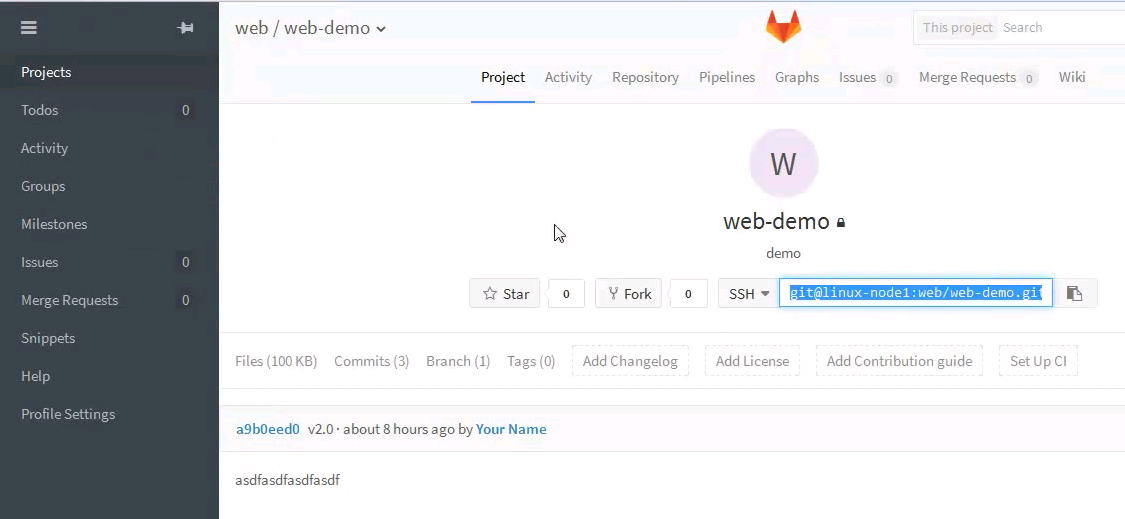
查看项目
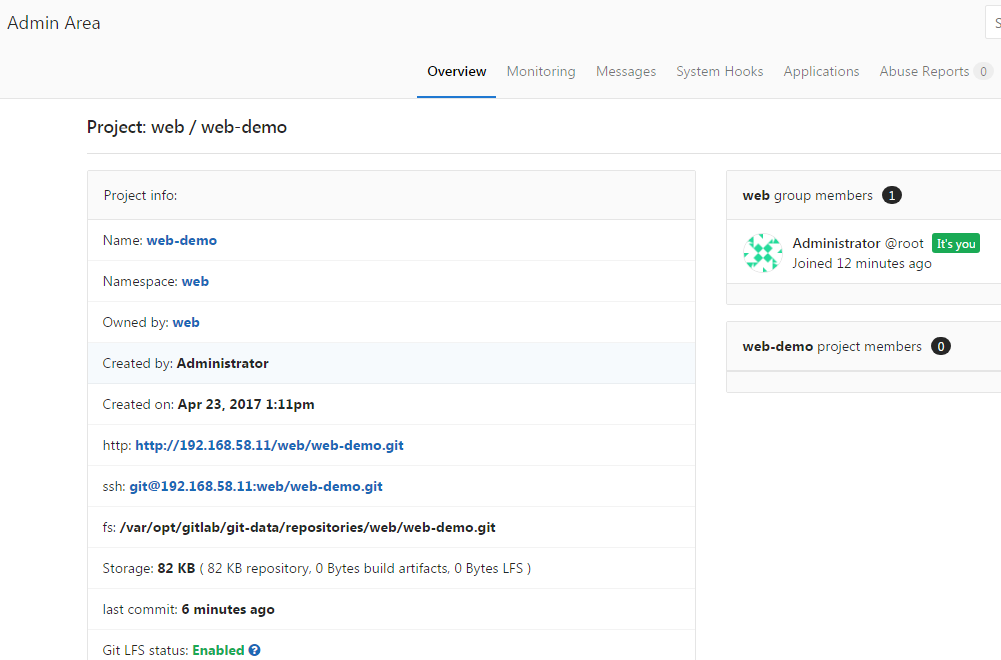
看到没ssh-key的提示了
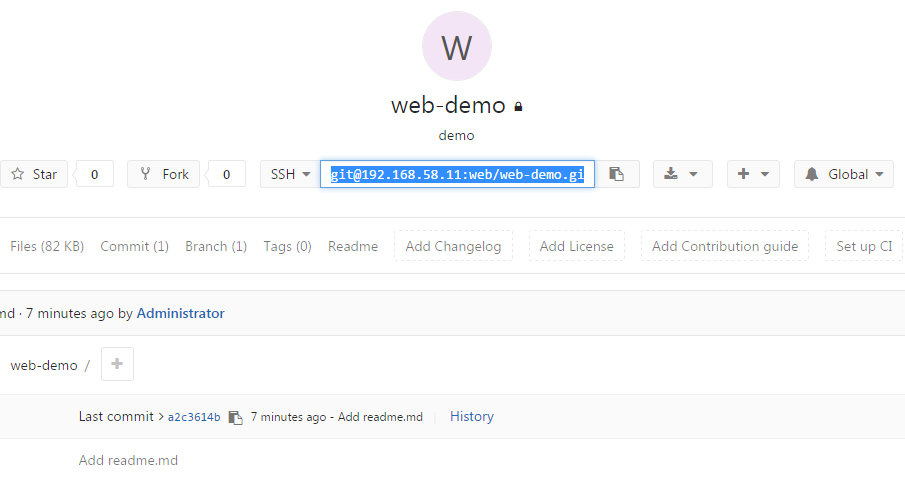
复制git@192.168.58.11:web/web-demo.git
遇到下面问题

[www@linux-node1 code]$ git

-bash: git: command not found

安装git即可

[root@linux-node1 scripts]# yum install git

Loaded plugins: fastestmirror

Loading mirror speeds from cached hostfile

 * base: mirrors.163.com

 * epel: mirrors.tuna.tsinghua.edu.cn

 * extras: mirrors.163.com

 * updates: mirrors.zju.edu.cn

Package git-1.8.3.1-6.el7_2.1.x86_64 already installed and latest version

Nothing to do

[root@linux-node1 scripts]#
由于实验环境变化,上面的ssh-key是5天前的,环境变化导致key失效,重新配置key

删除之前的重新添加
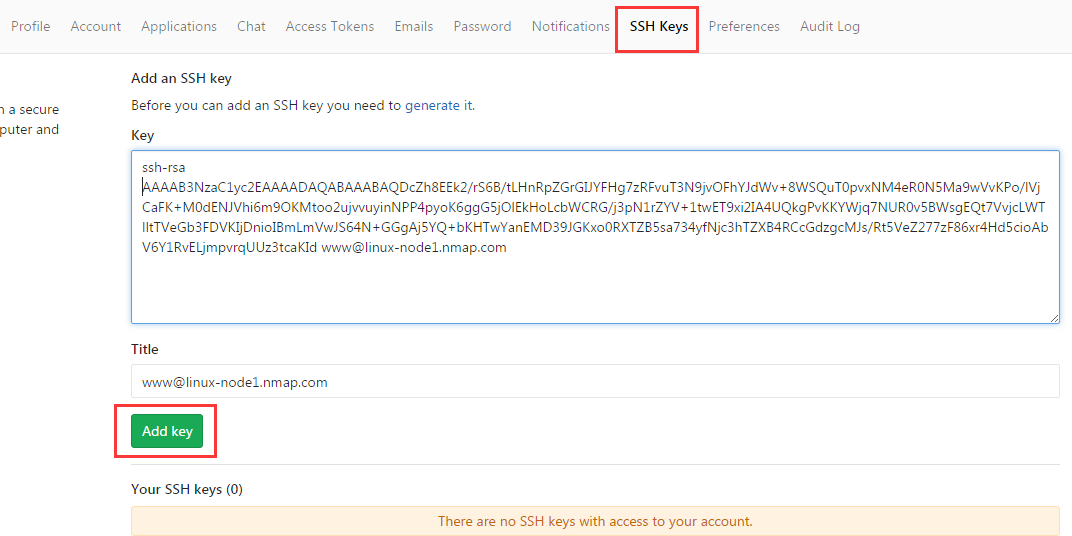
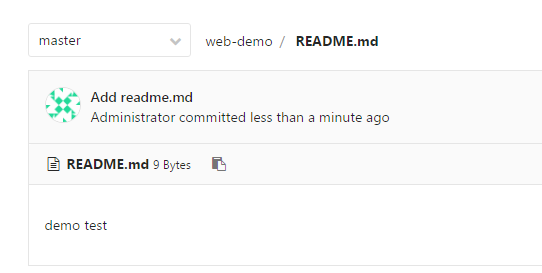
拉取代码(在这之前,先删除code目录下的web-demo)
[www@linux-node1 code]$ git clone git@192.168.58.11:web/web-demo.git

Cloning into 'web-demo'...

remote: Counting objects: 3, done.

remote: Total 3 (delta 0), reused 0 (delta 0)

Receiving objects: 100% (3/3), done.

[www@linux-node1 code]$ ll

total 0

drwxrwxr-x 3 www www 33 Apr 28 21:49 web-demo

[www@linux-node1 code]$ cd web-demo/

[www@linux-node1 web-demo]$ ll

total 4

-rw-rw-r-- 1 www www 9 Apr 28 21:49 README.md

[www@linux-node1 web-demo]$
[www@linux-node1 web-demo]$ cd

[www@linux-node1 ~]$ git clone git@192.168.58.11:web/web-demo.git

Cloning into 'web-demo'...

remote: Counting objects: 3, done.

remote: Total 3 (delta 0), reused 0 (delta 0)

Receiving objects: 100% (3/3), done.

[www@linux-node1 ~]$ cd web-demo/

[www@linux-node1 web-demo]$ ls

README.md

[www@linux-node1 web-demo]$
添加index.html
[www@linux-node1 ~]$ cd web-demo/

[www@linux-node1 web-demo]$ ls

README.md

[www@linux-node1 web-demo]$ echo 'hehehehhehehe' >index.html

[www@linux-node1 web-demo]$ cat index.html

hehehehhehehe

[www@linux-node1 web-demo]$ ll

total 8

-rw-rw-r-- 1 www www 14 Apr 28 21:54 index.html

-rw-rw-r-- 1 www www  9 Apr 28 21:53 README.md

[www@linux-node1 web-demo]$
提交时提示需要配置邮箱等
[www@linux-node1 web-demo]$ git add *

[www@linux-node1 web-demo]$ git commit -m "add index.html"

*** Please tell me who you are.

Run

  git config --global user.email "you@example.com"

  git config --global user.name "Your Name"

to set your account's default identity.

Omit --global to set the identity only in this repository.

fatal: empty ident name (for <www@linux-node1.nmap.com>) not allowed

[www@linux-node1 web-demo]$
[www@linux-node1 web-demo]$ git config --global user.email "nmap@test.com"

[www@linux-node1 web-demo]$ git config --global user.name "nmap"

[www@linux-node1 web-demo]$ git commit -m "add index.html"

[master 8c8b197] add index.html

 1 file changed, 1 insertion(+)

 create mode 100644 index.html
push到gitlab上
[www@linux-node1 web-demo]$ git push

warning: push.default is unset; its implicit value is changing in

Git 2.0 from 'matching' to 'simple'. To squelch this message

and maintain the current behavior after the default changes, use:

  git config --global push.default matching

To squelch this message and adopt the new behavior now, use:

  git config --global push.default simple

See 'git help config' and search for 'push.default' for further information.

(the 'simple' mode was introduced in Git 1.7.11. Use the similar mode

'current' instead of 'simple' if you sometimes use older versions of Git)

Counting objects: 4, done.

Delta compression using up to 4 threads.

Compressing objects: 100% (2/2), done.

Writing objects: 100% (3/3), 278 bytes | 0 bytes/s, done.

Total 3 (delta 0), reused 0 (delta 0)

To git@192.168.58.11:web/web-demo.git

   a2c3614..8c8b197  master -> master

[www@linux-node1 web-demo]$
[www@linux-node1 ~]$ cd /deploy/code/

[www@linux-node1 code]$ cd web-demo/

[www@linux-node1 web-demo]$ ll

total 4

-rw-rw-r-- 1 www www 9 Apr 28 21:49 README.md

[www@linux-node1 web-demo]$ pwd

/deploy/code/web-demo

[www@linux-node1 web-demo]$ git pull

remote: Counting objects: 3, done.

remote: Compressing objects: 100% (2/2), done.

remote: Total 3 (delta 0), reused 0 (delta 0)

Unpacking objects: 100% (3/3), done.

From 192.168.58.11:web/web-demo

   a2c3614..8c8b197  master     -> origin/master

Updating a2c3614..8c8b197

Fast-forward

 index.html | 1 +

 1 file changed, 1 insertion(+)

 create mode 100644 index.html

[www@linux-node1 web-demo]$

[www@linux-node1 web-demo]$ ll

total 8

-rw-rw-r-- 1 www www 14 Apr 28 21:57 index.html

-rw-rw-r-- 1 www www  9 Apr 28 21:49 README.md

[www@linux-node1 web-demo]$ cat index.html

hehehehhehehe

[www@linux-node1 web-demo]$
[www@linux-node1 web-demo]$ git show

commit 8c8b1977f52f30c55d670f53b3be735a189c6f75

Author: nmap <nmap@test.com>

Date:   Fri Apr 28 21:56:02 2017 +0800

    add index.html

diff --git a/index.html b/index.html

new file mode 100644

index 0000000..35811e7

--- /dev/null

+++ b/index.html

@@ -0,0 +1 @@

+hehehehhehehe

[www@linux-node1 web-demo]$
[www@linux-node1 web-demo]$ git show | grep commit

commit 8c8b1977f52f30c55d670f53b3be735a189c6f75

[www@linux-node1 web-demo]$

[www@linux-node1 web-demo]$ git show | grep commit |cut -d ' ' -f2

8c8b1977f52f30c55d670f53b3be735a189c6f75

[www@linux-node1 web-demo]$
这个git id很长,我们一般取前5、6、8位。很少见前5位重复的。字符串截取
[www@linux-node1 web-demo]$ git show | grep commit |cut -d ' ' -f2

8c8b1977f52f30c55d670f53b3be735a189c6f75

[www@linux-node1 web-demo]$ API_VERL=$(git show | grep commit |cut -d ' ' -f2)

[www@linux-node1 web-demo]$ echo ${API_VERL:0:6}

8c8b19

[www@linux-node1 web-demo]$
code_get(){

    writelog "code_get";

    cd $CODE_DIR  && git pull

    cp -r ${CODE_DIR} ${TMP_DIR}/

    API_VER="456"

}
code_get(){

    writelog "code_get";

    cd $CODE_DIR  && git pull

    cp -r ${CODE_DIR} ${TMP_DIR}/

    API_VERL=$(git show | grep commit |cut -d ' ' -f2)

    API_VER=$(echo ${API_VERL:0:6})

}
[www@linux-node1 web-demo]$ cd /scripts/

[www@linux-node1 scripts]$ ./deploy.sh

Usage: ./deploy.sh { deploy | rollback [ list |version ]}

[www@linux-node1 scripts]$ ./deploy.sh deploy

Already up-to-date.

code_build

web-demo_8c8b19_2017-04-28-22-03-56.tar.gz                             100% 8015     7.8KB/s   00:00

web-demo_8c8b19_2017-04-28-22-03-56.tar.gz                             100% 8015     7.8KB/s   00:00

[www@linux-node1 scripts]$

drwxr-xr-x 2 www www   40 Apr 28 21:17 web-demo_456_2017-04-28-21-17-17

-rw-rw-r-- 1 www www  222 Apr 28 21:17 web-demo_456_2017-04-28-21-17-17.tar.gz

drwxrwxr-x 3 www www   67 Apr 28 22:03 web-demo_8c8b19_2017-04-28-22-03-56

-rw-rw-r-- 1 www www 8015 Apr 28 22:03 web-demo_8c8b19_2017-04-28-22-03-56.tar.gz

[www@linux-node1 scripts]$ ll /opt/webroot/

[www@linux-node2 ~]$ ll /opt/webroot/

-rw-rw-r-- 1 www www  222 Apr 28 21:14 web-demo_456_2017-04-28-21-14-49.tar.gz

drwxr-xr-x 2 www www   58 Apr 28 21:17 web-demo_456_2017-04-28-21-17-17

-rw-rw-r-- 1 www www  222 Apr 28 21:17 web-demo_456_2017-04-28-21-17-17.tar.gz

-rw-rw-r-- 1 www www 8015 Apr 28 22:03 web-demo_8c8b19_2017-04-28-22-03-56.tar.gz

[www@linux-node2 ~]$
找到原因了。因为启动了git。它占用80端口。
而我们先部署的node1,而node1是先测试,通过才能继续后面的解压部署操作
node1肯定测试没通过。因为80端口给git了。
node2理所当然没解压了
脚本没问题
url_test里面加个提示。测试不通过显示在控制台
url_test(){

    URL=$1

    curl -s --head $URL | grep "200 OK"

    if [ $? -ne 0 ];then

      shell_unlock;

      writelog "test error" && exit;

    fi

}
url_test(){

    URL=$1

    curl -s --head $URL | grep "200 OK"

    if [ $? -ne 0 ];then

      shell_unlock;

      echo "test error" && exit;

    fi

}
[www@linux-node1 scripts]$ ./deploy.sh deploy

Already up-to-date.

code_build

web-demo_8c8b19_2017-04-28-22-07-08.tar.gz                             100% 8015     7.8KB/s   00:00

web-demo_8c8b19_2017-04-28-22-07-08.tar.gz                             100% 8015     7.8KB/s   00:00

test error

[www@linux-node1 scripts]$
[root@linux-node1 scripts]# tail -31 deploy.sh

main(){

    if [ -f ${LOCK_FILE} ];then

	echo "Deploy is running"  && exit;

    fi

    DEPLOY_METHOD=$1

    ROLLBACK_VER=$2

    case $DEPLOY_METHOD in

    deploy)

            shell_lock;

            code_get;

            code_build;

            code_config;

            code_tar;

            code_scp;

#            pre_deploy;

#            pre_test;

            group1_deploy;

            group1_test;

	    shell_unlock;

            ;;

    rollback)

            shell_lock;

            rollback ${ROLLBACK_VER};

            shell_unlock;

            ;;

    *)

            usage;

    esac

}

main $1 $2

[root@linux-node1 scripts]#
[www@linux-node1 scripts]$ ./deploy.sh deploy

Already up-to-date.

code_build

web-demo_8c8b19_2017-04-28-22-09-43.tar.gz                             100% 8018     7.8KB/s   00:00

web-demo_8c8b19_2017-04-28-22-09-43.tar.gz                             100% 8018     7.8KB/s   00:00

192.168.58.12.crontab.xml                                              100%   21     0.0KB/s   00:00

HTTP/1.1 200 OK

add to cluster

[www@linux-node1 scripts]$
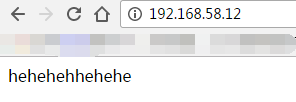
[www@linux-node1 ~]$ cd web-demo/

[www@linux-node1 web-demo]$ ls

index.html  README.md

[www@linux-node1 web-demo]$ vim index.html

[www@linux-node1 web-demo]$ cat index.html

hehehehhehehe

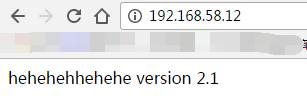
version 2.0

[www@linux-node1 web-demo]$ git add *

[www@linux-node1 web-demo]$ git commit -m "2.0"

[master 0ac9311] 2.0

 1 file changed, 1 insertion(+)

[www@linux-node1 web-demo]$
push上去
[www@linux-node1 web-demo]$ git push

warning: push.default is unset; its implicit value is changing in

Git 2.0 from 'matching' to 'simple'. To squelch this message

and maintain the current behavior after the default changes, use:

  git config --global push.default matching

To squelch this message and adopt the new behavior now, use:

  git config --global push.default simple

See 'git help config' and search for 'push.default' for further information.

(the 'simple' mode was introduced in Git 1.7.11. Use the similar mode

'current' instead of 'simple' if you sometimes use older versions of Git)

Counting objects: 5, done.

Delta compression using up to 4 threads.

Compressing objects: 100% (2/2), done.

Writing objects: 100% (3/3), 282 bytes | 0 bytes/s, done.

Total 3 (delta 0), reused 0 (delta 0)

To git@192.168.58.11:web/web-demo.git

   8c8b197..0ac9311  master -> master

[www@linux-node1 web-demo]$
[www@linux-node1 scripts]$ ./deploy.sh deploy

remote: Counting objects: 3, done.

remote: Compressing objects: 100% (2/2), done.

remote: Total 3 (delta 0), reused 0 (delta 0)

Unpacking objects: 100% (3/3), done.

From 192.168.58.11:web/web-demo

   76f1c4f..7983661  master     -> origin/master

Updating 76f1c4f..7983661

Fast-forward

 index.html | 2 +-

 1 file changed, 1 insertion(+), 1 deletion(-)

code_build

web-demo_798366_2017-04-28-22-21-31.tar.gz                             100% 9068     8.9KB/s   00:00

web-demo_798366_2017-04-28-22-21-31.tar.gz                             100% 9068     8.9KB/s   00:00

192.168.58.12.crontab.xml                                              100%   21     0.0KB/s   00:00

HTTP/1.1 200 OK

add to cluster

[www@linux-node1 scripts]$

-rw-rw-r-- 1 www www  222 Apr 28 21:14 /opt/webroot/web-demo_456_2017-04-28-21-14-49.tar.gz

-rw-rw-r-- 1 www www  222 Apr 28 21:17 /opt/webroot/web-demo_456_2017-04-28-21-17-17.tar.gz

-rw-rw-r-- 1 www www 8834 Apr 28 22:19 /opt/webroot/web-demo_76f1c4_2017-04-28-22-19-52.tar.gz

-rw-rw-r-- 1 www www 9068 Apr 28 22:21 /opt/webroot/web-demo_798366_2017-04-28-22-21-31.tar.gz

-rw-rw-r-- 1 www www 8015 Apr 28 22:03 /opt/webroot/web-demo_8c8b19_2017-04-28-22-03-56.tar.gz

-rw-rw-r-- 1 www www 8015 Apr 28 22:07 /opt/webroot/web-demo_8c8b19_2017-04-28-22-07-08.tar.gz

-rw-rw-r-- 1 www www 8018 Apr 28 22:09 /opt/webroot/web-demo_8c8b19_2017-04-28-22-09-43.tar.gz

[www@linux-node1 scripts]$ ./deploy.sh rollback web-demo_76f1c4_2017-04-28-22-19-52

[www@linux-node1 scripts]$
gitlab相关了解
安装的配置和目录结构
[root@linux-node1 scripts]# cd /opt/

[root@linux-node1 opt]# ll

total 12

drwx------  6 root root 4096 Apr  5 01:11 2017-04-05_01-11-16

drwxr-xr-x  3 root root   32 Apr  5 02:00 full

drwxr-xr-x 10 root root 4096 Apr  5 06:44 gitlab

drwxr-xr-x  4 root root   58 Apr  5 02:03 incr

drwxr-xr-x 23 www  www  4096 Apr 28 22:21 webroot

[root@linux-node1 opt]# cd gitlab/

[root@linux-node1 gitlab]# ll

total 1944

drwxr-xr-x  2 root root     103 Apr  5 06:43 bin

drwxr-xr-x 18 root root    4096 Apr  5 07:43 embedded

drwxr-xr-x  6 root root    4096 Apr  5 07:43 etc

drwxr-xr-x  2 root root    4096 Apr  5 06:45 init

-rw-r--r--  1 root root 1931990 Apr 22 21:36 LICENSE

drwxr-xr-x  2 root root    4096 Apr  5 06:43 LICENSES

drwxr-xr-x  2 root root    4096 Apr  5 06:45 service

drwxr-xr-x 15 root root    4096 Apr  5 06:45 sv

drwxr-xr-x  3 root root      20 Apr  5 06:44 var

-rw-r--r--  1 root root   19834 Apr 22 21:36 version-manifest.json

-rw-r--r--  1 root root    8769 Apr 22 21:36 version-manifest.txt

[root@linux-node1 gitlab]#
[root@linux-node1 gitlab]# cd etc/

[root@linux-node1 etc]# pwd

/opt/gitlab/etc

[root@linux-node1 etc]# ll

total 72

drwxr-xr-x 2 root root    28 Apr  5 07:43 gitaly

-rw-r--r-- 1 root root    50 Apr  5 06:44 gitlab-healthcheck-rc

-rw-r--r-- 1 root root    80 Apr  5 06:44 gitlab-psql-rc

drwx------ 3 git  root    38 Apr  5 07:43 gitlab-rails

-rw-r--r-- 1 root root 65425 Apr 22 21:36 gitlab.rb.template

drwx------ 3 git  root    16 Apr  5 06:44 gitlab-workhorse

drwxr-xr-x 3 root root    16 Apr  5 06:45 postgres-exporter

[root@linux-node1 etc]#
查看下配置目录
[root@linux-node1 etc]# tree

.

├── gitaly

│   ├── HOME

│   └── PATH

├── gitlab-healthcheck-rc

├── gitlab-psql-rc

├── gitlab-rails

│   ├── env

│   │   ├── BUNDLE_GEMFILE

│   │   ├── EXECJS_RUNTIME

│   │   ├── HOME

│   │   ├── ICU_DATA

│   │   ├── LD_PRELOAD

│   │   ├── PATH

│   │   ├── PYTHONPATH

│   │   ├── RAILS_ENV

│   │   └── SIDEKIQ_MEMORY_KILLER_MAX_RSS

│   └── gitlab-rails-rc

├── gitlab.rb.template

├── gitlab-workhorse

│   └── env

│       ├── HOME

│       └── PATH

└── postgres-exporter

    └── env

        └── DATA_SOURCE_NAME

7 directories, 18 files

[root@linux-node1 etc]#
[root@linux-node1 etc]# rpm -ql gitlab-ce | less

[root@linux-node1 etc]# cd /etc/gitlab/

[root@linux-node1 gitlab]# grep external_url gitlab.rb

##! For more details on configuring external_url see:

external_url 'http://192.168.58.11'

# registry_external_url 'https://registry.gitlab.example.com'

# pages_external_url "http://pages.example.com/"

# mattermost_external_url 'http://mattermost.example.com'

[root@linux-node1 gitlab]#
[root@linux-node1 gitlab]# gitlab-ctl reconfigure
[root@linux-node1 gitlab]# cd /scripts/

[root@linux-node1 scripts]# mv deploy.sh deploy_all.sh

[root@linux-node1 scripts]# vim deploy_all.sh

[root@linux-node1 scripts]# cat deploy_all.sh

#!/bin/bash

#Dir List

#mkdir -p /deploy/code/web-demo/

#mkdir -p /deploy/config/web-demo/base

#mkdir -p /deploy/config/web-demo/other

#mkdir -p /deploy/tar

#mkdir -p /deploy/tmp

#mkdir -p /opt/webroot

#mkdir -p /webroot

#chown -R www:www /deploy

#chown -R www:www /opt/webroot

#chown -R www:www /webroot

#Node List

PRE_LIST="192.168.58.11"

GROUP1_LIST="192.168.58.12"

ROLLBACK_LIST="192.168.58.11 192.168.58.12"

# Date/Time Veriables

LOG_DATE='date "+%Y-%m-%d"'

LOG_TIME='date "+%H-%M-%S"'

CDATE=$(date "+%Y-%m-%d")

CTIME=$(date "+%H-%M-%S")

#Shell Env

SHELL_NAME="deploy.sh"

SHELL_DIR="/home/www"

SHELL_LOG="${SHELL_DIR}/${SHELL_NAME}.log"

#Code Env

PRO_NAME="web-demo"

CODE_DIR="/deploy/code/web-demo"

CONFIG_DIR="/deploy/config/web-demo"

TMP_DIR="/deploy/tmp"

TAR_DIR="/deploy/tar"

LOCK_FILE="/tmp/deploy.lock"

usage(){

    echo  $"Usage: $0 { deploy | rollback [ list |version ]}"

}

writelog(){

        LOGINFO=$1

        echo "${CDATE} ${CTIME}: ${SHELL_NAME} : ${LOGINFO}" >> ${SHELL_LOG}

}

shell_lock(){

	touch ${LOCK_FILE}

}

url_test(){

    URL=$1

    curl -s --head $URL | grep "200 OK"

    if [ $? -ne 0 ];then

      shell_unlock;

      echo "test error" && exit;

    fi

}

shell_unlock(){

	rm -f ${LOCK_FILE}

}

code_get(){

    writelog "code_get";

    cd $CODE_DIR  && git pull

    cp -r ${CODE_DIR} ${TMP_DIR}/

    API_VERL=$(git show | grep commit |cut -d ' ' -f2)

    API_VER=$(echo ${API_VERL:0:6})

}

code_build(){

    echo code_build

}

code_config(){

    writelog "code_config"

    /bin/cp -r ${CONFIG_DIR}/base/* ${TMP_DIR}/"${PRO_NAME}"

    PKG_NAME="${PRO_NAME}"_"${API_VER}"_"${CDATE}-${CTIME}"

    cd ${TMP_DIR} && mv ${PRO_NAME} ${PKG_NAME}

}

code_tar(){

    writelog "code_tar"

    cd ${TMP_DIR} && tar cfz ${PKG_NAME}.tar.gz ${PKG_NAME}

    writelog "${PKG_NAME}.tar.gz"

}

code_scp(){

    writelog "code_scp"

    for node in $PRE_LIST;do

      scp ${TMP_DIR}/${PKG_NAME}.tar.gz $node:/opt/webroot/

    done

    for node in $GROUP1_LIST;do

      scp ${TMP_DIR}/${PKG_NAME}.tar.gz $node:/opt/webroot/

    done

}

pre_deploy(){

    writelog "remove from cluster"

      ssh $PRE_LIST "cd /opt/webroot/ && tar xfz ${PKG_NAME}.tar.gz"

      ssh $PRE_LIST "rm -rf /webroot/web-demo && ln -s /opt/webroot/${PKG_NAME} /webroot/web-demo"

}

pre_test(){

    url_test "http://${PRE_LIST}/index.html"

    echo "add to cluster"

}

group1_deploy(){

    writelog "remove  from cluster"

    for node in $GROUP1_LIST;do

      ssh $node "cd /opt/webroot/ && tar xfz ${PKG_NAME}.tar.gz"

      ssh $node "rm -rf /webroot/web-demo && ln -s /opt/webroot/${PKG_NAME} /webroot/web-demo"

    done

    scp ${CONFIG_DIR}/other/192.168.58.12.crontab.xml 192.168.58.12:/webroot/web-demo/crontab.xml

}

group1_test(){

    url_test "http://192.168.58.12/index.html"

    echo "add to cluster"

}

rollback_fun(){

    for node in $ROLLBACK_LIST;do

      ssh $node "rm -f /webroot/web-demo && ln -s /opt/webroot/$1 /webroot/web-demo"

    done

}

rollback(){

if [ -z $1 ];then

	shell_unlock;

	echo "Please input rollback version" && exit;

fi

    case $1 in

	list)

             	ls -l /opt/webroot/*.tar.gz

          	;;

          *)

             	rollback_fun $1

    esac

}

main(){

    if [ -f ${LOCK_FILE} ];then

	echo "Deploy is running"  && exit;

    fi

    DEPLOY_METHOD=$1

    ROLLBACK_VER=$2

    case $DEPLOY_METHOD in

    deploy)

            shell_lock;

            code_get;

            code_build;

            code_config;

            code_tar;

            code_scp;

            pre_deploy;

            pre_test;

            group1_deploy;

            group1_test;

	    shell_unlock;

            ;;

    rollback)

            shell_lock;

            rollback ${ROLLBACK_VER};

            shell_unlock;

            ;;

    *)

            usage;

    esac

}

main $1 $2

[root@linux-node1 scripts]#

自动化部署--shell脚本--3的更多相关文章
- 自动化部署--shell脚本--1
传统部署方式1.纯手工scp2.纯手工登录git pull .svn update3.纯手工xftp往上拉4.开发给打一个压缩包,rz上去.解压 传统部署缺点:1.全程运维参与,占用大量时间2.上线速 ...
- 自动化部署--shell脚本--2
node1和node2都装apache [root@linux-node1 ~]# yum install httpd -y Loaded plugins: fastestmirror Loadi ...
- LINUX系统自动化部署shell脚本
#!/bin/shsudo /etc/init.d/tomcatstopwaitsudo rm -rf /opt/tomcat7/work/*waitsudo rm -rf /opt/tomcat7/ ...
- 自动化远程部署shell脚本
历史原因,有一段时间,项目开发采用一种模式:项目开发及代码版本管理在外网,而主要测试在内网.所以为了同步开发进度,每天会将所有服务在外网jenkins上打包好,然后将服务jar包拷进内网,由于内网服务 ...
- 自动化部署shell
yum install curl policycoreutils openssh-server openssh-clients postfix [root@linux-node2 ~]# yum in ...
- Gitee自动化部署python脚本
一.前期准备 1.1 安装环境 1.安装python3 2.打开命令行安装selenium pip install selenium 二.python代码 2.1 源码 #!/usr/bin/pyth ...
- Ambari自动化卸载shell脚本
#!/bin/bash # Program: # uninstall ambari automatic # History: # 2014/01/13 - Ivan - 2862099249@qq.c ...
- shell脚本自动化部署
由于公司技术部团队较小,没有专门的运维团队,所以运维工作技术部承包了. 一.纯人工部署是这样的: 1. 本地打包:一般 maven clean package 2. 借助xftp上传到服务器对应目录 ...
- linux服务器部署jar包以及shell脚本的书写
背景:记录在linux环境下部署jar程序的过程 1 部署过程记录 1.1 程序结构 这里的main函数就在DemRest2.java 文件中. 为了部署方便,要做到以下两点: 1 在导出的jar包中 ...
随机推荐
- linux Bash 常用
linux 帮助文档 man + [命令] eg: man ls[命令] + --help eg:ls --helphelp +[命令] eg:help ceinfo + [命令] eg:info l ...
- 一次Web请求返回406原因与解决方案
ajax请求,响应信息返回的却是报错406,. 1.断点调试,进入对应处理方法,且得到正确信息返回到解析器.使用的是ssm,前端ftl 2.js将返回错误信息打出来,类似为: 百度406错误出现的原因 ...
- Join Algorithm
Join(SQL) An SQL join clause combines columns from one or more tables in a relational database. It c ...
- 『转』credential Provider 简易改写攻略
本次小学期的题目是windows下的凭证改编.本人负责的是Win7 下的credentials Provider 的编写以及其他杂七杂八的工作.当然给我印象最深的就是credentials provi ...
- .Net 3.5 安装教程
虽然说.NET Framework 3.5 SP1已经不是最新版的,但是还有大部分用Xp系统的人还得用它.不过我们使用的系统一般都是Ghost版Xp,Ghost大部分都做过尽量的简化,去除了不必要的组 ...
- debian镜像下载地址
http://cdimage.debian.org/debian-cd/9.8.0-live/amd64/iso-hybrid/
- java学习笔记27(File类)
File类: 定义:文件和目录径的抽象表示形式, Java中将路径或者文件封装成File对象 1.File类的静态成员变量 package com.zs.Demo2; import java.io.F ...
- intellij构建多模块项目
1.新建sailfish总目录, 2.新建maven项目,并将其手动移入sailfish,再用intellij打开该项目, <groupId>com.rainbow.sailfish< ...
- css引入外部字体使网站字体更美观
@font-face{font-family: myFont;src:url("../font/timesi.ttf");src:url("../font/timesbi ...
- maven修改本地仓库,远程仓库与中央仓库
什么是Maven仓库 在不用Maven的时候,比如说以前我们用Ant构建项目,在项目目录下,往往会看到一个名为/lib的子目录,那里存放着各类第三方依赖jar文件,如 log4j.jar,junit. ...
