Dedecmsv5.7整合ueditor 图片上传添加水印
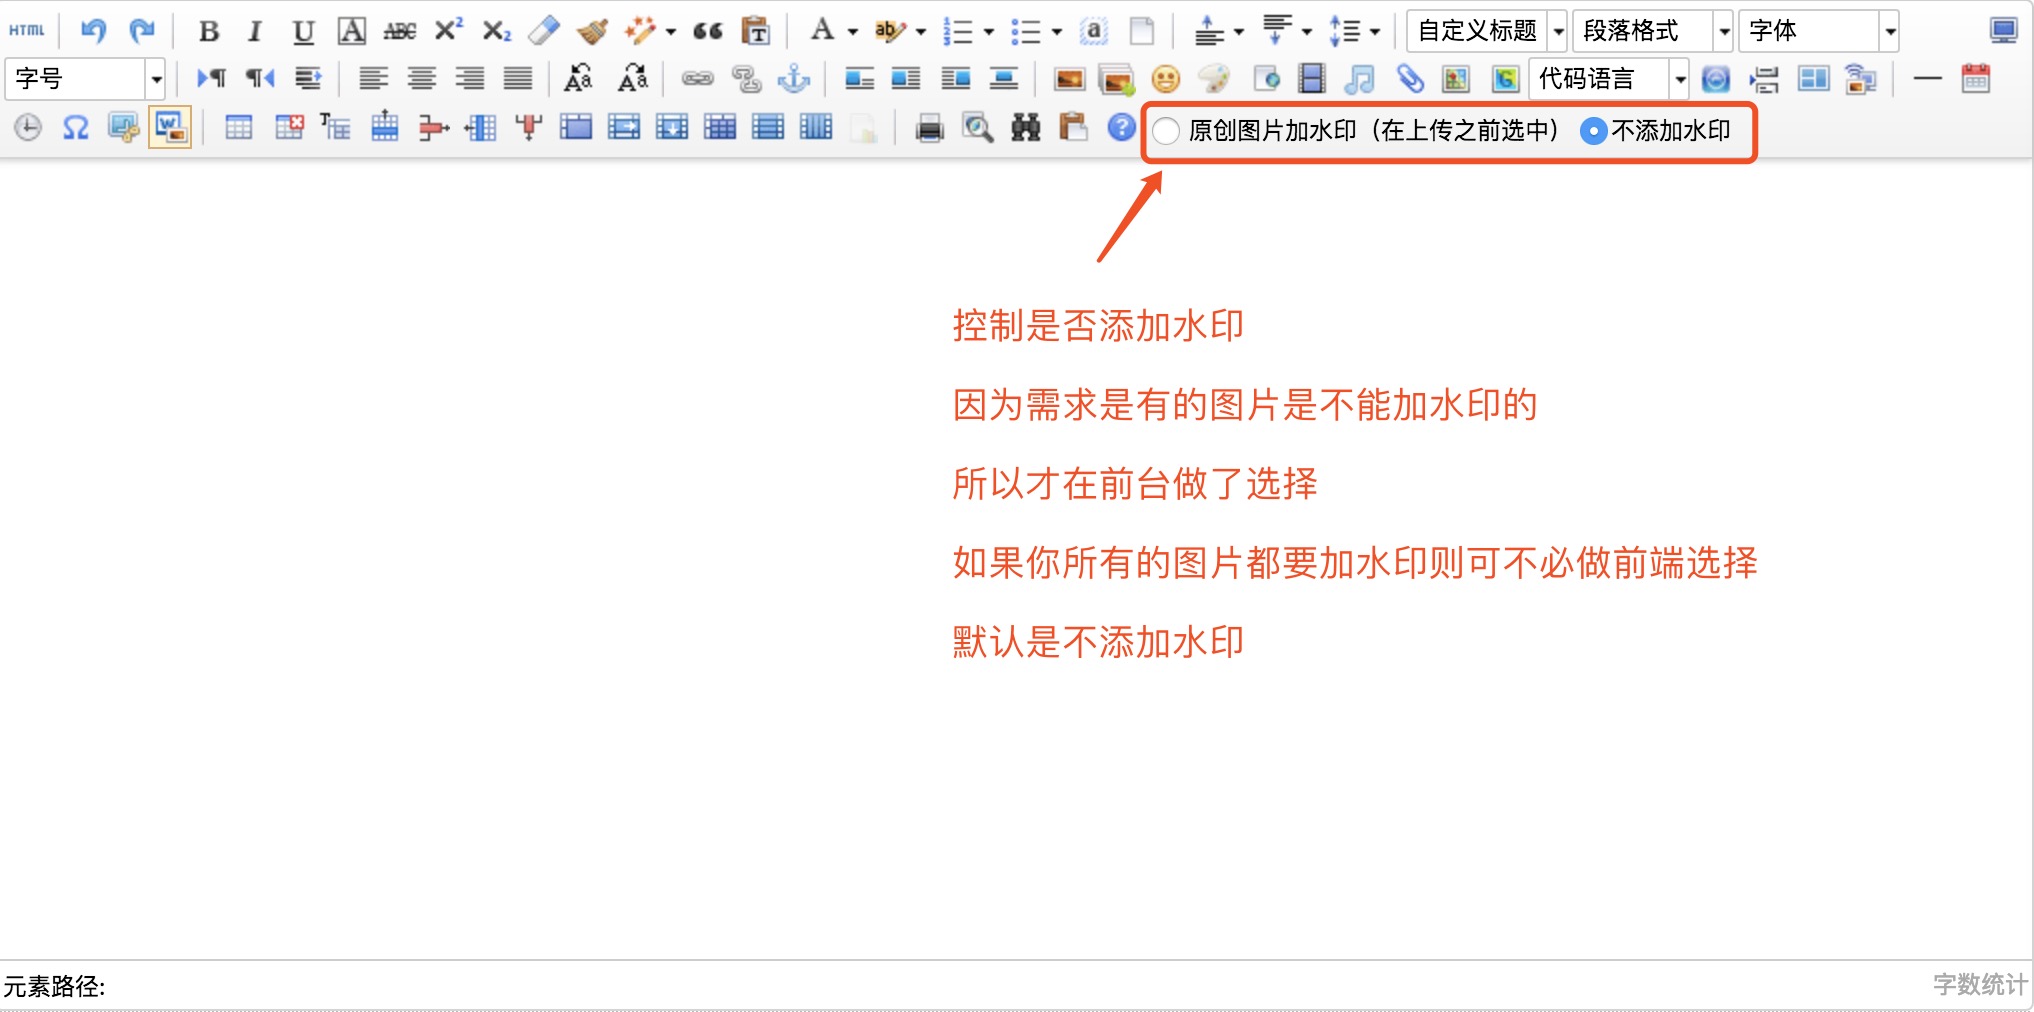
最近的项目是做dedecmsv5.7的二次开发,被要求上传的图片要加水印,百度ueditor编辑器不支持自动加水印,所以,找了很多资料整合记录一下,具体效果图
这里不仔细写dedecmsv5.7 整合ueditor编辑器了
1、打开ueditor目录下的php目录下的config.json配置文件
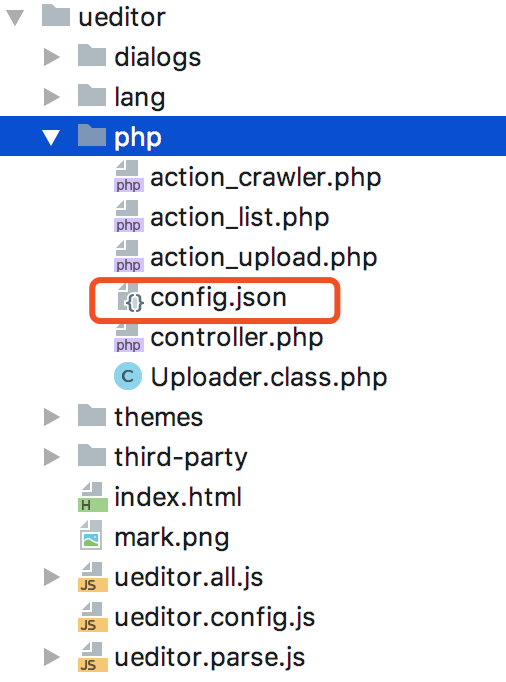
"iswatermark": false, /*图片加水印,默认不加水印*/
2、打开ueditor下的php文件夹里的action_upload.php,
(1)找到
case 'uploadimage':

        $config = array(

            "pathFormat" => $CONFIG['imagePathFormat'],

            "maxSize" => $CONFIG['imageMaxSize'],

            "allowFiles" => $CONFIG['imageAllowFiles']

        );

        $fieldName = $CONFIG['imageFieldName'];break;
在break;之前加入
/*判断session 是因为在前端是否添加水印,

  如果添加了水印,则设置session['iswatermark'] = 1,否则=0

*/

        if(isset($_SESSION['iswatermark'])){

            $watermark = $_SESSION['iswatermark'];

        }else{

            $watermark = $CONFIG['iswatermark'];

        }
(2)找到:
/* 生成上传实例对象并完成上传 */

$up = new Uploader($fieldName, $config, $base64);
改为:
/* 生成上传实例对象并完成上传 */

$up = new Uploader($fieldName, $config, $base64,$watermark);
3、打开ueditor下的php文件夹里的Uploader.class.php
(1)在构造函数__construct上面添加
private $water; //是否添加水印(属性)
(2)把构造函数改成
/**

     * 构造函数

     * @param string $fileField 表单名称

     * @param array $config 配置项

     * @param bool $base64 是否解析base64编码,可省略。若开启,则$fileField代表的是base64编码的字符串表单名

     */

    public function __construct($fileField, $config, $type = "upload",$watermark = false)
(3)在构造函数里面加入
$this->water = $watermark;
(4)在upFile方法里加入
//移动文件

        if (!(move_uploaded_file($file["tmp_name"], $this->filePath) && file_exists($this->filePath))) { //移动失败

            $this->stateInfo = $this->getStateInfo("ERROR_FILE_MOVE");

        } else { //移动成功

            if($this->water){

                $this->watermark($this->filePath,$this->filePath);

            }

            $this->stateInfo = $this->stateMap[0];

        }
注:上面加粗的加入的代码。如果把这段代码放在移动文件上面,下面加水印的话找不见源图片
(5)在这个类文件里添加以下方法,实现图片添加水印
/**

     * 图片加水印

     * $source  string  图片资源

     * $target  string  添加水印后的名字

     * $w_pos   int     水印位置安排(1-10)【1:左头顶;2:中间头顶;3:右头顶...值空:随机位置】

     * $w_img   string  水印图片路径

     * $w_text  string  显示的文字

     * $w_font  int     字体大小

     * $w_color string  字体颜色

     *

     */

    public function watermark($source, $target = '', $w_pos = 9, $w_img = '', $w_text = '56nev.com',$w_font = 10, $w_color = '#CC0000')

    {

        $this->w_img = '../../../data/mark/mark.png';//水印图片

        $this->w_pos = 9 ;

        $this->w_minwidth = 100;//最少宽度

        $this->w_minheight = 20;//最少高度

        $this->w_quality = 100;//图像质量

        $this->w_pct = 85;//透明度

        $w_pos = $w_pos ? $w_pos : $this->w_pos;

        $w_img = $w_img ? $w_img : $this->w_img;

        if(!$this->check($source)) return false;

        if(!$target) $target = $source;

        $source_info = getimagesize($source);//图片信息

        $source_w  = $source_info[0];//图片宽度

        $source_h  = $source_info[1];//图片高度

        if($source_w < $this->w_minwidth || $source_h < $this->w_minheight) return false;

        switch($source_info[2]) { //图片类型

            case 1 : //GIF格式

                $source_img = imagecreatefromgif($source);

                break;

            case 2 : //JPG格式

                $source_img = imagecreatefromjpeg($source);

                break;

            case 3 : //PNG格式

                $source_img = imagecreatefrompng($source);

//imagealphablending($source_img,false); //关闭混色模式

                imagesavealpha($source_img,true); //设置标记以在保存 PNG 图像时保存完整的 alpha 通道信息(与单一透明色相反)

                break;

            default :

                return false;

        }

        if(!empty($w_img) && file_exists($w_img)) { //水印图片有效

            $ifwaterimage = 1; //标记

            $water_info  = getimagesize($w_img);

            $width    = $water_info[0];

            $height    = $water_info[1];

            switch($water_info[2]) {

                case 1 :

                    $water_img = imagecreatefromgif($w_img);

                    break;

                case 2 :

                    $water_img = imagecreatefromjpeg($w_img);

                    break;

                case 3 :

                    $water_img = imagecreatefrompng($w_img);

                    imagealphablending($water_img,false);

                    imagesavealpha($water_img,true);

                    break;

                default :

                    return;

            }

        }else{

            $ifwaterimage = 0;

            $temp = imagettfbbox(ceil($w_font*2.5), 0, '../../texb.ttf', $w_text); //imagettfbbox返回一个含有 8 个单元的数组表示了文本外框的四个角

            $width = $temp[2] - $temp[6];

            $height = $temp[3] - $temp[7];

            unset($temp);

        }

        switch($w_pos) {

            case 1:

                $wx = 5;

                $wy = 5;

                break;

            case 2:

                $wx = ($source_w - $width) / 2;

                $wy = 0;

                break;

            case 3:

                $wx = $source_w - $width;

                $wy = 0;

                break;

            case 4:

                $wx = 0;

                $wy = ($source_h - $height) / 2;

                break;

            case 5:

                $wx = ($source_w - $width) / 2;

                $wy = ($source_h - $height) / 2;

                break;

            case 6:

                $wx = $source_w - $width;

                $wy = ($source_h - $height) / 2;

                break;

            case 7:

                $wx = 0;

                $wy = $source_h - $height;

                break;

            case 8:

                $wx = ($source_w - $width) / 2;

                $wy = $source_h - $height;

                break;

            case 9:

                $wx = $source_w - ($width+5);

                $wy = $source_h - ($height+5);

                break;

            case 10:

                $wx = rand(0,($source_w - $width));

                $wy = rand(0,($source_h - $height));

                break;

            default:

                $wx = rand(0,($source_w - $width));

                $wy = rand(0,($source_h - $height));

                break;

        }

        /*

           dst_im  目标图像

           src_im  被拷贝的源图像

           dst_x   目标图像开始 x 坐标

           dst_y   目标图像开始 y 坐标,x,y同为 0 则从左上角开始

           src_x   拷贝图像开始 x 坐标

           src_y   拷贝图像开始 y 坐标,x,y同为 0 则从左上角开始拷贝

           src_w   (从 src_x 开始)拷贝的宽度

           src_h   (从 src_y 开始)拷贝的高度

           pct 图像合并程度,取值 0-100 ,当 pct=0 时,实际上什么也没做,反之完全合并。

       */

        if($ifwaterimage) {

            if($water_info[2] == 3) {

                imagecopy($source_img, $water_img, $wx, $wy, 0, 0, $width, $height);

            }else{

                imagecopymerge($source_img, $water_img, $wx, $wy, 0, 0, $width, $height, $this->w_pct);

            }

        }else{

            if(!empty($w_color) && (strlen($w_color)==7)) {

                $r = hexdec(substr($w_color,1,2));

                $g = hexdec(substr($w_color,3,2));

                $b = hexdec(substr($w_color,5));

            }else{

                return;

            }

            imagestring($source_img,$w_font,$wx,$wy,$w_text,imagecolorallocate($source_img,$r,$g,$b));

        }

        switch($source_info[2]) {

            case 1 :

                imagegif($source_img, $target);

//GIF 格式将图像输出到浏览器或文件(欲输出的图像资源, 指定输出图像的文件名)

                break;

            case 2 :

                imagejpeg($source_img, $target, $this->w_quality);

                break;

            case 3 :

                imagepng($source_img, $target);

                break;

            default :

                return;

        }

        if(isset($water_info)){

            unset($water_info);

        }

        if(isset($water_img)) {

            imagedestroy($water_img);

        }

        unset($source_info);

        imagedestroy($source_img);

        return true;

    }

    public function check($image){

        return extension_loaded('gd') && preg_match("/\.(jpg|jpeg|gif|png)/i", $image, $m) && file_exists($image) && function_exists('imagecreatefrom'.($m[1] == 'jpg' ? 'jpeg' : $m[1]));

    }
到这一步,已经基本完成添加水印的处理了
4、解决的是前台选择“是否添加水印”的交互
思路:我是用js添加了radio 添加水印,不添加水印。通过ajax 设置session。添加水印,则设置session['iswatermark'] = 1,不添加则=0。就是第2、步,判断session那步
(1)setwatermark.js文件
window.onload = function(){

    var toolbar = $('body[topmargin=8] form #edui2');

    var html = '<input type="radio" class="changec" name="markwater" value="1" style="margin:7px 2px 0 5px;"/> 原创图片加水印(在上传之前选中)' +

        '<input type="radio" class="changec" name="markwater" value="0" style="margin:7px 2px 0 5px;" checked/>不添加水印';

    toolbar.append(html);

    $('body[topmargin=8] form #edui2 .changec').click(function () {

        var status = $(this).val();

        $.getJSON('/include/ueditor/php/controller.php',{"action":"setwatermark","watermark":status},function(data){

       })

    })

}
这个里面的getJson的url可以是任何php文件,目的是为了设置session,因为我想把相关的文件放在一起,所以写在了controller.php里面
可以根据具体的项目去找到对应的document元素然后往里面append。把这个js文件引入的页面里就可以了。
(2)找到ueditor下的php文件夹里的controller.php,
现在这个php文件的开头添加:
session_start();
如果开启 session没有写在开头的话,一刷新session就没了
在switch ($action) {}里面加入
/*设置是否加水印*/

    case 'setwatermark':

        $watermark = (isset($_GET['watermark']) && $_GET['watermark'])?$_GET['watermark']:0;

        if($watermark==1){

            $_SESSION['iswatermark'] = 1;

        }elseif ($watermark==0){

            $_SESSION['iswatermark'] = 0;

        }else{

            if(!isset($_SESSION['iswatermark'])){

                $_SESSION['iswatermark'] = 0;

            }

        }

        break;
到此,ueditor编辑器添加水印前后台交互就完成了。可能写的有点乱 :(
前后台交互的方法,本人愚笨,用了session的笨办法,如果还有更好的方法,大家可以留言交流!
Dedecmsv5.7整合ueditor 图片上传添加水印的更多相关文章
- ueditor图片上传插件的使用
在项目里使用到ueditor图片上传插件,以前图片上传都是直接使用js代码直接上传图片,比较麻烦,而且效率也比较低,而ueditor这款插件完美的解决了这个问题,这个是百度开发的一款富文本编辑器,在这 ...
- ueditor图片上传配置
ueditor图片上传配置文件为ueditor/php/config.json /* 上传图片配置项 */ "imageActionName": "uploadimage ...
- CI框架整合UEditor编辑器上传功能
最近项目中要使用到富文本编辑器,选用了功能强大的UEditor,接下来就来讲讲UEditor编辑器的上传功能整合. 本文UEditor版本:ueditor1_4_3_utf8_php版本 第一步:部署 ...
- springboot+UEditor图片上传
springboot+UEDitor百度编辑器整合图片上记录于此 1.下载ueditor插件包,解压到static/ueditor目录下 2.在你所需实现编辑器的页面引用三个JS文件 1) uedi ...
- asp.net ueditor 图片上传路径问题解决
最近练习做一个新闻系统,其中不能少了添加新闻和修改新闻的功能 ,而且还要添加图片.添加文字样式, 所以不得不使用富文本编辑器,在kindeditor和ueditor中,选择了目前还在持续更新的百度产品 ...
- 百度UEditor图片上传或文件上传路径自定义
最近在项目中使用到百度UEditor的图片以及文件上传功能,但在上传的时候路径总是按照预设规则来自动生成,不方便一些特殊文件的维护.于是开始查看文档和源代码,其实操作还是比较简单的,具体如下: 1.百 ...
- ueditor图片上传和显示问题
图片上传: 这段是contorller代码 @RequestMapping(value = "/uploadImg", method = RequestMethod.POST) @ ...
- SpringMVC+Spring+MyBatis 整合与图片上传简单示例
一.思路: (一) Dao层: 1. SqlMapConfig.xml,空文件即可.需要文件头.2. applicationContext_dao.xml. a) 数据库连接池b) SqlSessio ...
- [Asp.net core 2.0]Ueditor 图片上传
摘要 在项目中要用到富文本编辑器,包含上传图片,插入视频等功能.但ueditor只有.net版本,没有支持core.那么上传等接口就需要自己实现了. 一个例子 首先去百度ueditor官网下载简化版的 ...
随机推荐
- outlook使用笔记
使用电子邮件客户端(pc端)软件, 确实是不得已. 出于某些考试/了解的目的? 现在使用 在线/网页端电子邮件 确实要好得多, 方便得多了. outlook和其他软件都是 设置的 "帐户 a ...
- php的pear编程: phpDocumentor的使用?
pfc: php基础类库: pecl: php扩展公共库 pear: php extension and application repository. php的扩展和应用库 phar: ['fa:] ...
- php文档注释提取工具phpdocumentor的使用
phpDocumentor, 分为文档性注释, 和 非文档性注释; 命令为: phpdoc -h, -f, -d.... 提取/ 生成 程序的注释文档, 实际上有很多种工具, 如: doc++, do ...
- 论文阅读:Learning Visual Question Answering by Bootstrapping Hard Attention
Learning Visual Question Answering by Bootstrapping Hard Attention Google DeepMind ECCV-2018 2018 ...
- Unsupervised Image-to-Image Translation Networks --- Reading Writing
Unsupervised Image-to-Image Translation Networks --- Reading Writing 2017.03.03 Motivations: most ex ...
- tomcat中配置https请求
一. 创建tomcat证书 这里使用JDK自带的keytool工具来生成证书: 1. 在jdk的安装目录\bin\keytool.exe下打开keytool.exe 2. 在命令行中输入以下命令: ...
- Git stash 常用命令
参考: Git: How to look at the stash Git学习笔记05--git stash Git stash 常用命令 1.git stash: 保存当前的工作进度: 2.git ...
- ECharts配置项之title(标题)
1.标题居中 //left的值为'left', 'center', 'right' title:{ left:'center' } 2.主副标题之间的间距 title:{ //默认为10 itemGa ...
- 【UOJ#196】【BZOJ4574】[Zjoi2016]线段树
题目链接: http://www.lydsy.com/JudgeOnline/problem.php?id=4574 http://uoj.ac/problem/196 考虑数字随机并且值域够大,我们 ...
- 【三】php 数组
数组 1.数字索引数组:array('a','b','c'); 2.访问数组内容 $arr[下标] 3.新增数组元素 $arr[下标]=内容 4.使用循环访问数组 //针对数字索引 $arr=arr ...