自定义控件之 圆形 / 圆角 ImageView
一、问题在哪里?
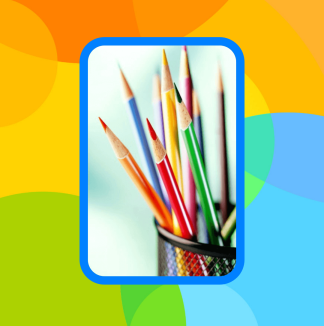
问题来源于app开发中一个很常见的场景——用户头像要展示成圆的:


二、怎么搞?
机智的我,第一想法就是,切一张中间圆形透明、四周与底色相同、尺寸与头像相同的蒙板图片,盖在头像上不就完事了嘛,哈哈哈!
在背景纯色的前提下,这的确能简单解决问题,但是如果背景没有这么简单呢?

在这种不规则背景下,有两个问题:
1) 背景图常常是适应手机宽度缩放,而头像的尺寸又是固定宽高DP的,所以固定的蒙板图片是没法保证在不同机型上都和背景图案吻合的。
2) 在这种非纯色背景下,哪天想调整一下头像位置就得重新换图片蒙板,实在是太难维护了……
所以呢,既然头像图片肯定是方的,那就就让ImageView圆起来吧。
[转载请保留本文地址:http://www.cnblogs.com/snser/p/5159126.html]
三、开始干活
基本思路是,自定义一个ImageView,通过重写onDraw方法画出一个圆形的图片来:
 public class ImageViewPlus extends ImageView{

     private Paint mPaintBitmap = new Paint(Paint.ANTI_ALIAS_FLAG);

     private Bitmap mRawBitmap;

     private BitmapShader mShader;

     private Matrix mMatrix = new Matrix();

     public ImageViewPlus(Context context, AttributeSet attrs) {

         super(context, attrs);

     }

     @Override

     protected void onDraw(Canvas canvas) {

         Bitmap rawBitmap = getBitmap(getDrawable());

         if (rawBitmap != null){

             int viewWidth = getWidth();

             int viewHeight = getHeight();

             int viewMinSize = Math.min(viewWidth, viewHeight);

             float dstWidth = viewMinSize;

             float dstHeight = viewMinSize;

             if (mShader == null || !rawBitmap.equals(mRawBitmap)){

                 mRawBitmap = rawBitmap;

                 mShader = new BitmapShader(mRawBitmap, TileMode.CLAMP, TileMode.CLAMP);

             }

             if (mShader != null){

                 mMatrix.setScale(dstWidth / rawBitmap.getWidth(), dstHeight / rawBitmap.getHeight());

                 mShader.setLocalMatrix(mMatrix);

             }

             mPaintBitmap.setShader(mShader);

             float radius = viewMinSize / 2.0f;

             canvas.drawCircle(radius, radius, radius, mPaintBitmap);

         } else {

             super.onDraw(canvas);

         }

     }

     private Bitmap getBitmap(Drawable drawable){

         if (drawable instanceof BitmapDrawable){

             return ((BitmapDrawable)drawable).getBitmap();

         } else if (drawable instanceof ColorDrawable){

             Rect rect = drawable.getBounds();

             int width = rect.right - rect.left;

             int height = rect.bottom - rect.top;

             int color = ((ColorDrawable)drawable).getColor();

             Bitmap bitmap = Bitmap.createBitmap(width, height, Bitmap.Config.ARGB_8888);

             Canvas canvas = new Canvas(bitmap);

             canvas.drawARGB(Color.alpha(color), Color.red(color), Color.green(color), Color.blue(color));

             return bitmap;

         } else {

             return null;

         }

     }

 }
分析一下代码:
canvas.drawCircle 决定了画出来的形状是圆形,而圆形的内容则是通过 mPaintBitmap.setShader 搞定的。
其中,BitmapShader需要设置Bitmap填充ImageView的方式(CLAMP:拉伸边缘, MIRROR:镜像, REPEAT:整图重复)。
这里其实设成什么不重要,因为我们实际需要的是将Bitmap按比例缩放成跟ImageView一样大,而不是预置的三种效果。
所以,别忘了 mMatrix.setScale 和 mShader.setLocalMatrix 一起用,将图片缩放一下。
[转载请保留本文地址:http://www.cnblogs.com/snser/p/5159126.html]
四、更多玩法 —— 支持边框
看下面的效果图,如果想给圆形的头像上加一个边框,该怎么搞呢?


 public class ImageViewPlus extends ImageView{

     private Paint mPaintBitmap = new Paint(Paint.ANTI_ALIAS_FLAG);

     private Paint mPaintBorder = new Paint(Paint.ANTI_ALIAS_FLAG);

     private Bitmap mRawBitmap;

     private BitmapShader mShader;

     private Matrix mMatrix = new Matrix();

     private float mBorderWidth = dip2px(15);

     private int mBorderColor = 0xFF0080FF;

     public ImageViewPlus(Context context, AttributeSet attrs) {

         super(context, attrs);

     }

     @Override

     protected void onDraw(Canvas canvas) {

         Bitmap rawBitmap = getBitmap(getDrawable());

         if (rawBitmap != null){

             int viewWidth = getWidth();

             int viewHeight = getHeight();

             int viewMinSize = Math.min(viewWidth, viewHeight);

             float dstWidth = viewMinSize;

             float dstHeight = viewMinSize;

             if (mShader == null || !rawBitmap.equals(mRawBitmap)){

                 mRawBitmap = rawBitmap;

                 mShader = new BitmapShader(mRawBitmap, TileMode.CLAMP, TileMode.CLAMP);

             }

             if (mShader != null){

                 mMatrix.setScale((dstWidth - mBorderWidth * 2) / rawBitmap.getWidth(), (dstHeight - mBorderWidth * 2) / rawBitmap.getHeight());

                 mShader.setLocalMatrix(mMatrix);

             }

             mPaintBitmap.setShader(mShader);

             mPaintBorder.setStyle(Paint.Style.STROKE);

             mPaintBorder.setStrokeWidth(mBorderWidth);

             mPaintBorder.setColor(mBorderColor);

             float radius = viewMinSize / 2.0f;

             canvas.drawCircle(radius, radius, radius - mBorderWidth / 2.0f, mPaintBorder);

             canvas.translate(mBorderWidth, mBorderWidth);

             canvas.drawCircle(radius - mBorderWidth, radius - mBorderWidth, radius - mBorderWidth, mPaintBitmap);

         } else {

             super.onDraw(canvas);

         }

     }

     private Bitmap getBitmap(Drawable drawable){

         if (drawable instanceof BitmapDrawable){

             return ((BitmapDrawable)drawable).getBitmap();

         } else if (drawable instanceof ColorDrawable){

             Rect rect = drawable.getBounds();

             int width = rect.right - rect.left;

             int height = rect.bottom - rect.top;

             int color = ((ColorDrawable)drawable).getColor();

             Bitmap bitmap = Bitmap.createBitmap(width, height, Bitmap.Config.ARGB_8888);

             Canvas canvas = new Canvas(bitmap);

             canvas.drawARGB(Color.alpha(color), Color.red(color), Color.green(color), Color.blue(color));

             return bitmap;

         } else {

             return null;

         }

     }

     private int dip2px(int dipVal)

     {

         float scale = getResources().getDisplayMetrics().density;

         return (int)(dipVal * scale + 0.5f);

     }

 }
看代码中,加边框实际上就是用实心纯色的 Paint 画了一个圆边,在此基础上画上原来的头像即可。
需要的注意的地方有三个:
1) 圆框的半径不是 radius ,而应该是 radius - mBorderWidth / 2.0f 。想象着拿着笔去画线,线其实是画在右图中白色圈的位置,只不过它很粗。
2) 在ImageView大小不变的基础上,头像的实际大小要比没有边框的时候小了,所以 mMatrix.setScale 的时候要把边框的宽度去掉。
3) 画头像Bitmap的时候不能直接 canvas.drawCircle(radius, radius, radius - mBorderWidth, mPaintBitmap) ,这样你会发现头像的右侧和下方边缘被拉伸了(右图)
为什么呢?因为 Paint 默认是以左上角为基准开始绘制的,此时头像的实际区域是右图中的红框,而超过红框的部分(圆形的右侧和下方),自然被 TileMode.CLAMP效果沿边缘拉伸了。
所以,需要通过挪动坐标系的位置和调整圆心,才能把头像画在正确的区域(右图绿框)中。
[转载请保留本文地址:http://www.cnblogs.com/snser/p/5159126.html]
五、更多玩法 —— 支持xml配置
既然有了边框,那如果想配置边框的宽度和颜色该如何是好呢?
基本上两个思路:
1) 给ImageViewPlus加上set接口,设置完成之后通过 invalidate(); 重绘一下即可;
2) 在xml里就支持配置一些自定义属性,这样用起来会方便很多。
这里重点说一下支持xml配置自定义属性。
自定义控件要支持xml配置自定义属性的话,首先需要在 \res\values 里去定义属性:
 <?xml version="1.0" encoding="utf-8"?>

 <resources>

     <attr name="borderColor" format="color" />

     <attr name="borderWidth" format="dimension" />

     <declare-styleable name="ImageViewPlus">

         <attr name="borderColor" />

         <attr name="borderWidth" />

     </declare-styleable>

 </resources>
View attrs_imageviewplus.xml
然后在ImageViewPlus的构造函数中去读取这些自定义属性:
     private static final int DEFAULT_BORDER_COLOR = Color.TRANSPARENT;

     private static final int DEFAULT_BORDER_WIDTH = 0;

     public ImageViewPlus(Context context, AttributeSet attrs) {

         super(context, attrs);

         //取xml文件中设定的参数

         TypedArray ta = context.obtainStyledAttributes(attrs, R.styleable.ImageViewPlus);

         mBorderColor = ta.getColor(R.styleable.ImageViewPlus_borderColor, DEFAULT_BORDER_COLOR);

         mBorderWidth = ta.getDimensionPixelSize(R.styleable.ImageViewPlus_borderWidth, dip2px(DEFAULT_BORDER_WIDTH));

         ta.recycle();

     }
在xml布局中使用自定义属性:
 <RelativeLayout xmlns:android="http://schemas.android.com/apk/res/android"

     xmlns:tools="http://schemas.android.com/tools"

     xmlns:snser="http://schemas.android.com/apk/res/cc.snser.imageviewplus"

     android:layout_width="match_parent"

     android:layout_height="match_parent"

     android:background="@drawable/wallpaper"

     android:orientation="vertical"

     tools:context="${relativePackage}.${activityClass}" >

     <cc.snser.imageviewplus.ImageViewPlus

         android:id="@+id/imgplus"

         android:layout_width="200dp"

         android:layout_height="300dp"

         android:layout_marginBottom="50dp"

         android:layout_centerHorizontal="true"

         android:layout_alignParentBottom="true"

         android:src="@drawable/img_square"

         snser:borderColor="#FF0080FF"

         snser:borderWidth="15dp" />

 </RelativeLayout>
[转载请保留本文地址:http://www.cnblogs.com/snser/p/5159126.html]
六、更多玩法 —— 圆角ImageView
搞定了圆形ImageView以及对应的边框,那如何实现下面这种圆角的ImageView呢?
其实原理上一样,把 canvas.drawCircle 对应改成 canvas.drawRoundRect 就OK了,直接贴代码吧:
 public class ImageViewPlus extends ImageView{

     /**

      * android.widget.ImageView

      */

     public static final int TYPE_NONE = 0;

     /**

      * 圆形

      */

     public static final int TYPE_CIRCLE = 1;

     /**

      * 圆角矩形

      */

     public static final int TYPE_ROUNDED_RECT = 2;

     private static final int DEFAULT_TYPE = TYPE_NONE;

     private static final int DEFAULT_BORDER_COLOR = Color.TRANSPARENT;

     private static final int DEFAULT_BORDER_WIDTH = 0;

     private static final int DEFAULT_RECT_ROUND_RADIUS = 0;

     private int mType;

     private int mBorderColor;

     private int mBorderWidth;

     private int mRectRoundRadius;

     private Paint mPaintBitmap = new Paint(Paint.ANTI_ALIAS_FLAG);

     private Paint mPaintBorder = new Paint(Paint.ANTI_ALIAS_FLAG);

     private RectF mRectBorder = new RectF();

     private RectF mRectBitmap = new RectF();

     private Bitmap mRawBitmap;

     private BitmapShader mShader;

     private Matrix mMatrix = new Matrix();

     public ImageViewPlus(Context context, AttributeSet attrs) {

         super(context, attrs);

         //取xml文件中设定的参数

         TypedArray ta = context.obtainStyledAttributes(attrs, R.styleable.ImageViewPlus);

         mType = ta.getInt(R.styleable.ImageViewPlus_type, DEFAULT_TYPE);

         mBorderColor = ta.getColor(R.styleable.ImageViewPlus_borderColor, DEFAULT_BORDER_COLOR);

         mBorderWidth = ta.getDimensionPixelSize(R.styleable.ImageViewPlus_borderWidth, dip2px(DEFAULT_BORDER_WIDTH));

         mRectRoundRadius = ta.getDimensionPixelSize(R.styleable.ImageViewPlus_rectRoundRadius, dip2px(DEFAULT_RECT_ROUND_RADIUS));

         ta.recycle();

     }

     @Override

     protected void onDraw(Canvas canvas) {

         Bitmap rawBitmap = getBitmap(getDrawable());

         if (rawBitmap != null && mType != TYPE_NONE){

             int viewWidth = getWidth();

             int viewHeight = getHeight();

             int viewMinSize = Math.min(viewWidth, viewHeight);

             float dstWidth = mType == TYPE_CIRCLE ? viewMinSize : viewWidth;

             float dstHeight = mType == TYPE_CIRCLE ? viewMinSize : viewHeight;

             float halfBorderWidth = mBorderWidth / 2.0f;

             float doubleBorderWidth = mBorderWidth * 2;

             if (mShader == null || !rawBitmap.equals(mRawBitmap)){

                 mRawBitmap = rawBitmap;

                 mShader = new BitmapShader(mRawBitmap, TileMode.CLAMP, TileMode.CLAMP);

             }

             if (mShader != null){

                 mMatrix.setScale((dstWidth - doubleBorderWidth) / rawBitmap.getWidth(), (dstHeight - doubleBorderWidth) / rawBitmap.getHeight());

                 mShader.setLocalMatrix(mMatrix);

             }

             mPaintBitmap.setShader(mShader);

             mPaintBorder.setStyle(Paint.Style.STROKE);

             mPaintBorder.setStrokeWidth(mBorderWidth);

             mPaintBorder.setColor(mBorderWidth > 0 ? mBorderColor : Color.TRANSPARENT);

             if (mType == TYPE_CIRCLE){

                 float radius = viewMinSize / 2.0f;

                 canvas.drawCircle(radius, radius, radius - halfBorderWidth, mPaintBorder);

                 canvas.translate(mBorderWidth, mBorderWidth);

                 canvas.drawCircle(radius - mBorderWidth, radius - mBorderWidth, radius - mBorderWidth, mPaintBitmap);

             } else if (mType == TYPE_ROUNDED_RECT){

                 mRectBorder.set(halfBorderWidth, halfBorderWidth, dstWidth - halfBorderWidth, dstHeight - halfBorderWidth);

                 mRectBitmap.set(0.0f, 0.0f, dstWidth - doubleBorderWidth, dstHeight - doubleBorderWidth);

                 float borderRadius = mRectRoundRadius - halfBorderWidth > 0.0f ? mRectRoundRadius - halfBorderWidth : 0.0f;

                 float bitmapRadius = mRectRoundRadius - mBorderWidth > 0.0f ? mRectRoundRadius - mBorderWidth : 0.0f;

                 canvas.drawRoundRect(mRectBorder, borderRadius, borderRadius, mPaintBorder);

                 canvas.translate(mBorderWidth, mBorderWidth);

                 canvas.drawRoundRect(mRectBitmap, bitmapRadius, bitmapRadius, mPaintBitmap);

             }

         } else {

             super.onDraw(canvas);

         }

     }

     private int dip2px(int dipVal)

     {

         float scale = getResources().getDisplayMetrics().density;

         return (int)(dipVal * scale + 0.5f);

     }

     private Bitmap getBitmap(Drawable drawable){

         if (drawable instanceof BitmapDrawable){

             return ((BitmapDrawable)drawable).getBitmap();

         } else if (drawable instanceof ColorDrawable){

             Rect rect = drawable.getBounds();

             int width = rect.right - rect.left;

             int height = rect.bottom - rect.top;

             int color = ((ColorDrawable)drawable).getColor();

             Bitmap bitmap = Bitmap.createBitmap(width, height, Bitmap.Config.ARGB_8888);

             Canvas canvas = new Canvas(bitmap);

             canvas.drawARGB(Color.alpha(color), Color.red(color), Color.green(color), Color.blue(color));

             return bitmap;

         } else {

             return null;

         }

     }

 }
View ImageViewPlus.java
 <RelativeLayout xmlns:android="http://schemas.android.com/apk/res/android"

     xmlns:tools="http://schemas.android.com/tools"

     xmlns:snser="http://schemas.android.com/apk/res/cc.snser.imageviewplus"

     android:layout_width="match_parent"

     android:layout_height="match_parent"

     android:background="@drawable/wallpaper"

     android:orientation="vertical"

     tools:context="${relativePackage}.${activityClass}" >

     <cc.snser.imageviewplus.ImageViewPlus

         android:id="@+id/imgplus"

         android:layout_width="200dp"

         android:layout_height="300dp"

         android:layout_marginBottom="50dp"

         android:layout_centerHorizontal="true"

         android:layout_alignParentBottom="true"

         android:src="@drawable/img_rectangle"

         snser:type="rounded_rect"

         snser:borderColor="#FF0080FF"

         snser:borderWidth="10dp"

         snser:rectRoundRadius="30dp" />

 </RelativeLayout>
View layout
 <?xml version="1.0" encoding="utf-8"?>

 <resources>

     <attr name="type">

         <enum name="none" value="0" />

         <enum name="circle" value="1" />

         <enum name="rounded_rect" value="2" />

     </attr>

     <attr name="borderColor" format="color" />

     <attr name="borderWidth" format="dimension" />

     <attr name="rectRoundRadius" format="dimension" />

     <declare-styleable name="ImageViewPlus">

         <attr name="type" />

         <attr name="borderColor" />

         <attr name="borderWidth" />

         <attr name="rectRoundRadius" />

     </declare-styleable>

 </resources>
View attrs_imageviewplus.xml
[转载请保留本文地址:http://www.cnblogs.com/snser/p/5159126.html]
七、Demo源码
保存下面的图片,扩展名改成zip后解压即可。

[转载请保留本文地址:http://www.cnblogs.com/snser/p/5159126.html]
自定义控件之 圆形 / 圆角 ImageView的更多相关文章
- [Android] 给图像加入相框、圆形圆角显示图片、图像合成知识
前一篇文章讲述了Android触屏setOnTouchListener实现突破缩放.移动.绘制和加入水印,继续我的"随手拍"项目完毕给图片加入相框.圆形圆角显示图片和图像合 ...
- Android 圆形/圆角图片的方法
Android 圆形/圆角图片的方法 眼下网上有非常多圆角图片的实例,Github上也有一些成熟的项目.之前做项目,为了稳定高效都是选用Github上的项目直接用.但这样的结束也是Android开发必 ...
- 安卓图片载入之使用universalimageloader载入圆形圆角图片
前言 话说这universalimageloader载入图片对搞过2年安卓程序都是用烂了再熟悉只是了.就是安卓新手也是百度就会有一大堆东西出来,今天为什么这里还要讲使用universalimagelo ...
- Android开发之自定义圆形的ImageView的实现
android中的ImageView只能显示矩形的图片,这样一来不能满足我们其他的需求,比如要显示圆形的图片,这个时候,我们就需要自定义ImageView了,其原理就是首先获取到图片的Bitmap,然 ...
- Android自己定义圆角ImageView
我们常常看到一些app中能够显示圆角图片.比方qq的联系人图标等等,实现圆角图片一种办法是直接使用圆角图片资源,当然假设没有圆角图片资源.我们也能够自己通过程序实现的,以下介绍一个自己定义圆角Imag ...
- Android自己定义圆角ImageView 支持网络图片
先看下效果图 我们再来看一张CSDN的圆角图片 从布局能够看出csdn app 的头像也是圆角的Image,但能够看到.有明显的毛刺感.不知道是csdn 程序猿的疏忽还是 我手机的问题,本人手机(小米 ...
- 自定义控件【圆形】圆角 BitmapShader
关于缩放比例 本例中,我们会为BitmapShader设置了一个matrix,目的是按比例放大或者缩小bitmap,并移动到View控件的中心,我们不会让view的宽高大于我们bitm ...
- Android自定义控件之圆形进度条ImageView
From:http://blog.csdn.net/xiadik/article/details/41648181package com.wangran.beautiful_girl_show.vie ...
- Android实现圆形圆角图片
本文主要使用两种方法实现图形圆角图片 自定View加上使用Xfermode实现 Shader实现 自定View加上使用Xfermode实现 /** * 根据原图和变长绘制圆形图片 * * @param ...
随机推荐
- Python高手之路【二】python基本数据类型
一:数字 int int(整型): 在32位机器上,整数的位数为32位,取值范围为-2**31-2**31-1,即-2147483648-2147483647 在64位系统上,整数的位数为64位,取值 ...
- 23种设计模式--责任链模式-Chain of Responsibility Pattern
一.责任链模式的介绍 责任链模式用简单点的话来说,将责任一步一步传下去,这就是责任,想到这个我们可以相当击鼓传花,这个是为了方便记忆,另外就是我们在项目中经常用到的审批流程等这一类的场景时我们就可以考 ...
- 前端学HTTP之重定向和负载均衡
前面的话 HTTP并不是独自运行在网上的.很多协议都会在HTTP报文的传输过程中对其数据进行管理.HTTP只关心旅程的端点(发送者和接收者),但在包含有镜像服务器.Web代理和缓存的网络世界中,HTT ...
- ASP.NET MVC5+EF6+EasyUI 后台管理系统(81)-数据筛选(万能查询)
系列目录 前言 听标题的名字似乎是一个非常牛X复杂的功能,但是实际上它确实是非常复杂的,我们本节将演示如何实现对数据,进行组合查询(数据筛选) 我们都知道Excel中是如何筛选数据的.就像下面一样 他 ...
- Android学习路线总结,绝对干货
title: Android学习路线总结,绝对干货 tags: Android学习路线,Android学习资料,怎么学习android grammar_cjkRuby: true --- 一.前言 不 ...
- MySQL设置字段的默认值为当前系统时间
问题产生: 当我们在对某个字段进行设置时间默认值,该默认值必须是的当前记录的插入时间,那么就将当前系统时间作为该记录创建的时间. 应用场景: 1.在数据表中,要记录每条数据是什么时候创建的,应该由数据 ...
- log4net使用手册
1. log4net简介 log4net是.Net下一个非常优秀的开源日志记录组件.log4net记录日志的功能非常强大.它可以将日志分不同的等级,以不同的格式,输出到不同的媒介.Java平台下,它还 ...
- Flexible 弹性盒子模型之CSS flex-grow 属性
实例 让第二个元素的宽度为其他元素的三倍: div:nth-of-type(1){flex-grow:1;} div:nth-of-type(2){flex-grow:3;} div:nth-of-t ...
- Android(安卓)-------CardView
1.activity_main.xml <android.support.v7.widget.CardView android:id="@+id/cardView" andr ...
- Concurrency
<Concurrency>:http://docs.oracle.com/javase/tutorial/essential/concurrency/index.html <Java ...