Mybatis+Springmvc+Spring整合常用的配置文件
1.创建web项目
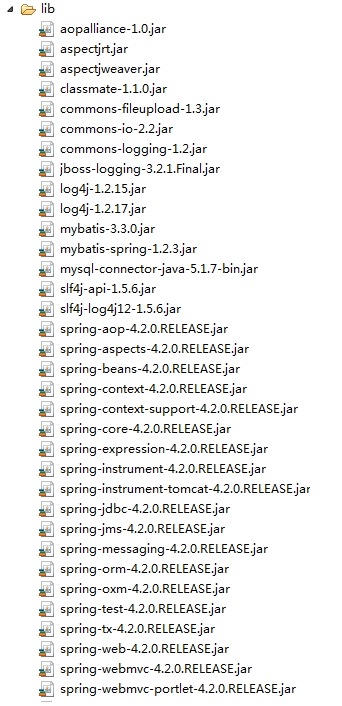
2.导入mabatis spring springnvc 需要的jar包
3.创建mybatis,spring,springmvc的配置文件
(1)web.xml配置文件
<?xml version="1.0" encoding="UTF-8"?>
<web-app version="2.5"
xmlns="http://java.sun.com/xml/ns/javaee"
xmlns:xsi="http://www.w3.org/2001/XMLSchema-instance"
xsi:schemaLocation="http://java.sun.com/xml/ns/javaee
http://java.sun.com/xml/ns/javaee/web-app_2_5.xsd">
<!-- 告知javaEE容器,有哪些内容需要添加到上下文中去 -->
<context-param>
<param-name>contextConfigLocation</param-name>
<param-value>
/WEB-INF/classes/applicationContext.xml,
<!-- /WEB-INF/classes/mvc-servlet.xml -->
</param-value>
</context-param>
<!-- 加载LOG4J -->
<context-param>
<param-name>log4jConfigLocation</param-name>
<param-value>/WEB-INF/log4j.xml</param-value>
</context-param>
<context-param>
<param-name>log4jRefreshInterval</param-name>
<param-value>60000</param-value>
</context-param>
<!-- 动态设置项目的运行路径 -->
<context-param>
<param-name>webAppRootKey</param-name>
<param-value>ssm.root</param-value>
</context-param>
<!-- 配置静态资源 -->
<servlet-mapping>
<servlet-name>default</servlet-name>
<url-pattern>/static/*</url-pattern>
</servlet-mapping>
<!-- 配置springmvc的前端控制器 -->
<servlet>
<servlet-name>mvc</servlet-name>
<servlet-class>org.springframework.web.servlet.DispatcherServlet</servlet-class>
<!-- 默认情况下:DispatcherServlet会寻找WEB-INF下,命名规范为[servlet-name]-servlet.xml文件。如:在上例中,它就会找/WEB-INF/spring-servlet.xml
如果需要修改,需要在web.xml中的<servlet>标记中增加 <init-param>。。。 </init-param>:-->
<init-param>
<param-name>contextConfigLocation</param-name>
<param-value>/WEB-INF/classes/mvc-servlet.xml</param-value>
</init-param>
</servlet>
<servlet-mapping>
<servlet-name>mvc</servlet-name>
<url-pattern>/</url-pattern>
</servlet-mapping>
<!-- spring框架提供的字符集过滤器 -->
<!-- spring Web MVC框架提供了org.springframework.web.filter.CharacterEncodingFilter用于解决POST方式造成的中文乱码问题 -->
<filter>
<filter-name>encodingFilter</filter-name>
<filter-class>org.springframework.web.filter.CharacterEncodingFilter</filter-class>
<init-param>
<param-name>encoding</param-name>
<param-value>UTF-8</param-value>
</init-param>
<!-- force强制,促使 -->
<init-param>
<param-name>forceEncoding</param-name>
<param-value>true</param-value>
</init-param>
</filter>
<filter-mapping>
<filter-name>encodingFilter</filter-name>
<url-pattern>/*</url-pattern>
</filter-mapping>
<!-- 登录过滤器-->
<filter>
<filter-name>loginFilter</filter-name>
<filter-class>com.cy.ssm.filter.LoginFilter</filter-class>
</filter>
<filter-mapping>
<filter-name>loginFilter</filter-name>
<url-pattern>/*</url-pattern>
</filter-mapping>
<!-- 监听器 -->
<listener>
<listener-class>org.springframework.web.context.ContextLoaderListener</listener-class>
</listener>
<listener>
<listener-class>org.springframework.web.util.Log4jConfigListener</listener-class>
</listener>
<welcome-file-list>
<welcome-file>index.jsp</welcome-file>
</welcome-file-list>
</web-app>
(2)mabatis配置文件
<?xml version="1.0" encoding="UTF-8"?>

<!DOCTYPE configuration PUBLIC "-//mybatis.org/DTD Config 3.0//EN"

    "http://mybatis.org/dtd/mybatis-3-config.dtd" >

<configuration>

</configuration>

(3)springmvc配置文件(servlet.xml)
<?xml version="1.0" encoding="UTF-8"?>
<beans xmlns="http://www.springframework.org/schema/beans"
xmlns:xsi="http://www.w3.org/2001/XMLSchema-instance" xmlns:context="http://www.springframework.org/schema/context"
xmlns:mvc="http://www.springframework.org/schema/mvc"
xsi:schemaLocation="http://www.springframework.org/schema/beans
http://www.springframework.org/schema/beans/spring-beans-3.0.xsd
http://www.springframework.org/schema/context http://www.springframework.org/schema/context/spring-context-3.0.xsd
http://www.springframework.org/schema/mvc
http://www.springframework.org/schema/mvc/spring-mvc-3.0.xsd">
<!-- 启动注解,注册服务,如验证框架、全局类型转换器-->
<mvc:annotation-driven/>
<!-- 启动自动扫描 -->
<context:component-scan base-package="com.cy.ssm">
<!-- 制定扫包规则 ,只扫描使用@Controller注解的JAVA类 -->
<context:include-filter type="annotation" expression="org.springframework.stereotype.Controller"/>
</context:component-scan>
<!-- 配置视图解析器 -->
<!--
prefix和suffix:查找视图页面的前缀和后缀(前缀[逻辑视图名]后缀),
比如传进来的逻辑视图名为WEB-INF/jsp/hello,则该该jsp视图页面应该存放在“WEB-INF/jsp/hello.jsp”; -->
<bean class="org.springframework.web.servlet.view.UrlBasedViewResolver">
<property name="viewClass" value="org.springframework.web.servlet.view.JstlView"></property>
<property name="prefix" value="/"></property> <!-- 我这里的视图直接放在WebRoot下的 -->
<property name="suffix" value=".jsp"></property>
</bean>
</beans>
(4)spring配置文件(applicationContext.xml)
<?xml version="1.0" encoding="UTF-8"?>
<beans xmlns="http://www.springframework.org/schema/beans"
xmlns:xsi="http://www.w3.org/2001/XMLSchema-instance" xmlns:context="http://www.springframework.org/schema/context"
xmlns:aop="http://www.springframework.org/schema/aop" xmlns:tx="http://www.springframework.org/schema/tx"
xsi:schemaLocation="http://www.springframework.org/schema/beans
http://www.springframework.org/schema/beans/spring-beans-3.0.xsd
http://www.springframework.org/schema/aop
http://www.springframework.org/schema/aop/spring-aop-3.0.xsd
http://www.springframework.org/schema/tx
http://www.springframework.org/schema/tx/spring-tx-3.1.xsd
http://www.springframework.org/schema/context
http://www.springframework.org/schema/context/spring-context-4.2.xsd">
<!-- 开启自动扫包 -->
<context:component-scan base-package="com.cy.ssm">
<!--制定扫包规则,不扫描@Controller注解的JAVA类,其他的还是要扫描 -->
<context:exclude-filter type="annotation" expression="org.springframework.stereotype.Controller"/>
</context:component-scan>
<!-- 启动AOP支持 -->
<aop:aspectj-autoproxy/>
<!-- 引入外部数据源配置信息 -->
<bean class="org.springframework.beans.factory.config.PropertyPlaceholderConfigurer">
<property name="locations">
<value>classpath:datasource.properties</value>
</property>
</bean>
<!-- 配置数据源 -->
<bean id="dataSource" class="org.springframework.jdbc.datasource.DriverManagerDataSource">
<property name="driverClassName" value="${jdbc.driver}"></property>
<property name="url" value="${jdbc.url}"></property>
<property name="username" value="${jdbc.username}"></property>
<property name="password" value="${jdbc.password}"></property>
</bean>
<!-- 配置Session工厂 -->
<bean id="sqlSessionFactory" class="org.mybatis.spring.SqlSessionFactoryBean">
<property name="dataSource" ref="dataSource"></property>
<!-- 加载mybatis.cfg.xml文件 -->
<property name="configLocation" value="classpath:mybatis.cfg.xml"></property>
<!-- 自动扫描需要定义类别名的包,将包内的JAVA类的类名作为类别名 -->
<property name="typeAliasesPackage" value="com.cy.ssm.beans"></property>
</bean>
<!-- 自动扫描所有的Mapper接口与文件 -->
<bean class="org.mybatis.spring.mapper.MapperScannerConfigurer">
<property name="basePackage" value="com.cy.ssm.mapper"></property>
</bean>
<!-- 配置事务管理器 -->
<bean id="txManager"
class="org.springframework.jdbc.datasource.DataSourceTransactionManager">
<property name="dataSource" ref="dataSource"></property>
</bean>
<!-- 定义个通知,指定事务管理器 -->
<tx:advice id="txAdvice" transaction-manager="txManager">
<tx:attributes>
<tx:method name="delete*" propagation="REQUIRED" read-only="false"
rollback-for="java.lang.Exception" />
<tx:method name="save*" propagation="REQUIRED" read-only="false"
rollback-for="java.lang.Exception" />
<tx:method name="insert*" propagation="REQUIRED" read-only="false"
rollback-for="java.lang.Exception" />
<tx:method name="update*" propagation="REQUIRED" read-only="false"
rollback-for="java.lang.Exception" />
<tx:method name="load*" propagation="SUPPORTS" read-only="true"/>
<tx:method name="find*" propagation="SUPPORTS" read-only="true"/>
<tx:method name="search*" propagation="SUPPORTS" read-only="true"/>
<tx:method name="select*" propagation="SUPPORTS" read-only="true"/>
<tx:method name="get*" propagation="SUPPORTS" read-only="true"/>
</tx:attributes>
</tx:advice>
<aop:config>
<!-- 配置一个切入点 -->
<aop:pointcut id="serviceMethods" expression="execution(* com.cy.ssm.service.impl.*ServiceImpl.*(..))" />
<aop:advisor advice-ref="txAdvice" pointcut-ref="serviceMethods" />
</aop:config>
</beans>
Mybatis+Springmvc+Spring整合常用的配置文件的更多相关文章
- mybatis与spring整合(基于配置文件)
本文主要介绍了如何将mybatis和spring整合在一起使用,本人使用的是mybatis3.05 + spring3.1.0M2 ,使用dbcp作为数据库连接池. 1.编写数据访问接口(UserDa ...
- Mybatis+SpringMVC+Spring整合
1,先添加spring支持: applicationContext.xml 配在WEBINF下,四个命名空间:aop,context,tx,p 配Listener:ContextLoaderList ...
- Spring+SpringMVC+MyBatis深入学习及搭建(九)——MyBatis和Spring整合
转载请注明出处:http://www.cnblogs.com/Joanna-Yan/p/6964162.html 前面讲到:Spring+SpringMVC+MyBatis深入学习及搭建(八)--My ...
- Mybatis第五篇【Mybatis与Spring整合】
Mybatis与Spring整合 既然我们已经学了Mybatis的基本开发了,接下来就是Mybatis与Spring的整合了! 以下使用的是Oracle数据库来进行测试 导入jar包 aopallia ...
- Mybatis和Spring整合&逆向工程
Mybatis和Spring整合&逆向工程Mybatis和Spring整合mybatis整合Spring的思路目的就是将在SqlMapConfig.xml中的配置移植到Spring的appli ...
- 手写Mybatis和Spring整合简单版示例窥探Spring的强大扩展能力
Spring 扩展点 **本人博客网站 **IT小神 www.itxiaoshen.com 官网地址****:https://spring.io/projects/spring-framework T ...
- MyBatis学习(四)MyBatis和Spring整合
MyBatis和Spring整合 思路 1.让spring管理SqlSessionFactory 2.让spring管理mapper对象和dao. 使用spring和mybatis整合开发mapper ...
- Mybatis与Spring整合,使用了maven管理项目,作为初学者觉得不错,转载下来
转载自:http://www.cnblogs.com/xdp-gacl/p/4271627.html 一.搭建开发环境 1.1.使用Maven创建Web项目 执行如下命令: mvn archetype ...
- mybatis与spring整合时读取properties问题的解决
在学习mybatis与spring整合是,想从外部引用一个db.properties数据库配置文件,在配置文件中使用占位符进行引用,如下: <context:property-placehold ...
随机推荐
- Failed to load C:\ProgramFilesTwo\Android\sdk\build-tools\27.0.3\lib\dx.jar
Eclipse遇到如下错误: Failed to load C:\ProgramFilesTwo\Android\sdk\build-tools\27.0.3\lib\dx.jar 原因: eclip ...
- 毕设问题(1)表格table的表头自定义、复合表头,组合表格
毕业设计,是一个web项目,遇到的些问题,记录下来.也许也有同样只知道一些,不是那么系统的学过的人,会遇到同样的问题,希望有所帮助. 百度知道有这样一个问题: bootstrap table 如何实现 ...
- #6392. 「THUPC2018」密码学第三次小作业 / Rsa (exgcd求逆元+快速幂+快速乘)
题目链接:https://loj.ac/problem/6392 题目大意:给定五个正整数c1,c2,e1,e2,N,其中e1与e2互质,且满足 c1 = m^e1 mod N c2 = m^e2 m ...
- Linux系统常用知识(centos7)
一.查看系统版本 1.查看linux内核版本 #cat /etc/redhat-release 二.主机名 2.1定义: 静态的(Static hostname):“静态”主机名也称为内核主机名,是系 ...
- intellij IDEA启动springboot项目报无效的源发行版错误解决方法
从http://start.spring.io/ 上下载的springboot 模板项目,导入intellij 后,报如下错误,原因是intellij 默认使用的Java compiler 是1.8版 ...
- windows下用VMware虚拟机下安装Linux CentOS6.9图文教程
首先,请在Windows7下安装VMware虚拟机,这个比较简单,直接从官网下载安装即可,这里不再叙述. 接着,从官网直接下载CentOS6.9的iso镜像文件,地址:https://www.cent ...
- STM32 TIM3 PWM输出 4路
一.设置TIM3的GPIO为推挽输出 void TIM3_IOConfig(void) { GPIO_InitTypeDef GPIO_InitStructure; RCC_APB2PeriphClo ...
- 【Linux】shell脚本参数传递
这里介绍参数传递的两种方式. 方式一:$0,$1,$2... 采用$0,$1,$2..等方式获取脚本命令行传入的参数 $0:脚本名称 $1....: 参数 例子: #编写一个shell $ vim t ...
- hashmap:cr:csdn
HashMap相关问题 1.你用过HashMap吗?什么是HashMap?你为什么用到它? 用过,HashMap是基于哈希表的Map接口的非同步实现,它允许null键和null值,且HashMap依托 ...
- 正确设置nginx/php-fpm/apache权限 提高网站安全性 防止被挂木马
核心总结:php-fpm/apache 进程所使用的用户,不能是网站文件所有者. 凡是违背这个原则,则不符合最小权限原则. 根据生产环境不断反馈,发现不断有 php网站被挂木马,绝大部分原因是因为权限 ...