JS、JQ实现焦点图轮播效果
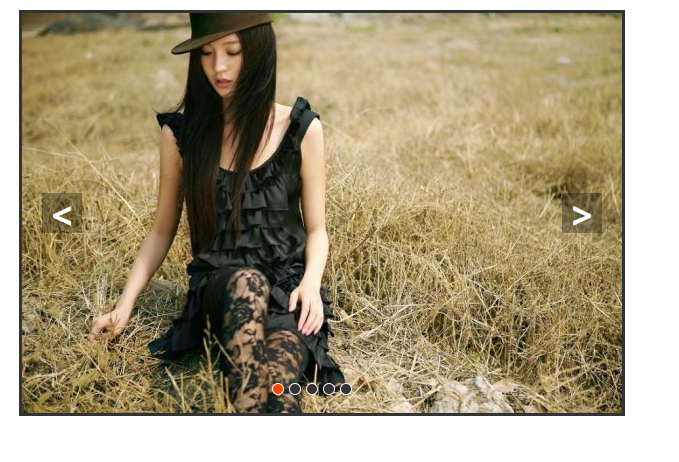
JS实现焦点图轮播效果
效果图:
代码如下,复制即可使用:
(不过里面的图片路径需要自己改成自己的图片路径,否则是没有图片显示的哦)
<!DOCTYPE html>
<html>
<head>
<meta charset="UTF-8">
<title>JS实现焦点图轮播效果</title>
<style type="text/css">
*{ margin: 0; padding: 0; text-decoration: none;}
body { padding: 20px;}
#container { width: 600px; height: 400px; border: 3px solid #333; overflow: hidden; position: relative;}
#list { width: 4200px; height: 400px; position: absolute; z-index: 1;}
#list img { float: left;}
#buttons { position: absolute; height: 10px; width: 100px; z-index: 2; bottom: 20px; left: 250px;}
#buttons span { cursor: pointer; float: left; border: 1px solid #fff; width: 10px; height: 10px; border-radius: 50%; background: #333; margin-right: 5px;}
#buttons .on { background: orangered;}
.arrow { cursor: pointer; display: none; line-height: 39px; text-align: center; font-size: 36px; font-weight: bold; width: 40px; height: 40px; position: absolute; z-index: 2; top: 180px; background-color: RGBA(0,0,0,.3); color: #fff;}
.arrow:hover { background-color: RGBA(0,0,0,.7);}
#container:hover .arrow { display: block;}
#prev { left: 20px;}
#next { right: 20px;}
</style>
<script type="text/javascript"> window.onload = function () {
var container = document.getElementById('container');
var list = document.getElementById('list');
var buttons = document.getElementById('buttons').getElementsByTagName('span');
var prev = document.getElementById('prev');
var next = document.getElementById('next');
var index = 1;
var len = 5;
var animated = false;
var interval = 3000;
var timer; function animate (offset) {
if (offset == 0) {
return;
}
animated = true;
var time = 300;
var inteval = 10;
var speed = offset/(time/inteval);
var left = parseInt(list.style.left) + offset; var go = function (){
if ( (speed > 0 && parseInt(list.style.left) < left) || (speed < 0 && parseInt(list.style.left) > left)) {
list.style.left = parseInt(list.style.left) + speed + 'px';
setTimeout(go, inteval);
}
else {
list.style.left = left + 'px';
if(left>-200){
list.style.left = -600 * len + 'px';
}
if(left<(-600 * len)) {
list.style.left = '-600px';
}
animated = false;
}
}
go();
} function showButton() {
for (var i = 0; i < buttons.length ; i++) {
if( buttons[i].className == 'on'){
buttons[i].className = '';
break;
}
}
buttons[index - 1].className = 'on';
} function play() {
timer = setTimeout(function () {
next.onclick();
play();
}, interval);
}
function stop() {
clearTimeout(timer);
} next.onclick = function () {
if (animated) {
return;
}
if (index == 5) {
index = 1;
}
else {
index += 1;
}
animate(-600);
showButton();
}
prev.onclick = function () {
if (animated) {
return;
}
if (index == 1) {
index = 5;
}
else {
index -= 1;
}
animate(600);
showButton();
} for (var i = 0; i < buttons.length; i++) {
buttons[i].onclick = function () {
if (animated) {
return;
}
if(this.className == 'on') {
return;
}
var myIndex = parseInt(this.getAttribute('index'));
var offset = -600 * (myIndex - index); animate(offset);
index = myIndex;
showButton();
}
} container.onmouseover = stop;
container.onmouseout = play; play(); }
</script>
</head>
<body> <div id="container">
<div id="list" style="left: -600px;">
<!-- 放最后的一张图片 -图片需要改为自己的图片路径 -->
<img src="img/5.jpg" alt="1"/>
<img src="img/1.jpg" alt="1"/>
<img src="img/2.jpg" alt="2"/>
<img src="img/3.jpg" alt="3"/>
<img src="img/4.jpg" alt="4"/>
<img src="img/5.jpg" alt="5"/>
<!-- 放第一张的图片 -->
<img src="img/1.jpg" alt="5"/>
</div>
<div id="buttons">
<span index="1" class="on"></span>
<span index="2"></span>
<span index="3"></span>
<span index="4"></span>
<span index="5"></span>
</div>
<a href="javascript:;" id="prev" class="arrow"><</a>
<a href="javascript:;" id="next" class="arrow">></a>
</div> </body>
</html>
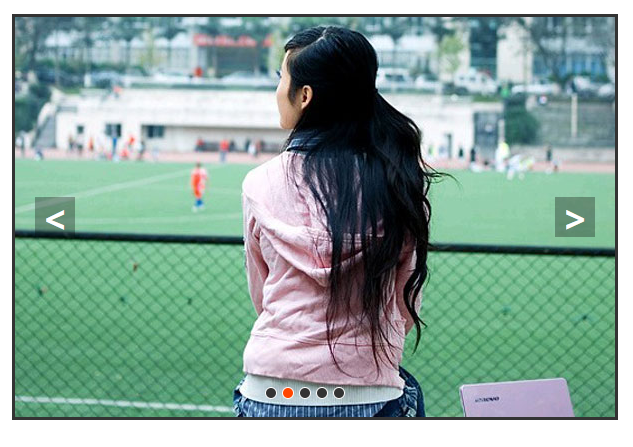
JQ实现焦点图轮播效果(一)
效果图:
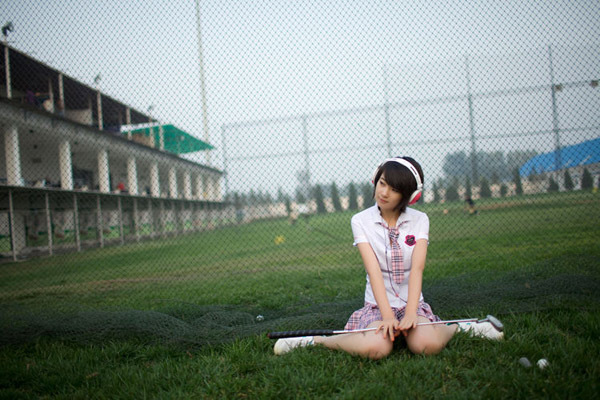
图片素材 :


代码如下,复制即可使用:
(不过里面的JQ路径和图片路径需要自己改成自己的JQ路径和图片路径,否则是没有效果显示的哦)
<!DOCTYPE html>

<html>

<head>

    <meta charset="UTF-8">

    <title>JQ实现焦点图轮播效果(一)</title>

    <style type="text/css">

        *{ margin: 0; padding: 0; text-decoration: none;}

        body { padding: 20px;}

        #container { width: 600px; height: 400px; border: 3px solid #333; overflow: hidden; position: relative;}

        #list { width: 4200px; height: 400px; position: absolute; z-index: 1;}

        #list img { float: left;}

        #buttons { position: absolute; height: 10px; width: 100px; z-index: 2; bottom: 20px; left: 250px;}

        #buttons span { cursor: pointer; float: left; border: 1px solid #fff; width: 10px; height: 10px; border-radius: 50%; background: #333; margin-right: 5px;}

        #buttons .on {  background: orangered;}

        .arrow { cursor: pointer; display: none; line-height: 39px; text-align: center; font-size: 36px; font-weight: bold; width: 40px; height: 40px;  position: absolute; z-index: 2; top: 180px; background-color: RGBA(0,0,0,.3); color: #fff;}

        .arrow:hover { background-color: RGBA(0,0,0,.7);}

        #container:hover .arrow { display: block;}

        #prev { left: 20px;}

        #next { right: 20px;}

    </style>
<!-- 此处需要改为自己的JQ路径 -->
<script type="text/javascript" src="js/jquery.min.js"></script>
<script type="text/javascript"> $(function () {
var container = $('#container');
var list = $('#list');
var buttons = $('#buttons span');
var prev = $('#prev');
var next = $('#next');
var index = 1;
var len = 5;
var interval = 3000;
var timer; function animate (offset) {
var left = parseInt(list.css('left')) + offset;
if (offset>0) {
offset = '+=' + offset;
}
else {
offset = '-=' + Math.abs(offset);
}
list.animate({'left': offset}, 300, function () {
if(left > -200){
list.css('left', -600 * len);
}
if(left < (-600 * len)) {
list.css('left', -600);
}
});
} function showButton() {
buttons.eq(index-1).addClass('on').siblings().removeClass('on');
} function play() {
timer = setTimeout(function () {
next.trigger('click');
play();
}, interval);
}
function stop() {
clearTimeout(timer);
} next.bind('click', function () {
if (list.is(':animated')) {
return;
}
if (index == 5) {
index = 1;
}
else {
index += 1;
}
animate(-600);
showButton();
}); prev.bind('click', function () {
if (list.is(':animated')) {
return;
}
if (index == 1) {
index = 5;
}
else {
index -= 1;
}
animate(600);
showButton();
}); buttons.each(function () {
$(this).bind('click', function () {
if (list.is(':animated') || $(this).attr('class')=='on') {
return;
}
var myIndex = parseInt($(this).attr('index'));
var offset = -600 * (myIndex - index); animate(offset);
index = myIndex;
showButton();
})
}); container.hover(stop, play); play(); });
</script>
</head>
<body> <div id="container">
<div id="list" style="left: -600px;">
<!-- 放最后的一张图片 -此处需要改为自己的图片路径 -->
<img src="img/5.jpg" alt="1"/>
<img src="img/1.jpg" alt="1"/>
<img src="img/2.jpg" alt="2"/>
<img src="img/3.jpg" alt="3"/>
<img src="img/4.jpg" alt="4"/>
<img src="img/5.jpg" alt="5"/>
<!-- 放第一张的图片 -->
<img src="img/1.jpg" alt="5"/>
</div>
<div id="buttons">
<span index="1" class="on"></span>
<span index="2"></span>
<span index="3"></span>
<span index="4"></span>
<span index="5"></span>
</div>
<a href="javascript:;" id="prev" class="arrow"><</a>
<a href="javascript:;" id="next" class="arrow">></a>
</div> </body>
</html>
JQ实现焦点图轮播效果(二)
效果图:

图片素材 :
 、
、 、
、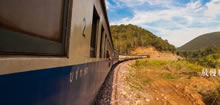 、
、
左右按钮素材 : , 左右按钮 IE6版本素材 :
代码如下,复制即可使用:
(不过里面的JQ路径和图片路径需要自己改成自己的JQ路径和图片路径,否则是没有效果显示的哦)
(适用浏览器:IE8、360、FireFox、Chrome、Safari、Opera、傲游、搜狗、世界之窗.)
<!DOCTYPE html>

<html lang="en">

<head>

    <meta charset="UTF-8">

    <title>JQ实现焦点图轮播效果(二)</title>

  <!-- 此处需要改为自己的JQ路径 -->
    <script type="text/javascript" src="js/jquery.min.js"></script>

    <style>

        /* CSS Document */

        body,ul,li{ padding:0; margin:0;}

        ul,li{ list-style:none;}

        img{ border:none;}

        a{ color:#6cf;}

        a:hover{ color:#84B263;}

        .box{ width:980px; margin:0 auto; position:relative; overflow:hidden; _height:100%;}

        .picbox{ width:980px; height:115px; overflow:hidden; position:relative;}

        .piclist{ height:115px;position:absolute; left:0px; top:0px}

        .piclist li{ background:#eee; margin-right:20px; padding:5px; float:left;}

        .swaplist{ position:absolute; left:-3000px; top:0px}

     /*这里需要改成自己的图片路径*/
        .og_prev,.og_next{ width:30px; height:50px; background:url(../images/icon.png) no-repeat; background:url(../images/icon_ie6.png) no-repeat\9; position:absolute; top:33px; z-index:99; cursor:pointer;filter:alpha(opacity=70); opacity:0.7;}

        .og_prev{ background-position:0 -60px; left:4px;}

        .og_next{ background-position:0 0; right:4px;}

    </style>

</head>

<body>

<div class="box" style="margin-top:50px;">

    <div class="picbox">

        <ul class="piclist mainlist">

        <!-- 此处需要改为自己的图片路径 -->
            <li><a href="#" target="_blank"><img src="data:images/1.jpg" width="220" height="105" /></a></li>

            <li><a href="#" target="_blank"><img src="data:images/2.jpg" /></a></li>

            <li><a href="#" target="_blank"><img src="data:images/3.jpg" /></a></li>

            <li><a href="#" target="_blank"><img src="data:images/4.jpg" /></a></li>

            <li><a href="#" target="_blank"><img src="data:images/1.jpg" /></a></li>

            <li><a href="#" target="_blank"><img src="data:images/2.jpg" /></a></li>

            <li><a href="#" target="_blank"><img src="data:images/3.jpg" /></a></li>

            <li><a href="#" target="_blank"><img src="data:images/4.jpg" /></a></li>

        </ul>

        <ul class="piclist swaplist"></ul>

    </div>

    <div class="og_prev"></div>

    <div class="og_next"></div>

</div>

<script>

// JavaScript Document

$(document).ready(function(e) {

    /***不需要自动滚动,去掉即可***/

    time = window.setInterval(function(){

        $('.og_next').click();

    },5000);

    /***不需要自动滚动,去掉即可***/

    linum = $('.mainlist li').length;//图片数量

    w = linum * 250;//ul宽度

    $('.piclist').css('width', w + 'px');//ul宽度

    $('.swaplist').html($('.mainlist').html());//复制内容

    $('.og_next').click(function(){

        if($('.swaplist,.mainlist').is(':animated')){

            $('.swaplist,.mainlist').stop(true,true);

        }

        if($('.mainlist li').length>4){//多于4张图片

            ml = parseInt($('.mainlist').css('left'));//默认图片ul位置

            sl = parseInt($('.swaplist').css('left'));//交换图片ul位置

            if(ml<=0 && ml>w*-1){//默认图片显示时

                $('.swaplist').css({left: '1000px'});//交换图片放在显示区域右侧

                $('.mainlist').animate({left: ml - 1000 + 'px'},'slow');//默认图片滚动

                if(ml==(w-1000)*-1){//默认图片最后一屏时

                    $('.swaplist').animate({left: '0px'},'slow');//交换图片滚动

                }

            }else{//交换图片显示时

                $('.mainlist').css({left: '1000px'})//默认图片放在显示区域右

                $('.swaplist').animate({left: sl - 1000 + 'px'},'slow');//交换图片滚动

                if(sl==(w-1000)*-1){//交换图片最后一屏时

                    $('.mainlist').animate({left: '0px'},'slow');//默认图片滚动

                }

            }

        }

    })

    $('.og_prev').click(function(){

        if($('.swaplist,.mainlist').is(':animated')){

            $('.swaplist,.mainlist').stop(true,true);

        }

        if($('.mainlist li').length>4){

            ml = parseInt($('.mainlist').css('left'));

            sl = parseInt($('.swaplist').css('left'));

            if(ml<=0 && ml>w*-1){

                $('.swaplist').css({left: w * -1 + 'px'});

                $('.mainlist').animate({left: ml + 1000 + 'px'},'slow');

                if(ml==0){

                    $('.swaplist').animate({left: (w - 1000) * -1 + 'px'},'slow');

                }

            }else{

                $('.mainlist').css({left: (w - 1000) * -1 + 'px'});

                $('.swaplist').animate({left: sl + 1000 + 'px'},'slow');

                if(sl==0){

                    $('.mainlist').animate({left: '0px'},'slow');

                }

            }

        }

    })

});

$(document).ready(function(){

    $('.og_prev,.og_next').hover(function(){

            $(this).fadeTo('fast',1);

        },function(){

            $(this).fadeTo('fast',0.7);

    })

})

</script>

</body>

</html>
如有错误,欢迎联系我改正,非常感谢!!!
JS、JQ实现焦点图轮播效果的更多相关文章
- JS实现焦点图轮播效果
大家平时逛淘宝网的时候,在首页就能看到焦点图轮播的效果,就是这个样子的: PS:想起每每打开淘宝,总会被这个玩意先夺眼球,偶尔还去点进去溜溜,幸好我定力好,总能控制住自己的购买欲望,为自己不用剁手感到 ...
- [Js]焦点图轮播效果
一.所用到的知识点 1.DOM操作 2.定时器 3.事件运用 4.Js动画 5.函数递归 6.无限滚动大法 二.结构和样式 <div id="banner" class=&q ...
- [Jquery]焦点图轮播效果
$(function(){ var $next=$(".right"); var $prev=$(".left"); var $list_nu ...
- jQuery制作焦点图(轮播图)
焦点图(轮播图) 案例 <!DOCTYPE html PUBLIC "-//W3C//DTD XHTML 1.0 Transitional//EN" "http:/ ...
- 原生JavaScript实现焦点图轮播
不管是高校的网站还是电商的页面,焦点图的切换和轮播应该是一项不可或缺的应用.今天把焦点图轮播制作的技术要点做下笔记,以供日后查看. 一.结构层(HTML) 焦点图的HTML结构很简单,就是一个父容器( ...
- JavaScript基础 -- 焦点图轮播(转载)
首先将HTML结构搭建好: <div id="container"> <div id="list" style="left: -60 ...
- 基于jQuery游戏网站焦点图轮播特效
基于jQuery的一款游戏网站焦点图轮播特效.这是一款带进度条定时切换,带缩略图切换的jQuery网站焦点图代码.效果图如下: 在线预览 源码下载 实现的代码. html代码: <cente ...
- 用最简单的代码写出banner图轮播效果
以下视频是由[赵一鸣随笔]博客提供的“用最简单的代码写出banner图轮播效果”. 查看全屏高清视频,请点击链接:http://www.zymseo.com/58.html
- 用JQ去实现一个轮播效果
前提:用JQ去实现轮播效果一步步的做一个梳理. 首先肯定是轮播的HTML和CSS样式了: <body> <div class="pic"> <div ...
随机推荐
- Java之IO流(字节流,字符流)
IO流和Properties IO流 IO流是指计算机与外部世界或者一个程序与计算机的其余部分的之间的接口.它对于任何计算机系统都非常关键, 因而所有 I/O 的主体实际上是内置在操作系统中的.单独的 ...
- google插件备份与安装
说明 chrome浏览器中有很多有用的扩展程序, 但是可能因为某些原因我们不能直接去扩展程序商店进行下载获取, 如果我们自己电脑上已经通过某种方式添加了扩展程序, 想把它移植到其他没有FQ或者压根没有 ...
- 导入eclipse工程到Android Studio中
ref:从 Eclipse 迁移至 Android Studio | Android Studiohttps://developer.android.com/studio/intro/migrate. ...
- 解题:WC 2007 石头剪刀布
题面 要我们把边定向,最大化留下来的三元环数目......并不能直接做,考虑容斥,去掉不合法的数目. 那么三个点不成环当且仅当有一个点出度为2一个点入度为2,发现最终答案就是$C_n^3-\sum C ...
- 图像处理之CSC性能优化(源码)
1 CSC基本实现 根据前一篇CSC转换的文档了解到,RGB与YUV的变换公式如下: YCbCr(256 级别) 可以从8位 RGB 直接计算,计算公式如下: Y = 0.299 R + 0.587 ...
- Consul 服务发现与配置
Consule 是什么 Consul包含多个组件,但是作为一个整体,为你的基础设施提供服务发现和服务配置的工具.他提供以下关键特性: 服务发现 Consul 的客户端可用提供一个服务,比如 api 或 ...
- jquery bxslider幻灯片样式改造
找了很多jquery的幻灯片,都觉得不是很好,最后发现bxslider兼容性最好,移动设备支持手动翻动. 但是官方提供的显示效果真的很难看,让人难以接受.最后只能自己DIY了. bxslider官方样 ...
- BZOJ第一页刷题计划
BZOJ第一页刷题计划 已完成:67 / 90 [BZOJ1000]A+B Problem:A+B: [BZOJ1001][BeiJing2006]狼抓兔子:最小割: [BZOJ1002][FJOI2 ...
- Elasticsearch6.3 使用jdbc连接
Elasticsearch6.3开始执行sql,可以和使用数据库一样的CRUD进行操作elasticsearch,连接过程如下(安装下载Elasticsearch略): 一:项目中添加maven依赖 ...
- 开启session
在index.php中开启 session_start();