深度学习常用数据集 API(包括 Fashion MNIST)
基准数据集
深度学习中经常会使用一些基准数据集进行一些测试。其中 MNIST, Cifar 10, cifar100, Fashion-MNIST 数据集常常被人们拿来当作练手的数据集。为了方便,诸如 Keras、MXNet、Tensorflow 都封装了自己的基础数据集,如 MNIST、cifar 等。如果我们要在不同平台使用这些数据集,还需要了解那些框架是如何组织这些数据集的,需要花费一些不必要的时间学习它们的 API。为此,我们为何不创建属于自己的数据集呢?下面我仅仅使用了 Numpy 来实现数据集 MNIST、Fashion MNIST、Cifa 10、Cifar 100 的操作,并封装为 HDF5,这样该数据集的可扩展性就会大大的增强,并且还可以被其他的编程语言 (如 Matlab) 来获取和使用。下面主要介绍如何通过创建的 API 来实现数据集的封装。
环境搭建
我使用了 Anaconda3 这个十分好用的包管理工具, 来减少管理和安装一些必须的包。下面我们载入该 API 必备的包:
import struct   # 处理二进制文件

import numpy as np   # 对矩阵运算很友好

import gzip, tarfile  # 对压缩文件进行处理

import os          # 管理本地文件

import pickle      # 序列化和反序列化

import time       # 记时
我是在 Jupyter Notebook 交互环境中运行代码的。
Bunch 结构
为了更好的使用该 API, 我利用了 Bunch 结构。在 Python 中,我们可以定义 Bunch Pattern, 字面意思大概是指链式的束式结构。主要用于存储松散的数据结构。
它能让我们以命令行参数的形式创建相关对象,并设置任何属性。下面我们来看看 Bunch 的魅力!Bunch 的定义利用了 dict 的特性。
class Bunch(dict):

    def __init__(self, *args, **kwds):

        super().__init__(*args, **kwds)

        self.__dict__ = self
下面我们构建一个 Bunch 的实例 Tom, 它代表一个住在北京的 54 岁的人。
Tom = Bunch(age="54", address="Beijing")
我们可以查看 Tom 的一些信息:
print('Tom 的年龄是 {},他住在 {}.'.format(Tom.age, Tom.address))
Tom 的年龄是 54,他住在 Beijing.
我们还可以直接对 Tom 增加属性,比如:
Tom.sex = 'male'

print(Tom)
{'age': '54', 'address': 'Beijing', 'sex': 'male'}
你也许会奇怪,Bunch 结构与 dict 结构好像没有太大的的区别,只不过是多了一个点号运算,那么,Bunch 到底有什么神奇之处呢?我们先看一个例子:
T = Bunch

t = T(left=T(left='a',right='b'), right=T(left='c'))

for first in t:

    print('第一层的节点:', first)

    for second in t[first]:

        print('\t第二层的节点:', second)

        for node in t[first][second]:

            print('\t\t第三层的节点:', node)
第一层的节点: left

	第二层的节点: left

		第三层的节点: a

	第二层的节点: right

		第三层的节点: b

第一层的节点: right

	第二层的节点: left

		第三层的节点: c
从上面的输出我们可以看出,t 便是一个简单的二叉树结构。这样,我们便可使用 Bunch 构建许多具有分层结构的数据类型。
下载数据集
链接:
- MNIST: http://yann.lecun.com/exdb/mnist
- Fashion MNIST: https://github.com/zalandoresearch/fashion-mnist
- Cifar: https://www.cs.toronto.edu/~kriz/cifar.html
我们将上述数据集均下载到同一个目录下,比如:'E:/Data/Zip/',下面我们将逐一介绍上述数据集。
MNIST & Fashion MNIST
MNIST 数据集可以说是深度学习中的 hello world 级别的数据集,很多教程都是把它作为入门级的数据集。不过有些人可能对它还不是很了解, 下面我们简单的了解一下!
MNIST 数据集来自美国国家标准与技术研究所(National Institute of Standards and Technology, NIST). 训练集 (training set) 由来自 250 个不同人手写的数字构成, 其中 \(50\%\) 是高中学生, \(50\%\) 来自人口普查局 (the Census Bureau) 的工作人员. 测试集(test set) 也是同样比例的手写数字数据.
MNIST 有一组 \(60\, 000\) 个样本的训练集和一组 \(10\, 000\) 个样本的测试集。它是 NIST 的子集。数字图像已被大小规范化, 并以固定大小的图像居中。
MNIST 数据集可在 http://yann.lecun.com/exdb/mnist/ 获取, 它包含了四个部分:
- train-images-idx3-ubyte.gz: training set images (9912422 bytes)
- train-labels-idx1-ubyte.gz: training set labels (28881 bytes)
- t10k-images-idx3-ubyte.gz: test set images (1648877 bytes)
- t10k-labels-idx1-ubyte.gz: test set labels (4542 bytes)
图像分类数据集中最常用的是手写数字识别数据集 MNIST[1]。但大部分模型在 MNIST 上的分类精度都超过了 \(95\%\)。为了更直观地观察算法之间的差异,我们可以使用一个图像内容更加复杂的数据集 Fashion-MNIST[2]。Fashion-MNIST 和 MNIST 一样,也包括了 \(10\) 个类别,分别为:t-shirt(T 恤)、trouser(裤子)、pullover(套衫)、dress(连衣裙)、coat(外套)、sandal(凉鞋)、shirt(衬衫)、sneaker(运动鞋)、bag(包)和 ankle boot(短靴)。
Fashion-MNIST 的存储方式和 MNIST 是一样的,故而,我们可以使用相同的方式对其进行处理。
MNIST 的使用
下面我以 MNIST 类来处理 MNIST 和 Fashion MNIST:
class MNIST:

    def __init__(self, root, namespace, train=True, transform=None):

        """

        (MNIST handwritten digits dataset from http://yann.lecun.com/exdb/mnist)

        (A dataset of Zalando's article images consisting of fashion products,

        a drop-in replacement of the original MNIST dataset

        from https://github.com/zalandoresearch/fashion-mnist)

        Each sample is an image (in 3D NDArray) with shape (28, 28, 1).

        Parameters

        ----------

        root : 数据根目录,如 'E:/Data/Zip/'

        namespace : 'mnist' or 'fashion_mnist'

        train : bool, default True

            Whether to load the training or testing set.

        transform : function, default None

            A user defined callback that transforms each sample. For example:

        ::

            transform=lambda data, label: (data.astype(np.float32)/255, label)

        """

        self._train = train

        self.namespace = namespace

        root = root + namespace

        self._train_data = f'{root}/train-images-idx3-ubyte.gz'

        self._train_label = f'{root}/train-labels-idx1-ubyte.gz'

        self._test_data = f'{root}/t10k-images-idx3-ubyte.gz'

        self._test_label = f'{root}/t10k-labels-idx1-ubyte.gz'

        self._get_data()

    def _get_data(self):

        '''

        官方网站的数据是以 `[offset][type][value][description]` 的格式封装的,

        因而 `struct.unpack` 时需要注意

        '''

        if self._train:

            data, label = self._train_data, self._train_label

        else:

            data, label = self._test_data, self._test_label

        with gzip.open(label, 'rb') as fin:

            struct.unpack(">II", fin.read(8))

            self.label = np.frombuffer(fin.read(), dtype=np.uint8)

        with gzip.open(data, 'rb') as fin:

            Y = struct.unpack(">IIII", fin.read(16))

            data = np.frombuffer(fin.read(), dtype=np.uint8)

            self.data = data.reshape(Y[1:])
下面,我们来看看如何载入这两个数据集?
MNIST
考虑到代码的可复用性,我将上述代码封装在我的 GitHub[3]
。将其下载到本地,你便可以直接使用。下面我将展示如何使用该 API。
首先,需要找到你下载的 API 目录,比如:D:\GitHub\basedataset\loader,然后载入到你当前的 Python 环境变量中。
import sys

sys.path.append('D:/GitHub/basedataset/loader/')

from zdata import MNIST
下面你便可以自如的调用 MNIST 类了。
root = 'E:/Data/Zip/'

namespace = 'mnist'

train_mnist = MNIST(root, namespace, train=True, transform=None)  # 获取训练集

test_mnist = MNIST(root, namespace, train=False, transform=None)  # 获取测试集

print('MNIST 的训练集规模:{}'.format((train_mnist.data.shape)))

print('MNIST 的测试集规模:{}'.format((test_mnist.data.shape)))
MNIST 的训练集规模:(60000, 28, 28)

MNIST 的测试集规模:(10000, 28, 28)
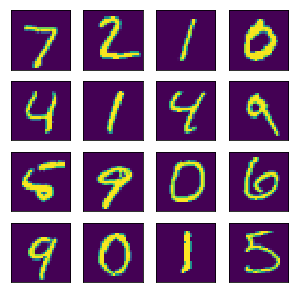
下面我们以 MNIST 的测试集为例,来看看 MNIST 具体长什么样吧!
from matplotlib import pyplot as plt

def show_imgs(imgs):

    '''

    展示 多张图片

    '''

    n = imgs.shape[0]

    h, w = 4, int(n / 4)

    _, figs = plt.subplots(h, w, figsize=(5, 5))

    K = np.arange(n).reshape((h, w))

    for i in range(h):

        for j in range(w):

            img = imgs[K[i, j]]

            figs[i][j].imshow(img)

            figs[i][j].axes.get_xaxis().set_visible(False)

            figs[i][j].axes.get_yaxis().set_visible(False)

    plt.show()
imgs = test_mnist.data[:16]

show_imgs(imgs)

Fashion MNIST
namespace = 'fashion_mnist'

train_mnist_f = MNIST(root, namespace, train=True, transform=None)

test_mnist_f = MNIST(root, namespace, train=False, transform=None)

print('Fashion MNIST 的训练集规模:{}'.format((train_mnist_f.data.shape)))

print('Fashion MNIST 的测试集规模:{}'.format((test_mnist_f.data.shape)))
Fashion MNIST 的训练集规模:(60000, 28, 28)

Fashion MNIST 的测试集规模:(10000, 28, 28)
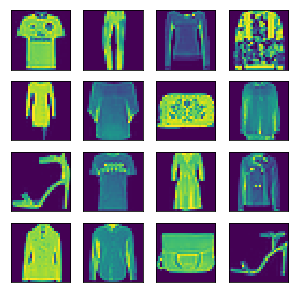
再看看 Fashion MNIST 具体长什么样吧!
imgs_f = test_mnist_f.data[:16]

show_imgs(imgs_f)

MNIST 和 Fashion MNIST 数据集还是太简单了,为了满足更多的需求,下面我们将进入 Cifar 数据集的 API 开发和使用环节。
Cifar API
class Bunch(dict):

    def __init__(self, *args, **kwds):

        super().__init__(*args, **kwds)

        self.__dict__ = self

class Cifar(Bunch):

    def __init__(self, root, namespace, transform=None, *args, **kwds):

        """CIFAR image classification dataset

         from https://www.cs.toronto.edu/~kriz/cifar.html

        Each sample is an image (in 3D NDArray) with shape (32, 32, 3).

        Parameters

        ----------

        meta : 保存了类别信息

        root : str, 数据根目录

        namespace : 'cifar-10' 或 'cifar-100'

        transform : function, default None

            A user defined callback that transforms each sample. For example:

        ::

            transform=lambda data, label: (data.astype(np.float32)/255, label)

        """

        super().__init__(*args, **kwds)

        self.url = 'https://www.cs.toronto.edu/~kriz/cifar.html'

        self.namespace = namespace

        self._extract(root)

        self._read_batch()

    def _extract(self, root):

        tar_name = f'{root}{self.namespace}-python.tar.gz'

        names = extractall(tar_name, root)

        # print('载入数据的字典信息:')

        #start = time.time()

        for name in names:

            path = f'{root}{name}'

            if os.path.isfile(path):

                if not (path.endswith('.html') or path.endswith('.txt~')):

                    k = name.split('/')[-1]

                    if path.endswith('meta'):

                        with open(path, 'rb') as fp:

                            self['meta'] = pickle.load(fp)

                    else:

                        with open(path, 'rb') as fp:

                            self[k] = pickle.load(fp, encoding='bytes')

        #     #time.sleep(0.2)

        #     t = int(time.time() - start) * '-'

        #     print(t, end='')

        # print('\n载入数据的字典信息完毕!')

    def _read_batch(self):

        if self.namespace == 'cifar-10':

            self.trainX = np.concatenate([

                self[f'data_batch_{str(i)}'][b'data'] for i in range(1, 6)

            ]).reshape(-1, 3, 32, 32).transpose((0, 2, 3, 1))

            self.trainY = np.concatenate([

                np.asanyarray(self[f'data_batch_{str(i)}'][b'labels'])

                for i in range(1, 6)

            ])

            self.testX = self.test_batch[b'data'].reshape(

                -1, 3, 32, 32).transpose((0, 2, 3, 1))

            self.testY = np.asanyarray(self.test_batch[b'labels'])

        elif self.namespace == 'cifar-100':

            self.trainX = self.train[b'data'].reshape(-1, 3, 32, 32).transpose((0, 2, 3, 1))

            self.train_fine_labels = np.asanyarray(

                self.train[b'fine_labels'])  # 子类标签

            self.train_coarse_labels = np.asanyarray(

                self.train[b'coarse_labels'])  # 超类标签

            self.testX = self.test[b'data'].reshape(-1, 3, 32, 32).transpose((0, 2, 3, 1))

            self.test_fine_labels = np.asanyarray(

                self.test[b'fine_labels'])  # 子类标签

            self.test_coarse_labels = np.asanyarray(

                self.test[b'coarse_labels'])  # 超类标签
为了方便管理和调用数据集,我定义了一个 DataBunch 类:
class DataBunch(Bunch):

    '''

    将数据集转换为 Bunch

    '''

    def __init__(self, root, *args, **kwds):

        super().__init__(*args, **kwds)

        B = Bunch

        self.mnist = B(MNIST(root, 'mnist'))

        self.fashion_mnist = B(MNIST(root, 'fashion_mnist'))

        self.cifar10 = B(Cifar(root, 'cifar-10'))

        self.cifar100 = B(Cifar(root, 'cifar-100'))
同样将上述代码放入 zdata 模块中。
Cifar 10 数据集
下面我们便可以直接利用 DataBunch 类来调用上述介绍的数据集:
import sys

sys.path.append('D:/GitHub/basedataset/loader/')

from zdata import DataBunch, show_imgs
root = 'E:/Data/Zip/'

db = DataBunch(root)
我们可以查看,我们封装的数据集:
db.keys()
dict_keys(['mnist', 'fashion_mnist', 'cifar10', 'cifar100'])
由于前面已经展示过 'mnist', 'fashion_mnist',下面我们将展示 Cifar API 的使用。更多详细内容参考我的博文 关于 『AI 专属数据库的定制』的改进[4]。
cifar-10 和 CIFAR-10 标记为 \(8000\) 万个 微小图像数据集[5]的子集。它们是由 Alex Krizhevsky, Vinod Nair, 和 Geoffrey Hinton 收集的。
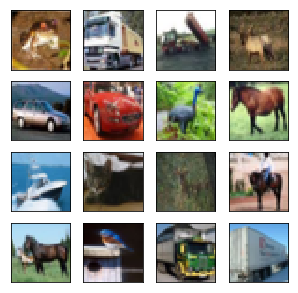
cifar-10 数据集由 \(10\) 类 \(32\times 32\) 彩色图像组成, 每类有 \(6\,000\) 张图像。被划分为 \(50\,000\) 张训练图像和 \(10\,000\) 张测试图像。
cifar10 = db.cifar10

imgs = cifar10.trainX[:16]

show_imgs(imgs)

为了方便数据的使用,我们可以将 db 写入到本地磁盘:
序列化
import pickle

def write_bunch(path):

    '''

    path:: 写入数据集的文件路径

    '''

    with open(path, 'wb') as fp:

        pickle.dump(db, fp)
root = 'E:/Data/Zip/'

path = f'{root}X.json'   # 写入数据集的文件路径

write_bunch(path)
这样以后我们就可以直接复制 f'{root}X.dat 或 f'{root}X.json' 到你可以放置的任何地方,然后你就可以通过 load 函数来调用 MNIST、Fashion MNIST、Cifa 10、Cifar 100 这些数据集。即:
反序列化
def read_bunch(path):

    with open(path, 'rb') as fp:

        bunch = pickle.load(fp)  # 即为上面的 DataBunch 的实例

    return bunch
db = read_bunch(path) # path 即你的数据集所在的路径
考虑到 JSON 对于其他编程语言的不友好,下面我们将介绍如何将 Bunch 数据集存储为 HDF5 格式的数据。
Bunch 转换为 HDF5 文件:高效存储 Cifar 等数据集
PyTables[6] 是 Python 与 HDF5 数据库/文件标准的结合[7]。它专门为优化 I/O 操作的性能、最大限度地利用可用硬件而设计,并且它还支持压缩功能。
下面的代码均是在 Jupyter NoteBook 下完成的:
import tables as tb

import numpy as np

def bunch2hdf5(root):

    '''

    这里我仅仅封装了 Cifar10、Cifar100、MNIST、Fashion MNIST 数据集,

    使用者还可以自己追加数据集。

    '''

    db = DataBunch(root)

    filters = tb.Filters(complevel=7, shuffle=False)

    # 这里我采用了压缩表,因而保存为 `.h5c` 但也可以保存为 `.h5`

    with tb.open_file(f'{root}X.h5c', 'w', filters=filters, title='Xinet\'s dataset') as h5:

        for name in db.keys():

            h5.create_group('/', name, title=f'{db[name].url}')

            if name != 'cifar100':

                h5.create_array(h5.root[name], 'trainX', db[name].trainX, title='训练数据')

                h5.create_array(h5.root[name], 'trainY', db[name].trainY, title='训练标签')

                h5.create_array(h5.root[name], 'testX', db[name].testX, title='测试数据')

                h5.create_array(h5.root[name], 'testY', db[name].testY, title='测试标签')

            else:

                h5.create_array(h5.root[name], 'trainX', db[name].trainX, title='训练数据')

                h5.create_array(h5.root[name], 'testX', db[name].testX, title='测试数据')

                h5.create_array(h5.root[name], 'train_coarse_labels', db[name].train_coarse_labels, title='超类训练标签')

                h5.create_array(h5.root[name], 'test_coarse_labels', db[name].test_coarse_labels, title='超类测试标签')

                h5.create_array(h5.root[name], 'train_fine_labels', db[name].train_fine_labels, title='子类训练标签')

                h5.create_array(h5.root[name], 'test_fine_labels', db[name].test_fine_labels, title='子类测试标签')

        for k in ['cifar10', 'cifar100']:

            for name in db[k].meta.keys():

                name = name.decode()

                if name.endswith('names'):

                    label_names = np.asanyarray([label_name.decode() for label_name in db[k].meta[name.encode()]])

                    h5.create_array(h5.root[k], name, label_names, title='标签名称')
完成 Bunch到 HDF5 的转换
root = 'E:/Data/Zip/'

bunch2hdf5(root)
h5c = tb.open_file('E:/Data/Zip/X.h5c')

h5c
File(filename=E:/Data/Zip/X.h5c, title="Xinet's dataset", mode='r', root_uep='/', filters=Filters(complevel=7, complib='zlib', shuffle=False, bitshuffle=False, fletcher32=False, least_significant_digit=None))

/ (RootGroup) "Xinet's dataset"

/cifar10 (Group) 'https://www.cs.toronto.edu/~kriz/cifar.html'

/cifar10/label_names (Array(10,)) '标签名称'

  atom := StringAtom(itemsize=10, shape=(), dflt=b'')

  maindim := 0

  flavor := 'numpy'

  byteorder := 'irrelevant'

  chunkshape := None

/cifar10/testX (Array(10000, 32, 32, 3)) '测试数据'

  atom := UInt8Atom(shape=(), dflt=0)

  maindim := 0

  flavor := 'numpy'

  byteorder := 'irrelevant'

  chunkshape := None

/cifar10/testY (Array(10000,)) '测试标签'

  atom := Int32Atom(shape=(), dflt=0)

  maindim := 0

  flavor := 'numpy'

  byteorder := 'little'

  chunkshape := None

/cifar10/trainX (Array(50000, 32, 32, 3)) '训练数据'

  atom := UInt8Atom(shape=(), dflt=0)

  maindim := 0

  flavor := 'numpy'

  byteorder := 'irrelevant'

  chunkshape := None

/cifar10/trainY (Array(50000,)) '训练标签'

  atom := Int32Atom(shape=(), dflt=0)

  maindim := 0

  flavor := 'numpy'

  byteorder := 'little'

  chunkshape := None

/cifar100 (Group) 'https://www.cs.toronto.edu/~kriz/cifar.html'

/cifar100/coarse_label_names (Array(20,)) '标签名称'

  atom := StringAtom(itemsize=30, shape=(), dflt=b'')

  maindim := 0

  flavor := 'numpy'

  byteorder := 'irrelevant'

  chunkshape := None

/cifar100/fine_label_names (Array(100,)) '标签名称'

  atom := StringAtom(itemsize=13, shape=(), dflt=b'')

  maindim := 0

  flavor := 'numpy'

  byteorder := 'irrelevant'

  chunkshape := None

/cifar100/testX (Array(10000, 32, 32, 3)) '测试数据'

  atom := UInt8Atom(shape=(), dflt=0)

  maindim := 0

  flavor := 'numpy'

  byteorder := 'irrelevant'

  chunkshape := None

/cifar100/test_coarse_labels (Array(10000,)) '超类测试标签'

  atom := Int32Atom(shape=(), dflt=0)

  maindim := 0

  flavor := 'numpy'

  byteorder := 'little'

  chunkshape := None

/cifar100/test_fine_labels (Array(10000,)) '子类测试标签'

  atom := Int32Atom(shape=(), dflt=0)

  maindim := 0

  flavor := 'numpy'

  byteorder := 'little'

  chunkshape := None

/cifar100/trainX (Array(50000, 32, 32, 3)) '训练数据'

  atom := UInt8Atom(shape=(), dflt=0)

  maindim := 0

  flavor := 'numpy'

  byteorder := 'irrelevant'

  chunkshape := None

/cifar100/train_coarse_labels (Array(50000,)) '超类训练标签'

  atom := Int32Atom(shape=(), dflt=0)

  maindim := 0

  flavor := 'numpy'

  byteorder := 'little'

  chunkshape := None

/cifar100/train_fine_labels (Array(50000,)) '子类训练标签'

  atom := Int32Atom(shape=(), dflt=0)

  maindim := 0

  flavor := 'numpy'

  byteorder := 'little'

  chunkshape := None

/fashion_mnist (Group) 'https://github.com/zalandoresearch/fashion-mnist'

/fashion_mnist/testX (Array(10000, 28, 28, 1)) '测试数据'

  atom := UInt8Atom(shape=(), dflt=0)

  maindim := 0

  flavor := 'numpy'

  byteorder := 'irrelevant'

  chunkshape := None

/fashion_mnist/testY (Array(10000,)) '测试标签'

  atom := Int32Atom(shape=(), dflt=0)

  maindim := 0

  flavor := 'numpy'

  byteorder := 'little'

  chunkshape := None

/fashion_mnist/trainX (Array(60000, 28, 28, 1)) '训练数据'

  atom := UInt8Atom(shape=(), dflt=0)

  maindim := 0

  flavor := 'numpy'

  byteorder := 'irrelevant'

  chunkshape := None

/fashion_mnist/trainY (Array(60000,)) '训练标签'

  atom := Int32Atom(shape=(), dflt=0)

  maindim := 0

  flavor := 'numpy'

  byteorder := 'little'

  chunkshape := None

/mnist (Group) 'http://yann.lecun.com/exdb/mnist'

/mnist/testX (Array(10000, 28, 28, 1)) '测试数据'

  atom := UInt8Atom(shape=(), dflt=0)

  maindim := 0

  flavor := 'numpy'

  byteorder := 'irrelevant'

  chunkshape := None

/mnist/testY (Array(10000,)) '测试标签'

  atom := Int32Atom(shape=(), dflt=0)

  maindim := 0

  flavor := 'numpy'

  byteorder := 'little'

  chunkshape := None

/mnist/trainX (Array(60000, 28, 28, 1)) '训练数据'

  atom := UInt8Atom(shape=(), dflt=0)

  maindim := 0

  flavor := 'numpy'

  byteorder := 'irrelevant'

  chunkshape := None

/mnist/trainY (Array(60000,)) '训练标签'

  atom := Int32Atom(shape=(), dflt=0)

  maindim := 0

  flavor := 'numpy'

  byteorder := 'little'

  chunkshape := None
从上面的结构可看出我将 Cifar10、Cifar100、MNIST、Fashion MNIST 进行了封装,并且还附带了它们各种的数据集信息。比如标签名,数字特征(以数组的形式进行封装)等。
%%time

arr = h5c.root.cifar100.trainX.read() # 读取数据十分快速
Wall time: 125 ms
arr.shape
(50000, 32, 32, 3)
h5c.root
/ (RootGroup) "Xinet's dataset"

  children := ['cifar10' (Group), 'cifar100' (Group), 'fashion_mnist' (Group), 'mnist' (Group)]
X.h5c 使用说明
下面我们以 Cifar100 为例来展示我们自创的数据集 X.h5c(我将其上传到了百度云盘「链接:https://pan.baidu.com/s/12jzaJ2d2kvHCXbQa_HO6YQ 提取码:2clg」可以下载直接使用;亦可你自己生成,不过我推荐自己生成,可以对数据集加深理解)
cifar100 = h5c.root.cifar100

cifar100
/cifar100 (Group) 'https://www.cs.toronto.edu/~kriz/cifar.html'

  children := ['coarse_label_names' (Array), 'fine_label_names' (Array), 'testX' (Array), 'test_coarse_labels' (Array), 'test_fine_labels' (Array), 'trainX' (Array), 'train_coarse_labels' (Array), 'train_fine_labels' (Array)]
'coarse_label_names' 指的是粗粒度或超类标签名,'fine_label_names' 则是细粒度标签名。
可以使用 read() 方法直接获取信息,也可以使用索引的方式获取。
coarse_label_names = cifar100.coarse_label_names[:]

# 或者

coarse_label_names = cifar100.coarse_label_names.read()

coarse_label_names.astype('str')
array(['aquatic_mammals', 'fish', 'flowers', 'food_containers',

       'fruit_and_vegetables', 'household_electrical_devices',

       'household_furniture', 'insects', 'large_carnivores',

       'large_man-made_outdoor_things', 'large_natural_outdoor_scenes',

       'large_omnivores_and_herbivores', 'medium_mammals',

       'non-insect_invertebrates', 'people', 'reptiles', 'small_mammals',

       'trees', 'vehicles_1', 'vehicles_2'], dtype='<U30')
fine_label_names = cifar100.fine_label_names[:].astype('str')

fine_label_names
array(['apple', 'aquarium_fish', 'baby', 'bear', 'beaver', 'bed', 'bee',

       'beetle', 'bicycle', 'bottle', 'bowl', 'boy', 'bridge', 'bus',

       'butterfly', 'camel', 'can', 'castle', 'caterpillar', 'cattle',

       'chair', 'chimpanzee', 'clock', 'cloud', 'cockroach', 'couch',

       'crab', 'crocodile', 'cup', 'dinosaur', 'dolphin', 'elephant',

       'flatfish', 'forest', 'fox', 'girl', 'hamster', 'house',

       'kangaroo', 'keyboard', 'lamp', 'lawn_mower', 'leopard', 'lion',

       'lizard', 'lobster', 'man', 'maple_tree', 'motorcycle', 'mountain',

       'mouse', 'mushroom', 'oak_tree', 'orange', 'orchid', 'otter',

       'palm_tree', 'pear', 'pickup_truck', 'pine_tree', 'plain', 'plate',

       'poppy', 'porcupine', 'possum', 'rabbit', 'raccoon', 'ray', 'road',

       'rocket', 'rose', 'sea', 'seal', 'shark', 'shrew', 'skunk',

       'skyscraper', 'snail', 'snake', 'spider', 'squirrel', 'streetcar',

       'sunflower', 'sweet_pepper', 'table', 'tank', 'telephone',

       'television', 'tiger', 'tractor', 'train', 'trout', 'tulip',

       'turtle', 'wardrobe', 'whale', 'willow_tree', 'wolf', 'woman',

       'worm'], dtype='<U13')
'testX' 与 'trainX' 分别代表数据的测试数据和训练数据,而其他的节点所代表的含义也是类似的。
例如,我们可以看看训练集的数据和标签:
trainX = cifar100.trainX

train_coarse_labels = cifar100.train_coarse_labels
array([11, 15, 4, ..., 8, 7, 1])
shape 为 (50000, 32, 32, 3),数据的获取,我们一样可以采用索引的形式或者使用 read():
train_data = trainX[:]

print(train_data[0].shape)

print(train_data.dtype)
(32, 32, 3)

uint8
当然,我们也可以直接使用 trainX 做运算。
for x in cifar100.trainX:

    y = x * 2

    break

print(y.shape)
(32, 32, 3)
h5c.get_node(h5c.root.cifar100, 'trainX')
/cifar100/trainX (Array(50000, 32, 32, 3)) '训练数据'

  atom := UInt8Atom(shape=(), dflt=0)

  maindim := 0

  flavor := 'numpy'

  byteorder := 'irrelevant'

  chunkshape := None
更甚者,我们可以直接定义迭代器来获取数据:
trainX = cifar100.trainX

train_coarse_labels = cifar100.train_coarse_labels
def data_iter(X, Y, batch_size):

    n = X.nrows

    idx = np.arange(n)

    if X.name.startswith('train'):

        np.random.shuffle(idx)

    for i in range(0, n ,batch_size):

        k = idx[i: min(n, i + batch_size)].tolist()

        yield np.take(X, k, 0), np.take(Y, k, 0)
for x, y in data_iter(trainX, train_coarse_labels, 8):

    print(x.shape, y)

    break
(8, 32, 32, 3) [ 7 7 0 15 4 8 8 3]
更多使用详情见:使用 迭代器 获取 Cifar 等常用数据集[8]
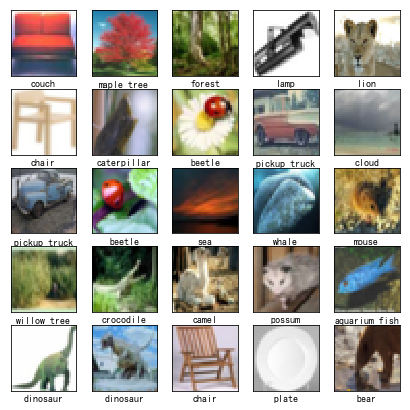
为了更加形象的说明该数据集,我们将其可视化:
from pylab import plt, mpl

mpl.rcParams['font.sans-serif'] = ['SimHei']  # 指定默认字体

mpl.rcParams['axes.unicode_minus'] = False  # 解决保存图像是负号 '-' 显示为方块的问题

def show_imgs(imgs, labels):

    '''

    展示 多张图片

    '''

    imgs = np.transpose(imgs, (0, 2, 3, 1))

    n = imgs.shape[0]

    h, w = 5, int(n / 5)

    fig, ax = plt.subplots(h, w, figsize=(7, 7))

    K = np.arange(n).reshape((h, w))

    names = np.asanyarray([cifar.fine_label_names[label] for label in labels], dtype='U')

    names = names.reshape((h, w))

    for i in range(h):

        for j in range(w):

            img = imgs[K[i, j]]

            ax[i][j].imshow(img)

            ax[i][j].axes.get_yaxis().set_visible(False)

            ax[i][j].axes.set_xlabel(names[i][j])

            ax[i][j].set_xticks([])

    plt.show()
为了高效使用数据集 X.h5,我们使用迭代器的方式来获取它:
class Loader:

    """

    方法

    ========

    L 为该类的实例

    len(L)::返回 batch 的批数

    iter(L)::即为数据迭代器

    Return

    ========

    可迭代对象(numpy 对象)

    """

    def __init__(self, X, Y, batch_size, shuffle):

        '''

        X, Y 均为类 numpy

        '''

        self.X = X

        self.Y = Y

        self.batch_size = batch_size

        self.shuffle = shuffle

    def __iter__(self):

        n = len(self.X)

        idx = np.arange(n)

        if self.shuffle:

            np.random.shuffle(idx)

        for k in range(0, n, self.batch_size):

            K = idx[k:min(k + self.batch_size, n)].tolist()

            yield np.take(self.X, K, 0), np.take(self.Y, K, 0)

    def __len__(self):

        return round(len(self.X) / self.batch_size)
import tables as tb

import numpy as np

batch_size = 512

xpath = 'E:/xdata/X.h5'  # 文件所在路径

h5 = tb.open_file(xpath)

cifar = h5.root.cifar100

train_cifar = Loader(cifar.trainX, cifar.train_fine_labels, batch_size, True)

for imgs, labels in iter(train_cifar):

    break

show_imgs(imgs[:25], labels[:25])

上面的大部分代码被我放在了 Github:https://github.com/DataLoaderX/datasetsome/blob/master/dataloader/tabx.py。
总结
上面的 API 设计过程中,我发现到了许多自身的不足,不断改进 API 的过程中,我获得了学习和创造的喜悦。上面所介绍的 X.h5c 数据集不仅仅是那些数据集的封装,你还可以继续添加自己的数据集到该 数据库中。同时,类 Loader 十分有用,它定义了一个标准,一个可以延拓到处理其他深度学习的数据集中去。
基于上述思想,我设计了如下 API:
- one-shot 的标准数据集——Omniglot
- 使用 python 获取 CASIA 脱机和在线手写汉字库
- python 获取 CASIA 脱机和在线手写汉字库 (二)
- MPF(Bunch) 转换为 HDF5
- COCO 使用说明
LeCun, Y., Cortes, C., & Burges, C. http://yann.lecun.com/exdb/mnist/ ↩︎
Xiao, H., Rasul, K., & Vollgraf, R. (2017). Fashion-mnist: a novel image dataset for benchmarking machine learning algorithms. arXiv preprint arXiv:1708.07747. ↩︎
https://github.com/DataLoaderX/datazone/tree/master/lab/utils/tools ↩︎
https://yq.aliyun.com/articles/614332?spm=a2c4e.11155435.0.0.30543312vFsboY ↩︎
深度学习常用数据集 API(包括 Fashion MNIST)的更多相关文章
- 卷积神经网络CNN与深度学习常用框架的介绍与使用
一.神经网络为什么比传统的分类器好 1.传统的分类器有 LR(逻辑斯特回归) 或者 linear SVM ,多用来做线性分割,假如所有的样本可以看做一个个点,如下图,有蓝色的点和绿色的点,传统的分类器 ...
- 深度学习开源库tiny-dnn的使用(MNIST)
tiny-dnn是一个基于DNN的深度学习开源库,它的License是BSD 3-Clause.之前名字是tiny-cnn是基于CNN的,tiny-dnn与tiny-cnn相关又增加了些新层.此开源库 ...
- Recorder︱深度学习小数据集表现、优化(Active Learning)、标注集网络获取
一.深度学习在小数据集的表现 深度学习在小数据集情况下获得好效果,可以从两个角度去解决: 1.降低偏差,图像平移等操作 2.降低方差,dropout.随机梯度下降 先来看看深度学习在小数据集上表现的具 ...
- Python3读取深度学习CIFAR-10数据集出现的若干问题解决
今天在看网上的视频学习深度学习的时候,用到了CIFAR-10数据集.当我兴高采烈的运行代码时,却发现了一些错误: # -*- coding: utf-8 -*- import pickle as p ...
- 包含深度学习常用框架的Docker环境
相关的代码都在Github上,请参见我的Github,https://github.com/lijingpeng/deep-learning-notes 敬请多多关注哈~~~ All in one d ...
- python数据可视化、数据挖掘、机器学习、深度学习 常用库、IDE等
一.可视化方法 条形图 饼图 箱线图(箱型图) 气泡图 直方图 核密度估计(KDE)图 线面图 网络图 散点图 树状图 小提琴图 方形图 三维图 二.交互式工具 Ipython.Ipython not ...
- 深度学习原理与框架-Tensorflow基本操作-mnist数据集的逻辑回归 1.tf.matmul(点乘操作) 2.tf.equal(对应位置是否相等) 3.tf.cast(将布尔类型转换为数值类型) 4.tf.argmax(返回最大值的索引) 5.tf.nn.softmax(计算softmax概率值) 6.tf.train.GradientDescentOptimizer(损失值梯度下降器)
1. tf.matmul(X, w) # 进行点乘操作 参数说明:X,w都表示输入的数据, 2.tf.equal(x, y) # 比较两个数据对应位置的数是否相等,返回值为True,或者False 参 ...
- 深度学习常用的数据源(MNIST,CIFAR,VOC2007系列数据)
MINIST手写数据集 压缩包版: http://yann.lecun.com/exdb/mnist/train-images-idx3-ubyte.gz http://yann.lecun.com/ ...
- 深度学习voc数据集图片resize
本人新写的3个pyhton脚本. (1)单张图片的resize: # coding = utf-8 import Image def convert(width,height): im = Image ...
随机推荐
- python学习笔记3-函数,判断负小数
一.函数 def hello(file_name,content): #形参file_name content f=open(file_name,'a+') f.seek(0) f.write(con ...
- Elasticsearch技术解析与实战(五)Document解析
1.手动指定document id 一般来说,是从某些其他的系统中,导入一些数据到es时,会采取这种方式,就是使用系统中已有数据的唯一标识,作为es中document的id. PUT /index/t ...
- 视差滚动(Parallax Scrolling)的一点小心得
下面内容来源于我知乎的这个答案:http://www.zhihu.com/question/20990029/answer/21436067 假期有空,整理到博客园这边,并做了一些语境的调整. ——— ...
- python练习-Socket实现远程cmd命令
需求:基于tcp的套接字实现远程执行命令的操作 代码示例: # 编辑者:闫龙 #Client端部分 import socket #导入骚凯特模块 CmdObj = socket.socket(sock ...
- C# 安装部署Windows服务脚本
@echo off Installutil.exe 程序目录 F:\test\TestWindows.exe 服务程序目录 @sc start "服务名称" @sc config ...
- UNIX环境高级编程 第14章 高级I/O
这一章涉及很多概念和函数,包括:非阻塞I/O.记录锁.I/O复用.异步I/O.readv和writev函数以及内存映射. 非阻塞I/O 在Unix中,可以将系统调用分为两种,一种是“低速”系统调用,另 ...
- Java并发编程(2) AbstractQueuedSynchronizer的设计与实现
一 前言 上一篇分析AQS的内部结构,其中有介绍AQS是什么,以及它的内部结构的组成,那么今天就来分析下前面说的内部结构在AQS中的具体作用(主要在具体实现中体现). 二 AQS的接口和简单示例 上篇 ...
- codevs 1230 元素查找
题目链接:http://codevs.cn/problem/1230/ 题解: 会有很多方法写这道题,写个裸的哈希练练手 #include<cstdio> ,MOD=; int n,m,h ...
- 两个Bounding Box的IOU计算代码
Bounding Box的数据结构为(xmin,ymin,xmax,ymax) 输入:box1,box2 输出:IOU值 import numpy as np def iou(box1,box2): ...
- angular 如何使用第三方组件ng-bootstrap
1.在你的项目中以下指令 npm install --save @ng-bootstrap/ng-bootstrap 安装完成会显示 + @ng-bootstrap/ng-bootstrap@1 ...
