TensorFlow从入门到理解(四):你的第一个循环神经网络RNN(分类例子)
运行代码:
import tensorflow as tf

from tensorflow.examples.tutorials.mnist import input_data

# set random seed for comparing the two result calculations

tf.set_random_seed(1)

# this is data

mnist = input_data.read_data_sets('MNIST_data', one_hot=True)

# hyperparameters

lr = 0.001

training_iters = 100000

batch_size = 128

n_inputs = 28   # MNIST data input (img shape: 28*28)

n_steps = 28    # time steps

n_hidden_units = 128   # neurons in hidden layer

n_classes = 10      # MNIST classes (0-9 digits)

# tf Graph input

x = tf.placeholder(tf.float32, [None, n_steps, n_inputs])

y = tf.placeholder(tf.float32, [None, n_classes])

# Define weights

weights = {

    # (28, 128)

    'in': tf.Variable(tf.random_normal([n_inputs, n_hidden_units])),

    # (128, 10)

    'out': tf.Variable(tf.random_normal([n_hidden_units, n_classes]))

}

biases = {

    # (128, )

    'in': tf.Variable(tf.constant(0.1, shape=[n_hidden_units, ])),

    # (10, )

    'out': tf.Variable(tf.constant(0.1, shape=[n_classes, ]))

}

def RNN(X, weights, biases):

    # hidden layer for input to cell

    # transpose the inputs shape from

    # X ==> (128 batch * 28 steps, 28 inputs)

    X = tf.reshape(X, [-1, n_inputs])

    # into hidden

    # X_in = (128 batch * 28 steps, 128 hidden)

    X_in = tf.matmul(X, weights['in']) + biases['in']

    # X_in ==> (128 batch, 28 steps, 128 hidden)

    X_in = tf.reshape(X_in, [-1, n_steps, n_hidden_units])

    # cell

    ##########################################

    # basic LSTM Cell.

    cell = tf.contrib.rnn.BasicLSTMCell(n_hidden_units)

    # lstm cell is divided into two parts (c_state, h_state)

    init_state = cell.zero_state(batch_size, dtype=tf.float32)

    outputs, final_state = tf.nn.dynamic_rnn(cell, X_in, initial_state=init_state, time_major=False)

    # unpack to list [(batch, outputs)..] * steps

    outputs = tf.unstack(tf.transpose(outputs, [1,0,2]))

    results = tf.matmul(outputs[-1], weights['out']) + biases['out']    # shape = (128, 10)

    return results

pred = RNN(x, weights, biases)

cost = tf.reduce_mean(tf.nn.softmax_cross_entropy_with_logits(logits=pred, labels=y))

train_op = tf.train.AdamOptimizer(lr).minimize(cost)

correct_pred = tf.equal(tf.argmax(pred, 1), tf.argmax(y, 1))

accuracy = tf.reduce_mean(tf.cast(correct_pred, tf.float32))

with tf.Session() as sess:

    init = tf.global_variables_initializer()

    sess.run(init)

    step = 0

    while step * batch_size < training_iters:

        batch_xs, batch_ys = mnist.train.next_batch(batch_size)

        batch_xs = batch_xs.reshape([batch_size, n_steps, n_inputs])

        sess.run([train_op], feed_dict={

            x: batch_xs,

            y: batch_ys,

        })

        if step % 20 == 0:

            print(sess.run(accuracy, feed_dict={

            x: batch_xs,

            y: batch_ys,

            }))

        step += 1
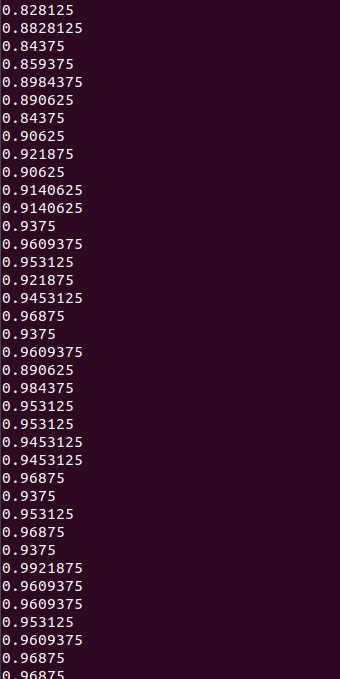
运行结果:
TensorFlow从入门到理解(四):你的第一个循环神经网络RNN(分类例子)的更多相关文章
- TensorFlow从入门到理解(五):你的第一个循环神经网络RNN(回归例子)
运行代码: import tensorflow as tf import numpy as np import matplotlib.pyplot as plt BATCH_START = 0 TIM ...
- TensorFlow从入门到理解
一.<莫烦Python>学习笔记: TensorFlow从入门到理解(一):搭建开发环境[基于Ubuntu18.04] TensorFlow从入门到理解(二):你的第一个神经网络 Tens ...
- 通过keras例子理解LSTM 循环神经网络(RNN)
博文的翻译和实践: Understanding Stateful LSTM Recurrent Neural Networks in Python with Keras 正文 一个强大而流行的循环神经 ...
- 基于TensorFlow的循环神经网络(RNN)
RNN适用场景 循环神经网络(Recurrent Neural Network)适合处理和预测时序数据 RNN的特点 RNN的隐藏层之间的节点是有连接的,他的输入是输入层的输出向量.extend(上一 ...
- TensorFlow从入门到理解(六):可视化梯度下降
运行代码: import tensorflow as tf import numpy as np import matplotlib.pyplot as plt from mpl_toolkits.m ...
- TensorFlow从入门到理解(三):你的第一个卷积神经网络(CNN)
运行代码: from __future__ import print_function import tensorflow as tf from tensorflow.examples.tutoria ...
- TensorFlow从入门到理解(二):你的第一个神经网络
运行代码: from __future__ import print_function import tensorflow as tf import numpy as np import matplo ...
- TensorFlow从入门到理解(一):搭建开发环境【基于Ubuntu18.04】
*注:教程及本文章皆使用Python3+语言,执行.py文件都是用终端(如果使用Python2+和IDE都会和本文描述有点不符) 一.安装,测试,卸载 TensorFlow官网介绍得很全面,很完美了, ...
- 循环神经网络-RNN入门
首先学习RNN需要一定的基础,即熟悉普通的前馈神经网络,特别是BP神经网络,最好能够手推. 所谓前馈,并不是说信号不能反向传递,而是网络在拓扑结构上不存在回路和环路. 而RNN最大的不同就是存在环路. ...
随机推荐
- listview 样式 LVS_REPORT 与 LVS_EDITLABELS 编辑单元格时,当前行第一列内容不显示
今天想做一个可编辑单元格的 listview,样式是 LVS_REPORT 与 LVS_EDITLABELS 网上搜索了一些相关资料,照葫芦画瓢写了一个,可测试的时候发现,当从第2列开始编辑的时候,第 ...
- Linux:在文件最后一列添加递增数(awk,cat函数)
假设有文件file1.txt: aa eeeee bb eeeee cc eeeee dd eeeee 先修改为: aa eeeee 1 bb eeeee 2 cc eeeee3 dd eeeee ...
- 第三十二节,使用谷歌Object Detection API进行目标检测、训练新的模型(使用VOC 2012数据集)
前面已经介绍了几种经典的目标检测算法,光学习理论不实践的效果并不大,这里我们使用谷歌的开源框架来实现目标检测.至于为什么不去自己实现呢?主要是因为自己实现比较麻烦,而且调参比较麻烦,我们直接利用别人的 ...
- 彻底删除与安装MySQL
一.下载msi安装版:https://dev.mysql.com/downloads/mysql/ 二.安装前一定要彻底删除已有的MySQL:(从未安装过,忽略此步) 1.计算机处右键快捷菜单,管理, ...
- windows下ngnix+php配置
1.需要工具: 下载ngnix 网址:http://nginx.org/ 下载:RunHiddenConsole 第二步 将下载文件解压后,将RunHiddenConsole拷贝到ngnix目录与p ...
- 从CAP理论中分析Eureka与zookeeper的区别
著名的CAP理论指出,一个分布式系统不可能同时满足C(一致性).A(可用性)和P(分区容错性).由于分区容错性在是分布式系统中必须要保证的,因此我们只能在A和C之间进行权衡.在此Zookeeper保证 ...
- Luogu P3181 [HAOI2016]找相同字符 广义$SAM$
题目链接 \(Click\) \(Here\) 设一个串\(s\)在\(A\)中出现\(cnt[s][1]\)次,在\(B\)中出现\(cnt[s][2]\)次,我们要求的就是: \[\sum cnt ...
- go的net/http用法
http包提供了HTTP客户端和服务端的实现 一:http客户端的几种方法 1. func (c *Client) Get(url string) (resp *Response, err error ...
- 2017-12-18python全栈9期第三天第一节之昨天内容回顾与作业讲解用户三次机会再试试
#!/user/bin/python# -*- coding:utf-8 -*-username = "zd"password = "123"i = 3whil ...
- python机器学习-sklearn挖掘乳腺癌细胞(三)
python机器学习-sklearn挖掘乳腺癌细胞( 博主亲自录制) 网易云观看地址 https://study.163.com/course/introduction.htm?courseId=10 ...