cesium 水面、淹没 效果
水面效果
参考:
http://cesiumcn.org/topic/158.html
http://api.rivermap.cn/cesium/rivermap/map.html
https://blog.csdn.net/weixin_42496466/article/details/80747565
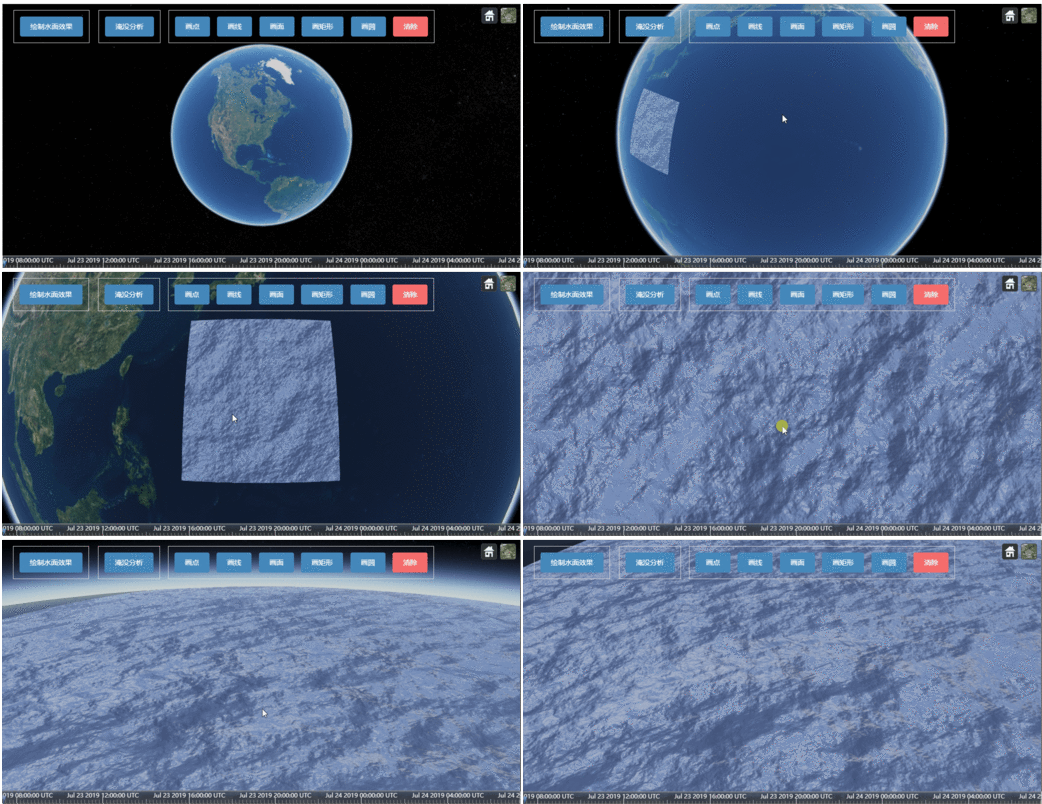
demo效果:

主要代码:
//绘制水面波浪效果

    drawWater: function(){

      this.viewer.scene.globe.depthTestAgainstTerrain = false;

      var waterFace=[

        130.0, 30.0, 0,

        150.0, 30.0, 0,

        150.0, 10.0, 0,

        130.0, 10.0, 0];

      var waterPrimitive = new Cesium.Primitive({

        show:true,// 默认隐藏

        allowPicking:false,

        geometryInstances : new Cesium.GeometryInstance({

          geometry : new Cesium.PolygonGeometry({

            polygonHierarchy : new Cesium.PolygonHierarchy(Cesium.Cartesian3.fromDegreesArrayHeights(waterFace)),

            //extrudedHeight: 0,//注释掉此属性可以只显示水面

            //perPositionHeight : true//注释掉此属性水面就贴地了

          })

        }),

        // 可以设置内置的水面shader

        appearance : new Cesium.EllipsoidSurfaceAppearance({

          material : new Cesium.Material({

            fabric : {

              type : 'Water',

              uniforms : {

                //baseWaterColor:new Cesium.Color(0.0, 0.0, 1.0, 0.5),

                //blendColor: new Cesium.Color(0.0, 0.0, 1.0, 0.5),

                //specularMap: 'gray.jpg',

                //normalMap: '../assets/waterNormals.jpg',

                normalMap: '本地贴图地址 或 base64',

                frequency: 1000.0,

                animationSpeed: 0.01,

                amplitude: 10.0

              }

            }

          }),

          fragmentShaderSource:'varying vec3 v_positionMC;\nvarying vec3 v_positionEC;\nvarying vec2 v_st;\nvoid main()\n{\nczm_materialInput materialInput;\nvec3 normalEC = normalize(czm_normal3D * czm_geodeticSurfaceNormal(v_positionMC, vec3(0.0), vec3(1.0)));\n#ifdef FACE_FORWARD\nnormalEC = faceforward(normalEC, vec3(0.0, 0.0, 1.0), -normalEC);\n#endif\nmaterialInput.s = v_st.s;\nmaterialInput.st = v_st;\nmaterialInput.str = vec3(v_st, 0.0);\nmaterialInput.normalEC = normalEC;\nmaterialInput.tangentToEyeMatrix = czm_eastNorthUpToEyeCoordinates(v_positionMC, materialInput.normalEC);\nvec3 positionToEyeEC = -v_positionEC;\nmaterialInput.positionToEyeEC = positionToEyeEC;\nczm_material material = czm_getMaterial(materialInput);\n#ifdef FLAT\ngl_FragColor = vec4(material.diffuse + material.emission, material.alpha);\n#else\ngl_FragColor = czm_phong(normalize(positionToEyeEC), material);\

gl_FragColor.a=0.5;\n#endif\n}\n'//重写shader,修改水面的透明度

        })

      });

      this.viewer.scene.primitives.add(waterPrimitive);

      this.viewer.camera.flyTo({

        destination : Cesium.Cartesian3.fromDegrees(140, 20, 6000000.0),

        orientation : {

          heading: Cesium.Math.toRadians(0.0), //默认朝北0度,顺时针方向,东是90度

          pitch: Cesium.Math.toRadians(-90), //默认朝下看-90,0为水平看,

          roll: Cesium.Math.toRadians(0) //默认0

        }

      });

    }
注意这里
this.viewer.scene.globe.depthTestAgainstTerrain = false;
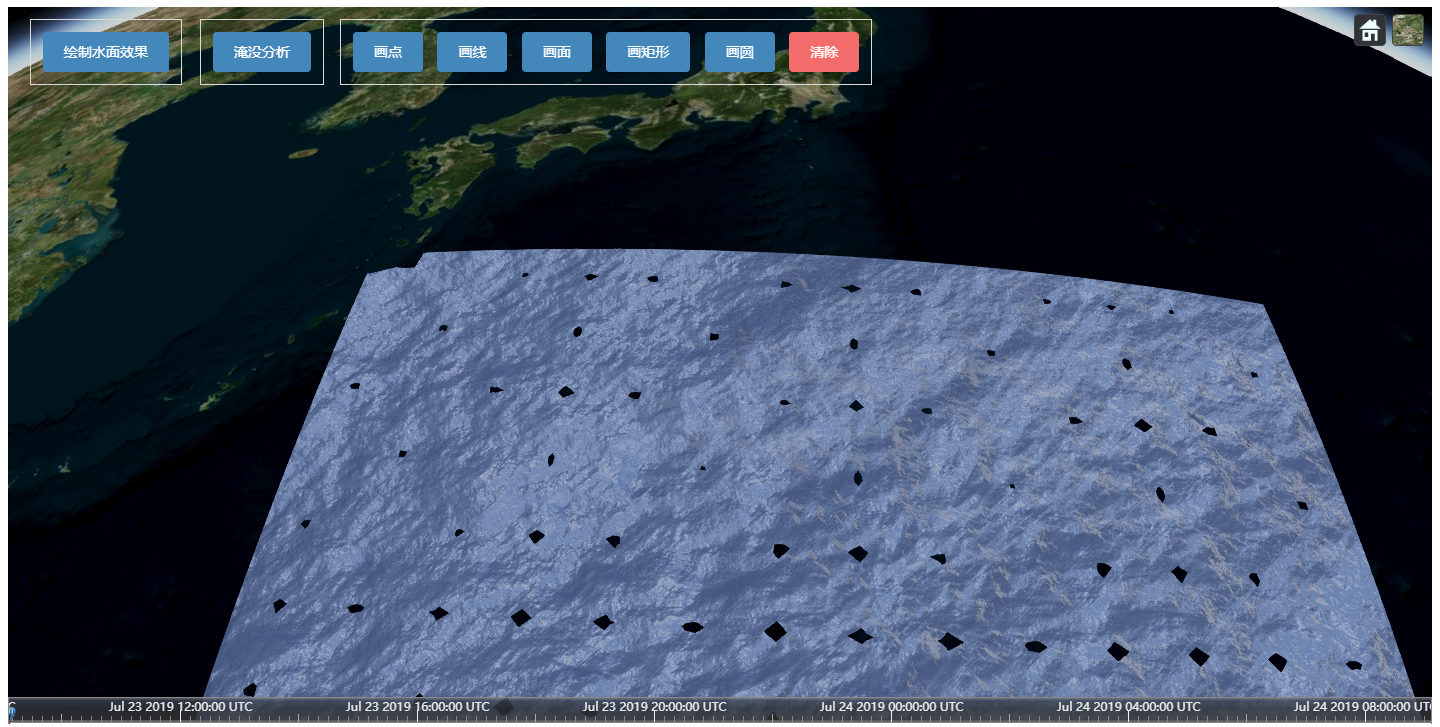
而淹没效果需要将其设置为 true;当其值为 true 时,水面效果 会出现缝隙,如下图所示。

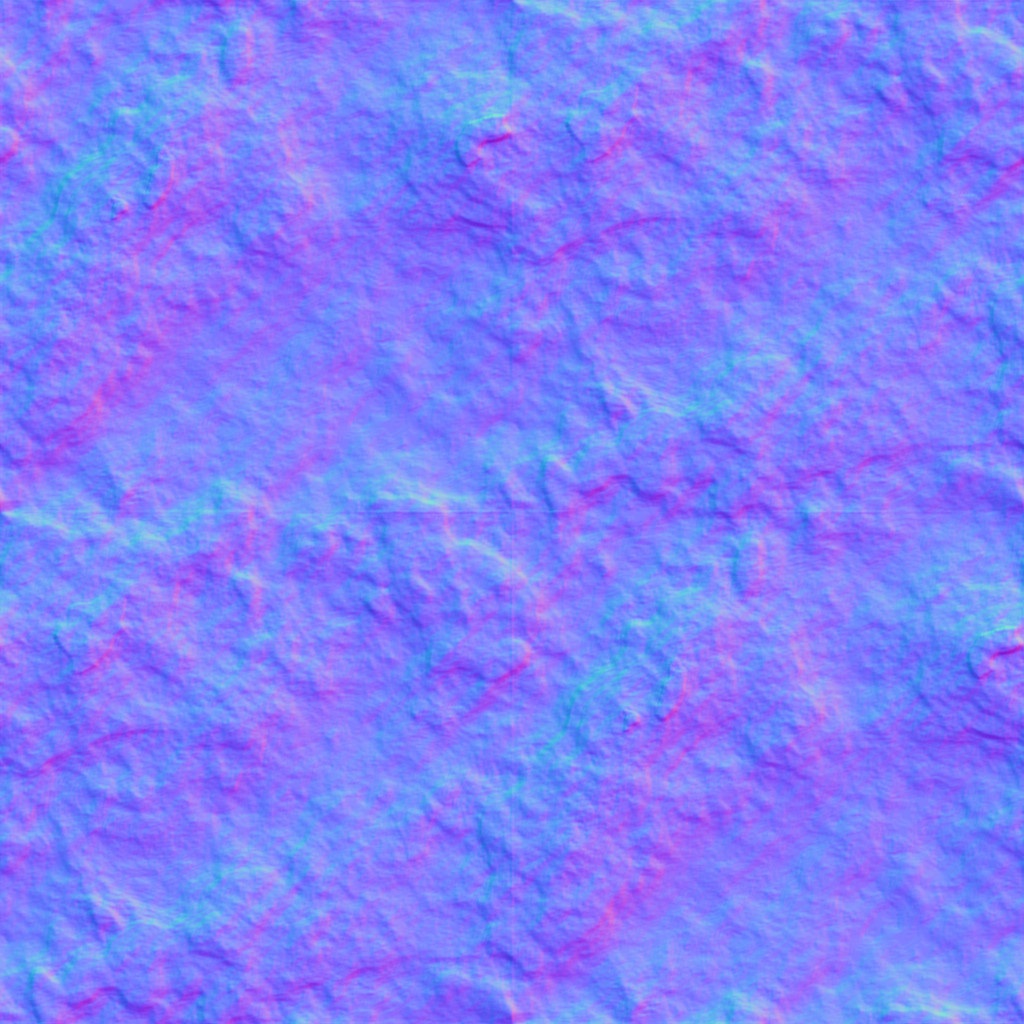
贴图从参考链接中可获取,这里附上:
http://api.rivermap.cn/cesium/Build/CesiumUnminified/Assets/Textures/waterNormals.jpg

淹没效果
参考:
https://github.com/liyangis/sn_cesium
demo效果:

主要代码(包含未用到的热力图效果代码):
import Cesium from 'cesium/Source/Cesium'

import HeatMap from "../modules/heatmap";

// 淹没分析

export default class SubmergenceAnalysis {

    constructor(viewer, isTerrain = true, height_max, height_min, step, map_type,positionsArr,speed) {

        this.viewer = viewer

        this.isTerrain = isTerrain

        this.handler = null

        this.tempEntities = []

        this.polygonEntities = []

        this.linePositionList = []

        this.tempPoints = []

        this.extrudedHeight = height_min

        this.height_max = height_max

        this.height_min = height_min

        this.step = step

        // 默认是范围图/深度图

        this.map_type = map_type

        this.polygon_degrees = positionsArr

        this.speed = speed

        //this._initViewStatus(this.viewer)

        this._addDisListener()

    }

    _initViewStatus(viewer) {

        var scene = viewer.scene

        scene.globe.depthTestAgainstTerrain = true

        viewer.camera.flyTo({

        //scene.camera.setView({

            // 摄像头的位置

            destination: Cesium.Cartesian3.fromDegrees(108.9, 34, 5000.0),

            orientation: {

                heading: Cesium.Math.toRadians(0.0),//默认朝北0度,顺时针方向,东是90度

                pitch: Cesium.Math.toRadians(-20),//默认朝下看-90,0为水平看,

                roll: Cesium.Math.toRadians(0)//默认0

            }

        });

        viewer.skyAtmosphere = false

    }

    // 根据矩形范围得到行列数点坐标和高程信息

    _getPoints(xmin, xmax, ymin, ymax) {

        const x_count = 10

        const y_count = 10

        let cartesians = new Array(x_count * y_count);

        const x_d = (xmax - xmin) / x_count

        for (var i = 0; i < x_count; ++i) {

            const start_pt = { x: xmin + i * x_d, y: ymax }

            const end_pt = { x: xmin + i * x_d, y: ymin }

            for (let j = 0; j < y_count; j++) {

                const offset = j / (y_count - 1);

                const x = Cesium.Math.lerp(start_pt.x, end_pt.x, offset);

                const y = Cesium.Math.lerp(start_pt.y, end_pt.y, offset);

                cartesians[j + i * y_count] = Cesium.Cartographic.fromDegrees(x, y);

            }

        }

        return cartesians

    }

    _getHeights(cartesians, extrudedHeight, callback) {

        var terrainProvider = new Cesium.createWorldTerrain({

                requestVertexNormals: true

            })

        // 根据地形计算某经纬度点的高度

        var promise = Cesium.sampleTerrainMostDetailed(terrainProvider, cartesians);

        Cesium.when(promise, function (updatedPositions) {

            let positions = updatedPositions.filter(d => {

                const cartographic = d

                if (cartographic) {

                    const h_d = extrudedHeight - cartographic.height

                    return h_d > 0

                }

            })

            positions = positions.map(d => {

                const cartographic = d

                let h = extrudedHeight - cartographic.height

                return {

                    x: Cesium.Math.toDegrees(cartographic.longitude),

                    y: Cesium.Math.toDegrees(cartographic.latitude),

                    value: h

                }

            })

            if (callback) {

                callback(positions)

            }

        });

    }

    _addDisListener() {

        let viewer = this.viewer

        let scene = viewer.scene

        let linePositionList = this.linePositionList

        viewer.cesiumWidget.screenSpaceEventHandler.removeInputAction(Cesium.ScreenSpaceEventType.LEFT_DOUBLE_CLICK)

        this.handler = new Cesium.ScreenSpaceEventHandler(scene.canvas)

        // 绘制线

        this._drawLine(linePositionList)

        //this.loadGrandCanyon()

        // 绘制面

        if (this.map_type) {

            this._drawPoly(this.polygon_degrees)

        } else {

            // 得到插值网格

            const bounds = {

                west: 115.8784,

                east: 115.9614,

                south: 39.9912,

                north: 40.0381

            }

            const positions_cartesian = this._getPoints(bounds.east, bounds.west, bounds.south, bounds.north)

            this._getHeights(positions_cartesian, this.extrudedHeight, (d) => {

                this.heatMapObj = new HeatMap(this.viewer, d, bounds);

            })

        }

    }

    _reDraw() {

        this.tempPoints = []

        this.linePositionList.length = 0

        this.areaPositionList.length = 0

        for (let entity of this.tempEntities) {

            this.viewer.entities.remove(entity)

        }

        this.tempEntities = []

    }

    _drawLine(linePositionList) {

        let lineStyle = {

            width: 2,

            material: Cesium.Color.CHARTREUSE

        }

        let entity = this.viewer.entities.add({

            polyline: lineStyle,

        })

        entity.polyline.positions = new Cesium.CallbackProperty(function () {

            return linePositionList

        }, false)

        this.polygonEntities.push(entity)

    }

    _drawPoint(point_Cartesian3) {

        let entity =

            this.viewer.entities.add({

                position: point_Cartesian3,

                point: {

                    pixelSize: 10,

                    color: Cesium.Color.GOLD,

                    // disableDepthTestDistance: Number.POSITIVE_INFINITY,

                    // heightReference: Cesium.HeightReference.CLAMP_TO_GROUND

                }

            })

        this.tempEntities.push(entity)

    }

    _drawPoly(degrees) {

        const that = this

        let entity =

            this.viewer.entities.add({

                polygon: {

                    hierarchy: {},

                    material: new Cesium.Color.fromBytes(64, 157, 253, 100),

                    perPositionHeight: true,

                }

            })

        entity.polygon.hierarchy = new Cesium.PolygonHierarchy(Cesium.Cartesian3.fromDegreesArray(degrees))

        entity.polygon.extrudedHeight = new Cesium.CallbackProperty(() => that.extrudedHeight, false)

        this.polygonEntities.push(entity)

    }

    // 世界坐标转经纬坐标

    _car3ToLatLon(cartesian) {

        let cartographic = Cesium.Cartographic.fromCartesian(cartesian)

        let longitudeString = Cesium.Math.toDegrees(cartographic.longitude)

        let latitudeString = Cesium.Math.toDegrees(cartographic.latitude)

        return {

            lon: longitudeString,

            lat: latitudeString,

            height: cartographic.height

        }

    }

    //移除整个资源

    remove() {

        let viewer = this.viewer

        for (let tempEntity of this.tempEntities) {

            viewer.entities.remove(tempEntity)

        }

        for (let lineEntity of this.polygonEntities) {

            viewer.entities.remove(lineEntity)

        }

        this.handler.destroy()

    }

    start() {

        const that = this

        this.timer = window.setInterval(() => {

            if ((that.height_max > that.extrudedHeight) && (that.extrudedHeight >= that.height_min)) {

                that.extrudedHeight = that.extrudedHeight + that.step

            } else {

                that.extrudedHeight = that.height_min

            }

            if (!that.map_type) {

                if (this.heatMapObj) {

                    const bounds = {

                        west: 115.8784,

                        east: 115.9614,

                        south: 39.9912,

                        north: 40.0381

                    }

                    const positions_cartesian = this._getPoints(bounds.east, bounds.west, bounds.south, bounds.north)

                    this._getHeights(positions_cartesian, this.extrudedHeight, (d) => {

                        this.heatMapObj.update(d);

                    })

                }

            }

        },that.speed*1000)

        if (that.map_type) {

            that._drawPoly(that.polygon_degrees)

        } else {

            if (this.heatMapObj) { }

        }

    }

    clear() {

        let viewer = this.viewer

        if (this.timer) {

            window.clearInterval(this.timer)

            this.timer = null

        }

        this.extrudedHeight = this.height_min;

        if (this.heatMapObj)

            this.heatMapObj.show(false)

        for (let entity of this.polygonEntities) {

            viewer.entities.remove(entity)

        }

        viewer.skyAtmosphere = true;

    }

    changeMapType(type) {

        if (!type) {

            if (!this.heatMapObj) {

                // 得到插值网格

                const bounds = {

                    west: 115.8784,

                    east: 115.9614,

                    south: 39.9912,

                    north: 40.0381

                }

                const positions_cartesian = this._getPoints(bounds.east, bounds.west, bounds.south, bounds.north)

                this._getHeights(positions_cartesian, this.extrudedHeight, (d) => {

                    this.heatMapObj = new HeatMap(this.viewer, d, bounds);

                })

            }

            this.heatMapObj && this.heatMapObj.show(true)

            for (let entity of this.polygonEntities) {

                entity.show = false;

            }

        } else {

            this.heatMapObj.show(false)

            for (let entity of this.polygonEntities) {

                entity.show = true;

            }

        }

    }

    // 切割一部分地形

    loadGrandCanyon() {

        var globe = this.viewer.scene.globe;

        const viewer = this.viewer

        // viewer.skyAtmosphere = false,

        // Pick a position at the Grand Canyon

        var position = Cesium.Cartographic.toCartesian(new Cesium.Cartographic.fromDegrees(115.9165534, 40.0139345, 100));

        var distance = 30000.0;

        var boundingSphere = new Cesium.BoundingSphere(position, distance);

        globe.clippingPlanes = new Cesium.ClippingPlaneCollection({

            modelMatrix: Cesium.Transforms.eastNorthUpToFixedFrame(position),

            planes: [

                new Cesium.ClippingPlane(new Cesium.Cartesian3(1.0, 0.0, 0.0), distance),

                new Cesium.ClippingPlane(new Cesium.Cartesian3(-1.0, 0.0, 0.0), distance),

                new Cesium.ClippingPlane(new Cesium.Cartesian3(0.0, 1.0, 0.0), distance),

                new Cesium.ClippingPlane(new Cesium.Cartesian3(0.0, -1.0, 0.0), distance)

            ],

            unionClippingRegions: true

        });

        globe.clippingPlanes.enabled = true;

        viewer.camera.viewBoundingSphere(boundingSphere, new Cesium.HeadingPitchRange(0.5, -0.5, boundingSphere.radius * 5.0));

        viewer.camera.lookAtTransform(Cesium.Matrix4.IDENTITY);

    }

}
洪水淹没效果
在上一步的基础上,希望达到“洪水顺着河流向前淹没”效果
效果如下图:(注:只能在特定地区,特定观察角度,效果才会稍好一点
cesium 水面、淹没 效果的更多相关文章
- Cesium专栏-淹没分析(附源码下载)
Cesium 是一款面向三维地球和地图的,世界级的JavaScript开源产品.它提供了基于JavaScript语言的开发包,方便用户快速搭建一款零插件的虚拟地球Web应用,并在性能,精度,渲染质量以 ...
- Cesium 实现粒子效果贴地(伪)
有时我们面对这样的需求,需要在地面上放一个周期性放大缩小的标记,可以使用粒子效果实现,但是粒子效果图片很难贴地(如果你知道怎么做,欢迎分享,期待有人打我脸),我只能变通实现一个看似贴地但实际没有贴地的 ...
- Cesium专栏-裁剪效果(基于3dtiles模型,附源码下载)
Cesium Cesium 是一款面向三维地球和地图的,世界级的JavaScript开源产品.它提供了基于JavaScript语言的开发包,方便用户快速搭建一款零插件的虚拟地球Web应用,并在性能,精 ...
- [ActionScript 3.0] AS3.0 水面波纹效果
import flash.geom.Point; import flash.display.BitmapData; import flash.filters.DisplacementMapFilter ...
- 基于cesium的GIS洪水淹没三维模拟系统
简介: “FloodFreeth3D”是一款对Mike11软件计算的洪水演进结果使用cesium进行淹没演进三维模拟的软件产品. 技术参数: 1. B/S架构,支持多Web浏览器(ie.chrom ...
- Cesium应用篇:3控件(5)CesiumInspector
CesiumInspector控件并不是带来太多功能上的,但对开发人员来说,对于了解Cesium的渲染效果以及性能调优,还是一个很有价值的控件,特别是一些渲染状态下的问题,采用该控件,应该还是会有很多 ...
- cesium自定义气泡窗口infoWindow
一.自定义气泡窗口与cesium默认窗口效果对比: 1.cesium点击弹出气泡窗口显示的位置固定在地图的右上角,默认效果: 2.对于习惯arcgis或者openlayer气泡窗口样式的giser来说 ...
- cesium 之自定义气泡窗口 infoWindow 篇
前言 cesium 官网的api文档介绍地址cesium官网api,里面详细的介绍 cesium 各个类的介绍,还有就是在线例子:cesium 官网在线例子,这个也是学习 cesium 的好素材. 自 ...
- cesium随笔 — 获取当前鼠标的经度、纬度、高度
代码: function getPosition() { //得到当前三维场景 var scene = viewer.scene; //得到当前三维场景的椭球体 var ellipsoid = sce ...
随机推荐
- Java 获取客户端真实IP地址
本文基于方法 HttpServletRequest.getHeader 和 HttpServletRequest.getRemoteAddr 介绍如何在服务器端获取客户端真实IP地址. 业务背景 服务 ...
- 23种C#设计模式,源码在GitHub ( 具体代码 , 优缺点 , 相关网址) 希望对大家有所帮助
点击 进入Github 地址
- 查看CPU占用工具
recording_5492_1.jfr jcmd 5942 JFR.start delay=1s duration=200s name=serverRecording filename=./reco ...
- 2018-2019 20165226 Exp 8 Web基础
2018-2019 20165226 Exp 8 Web基础 目录 一.实验内容说明及基础问题回答 二.实验过程 1.Web前端:HTML 2.Web前端j:avascipt 3.Web后端:MySQ ...
- 第07组 Alpha冲刺(2/6)
队长:摇光 队长:杨明哲 组长博客:求戳 作业博客:求再戳 队长:杨明哲 过去两天完成了哪些任务 文字/口头描述:重写后端,完成了数据请求部分的后端. 展示GitHub当日代码/文档签入记录:(组内共 ...
- Unity制作王者荣耀商业级手游
<王者荣耀>这种现象级手机游戏是如何制作出来的呢?本文以<王者荣耀>MOBO类型的多人在线战术竞技游戏为入口,覆盖Unity游戏制作开发前端与Node.js服务器端的开发必备知 ...
- 右键查看别人网页的js代码为什么会显示乱码
查看别人网页的js显示乱码 解决方法: 打开浏览器,选择设置,点击更多,选择文字编码为Unicode
- Python的开源人脸识别库:离线识别率高达99.38%(附源码)
Python的开源人脸识别库:离线识别率高达99.38%(附源码) 转https://cloud.tencent.com/developer/article/1359073 11.11 智慧上云 ...
- 【转】Django继承AbstractUser新建User Model时出现auth.User.groups: (fields.E304)错误
错误详情如下: (venv) D:\workspace\music>python manage.py makemigrations SystemCheckError: System check ...
- ISO/IEC 9899:2011 条款6.7.7——类型名
6.7.7 类型名 语法 1.type-name: specifier-qualifier-list abstract-declaratoropt abstract-declarator: po ...
