【转载】自定义View,有这一篇就够了
为了扫除学习中的忙点,尽可能多的覆盖Android知识的边边角角,决定对自定义View做一个稍微全面一点的使用方法总结,在内容上面并没有什么独特的地方,其他大神们博客上面基本上都有讲这方面的内容,如果你对自定义View很熟了,那么就不用往下看啦~。如果对自定义View不是很熟,或者说很多内容忘记了想复习一下,更或者说是从来没用过,欢迎和我一起重温这方面的知识,或许我的博文更复合你的胃口呢(__) 嘻嘻......
1.自定义View
首先我们要明白,为什么要自定义View?主要是Android系统内置的View无法实现我们的需求,我们需要针对我们的业务需求定制我们想要的View。自定义View我们大部分时候只需要重写两个函数:onMeasure()和onDraw()。onMeasure负责对当前View的尺寸进行测量,onDraw负责把当前这个View绘制出来。当然了,你还得写至少2个构造函数:
    public MyView(Context context) {

        super(context);

    }

    public MyView(Context context, AttributeSet attrs) {

        super(context, attrs);

    }
1.1.onMeasure
我们自定义的View,首先得要测量宽高尺寸。为什么要测量宽高尺寸?我在刚学自定义View的时候非常无法理解!因为我当时觉得,我在xml文件中已经指定好了宽高尺寸了,我自定义View中有必要再次获取宽高并设置宽高吗? 既然我自定义的View是继承自View类,google团队直接在View类中直接把xml设置的宽高获取,并且设置进去不就好了吗?那google为啥还让我们做这样的"重复工作"呢?客官别急,马上给您上茶~
在学习Android的时候,我们就知道,在xml布局文件中,我们的layout_width和layout_height参数可以不写具体的尺寸,而是wrap_content或者是match_parent。其意思我们都知道,就是将尺寸设置为"包住内容"和"填充父布局给我们的所有空间"。这两个设置并没有指定真正的大小,可视我们绘制到屏幕上的View必须是要有具体点宽高的,正是因为这个原因,我们必须自己去处理和设置尺寸。当然了,View类给了默认的处理,但是如果View类的默认处理不满足我们的要求,我们就得重写onMeasure函数拉~。这里举个例子,比如我们希望我们的View是个正方形,如果在xml中指定宽高为wrap_content,如果使用View类提供的measure处理方式,显然无法满足我们的需求~。
先看看onMeasure函数原型:
protected void onMeasure(int widthMeasureSpec, int heightMeasureSpec)
参数中的widthMeasureSpec和heightMeasureSpec是个什么鬼?看起来很像width和height,没错,这两个参数就是包含宽和高的信息。什么?包含?难道还要其他信息?是的!它还包含测量模式,也就是说,一个int整数,里面放了测量模式和尺寸大小。那么一个数怎么放两个信息呢?我们知道,我们在设置宽高时有3个选择:wrap_content、match_parent以及指定固定尺寸,而测量模式也有3种:UNSPECIFIED、EXACTLY、AT_MOST,当然,他们并不是一一对应关系哈,这三种模式后面我会详细介绍,但测量模式并非就是这3种情况,而如果使用二进制,我们只需要使用2个bit就可以做到,因为2个bit取值范围是[0,3]里面可以存放4个数足够我们用了。那么Google是怎么把一个int同时放测量模式和尺寸信息呢?我们知道int型数据占用32个bit,而Google实现的是,将int数据的前2个bit用于区分不同的布局模式,后面30个bit存放的是尺寸的数据。
那我们怎么从int数据中提取测量模式和尺寸呢?放心,不用你每次都要写一次移位<<和取且& 操作,Android内置类MeasureSpec帮我们写好拉~,我们只需按照下面方法就可以拿到拉:
int widthMode = MeasureSpec.getMode(widthMeasureSpec);

int widthSize = MeasureSpec.getSize(widthMeasureSpec);
爱思考的你肯定会问,既然我们能通过widthMeasureSpec拿到宽度尺寸大小,那我们还要测量模式干嘛?测量模式会不会是多余的?请注意:这里的尺寸大小并不是最终我们的View的尺寸大小,而是父View提供的参考大小。我们看看测量模式,测量模式是干啥用个的呢?
| 测量模式 | 表示意思 |
|---|---|
| UNSPECIFIED | 父容器没有对当前View有任何限制,当前View可以任意取尺寸 |
| EXACTLY | 当前的尺寸就是当前View应该去的尺寸 |
| AT_MOST | 当前尺寸是当前View能取的最大尺寸 |
而上面的测量模式跟我们的布局时的wrap_content、match_parent以及写成固定的尺寸有什么对应的关系呢?
match_parent——>EXACTLY。怎么理解呢?match_parent就是要利用父View给我们提供的所有剩余空间,而父View剩余空间是确定的,也就是这个测量模式的整数里面存放的尺寸。
warp_content——>AT_MOST。怎么理解呢?就是我们想要将大小设置为包裹我们View内容,那么尺寸大小就是父View给我们作为参考的尺寸,只要不超过这个尺寸就可以拉,具体尺寸就根据我们的需求去设定。
固定尺寸(如100dp)——>EXACTLY。用户自己指定了尺寸大小,我们就不用再去干涉了,当然是以指定的大小为主拉。
1.2.动手重写onMeasure函数
上面讲了太多理论,我们实际操作一下吧,感受一下onMeasure的使用,假设我们要实现这样一个效果:将当前的View以正方形的形式显示,即要宽高相等,并且默认的宽高值为100像素。就可以这样编写:
 private int getMySize(int defaultSize, int measureSpec) {

        int mySize = defaultSize;

        int mode = MeasureSpec.getMode(measureSpec);

        int size = MeasureSpec.getSize(measureSpec);

        switch (mode) {

            case MeasureSpec.UNSPECIFIED: {//如果没有指定大小,就设置为默认大小

                mySize = defaultSize;

                break;

            }

            case MeasureSpec.AT_MOST: {//如果测量模式是最大取值为size

                //我们将大小取最大值,你也可以取其他值

                mySize = size;

                break;

            }

            case MeasureSpec.EXACTLY: {//如果是固定的大小,那就不要去改变它

                mySize = size;

                break;

            }

        }

        return mySize;

}

@Override

protected void onMeasure(int widthMeasureSpec, int heightMeasureSpec) {

        super.onMeasure(widthMeasureSpec, heightMeasureSpec);

        int width = getMySize(100, widthMeasureSpec);

        int height = getMySize(100, heightMeasureSpec);

        if (width < height) {

            height = width;

        } else {

            width = height;

        }

        setMeasuredDimension(width, height);

}
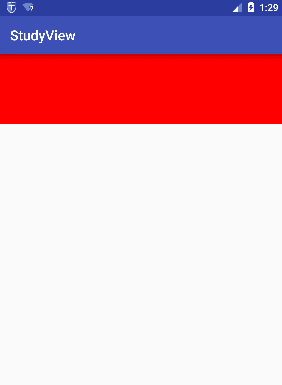
我们设置一下布局
  <com.hc.studyview.MyView

        android:layout_width="match_parent"

        android:layout_height="100dp"

        android:background="#ff0000" />
看看使用了我们自定义onMeasure函数后的效果:
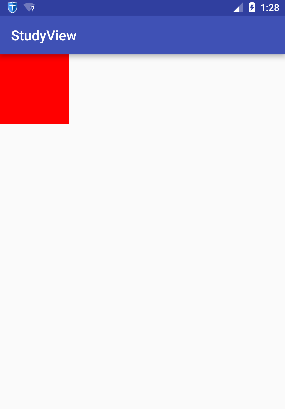
如果我们不重写onMeasure,效果则是如下:
1.3.重写onDraw
上面我们学会了自定义尺寸大小,那么尺寸我们会设定了,接下来就是把我们想要的效果画出来吧~绘制我们想要的效果很简单,直接在画板Canvas对象上绘制就好啦,过于简单,我们以一个简单的例子去学习:假设我们需要实现的是,我们的View显示一个圆形,我们在上面已经实现了宽高尺寸相等的基础上,继续往下做:
  @Override

    protected void onDraw(Canvas canvas) {

        //调用父View的onDraw函数,因为View这个类帮我们实现了一些

        // 基本的而绘制功能,比如绘制背景颜色、背景图片等

        super.onDraw(canvas);

        int r = getMeasuredWidth() / 2;//也可以是getMeasuredHeight()/2,本例中我们已经将宽高设置相等了

        //圆心的横坐标为当前的View的左边起始位置+半径

        int centerX = getLeft() + r;

        //圆心的纵坐标为当前的View的顶部起始位置+半径

        int centerY = getTop() + r;

        Paint paint = new Paint();

        paint.setColor(Color.GREEN);

        //开始绘制

        canvas.drawCircle(centerX, centerY, r, paint);

    }
效果如图:

1.4.自定义布局属性
如果有些属性我们希望由用户指定,只有当用户不指定的时候才用我们硬编码的值,比如上面的默认尺寸,我们想要由用户自己在布局文件里面指定该怎么做呢?那当然是通过我们自定义属性,让用户自己定义属性啦~
首先我们需要在res/values/stayles.xml文件(如果没有请自己新建)里面声明一个我们自定义的属性:
<resources>

    <!--name为声明的"属性集合"名,可以随便取,但是最好是设置为跟我们的View一样的名称-->

    <declare-styleable name="MyView">

        <!--声明我们的属性,名称为default_size,取值类型为尺寸类型(dp,px等)-->

        <attr name="default_size" format="dimension" />

    </declare-styleable>

</resources>
接下来就是在布局文件用上我们的自定义属性啦~
<?xml version="1.0" encoding="utf-8"?>

<LinearLayout xmlns:android="http://schemas.android.com/apk/res/android"

    xmlns:hc="http://schemas.android.com/apk/res-auto"

    android:layout_width="match_parent"

    android:layout_height="match_parent">

    <com.hc.studyview.MyView

        android:layout_width="match_parent"

        android:layout_height="100dp"

        hc:default_size="100dp" />

</LinearLayout>
注意:需要在根标签(LinearLayout)里面设定命名空间,命名空间名称可以随便取,比如hc,命名空间口面取的值是固定的:"htt://schemas.android.com/apk/res-auto"
最后就是在我们的自定义的View里面把我们自定义的属性的值取出来,在构造函数中,还记得AttributeSet属性吗?就是靠它帮我们把布局里面的属性取出来:
 private int defalutSize;

  public MyView(Context context, AttributeSet attrs) {

      super(context, attrs);

      //第二个参数就是我们在styles.xml文件中的<declare-styleable>标签

        //即属性集合的标签,在R文件中名称为R.styleable+name

        TypedArray a = context.obtainStyledAttributes(attrs, R.styleable.MyView);

        //第一个参数为属性集合里面的属性,R文件名称:R.styleable+属性集合名称+下划线+属性名称

        //第二个参数为,如果没有设置这个属性,则设置的默认的值

        defalutSize = a.getDimensionPixelSize(R.styleable.MyView_default_size, 100);

        //最后记得将TypedArray对象回收

        a.recycle();

   }
最后把MyView的完整代码附上:
package com.hc.studyview;

import android.content.Context;

import android.content.res.TypedArray;

import android.graphics.Canvas;

import android.graphics.Color;

import android.graphics.Paint;

import android.util.AttributeSet;

import android.util.Log;

import android.view.MotionEvent;

import android.view.View;

/**

 * Package com.hc.studyview

 * Created by HuaChao on 2016/6/3.

 */

public class MyView extends View {

    private int defalutSize;

    public MyView(Context context) {

        super(context);

    }

    public MyView(Context context, AttributeSet attrs) {

        super(context, attrs);

        //第二个参数就是我们在styles.xml文件中的<declare-styleable>标签

        //即属性集合的标签,在R文件中名称为R.styleable+name

        TypedArray a = context.obtainStyledAttributes(attrs, R.styleable.MyView);

        //第一个参数为属性集合里面的属性,R文件名称:R.styleable+属性集合名称+下划线+属性名称

        //第二个参数为,如果没有设置这个属性,则设置的默认的值

        defalutSize = a.getDimensionPixelSize(R.styleable.MyView_default_size, 100);

        //最后记得将TypedArray对象回收

        a.recycle();

    }

    private int getMySize(int defaultSize, int measureSpec) {

        int mySize = defaultSize;

        int mode = MeasureSpec.getMode(measureSpec);

        int size = MeasureSpec.getSize(measureSpec);

        switch (mode) {

            case MeasureSpec.UNSPECIFIED: {//如果没有指定大小,就设置为默认大小

                mySize = defaultSize;

                break;

            }

            case MeasureSpec.AT_MOST: {//如果测量模式是最大取值为size

                //我们将大小取最大值,你也可以取其他值

                mySize = size;

                break;

            }

            case MeasureSpec.EXACTLY: {//如果是固定的大小,那就不要去改变它

                mySize = size;

                break;

            }

        }

        return mySize;

    }

    @Override

    protected void onMeasure(int widthMeasureSpec, int heightMeasureSpec) {

        super.onMeasure(widthMeasureSpec, heightMeasureSpec);

        int width = getMySize(defalutSize, widthMeasureSpec);

        int height = getMySize(defalutSize, heightMeasureSpec);

        if (width < height) {

            height = width;

        } else {

            width = height;

        }

        setMeasuredDimension(width, height);

    }

    @Override

    protected void onDraw(Canvas canvas) {

        //调用父View的onDraw函数,因为View这个类帮我们实现了一些

        // 基本的而绘制功能,比如绘制背景颜色、背景图片等

        super.onDraw(canvas);

        int r = getMeasuredWidth() / 2;//也可以是getMeasuredHeight()/2,本例中我们已经将宽高设置相等了

        //圆心的横坐标为当前的View的左边起始位置+半径

        int centerX = getLeft() + r;

        //圆心的纵坐标为当前的View的顶部起始位置+半径

        int centerY = getTop() + r;

        Paint paint = new Paint();

        paint.setColor(Color.GREEN);

        //开始绘制

        canvas.drawCircle(centerX, centerY, r, paint);

    }

}
2.自定义ViewGroup
自定义View的过程很简单,就那几步,可自定义ViewGroup可就没那么简单啦~,因为它不仅要管好自己的,还要兼顾它的子View。我们都知道ViewGroup是个View容器,它装纳child View并且负责把childView放入指定的位置。我们假设一下,如果是让你负责设计ViewGroup,你会怎么去设计呢?
1.首先,我们得知道各个子View的大小吧,只有先知道子View的大小,我们才知道当前的ViewGroup该设置为多大去容纳它们。
2.根据子View的大小,以及我们的ViewGroup要实现的功能,决定出ViewGroup的大小。
3.ViewGroup和子View的大小算出来了之后,接下来就是去摆放了吧,具体怎么去拜访呢?这得根据你定制的需求去摆放了,比如,你想让子View按照垂直顺序一个挨着一个放,或则会按照先后顺序一个叠一个去放,这是你自己决定的。
4.已经知道怎么去拜访还不行啊,决定了怎么拜访就是相当于把已有的空间"分割"成大大小小的空间,每个控件对于一个子View,接下来就是把子View对号入座了,把它们放进它们该放的地方去。
现在就完成了ViewGroup的设计了,我们来个具体的案例,将子View按从上到下垂直顺序一个挨着一个摆放,即模仿实现LinearLayout的垂直布局。
首先重写onMeasure,实现测量子View大小以及设定ViewGroup的大小:
    @Override

    protected void onMeasure(int widthMeasureSpec, int heightMeasureSpec) {

        super.onMeasure(widthMeasureSpec, heightMeasureSpec);

        //将所有的子View进行测量,这会触发每个子View的onMeasure函数

        //注意要与measureChild区分,measureChild是对单个view进行测量

        measureChildren(widthMeasureSpec, heightMeasureSpec);

        int widthMode = MeasureSpec.getMode(widthMeasureSpec);

        int widthSize = MeasureSpec.getSize(widthMeasureSpec);

        int heightMode = MeasureSpec.getMode(heightMeasureSpec);

        int heightSize = MeasureSpec.getSize(heightMeasureSpec);

        int childCount = getChildCount();

        if (childCount == 0) {//如果没有子View,当前ViewGroup没有存在的意义,不用占用空间

            setMeasuredDimension(0, 0);

        } else {

            //如果宽高都是包裹内容

            if (widthMode == MeasureSpec.AT_MOST && heightMode == MeasureSpec.AT_MOST) {

                //我们将高度设置为所有子View的高度相加,宽度设为子View中最大的宽度

                int height = getTotleHeight();

                int width = getMaxChildWidth();

                setMeasuredDimension(width, height);

            } else if (heightMode == MeasureSpec.AT_MOST) {//如果只有高度是包裹内容

                //宽度设置为ViewGroup自己的测量宽度,高度设置为所有子View的高度总和

                setMeasuredDimension(widthSize, getTotleHeight());

            } else if (widthMode == MeasureSpec.AT_MOST) {//如果只有宽度是包裹内容

                //宽度设置为子View中宽度最大的值,高度设置为ViewGroup自己的测量值

                setMeasuredDimension(getMaxChildWidth(), heightSize);

            }

        }

    }

    /***

     * 获取子View中宽度最大的值

     */

    private int getMaxChildWidth() {

        int childCount = getChildCount();

        int maxWidth = 0;

        for (int i = 0; i < childCount; i++) {

            View childView = getChildAt(i);

            if (childView.getMeasuredWidth() > maxWidth)

                maxWidth = childView.getMeasuredWidth();

        }

        return maxWidth;

    }

    /***

     * 将所有子View的高度相加

     **/

    private int getTotleHeight() {

        int childCount = getChildCount();

        int height = 0;

        for (int i = 0; i < childCount; i++) {

            View childView = getChildAt(i);

            height += childView.getMeasuredHeight();

        }

        return height;

    }
代码中的注释我已经写得很详细,不再对每一行代码进行讲解。上面的onMeasure将子View测量好了,以及把自己的尺寸也设置好了,接下来我们去摆放子View吧~
 @Override

    protected void onLayout(boolean changed, int l, int t, int r, int b) {

        int count = getChildCount();

        //记录当前的高度位置

        int curHeight = t;

        //将子View逐个摆放

        for (int i = 0; i < count; i++) {

            View child = getChildAt(i);

            int height = child.getMeasuredHeight();

            int width = child.getMeasuredWidth();

            //摆放子View,参数分别是子View矩形区域的左、上、右、下边

            child.layout(l, curHeight, l + width, curHeight + height);

            curHeight += height;

        }

    }
我们测试一下,将我们自定义的ViewGroup里面放3个Button,将这3个Button的宽度设置不一样,把我们的ViewGroup的宽高都设置为包裹内容wrap_content,为了看的效果明显,我们给ViewGroup加个背景:
<?xml version="1.0" encoding="utf-8"?>

<LinearLayout xmlns:android="http://schemas.android.com/apk/res/android"

    android:layout_width="match_parent"

    android:layout_height="match_parent">

    <com.hc.studyview.MyViewGroup

        android:layout_width="wrap_content"

        android:layout_height="wrap_content"

        android:background="#ff9900">

        <Button

            android:layout_width="100dp"

            android:layout_height="wrap_content"

            android:text="btn" />

        <Button

            android:layout_width="200dp"

            android:layout_height="wrap_content"

            android:text="btn" />

        <Button

            android:layout_width="50dp"

            android:layout_height="wrap_content"

            android:text="btn" />

    </com.hc.studyview.MyViewGroup>

</LinearLayout>
看看最后的效果吧~
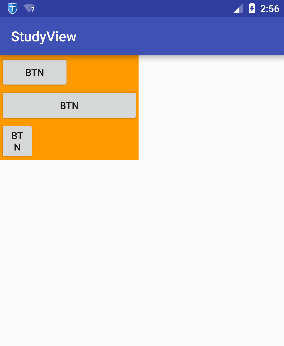
是不是很激动我们自己也可以实现LinearLayout的效果啦~~
最后附上MyViewGroup的完整源码:
package com.hc.studyview;

import android.content.Context;

import android.util.AttributeSet;

import android.view.MotionEvent;

import android.view.View;

import android.view.ViewGroup;

/**

 * Package com.hc.studyview

 * Created by HuaChao on 2016/6/3.

 */

public class MyViewGroup extends ViewGroup {

    public MyViewGroup(Context context) {

        super(context);

    }

    public MyViewGroup(Context context, AttributeSet attrs) {

        super(context, attrs);

    }

    /***

     * 获取子View中宽度最大的值

     */

    private int getMaxChildWidth() {

        int childCount = getChildCount();

        int maxWidth = 0;

        for (int i = 0; i < childCount; i++) {

            View childView = getChildAt(i);

            if (childView.getMeasuredWidth() > maxWidth)

                maxWidth = childView.getMeasuredWidth();

        }

        return maxWidth;

    }

    /***

     * 将所有子View的高度相加

     **/

    private int getTotleHeight() {

        int childCount = getChildCount();

        int height = 0;

        for (int i = 0; i < childCount; i++) {

            View childView = getChildAt(i);

            height += childView.getMeasuredHeight();

        }

        return height;

    }

    @Override

    protected void onMeasure(int widthMeasureSpec, int heightMeasureSpec) {

        super.onMeasure(widthMeasureSpec, heightMeasureSpec);

        //将所有的子View进行测量,这会触发每个子View的onMeasure函数

        //注意要与measureChild区分,measureChild是对单个view进行测量

        measureChildren(widthMeasureSpec, heightMeasureSpec);

        int widthMode = MeasureSpec.getMode(widthMeasureSpec);

        int widthSize = MeasureSpec.getSize(widthMeasureSpec);

        int heightMode = MeasureSpec.getMode(heightMeasureSpec);

        int heightSize = MeasureSpec.getSize(heightMeasureSpec);

        int childCount = getChildCount();

        if (childCount == 0) {//如果没有子View,当前ViewGroup没有存在的意义,不用占用空间

            setMeasuredDimension(0, 0);

        } else {

            //如果宽高都是包裹内容

            if (widthMode == MeasureSpec.AT_MOST && heightMode == MeasureSpec.AT_MOST) {

                //我们将高度设置为所有子View的高度相加,宽度设为子View中最大的宽度

                int height = getTotleHeight();

                int width = getMaxChildWidth();

                setMeasuredDimension(width, height);

            } else if (heightMode == MeasureSpec.AT_MOST) {//如果只有高度是包裹内容

                //宽度设置为ViewGroup自己的测量宽度,高度设置为所有子View的高度总和

                setMeasuredDimension(widthSize, getTotleHeight());

            } else if (widthMode == MeasureSpec.AT_MOST) {//如果只有宽度是包裹内容

                //宽度设置为子View中宽度最大的值,高度设置为ViewGroup自己的测量值

                setMeasuredDimension(getMaxChildWidth(), heightSize);

            }

        }

    }

    @Override

    protected void onLayout(boolean changed, int l, int t, int r, int b) {

        int count = getChildCount();

        //记录当前的高度位置

        int curHeight = t;

        for (int i = 0; i < count; i++) {

            View child = getChildAt(i);

            int height = child.getMeasuredHeight();

            int width = child.getMeasuredWidth();

            child.layout(l, curHeight, l + width, curHeight + height);

            curHeight += height;

        }

    }

}
好啦~自定义View的学习到此结束,是不是发现自定义View如此简单呢?
作者:huachao1001
链接:http://www.jianshu.com/p/c84693096e41
【转载】自定义View,有这一篇就够了的更多相关文章
- Android显示框架:自定义View实践之绘制篇
文章目录 一 View 二 Paint 2.1 颜色处理 2.2 文字处理 2.3 特殊处理 三 Canvas 3.1 界面绘制 3.2 范围裁切 3.3 集合变换 四 Path 4.1 添加图形 4 ...
- 转载:MySQL看这一篇就够了
No.1 数据库概念 什么是数据库? 数据库就是一种特殊的文件,内部存储着需要的数据 RDBMS 所谓关系数据库,是建立在关系模型基础的数据库,借助于集合代数等数学概念和方法来处理数据库中的数据 SQ ...
- 手把手带你做一个超炫酷loading成功动画view Android自定义view
写在前面: 本篇可能是手把手自定义view系列最后一篇了,实际上我也是一周前才开始真正接触自定义view,通过这一周的练习,基本上已经熟练自定义view,能够应对一般的view需要,那么就以本篇来结尾 ...
- 安卓自定义控件(三)实现自定义View
前面两篇博客,把View绘制的方法说了一下,但是,我们只在onDraw里面做文章,控件都是直接传入一个Context,还不能在布局文件里使用自定义View.这一篇博客,就不再讲绘制,在我们原先的基础上 ...
- 安卓自定义View教程目录
基础篇 安卓自定义View基础 - 坐标系 安卓自定义View基础 - 角度弧度 安卓自定义View基础 - 颜色 进阶篇 安卓自定义View进阶 - 分类和流程 安卓自定义View进阶 - Canv ...
- Android进阶之绘制-自定义View完全掌握(二)
这是自定义View系列的第二篇博客,我们继续来学习关于自定义View的知识. 今天我们来实现一下广告条案例. 我们要实现的是这样的一个效果. 要想实现这样的效果,我们可以借助ViewPager控件,然 ...
- 【朝花夕拾】Android自定义View篇之(六)Android事件分发机制(中)从源码分析事件分发逻辑及经常遇到的一些“诡异”现象
前言 转载请注明,转自[https://www.cnblogs.com/andy-songwei/p/11039252.html]谢谢! 在上一篇文章[[朝花夕拾]Android自定义View篇之(五 ...
- 【朝花夕拾】Android自定义View篇之(一)View绘制流程
前言 转载请申明转自[https://www.cnblogs.com/andy-songwei/p/10955062.html]谢谢! 自定义View.多线程.网络,被认为是Android开发者必须牢 ...
- 【朝花夕拾】Android自定义View篇之(九)多点触控(下)实践出真知
前言 在上一篇文章中,已经总结了MotionEvent以及多点触控相关的基础理论知识和常用的函数.本篇将通过实现单指拖动图片,多指拖动图片的实际案例来进行练习并实现一些效果,来理解前面的理论知识.要理 ...
随机推荐
- 10-排序5 PAT Judge (25 分)
The ranklist of PAT is generated from the status list, which shows the scores of the submissions. Th ...
- Flask 中的 Render Redirect HttpResponse
1.Flask中的HTTPResponse 在Flask 中的HttpResponse 在我们看来其实就是直接返回字符串 2.Flask中的Redirect 每当访问"/redi" ...
- Java 并发系列之九:java 原子操作类Atomic(13个)
1. 原子更新基本类型类 2. 原子更新数组 3. 原子更新引用 4. 原子更新属性 5. txt java 原子操作类Atomic 概述 java.util.concurrent.atomic里的原 ...
- libevent笔记6:ssl bufferevent
Libevent另外提供了基于openssl的bufferevent来支持ssl,通过特殊的ssl bufferevent来对数据进行加密. ps:本文不对openssl相应的接口做介绍因为不熟 SS ...
- 【C/C++开发】C++11 并发指南三(std::mutex 详解)
本系列文章主要介绍 C++11 并发编程,计划分为 9 章介绍 C++11 的并发和多线程编程,分别如下: C++11 并发指南一(C++11 多线程初探)(本章计划 1-2 篇,已完成 1 篇) C ...
- 《Linux就该这么学》培训笔记_ch18_使用MariaDB数据库管理系统
<Linux就该这么学>培训笔记_ch18_使用MariaDB数据库管理系统 文章最后会post上书本的笔记照片. 文章主要内容: 初始化MariaDB服务 管理用户以及授权 创建数据库与 ...
- scala 项目pom示例
<?xml version="1.0" encoding="UTF-8"?> <project xmlns="http://mave ...
- 3 Linux性能优化之 CPU上下文
- List Map Set的线程安全
常见的ArrayList LinkedList HashMap TreeMap LinkedHashMap HashSet TreeSet LinkedHashSet 都是线程不安全的.如果要使用 ...
- 【chromium】 cef源码下载
至少需要17GB的磁盘空间,不光有CEF源码,还会下载chromium源码.编译master分支的话,如果编译到chromium可能会需要windows sdk,windows sdk的版本可以参考下 ...