git 详细部署及其应用
第1章 版本控制系统
自动生成备份。随时回滚。知道改动的地方。
1.1 svn和git的区别
1.1.1 svn
集中式的版本控制系统,只有一个中央数据仓库,如果中央数据库仓库挂了或者不可访问,所有的使用者无法使用svn,无法进行提交或备份文件,注意它的高可用方案。

1.1.2 git(一般是代码管理)
分布式的版本控制系统,在每个使用者电脑上就有一个完整的数据仓库,没有网络依然可以使用Git。当然为了习惯及团队协作,会将本地数据同步到Git服务器或者GitHub等代码仓库。

第2章 部署安装git
2.1 环境准备
[root@m02 ~]# cat /etc/redhat-release
CentOS Linux release 7.2.1511 (Core)
[root@m02 ~]# uname -r
3.10.0-327.el7.x86_64
[root@m02 ~]# getenforce 关闭selinux
Disabled
[root@m02 ~]# systemctl status iptables.service 关闭防火墙
● iptables.service
Loaded: not-found (Reason: No such file or directory)
Active: inactive (dead)
2.2 部署与配置
查看版本git,centos7系统自带无需安装,
[root@git ~]# rpm -qa git
git-1.8.3.1-5.el7.x86_64
安装
git 全局配置
[root@git ~]# git config --global user.name "liu" #配置git使用用户
[root@git ~]# git config --global user.email "limit678@163.com" #配置git使用邮箱
[root@git ~]# git config --global color.ui true #语法高亮
[root@git ~]# git config --list # 查看全局配置
user.name=liu
user.name=liu
user.email=limit678@163.com
color.ui=true
查看
[root@git ~]# cat .gitconfig
[user]
name = liu
email = lsx930322@163.com
[color]
ui = true
2.3 初始化Git工作目录
[root@git ~]# mkdir git_data 创建目录
[root@git ~]# cd git_data/
[root@git git_data]# git init 初始化
初始化空的 Git 版本库于 /root/git_data/.git/
[root@git git_data]# git status 查看工作区状态
# 位于分支 master
#
# 初始提交
#
无文件要提交(创建/拷贝文件并使用 "git add" 建立跟踪)
[root@git git_data]# ls -a
. .. .git
第3章 使用
3.1 创建数据提交数据
常规使用(创建数据-提交数据)
[root@git git_data]# touch README 创建文件
[root@git git_data]# git status
[root@git git_data]# git status
# 位于分支 master
#
# 初始提交
#
# 要提交的变更:
# (使用 "git rm --cached <file>..." 撤出暂存区)
#
# 新文件: README
[root@git git_data]# git add README 提交数据到暂存区域
[root@git git_data]# git commit -m 'commit README file' 将全部的暂存区域commit 提交 -m 标识一下操作记录注释信息
[master(根提交) 5ace35f] commit README file
1 file changed, 0 insertions(+), 0 deletions(-)
create mode 100644 README
[root@git git_data]# ll
总用量 0
-rw-r--r-- 1 root root 0 7月 30 14:20 README
3.2 删除暂存区域数据
3.2.1 没有提交到暂存区域
[root@git git_data]# touch test
[root@git git_data]# git status
# 位于分支 master
# 未跟踪的文件:
# (使用 "git add <file>..." 以包含要提交的内容)
#
# test
提交为空,但是存在尚未跟踪的文件(使用 "git add" 建立跟踪)
[root@git git_data]# rm -f test
[root@git git_data]# git status
# 位于分支 master
无文件要提交,干净的工作区
3.2.2 对已经提交到暂存区域
第一种:只移除暂存
[root@git git_data]# touch test
[root@git git_data]# git add *
[root@git git_data]# git status
# 位于分支 master
# 要提交的变更:
# (使用 "git reset HEAD <file>..." 撤出暂存区)
#
# 新文件: test
#
[root@git git_data]# git rm --cached test
rm 'test'
[root@git git_data]# git status
# 位于分支 master
# 未跟踪的文件:
# (使用 "git add <file>..." 以包含要提交的内容)
#
# test
提交为空,但是存在尚未跟踪的文件(使用 "git add" 建立跟踪)
第二种:彻底删除
[root@git git_data]# git status
# 位于分支 master
# 要提交的变更:
# (使用 "git reset HEAD <file>..." 撤出暂存区)
#
# 新文件: test
#
[root@git git_data]# ll
总用量 0
-rw-r--r-- 1 root root 0 7月 30 14:20 README
-rw-r--r-- 1 root root 0 7月 30 14:37 test
[root@git git_data]# git rm -f test
rm 'test'
[root@git git_data]# ll
总用量 0
-rw-r--r-- 1 root root 0 7月 30 14:20 README
3.3 重命名
3.3.1 针对于没有提交到暂存区域的
[root@git git_data]# touch test1
[root@git git_data]# git status
# 位于分支 master
# 未跟踪的文件:
# (使用 "git add <file>..." 以包含要提交的内容)
#
# test1
提交为空,但是存在尚未跟踪的文件(使用 "git add" 建立跟踪)
[root@git git_data]# mv test1 test2 直接mv改掉
[root@git git_data]# git status
# 位于分支 master
# 未跟踪的文件:
# (使用 "git add <file>..." 以包含要提交的内容)
#
# test2
提交为空,但是存在尚未跟踪的文件(使用 "git add" 建立跟踪)
3.3.2 针对于已经提价到暂存区域
[root@git git_data]# git status
# 位于分支 master
# 要提交的变更:
# (使用 "git reset HEAD <file>..." 撤出暂存区)
#
# 新文件: test2
#
[root@git git_data]# git mv test2 test3
[root@git git_data]# git status
# 位于分支 master
# 要提交的变更:
# (使用 "git reset HEAD <file>..." 撤出暂存区)
#
# 新文件: test3
3.4 日志查看
[root@git git_data]# git log
commit 5ace35f60f1cbc2d5230c7ad161dfa6a54d029a1
Author: liu <limit678@163.com>
Date: Mon Jul 30 14:25:32 2018 +0800
commit README file
=======================================================
[root@git git_data]# git log
commit 5ace35f60f1cbc2d5230c7ad161dfa6a54d029a1
Author: liu <limit678@163.com>
Date: Mon Jul 30 14:25:32 2018 +0800
commit README file
[root@git git_data]# git commit -m 'test'
[master 9d317a9] test
1 file changed, 0 insertions(+), 0 deletions(-)
create mode 100644 test3
[root@git git_data]# git log
commit 9d317a98495ff5eaab92659c840fffc4d6553288
Author: liu <limit678@163.com>
Date: Mon Jul 30 14:51:10 2018 +0800
test
commit 5ace35f60f1cbc2d5230c7ad161dfa6a54d029a1
Author: liu <limit678@163.com>
Date: Mon Jul 30 14:25:32 2018 +0800
commit README file
3.4.1 修改添加内容
[root@git git_data]# echo "ok" >> README
[root@git git_data]# git status
# 位于分支 master
# 尚未暂存以备提交的变更:
# (使用 "git add <file>..." 更新要提交的内容)
# (使用 "git checkout -- <file>..." 丢弃工作区的改动)
#
# 修改: README
#
修改尚未加入提交(使用 "git add" 和/或 "git commit -a")
[root@git git_data]# git commit -a -m 'modified README' -a ==add
[master 5fb8615] modified README
1 file changed, 1 insertion(+)
[root@git git_data]# git status
# 位于分支 master
无文件要提交,干净的工作区
[root@git git_data]# git log
commit 5fb86152408a9f5efef540e9baba9e2c5796f3e6
Author: liu <limit678@163.com>
Date: Mon Jul 30 14:53:48 2018 +0800
modified README
=================================================================================
[root@git git_data]# touch liu/liu1
[root@git git_data]# mv liu/liu1 liu/liu1.txt git 中默认不能提交空目录
[root@git git_data]# git status
# 位于分支 master
# 未跟踪的文件:
# (使用 "git add <file>..." 以包含要提交的内容)
#
# liu/
提交为空,但是存在尚未跟踪的文件(使用 "git add" 建立跟踪)
[root@git git_data]# git commit -a -m 'commit liu/liu1.txt'
[master a3658d4] commit liu/liu1.txt
1 file changed, 0 insertions(+), 0 deletions(-)
create mode 100644 liu/liu1.txt
[root@git git_data]# git status
# 位于分支 master
无文件要提交,干净的工作区
[root@git git_data]# git log
commit a3658d4f9ad7b50ce9d2256defce802fe19b2540
Author: liu <limit678@163.com>
Date: Mon Jul 30 14:59:10 2018 +0800
commit liu/liu1.txt
3.4.2 git log参数
git log #→查看提交历史记录
git log -2 #→查看最近几条记录
git log -p -1 #→-p显示每次提交的内容差异,例如仅查看最近一次差异
git log --stat -2
#→--stat简要显示数据增改行数,这样能够看到提交中修改过的内容,对文件添加或移动的行数,并在最后列出所有增减行的概要信息
git log --pretty=oneline #→--pretty根据不同的格式展示提交的历史信息
git log --pretty=fuller -2 #→以更详细的模式输出提交的历史记录
git log --pretty=fomat:"%h %cn" #→查看当前所有提交记录的简短SHA-1哈希字串与提交者的姓名,其他格式如下。
#→还可以使用format参数来指定具体的输出格式,这样非常便于后期编程的提取分析哦,常用的格式有:
%s 提交说明。
%cd 提交日期。
%an 作者的名字。
%cn 提交者的姓名。
%ce 提交者的电子邮件。
%H 提交对象的完整SHA-1哈希字串。
%h 提交对象的简短SHA-1哈希字串。
%T 树对象的完整SHA-1哈希字串。
%t 树对象的简短SHA-1哈希字串。
%P 父对象的完整SHA-1哈希字串。
%p 父对象的简短SHA-1哈希字串。
%ad 作者的修订时间。
3.5 历史还原
Git服务程序中有一一个叫做HEAD的版本指针,当用户申请还原数据时,其实就是将HEAD指针指向到某个特定的提交版本,但是因为Git是分布式版本控制系统,为了避免历史记录冲突,故使用了SHA-1计算出十六进制的哈希字串来区分每个提交版本,另外默认的HEAD版本指针会指向到最近的一次提交版本记录,而上一个提交版本会叫HEADA ,上上一个版本则会叫做HEADAA ,当然一般会用HEAD~5来表示往 上数第五个提交版本。
git reset --hard HEAD^ #→还原历史提交版本上一次
git reset --hard 3de15d4 #→找到历史还原点的SHA-1值后,就可以还原(值不写全,系统会自动匹配)
===============================================================================================
[root@git git_data]# git log --pretty=oneline
a3658d4f9ad7b50ce9d2256defce802fe19b2540 commit liu/liu1.txt
5fb86152408a9f5efef540e9baba9e2c5796f3e6 modified README
9d317a98495ff5eaab92659c840fffc4d6553288 test
5ace35f60f1cbc2d5230c7ad161dfa6a54d029a1 commit README file
[root@git git_data]# git reset --hard HEAD^
HEAD 现在位于 5fb8615 modified README
[root@git git_data]# git log --pretty=oneline
5fb86152408a9f5efef540e9baba9e2c5796f3e6 modified README
9d317a98495ff5eaab92659c840fffc4d6553288 test
5ace35f60f1cbc2d5230c7ad161dfa6a54d029a1 commit README file
=================================================================================================
[root@git git_data]# git reset --hard 5ace3
HEAD 现在位于 5ace35f commit README file
[root@git git_data]# git log --pretty=oneline
5ace35f60f1cbc2d5230c7ad161dfa6a54d029a1 commit README file
3.6 还原到未来的数据(查找版本号)
[root@git git_data]# git reflog
5ace35f HEAD@{0}: reset: moving to 5ace3
5fb8615 HEAD@{1}: reset: moving to HEAD^
a3658d4 HEAD@{2}: commit: commit liu/liu1.txt
5fb8615 HEAD@{3}: commit: modified README
9d317a9 HEAD@{4}: commit: test
5ace35f HEAD@{5}: commit (initial): commit README file
3.7 标签的使用
git tag V1.0 #→当前提交内容打一个标签(方便快速回滚),每次提交都可以打个tag。
git tag #→查看当前所有的标签
git show V1.0 #→查看当前1.0版本的详细信息
git tag v1.2 -m "version 1.2 release is test" #→创建带有说明的标签,-a指定标签名字,-m指定说明文字
git tag -d v1.0 #→我们为同一个提交版本设置了两次标签,删除之前的v1.0
=============================================================================================
[root@git git_data]# git tag V1.0
[root@git git_data]# git tag
V1.0
[root@git git_data]# git reset --hard V1.0
HEAD 现在位于 5ace35f commit README file
默认给当前commit打标记。每次commit之后跟着直接打一个标记,
3.8 对比数据
git diff可以对比当前文件与仓库已保存文件的区别,知道了对README作了什么修改后再把它提交到仓库就放心多了。
git diff README
[root@git git_data]# git diff README 没有改动执行命令没有反应为空
[root@git git_data]# echo "liu" >> README
[root@git git_data]# git diff README
diff --git a/README b/README
index e69de29..86c8bbd 100644
--- a/README
+++ b/README
@@ -0,0 +1 @@
+liu 看到添加了liu
第4章 分支管理
4.1 分支结构
在实际的项目开发中,尽量保证master分支稳定,仅用于发布新版本,平时不要随便直接修改里面的数据文件。
那在哪干活呢?干活都在dev分支上。每个人从dev分支创建自己个人分支,开发完合并到dev分支,最后dev分支合并到master分支。所以团队的合作分支看起来会像下图那样。
4.2
创建分支
[root@git git_data]# git branch liu2 创建liu2分支
[root@git git_data]# git branch 查看分支
liu1
liu2
* master
[root@git git_data]# git checkout
liu2 切换分支
M README
切换到分支 'liu2'
[root@git git_data]# git branch
liu1
* liu2
master
==============================================================================
我们在liu2或者liu1中做的任何操作都不不会影响到master分支的内容如下:
[root@git git_data]# echo "laolihaili"
>> README
[root@git git_data]# git commit -a -m 'commit
branch liu2 README add '
[liu2 aa9cb36] commit branch liu2 README add
1 file
changed, 2 insertions(+)
[root@git git_data]# cat README
liu
laolihaili
[root@git git_data]# git checkout master
切换到分支 'master'
[root@git git_data]# cat README
4.3
自动合并分支
想把liu1的工作成果合并到master分支上;
先切换到master分支
git merge
liu1 合并Liu1分支至master查看合并的文件
git branch -d liu1确认合并完成后,可以放心地删除Linux分支。
[root@git git_data]# git checkout master
D README
Switched to branch 'master'
[root@git git_data]# cat liu1
cat: liu1: No such file or directory
[root@git git_data]# ll
total 0
[root@git git_data]# git branch
limit
* master
[root@git git_data]# git checkout limit
D README
Switched to branch 'limit'
[root@git git_data]# ll
total 4
-rw-r--r-- 1 root root 11 Jul 30 17:30 liu1
[root@git git_data]# cat liu1
laoliahile
[root@git git_data]# git checkout master
D README
Switched to branch 'master'
[root@git git_data]# git merge limit
Updating 064fa6d..1f2ac75
Fast-forward
liu1 | 1 +
1 file
changed, 1 insertion(+)
create mode
100644 liu1
==============================================================================
删除分支
[root@git git_data]# git branch limit2
[root@git git_data]# git branc
git: 'branc' is not a git command. See 'git
--help'.
[root@git git_data]# git branch
limit
limit2
* master
[root@git git_data]# git branch -d limit2
Deleted branch limit2 (was 1f2ac75).
[root@git git_data]# git branch
limit
* master
4.4
手动合并分支
针对于同目录同文件同地点同行会有代码冲突,此时需要我们去更改文件从新commit
[root@git git_data]# git branch
limit
* master
[root@git git_data]# git status
# On branch master
# Changes to be committed:
# (use
"git reset HEAD <file>..." to unstage)
#
# deleted: README
#
[root@git git_data]# echo "test 1" >> liu1
[root@git git_data]# git commit -a -m 'master
branch add to liu1'
[master 5d3f052] master branch add to liu1
2 files
changed, 1 insertion(+), 1 deletion(-)
delete mode
100644 README
[root@git git_data]# git status
# On branch master
nothing to commit, working directory clean
[root@git git_data]# git checkout limit
Switched to branch 'limit'
[root@git git_data]# git branch
* limit
master
[root@git git_data]# echo "test 2"
>> liu1
[root@git git_data]# git commit -a -m 'limit
branch add to liu1'
[limit f465039] limit branch add to liu1
1 file
changed, 1 insertion(+)
[root@git git_data]# git status
# On branch limit
nothing to commit, working directory clean
[root@git git_data]# git checkout master
Switched to branch 'master'
[root@git git_data]# git branch
limit
* master
[root@git git_data]# cat liu1
laoliahile
<<<<<<< HEAD
test 1
=======
test 2
>>>>>>> limit
[root@git git_data]# vim liu1
[root@git git_data]# git merge limit
Auto-merging liu1
CONFLICT (content): Merge conflict in liu1
Automatic merge failed; fix conflicts and then
commit the result.
[root@git git_data]# git commit -a -m 'merge by
hand'
[master 4b6de67] merge by hand
[root@git git_data]# git status
# On branch master
nothing to commit, working directory clean
[root@git git_data]# cat liu1
laoliahile
test 1
test 2
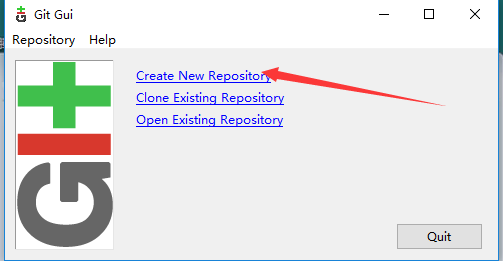
第5章 windowns 使用git
5.1
介绍安装部署
软件下载地址:https://github.com/git-for-windows/git/releases/download/v2.15.1.windows.2/Git-2.15.1.2-64-bit.exe
windowns 的git ,本质是Windows上的Linux系统
TortoiseGit-2.2.0.0-64bit
给git加上一个外壳,svn客户端的git版本
5.2
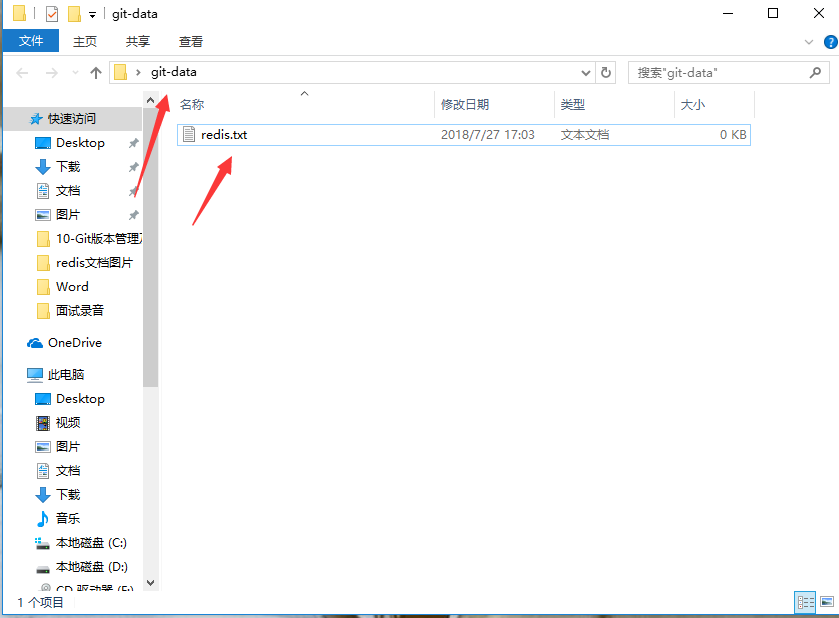
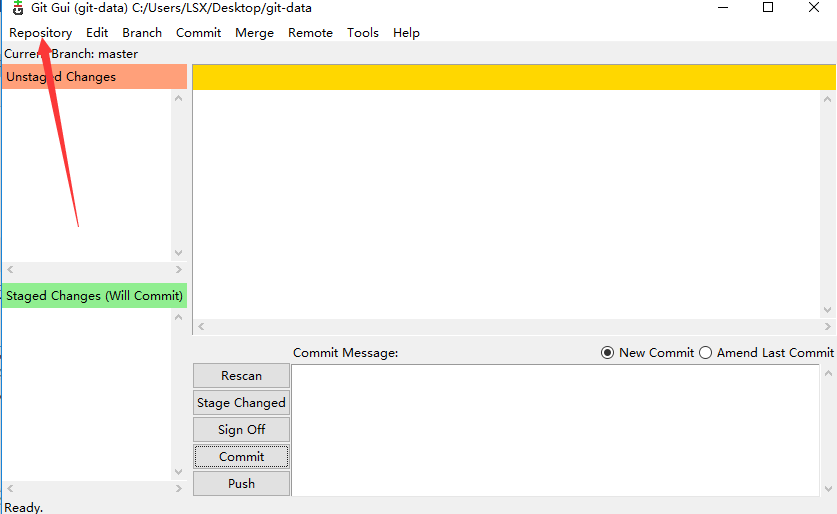
创建新的仓库

添加文件到git-data
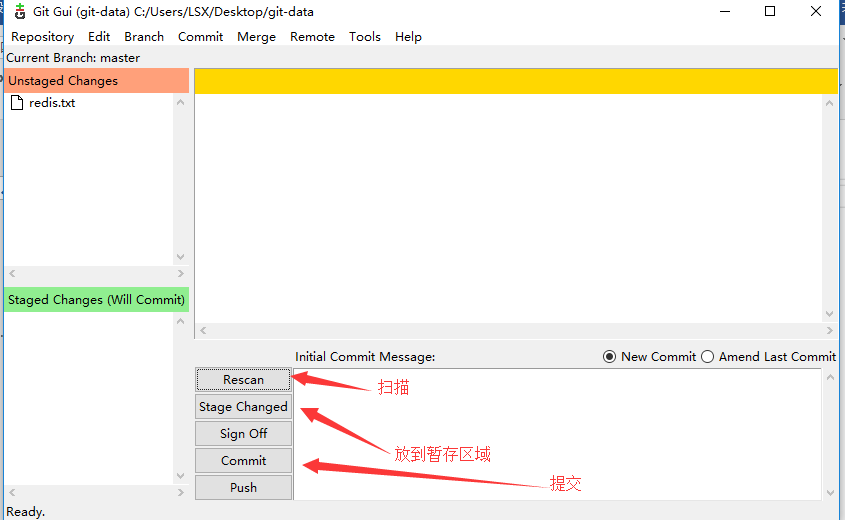
查看历史版本
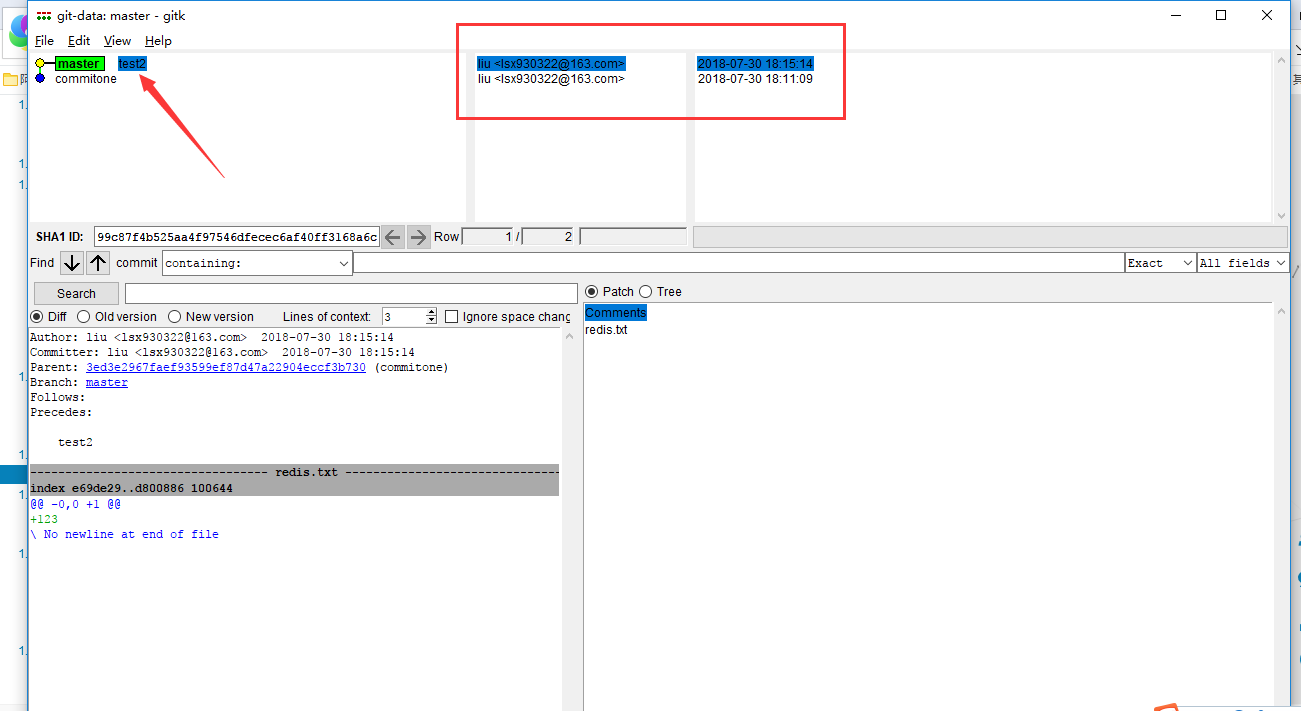
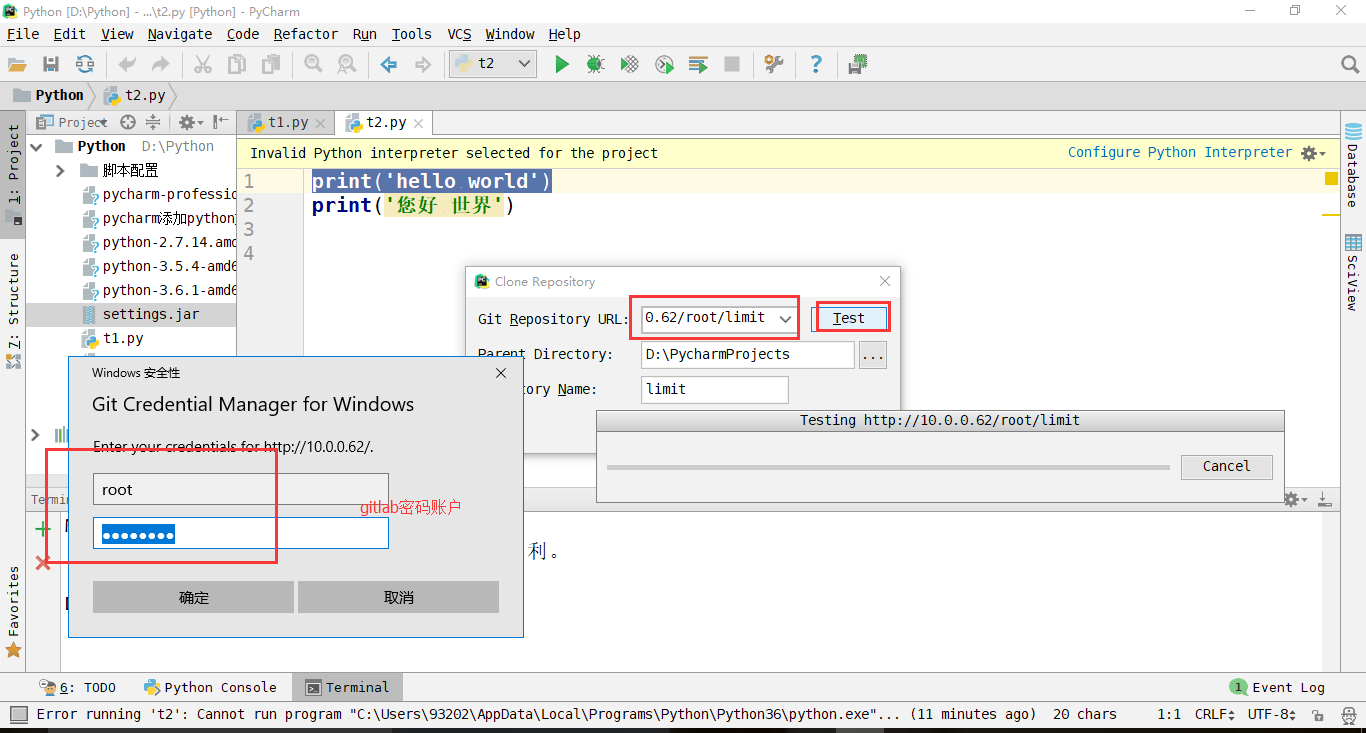
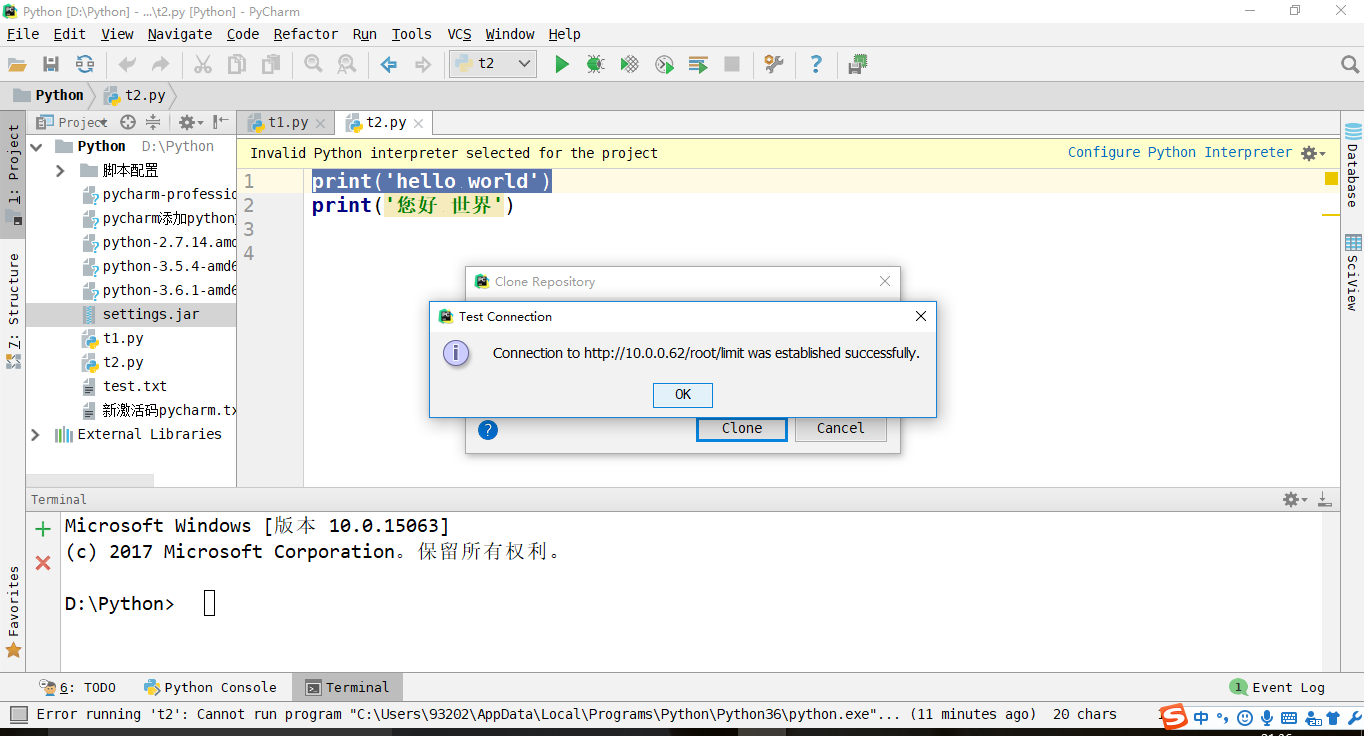
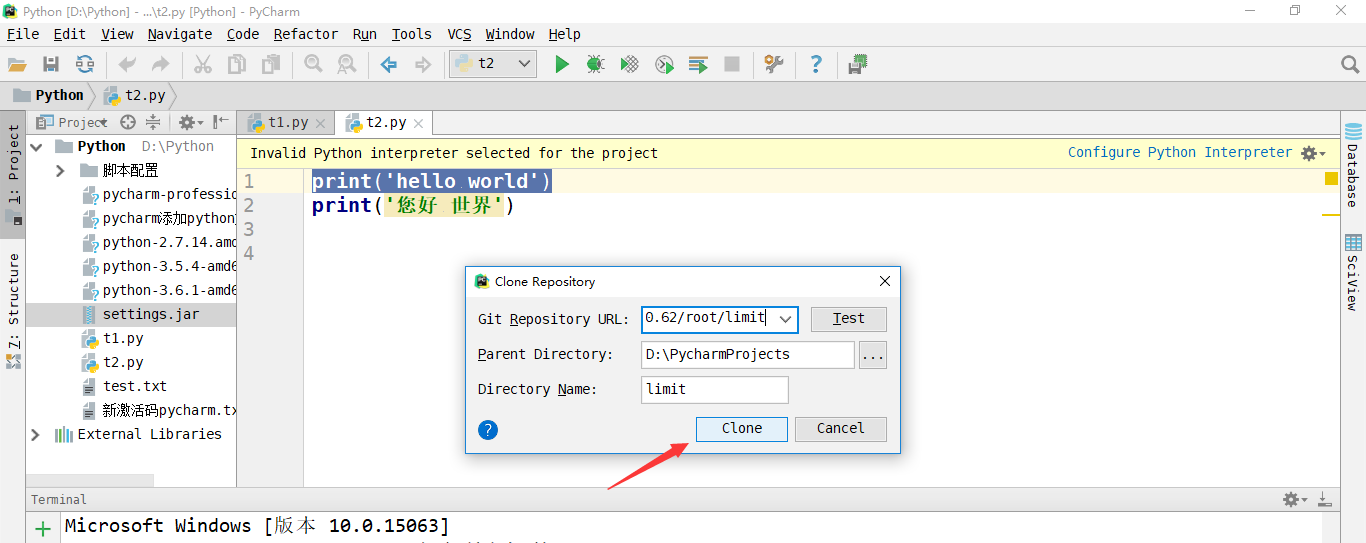
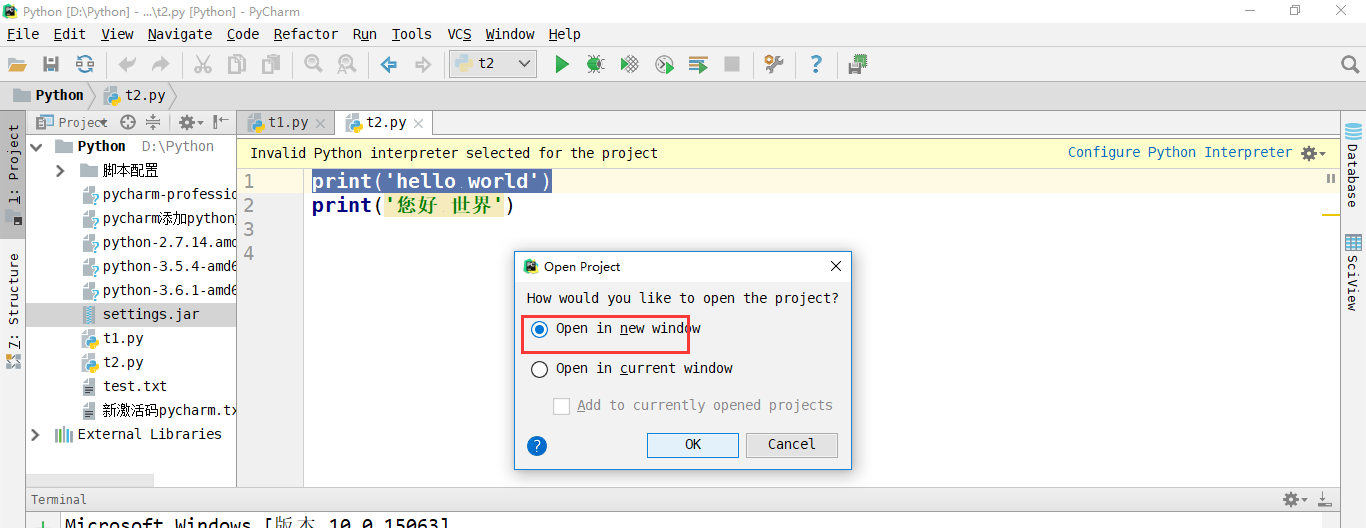
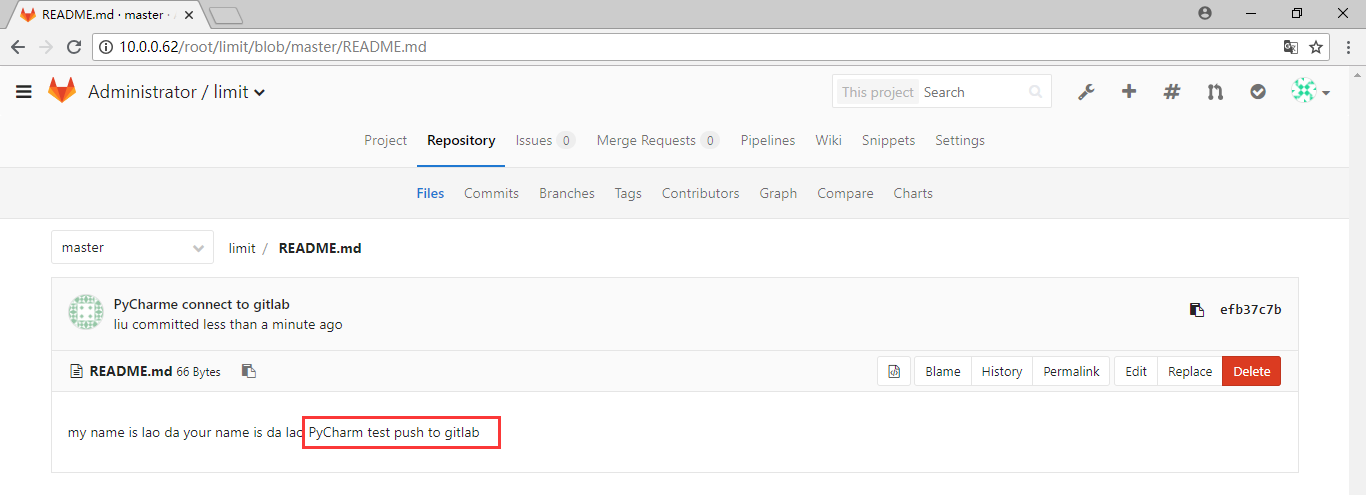
第6章 链接PyCharme


提交

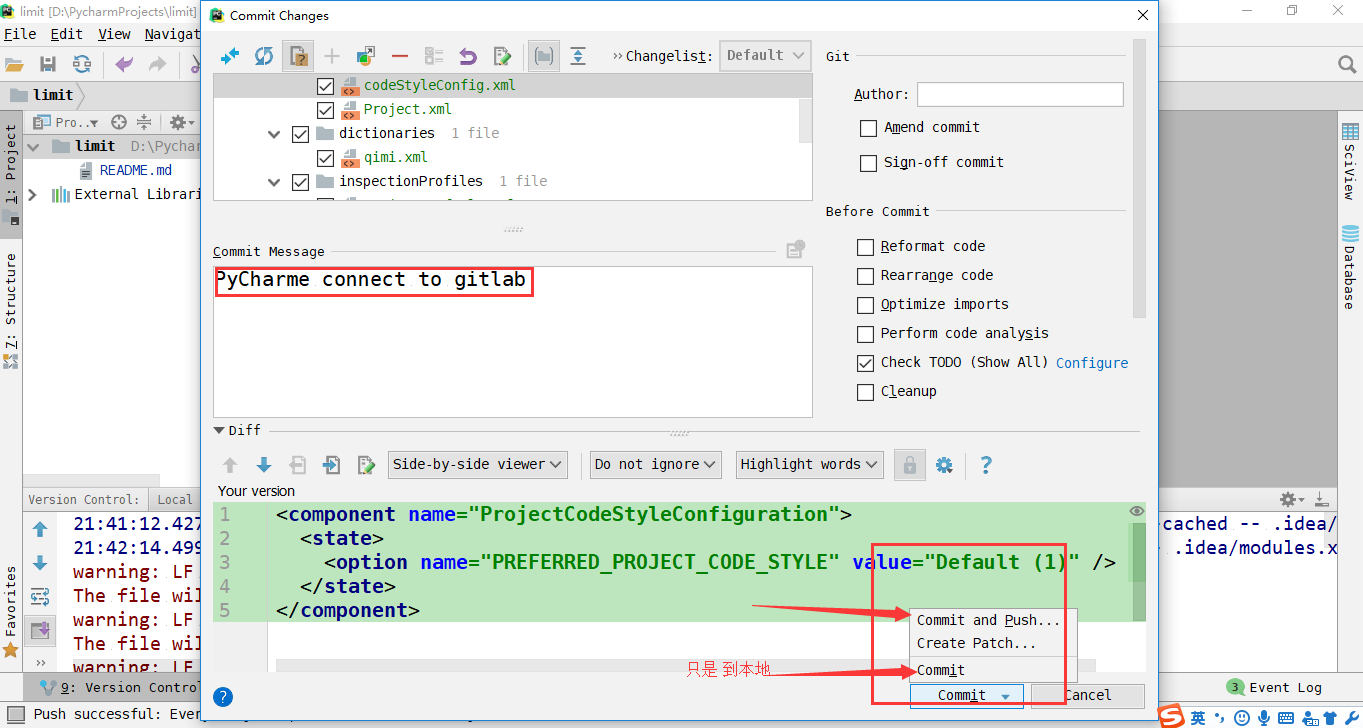
gitlab web界面显示
6.1 PyCharm创建分支branch
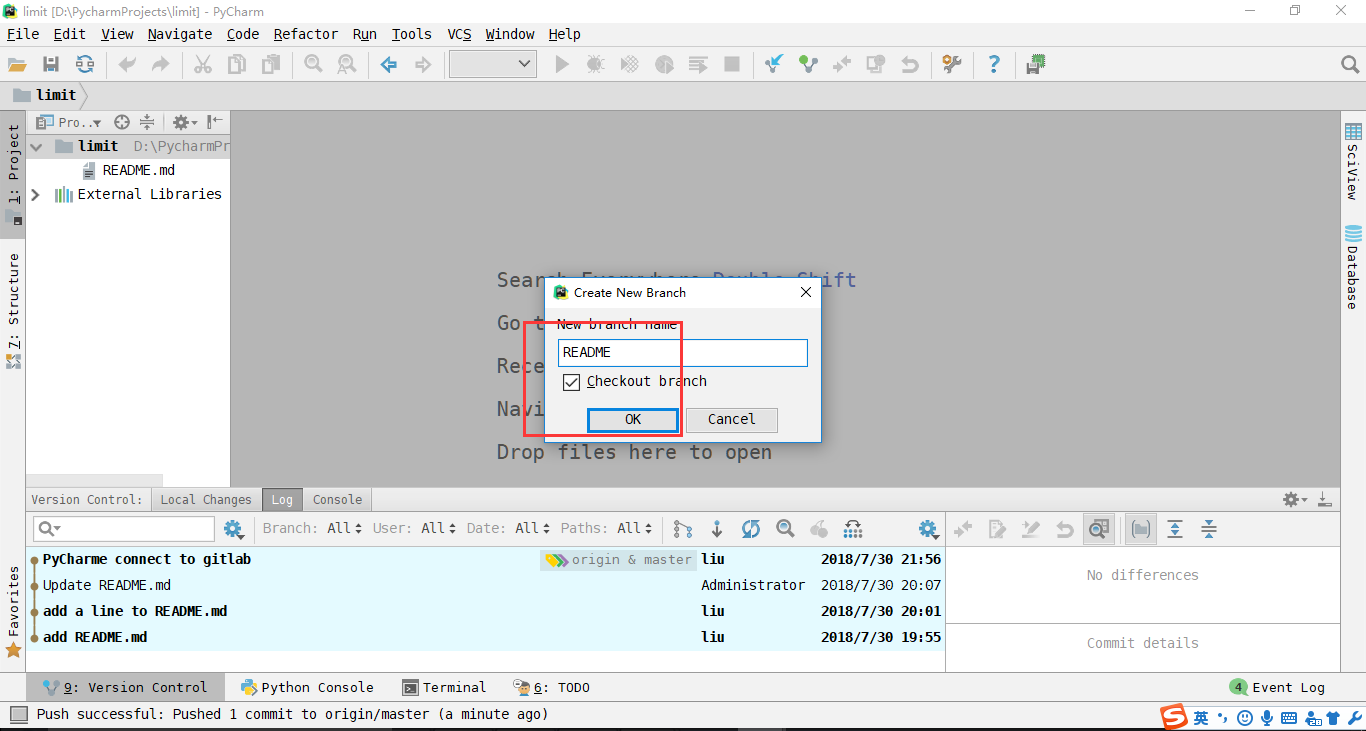
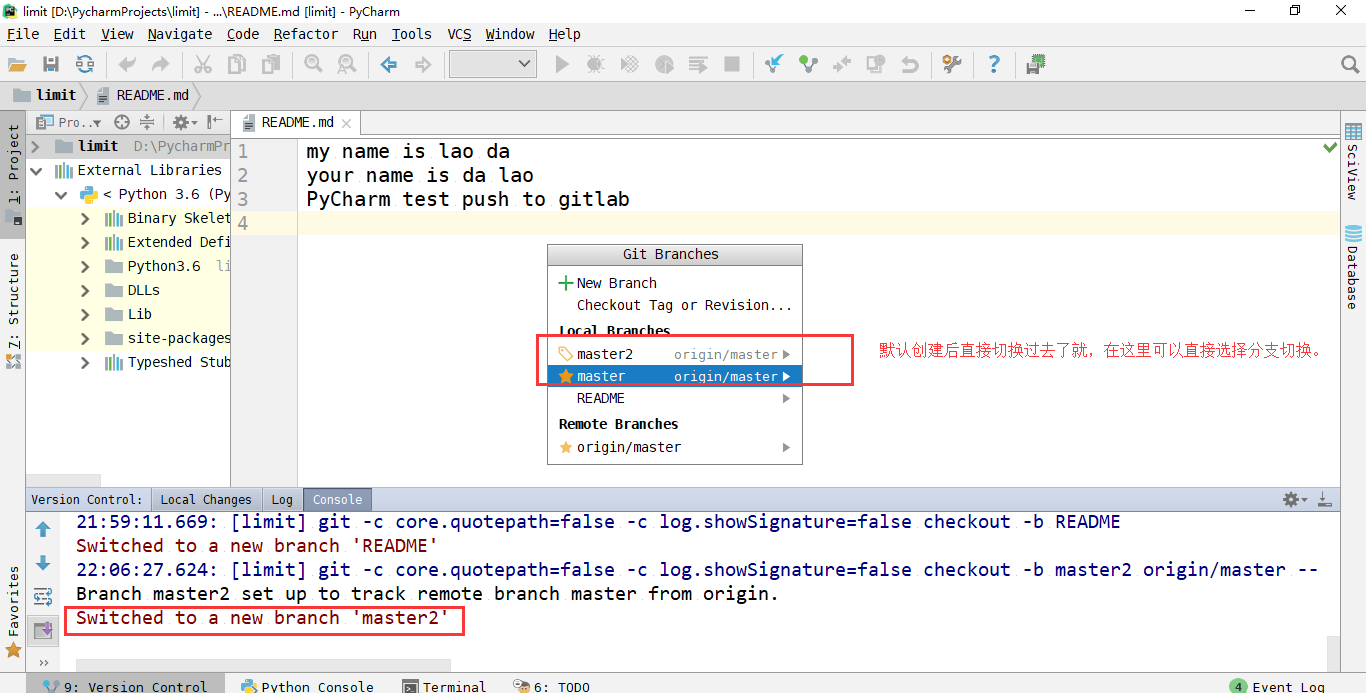
master分支的内容
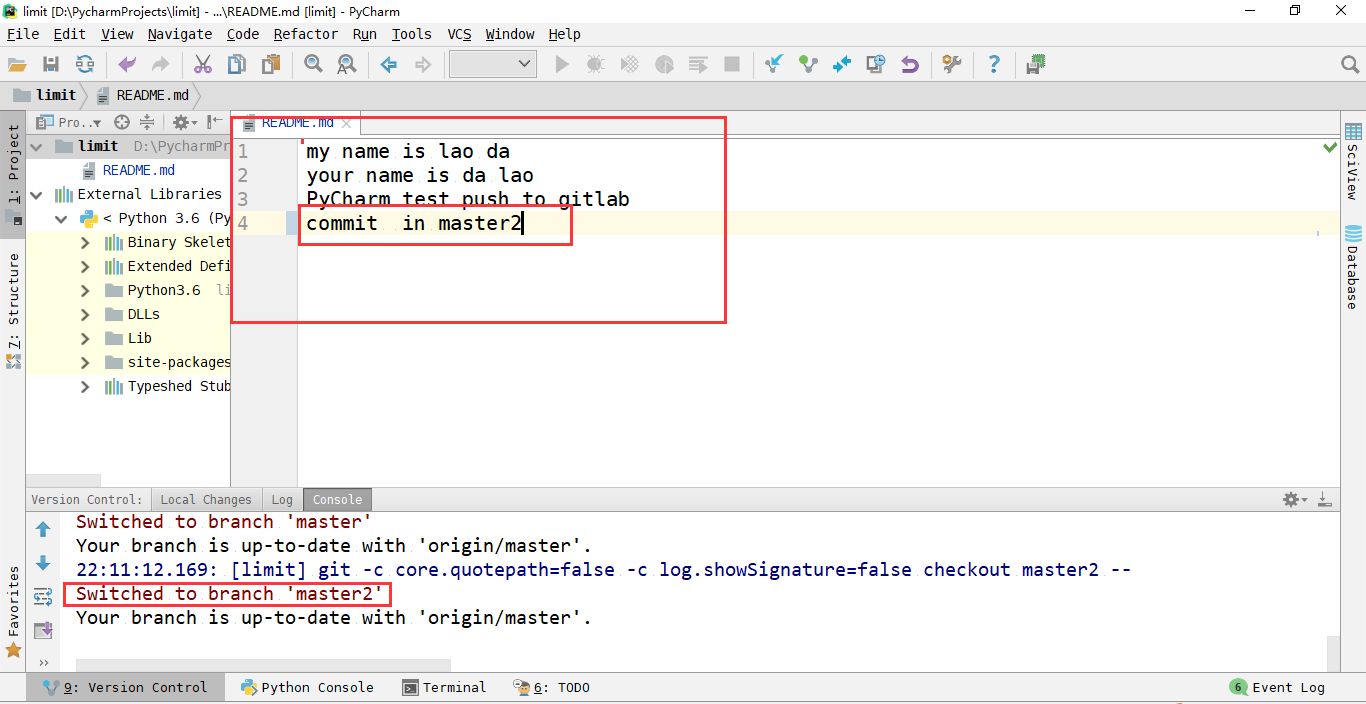
切换到master分支

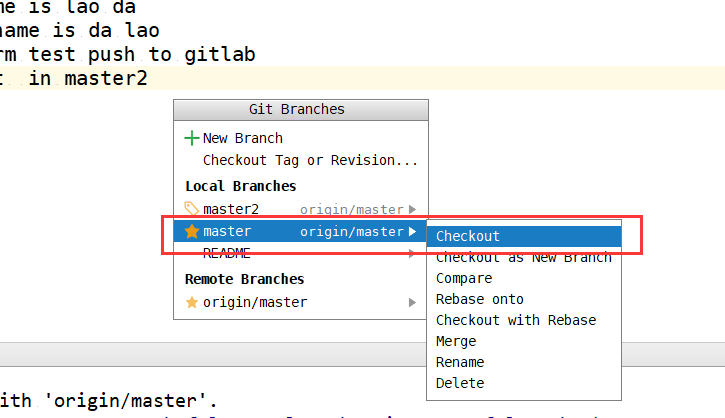

可以看到不同分支的内容不同。
git 详细部署及其应用的更多相关文章
- git开发部署流程
git的分支操作 https://blog.csdn.net/QH_JAVA/article/details/77853605 Git 开发部署流程 采用业界成熟方案 Git Flow 分支方式进行开 ...
- Git详细操作
Git详细操作 一.本地配置 1公钥钥配置 1.参考帮助文档:https://gitee.com/help/ 仓库管理 =公钥管理 =生成/添加SSH公钥 ssh-keygen -t rsa -C & ...
- 自动化运维工具Ansible详细部署 (转载)
自动化运维工具Ansible详细部署 标签:ansible 原创作品,允许转载,转载时请务必以超链接形式标明文章 原始出处 .作者信息和本声明.否则将追究法律责任.http://sofar.blog. ...
- git详细教程
Table of Contents 1 Git详细教程 1.1 Git简介 1.1.1 Git是何方神圣? 1.1.2 重要的术语 1.1.3 索引 1.2 Git安装 1.3 Git配置 1.3.1 ...
- Git自动部署
Git自动部署文件位于repository下面的hooks里的post-receive #!/bin/sh set -e git-update-server-info gitosis-run-hook ...
- 极速地将git项目部署到SAE的svn服务器上
本文最初发布于我的个人博客:http://jerryzou.com/posts/gitForSAE/ 我花了一些时间自己写了一个能够极速地将一个git项目部署到SAE的svn服务器上的脚本.代码不是复 ...
- 自动化运维工具Ansible详细部署 - 人生理想在于坚持不懈 - 51CTO技术博客
自动化运维工具Ansible详细部署 - 人生理想在于坚持不懈 - 51CTO技术博客 自动化运维工具Ansible详细部署
- git一键部署代码到远程服务器(linux)(采坑总结)
原来一直使用FileZilla来代码部署,去年使用git,代码版本管理,真TM好用,一起回顾下历程! 一. 代码部署方式及思路: 1. 使用FTP/SFTP工具,上传代码 2. git人工部署.1. ...
- Git学习系列之Windows上安装Git详细步骤(图文详解)
前言 最初,Git是用于Linux下的内核代码管理.因为其非常好用,目前,已经被成功移植到Mac和Windows操作系统下. 鉴于大部分使用者使用的是Windows操作系统,故,这里详细讲解Windo ...
随机推荐
- [K/3Cloud] 代码中设置某个字段必录
Control ctl = this.GetControl(fieldKey); FieldEditor editCtl = ctl as FieldEditor; if (editCtl != nu ...
- POJ 3415 (后缀自动机)
POJ 3415 Common Substrings Problem : 给两个串S.T (len <= 10^5), 询问两个串有多少个长度大于等于k的子串(位置不同也算). Solution ...
- BootStrap3栅格系统与布局
栅格系统与布局 Use our powerful mobile-first flexbox grid to build layouts of all shapes and sizes thanks t ...
- Network-POJ3694(最小公共祖先LCA+Tarjin)
http://poj.org/problem?id=3694 这一题 为什么要找最小祖先呢 当两个节点连到一块的时候 找最小公共节点就相当于找强连通分支 再找最小公共节点的过程中直到找到 这个过 ...
- Spring Cloud体系实现标签路由
如果你正在使用Spring Cloud体系,在实际使用过程中正遇到以下问题,可以阅读本文章的内容作为后续你解决这些问题的参考,文章内容不保证无错,请务必仔细思考之后再进行实践. 问题: 1,本地连上开 ...
- 中高级前端应该必会,js实现事件委托代理、切换样式、元素获取相对于文档位置等
1.介绍 随着组件开发大流行,现在三大框架已经基本占领了整个前端. 这时候,我们要是引入一个 jq 是不是先得你的项目非常臃肿,jq 也很不适合. 这个时候,你就需要来增加你 js 的功底. 2.各种 ...
- yarn之安装依赖包
安装依赖关系 yarn install用于安装项目的所有依赖项.依赖关系从您的项目package.json文件中检索,并存储在yarn.lock文件中. 开发包时,安装依赖关系最常见的是在 您刚刚检出 ...
- Linux VSFTP服务器
Linux VSFTP服务器 一.Linux FTP服务器分类: <1>wu-ftp <2>proftp=profession ftp <3>vsftp=very ...
- [转] CVonline: Image Databases
转自:CVonline by Robert Fisher 图像数据库 Index by Topic Action Databases Biological/Medical Face Databases ...
- 单点登录之CAS简介
cas官网http://www.ja-sig.org/products/cas/. ok,如今開始本文的重点内容解说,先来了解一下cas 实现single sign out的原理,如图所看到的: ...