LDO current regulator for power LED
LDO current regulator for power LED
Challenge
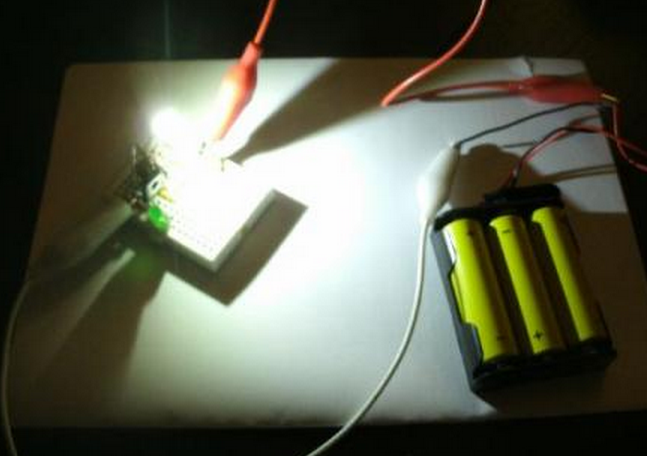
You've got a power LED? Great! Build a flash light!
What does the spec say? "Voltage: 3.6 .. 3.8 V, power 3 W." Okay. This means that it draws some 800 mA. Three mignon cells give 4.5 V for at least three hours. So we add a resistor of 1.2 Ohm and we are safe. If the LED runs at 3.6 V this gives 750 mA and 2.8 W while the resistor voltage is 0.9 V resulting in 0.675 W for the resistor. So we take a resistor that can stand 1 W. Simple, isn't it?
Yes and no. The LED in this simple circuit will glow but what happens if voltage drops because batteries go flat? If voltage drops by 10 % you'll get 4.05 V and current drops by some 50 % meaning that you need rather full batteries to get a reasonable amount of light from your LED. First idea is to put a voltage regulator between the batteries and the circuit and adapt the resistor to its output voltage. However, finding a suitable regulator is tricky. You need a low dropout voltage to let the LED work at full brightness when batteries voltage becomes low.
BJT Current Limiter
We can do better! To stabilize brightness we have to regulate the power consumption of the LED by controlling the current. Wikipedia [1] shows a simple circuit of two transistors and three resistors limiting current independent of supply voltage. We change this circuit by removing resistor R2 which is not really needed. What about dropout voltage? Clearly, there is VCEsat of Q2 which can be in the area of 0.2 V at current around 1 A (for BC640, BD13x, BD23x, BD43x...). However, there is the additional voltage of the emitter resistor which equals VBEon of Q1, typically some 0.7 .. 0.9 V. So we get a total dropout voltage of VBEon1 + VCEsat2 resulting in some 1.0 V.
This dropout voltage is too high for three mignon cells. If you are not keen on energy efficiency and ready to carry four mignon cells then you are done.
Rail to Rail Operational Amplifier
But we can do even more better! The two transistor current limiter is a control loop sensing the current by a resistor and keeping the voltage equal to VBE of a transistor. What about reducing this voltage? There are operational amplifiers with rail to rail input and output meaning that they can handle voltages from VSS to VDD. There are numerous such parts like the MC33201.
Have a look at this current limiter circuit in Wikipedia [2]. Voltage over the sense resistor is kept equal to voltage over z-diode. Okay, there are no z-diodes of really low voltage. Since the amplifier has high input impedance we can use a voltage regulator and simply reduce the voltage using a voltage divider.

One point still to notice is output current of the amplifier. If we use a BD139 transistor this will give us a current gain of 40 or more meaning that the amplifier has to deliver 20 mA which is okay for the MC33201. If the transistor needs higher base current than the amplifier can deliver we have to at an emitter follower between amplifier and transistor.
In our 3 W LED example we can use a resistor of 0.33 Ohm delivering a voltage of some 0.25 V in operation which can be handled by the op amp. Now add VCEsat of 0.2 V and get less than .5 V dropout. Okay, this is a little cheating becuse VCEsat would requires 80 mA which won't be delivered by an MC33201.
Dimming
Brightness can be controlled by reference voltage. Simply use a potentiometer as voltage divider. Or connect the amplifier input to another circuit like a multivibrator to flash the light or to some rectifier and low pass for a light organ.
Future Work
If we are controlling brightness using a mirocontroller with ADC and DAC or PWM we can even drop the Op Amp. Feedback voltage will be digitized by the ADC, then a PID program computes output voltage and DAC or PWM with RC low pass control power transistor. This gives opportunity for additional functionality like touch pad control, remote control, or automatices.
Using a MOSFET instead of a BJT might further reduce dropout voltage. For instance, MCP87xx have very low RDS and low threshold voltage making them suitable also for the microcontroller idea running the controller at 2 V or so.
Final Remarks
There is an instructable [3] showing how to build a power LED driver. This article mainly describes a discrete circuit similar to the two BJT circuit in [1] but with Q2 replaced by a power MOS transistor. MOS transistos can give lower dropout voltage but we need really high power high price transistor.
References
[1] Current limiting http://en.wikipedia.org/wiki/Current_limiting#Single_Power-supply_circuits
[2] Op-amp current sources http://en.wikipedia.org/wiki/Current_source#Op-amp_current_sources
[3] High Power LED Driver Circuits http://www.instructables.com/id/Circuits-for-using-High-Power-LED-s/step6/The-new-stuff-Constant-Current-Source-1/
LDO current regulator for power LED的更多相关文章
- Linux regulator framework(1) - 概述【转】
转自蜗窝科技:http://www.wowotech.net/pm_subsystem/regulator_framework_overview.html 1. 前言 Regulator,中文名翻译为 ...
- ADC Power Supplies
http://www.planetanalog.com/author.asp?section_id=3041&doc_id=563055 Jonathan Harris, Product Ap ...
- Linux下Power Management开发总结
本文作为一个提纲挈领的介绍性文档,后面会以此展开,逐渐丰富. 1. 前言 在 <开发流程>中介绍了PM开发的一般流程,重点是好的模型.简单有效的接口参数.可量化的测试环境以及可独性强的输出 ...
- Linux电源管理-Linux regulator framework概述
前言 1. 什么是regulator? regulator翻译为"调节器",分为voltage regulator(电压调节器)和current(电流调节器).一般电源 ...
- Current Sourcing (拉電流) and Current Sinking(灌電流)
Current Sourcing and Sinking Current sourcing and sinking is often mentioned in relation to electron ...
- 5、regulator系统的概念及测试
概念:Regulator : 电源芯片, 比如电压转换芯片Consumer : 消费者,使用电源的部件, Regulator是给Consumer供电的machine : 单板,上面焊接有Regulat ...
- 2019.1.3 WLAN 802.11 a/b/g PHY Specification and EDVT Measurement II - Transmit Spectrum Mask & Current Consumption
Transmit Spectrum Mask Specification – 802.11b SpecificationFor 802.11b 18.4.7.3The transmitted spec ...
- 8. [mmc subsystem] host(第二章)——sdhci
一.sdhci core说明 1.sdhci说明 具体参考<host(第一章)--概述> SDHC:Secure Digital(SD) Host Controller,是指一套sd ho ...
- linux kernel menuconfig【转载】
原文网址:http://www.cnblogs.com/kulin/archive/2013/01/04/linux-core.html Linux内核裁减 (1)安装新内核: i)将新内核copy到 ...
随机推荐
- iOS 根据生日得到生肖,星座,年龄的算法
根据用户生日,得到相应的年龄,星座和生肖.有的项目中可能会用到,贴出来共享. 得到年龄,这个很简单了: - (void)getAgeWith:(NSDate*)birthday{ //日历 NSCal ...
- [转]hisi mmz模块驱动讲解
一.概述 如图所示,在海思平台上将内存分为两个部分:os内存和mmz内存.os内存指:由linux操作系统管理的内存:mmz内存:由mmz驱动模块进行管理供媒体业务单独使用的内存,在驱动加载时可以指定 ...
- linux 图形配置网络
命令:setup 打开网络等系统信息的图形配置 yyp复制 vi /etc/sysconfig/network-scripts/ifcfg-eth0 配置网络参数 重启网卡:/etc/init.d/n ...
- Quartus II 安装教程—FPGA入门教程【钛白Logic】
Quartus II 工具安装一般分为两个部分,首先是开发工具本身的安装,其次就是器件库的安装,我们可以根据我们的需要选择相应的器件库来安装,这里我们使用Cyclone IV的FPGA,即安装Cycl ...
- swapper进程【转】
转自:https://blog.csdn.net/qq_27357145/article/details/80462292 LINUX进程小结 id为0的进程通常是调度进程,常常被称为交换进程(swa ...
- 使用java如何操作elasticsearch?简单示例。
在线API:https://www.elastic.co/guide/en/elasticsearch/client/java-api/2.4/transport-client.html教程:http ...
- jquery模型(外壳实现)
详细解释: 1.现在传入的参数是window,document,可以知道是它俩引用 2. 3. 4.每次调用jquery方法,都会创建一个实例,但是内存并没有暴涨,原因是:jquery里面new 的这 ...
- 几个比较实用的CSS
1.filter:chroma(color:#FFFFFF); 让指定的背景色透明,例: <table cellspacing = "0" cellpadding = ...
- fhq treap 学习笔记
序 今天心血来潮,来学习一下fhq treap(其实原因是本校有个OIer名叫fh,当然不是我) 简介 fhq treap 学名好像是"非旋转式treap及可持久化"...听上去怪 ...
- Java编程的逻辑 (52) - 抽象容器类
本系列文章经补充和完善,已修订整理成书<Java编程的逻辑>,由机械工业出版社华章分社出版,于2018年1月上市热销,读者好评如潮!各大网店和书店有售,欢迎购买,京东自营链接:http:/ ...