angular4和asp.net core 2 web api
angular4和asp.net core 2 web api
这是一篇学习笔记. angular 5 正式版都快出了, 不过主要是性能升级.
我认为angular 4还是很适合企业的, 就像.net一样.
我用的是windows 10
安装工具:
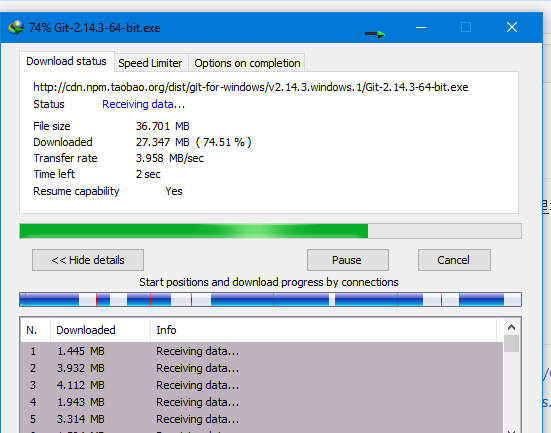
git for windows: 官网很慢, 所以找一个镜像站下载: https://github.com/waylau/git-for-win, 淘宝镜像的速度还是蛮快的:
安装的时候, 建议选择这个, 会添加很多命令行工具:
nodejs: 去官网下载就行: https://nodejs.org/en/
正常安装即可. npm的版本不要低于5.0吧:

angular-cli, 官网: https://github.com/angular/angular-cli
npm install -g @angular/cli
visual studio code: https://code.visualstudio.com/
and visual studio 2017 of course.
建立angular项目
进入命令行在某个地方执行命令:
ng new client-panel
这就会建立一个client-panel文件夹, 里面是该项目的文件, 然后它会立即执行npm install命令(这里不要使用淘宝的cnpm进行安装, 有bug), 稍等一会就会结束.
使用vscode打开该目录, 然后在vscode里面打开terminal:
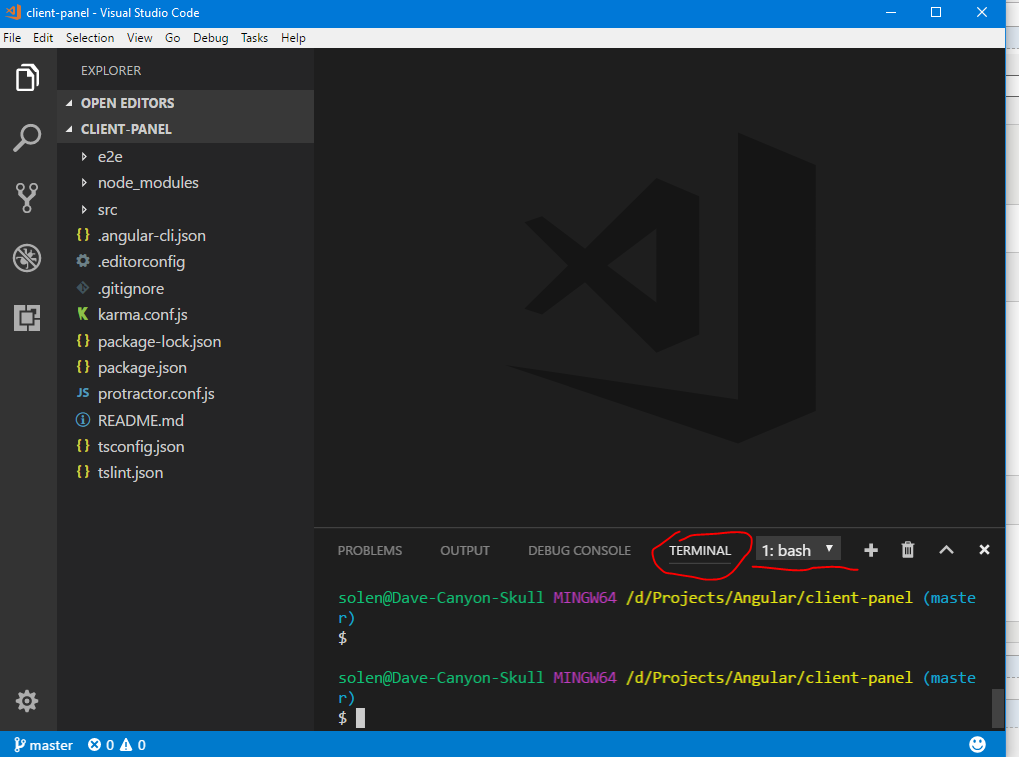
terminal默认的可能是powershell, 如果你感觉powershell有点慢的话, 可以换成bash(安装git时候带的)或者windows command line等.
第一次打开terminal的时候, vscode上方会提示你配置terminal, 这时就可以更换默认的terminal. 否则的话, 你可以点击菜单file-reference-settings, 自己选择一个terminal应用:

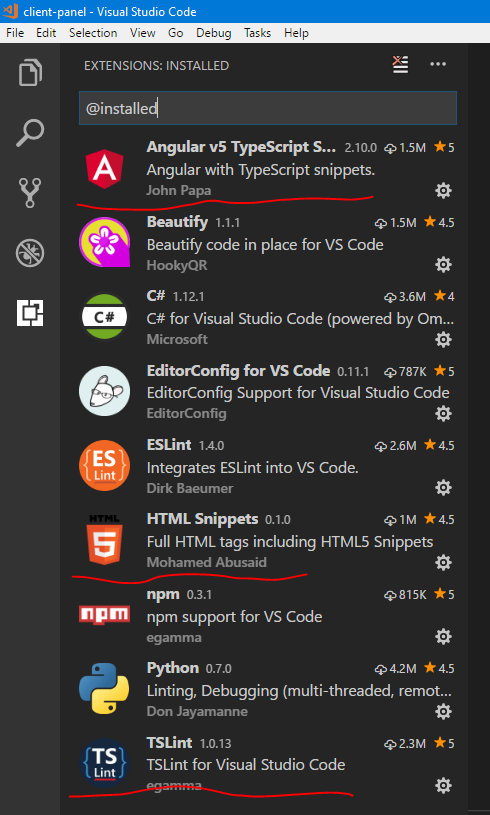
同样可以安装几个vscode的插件:
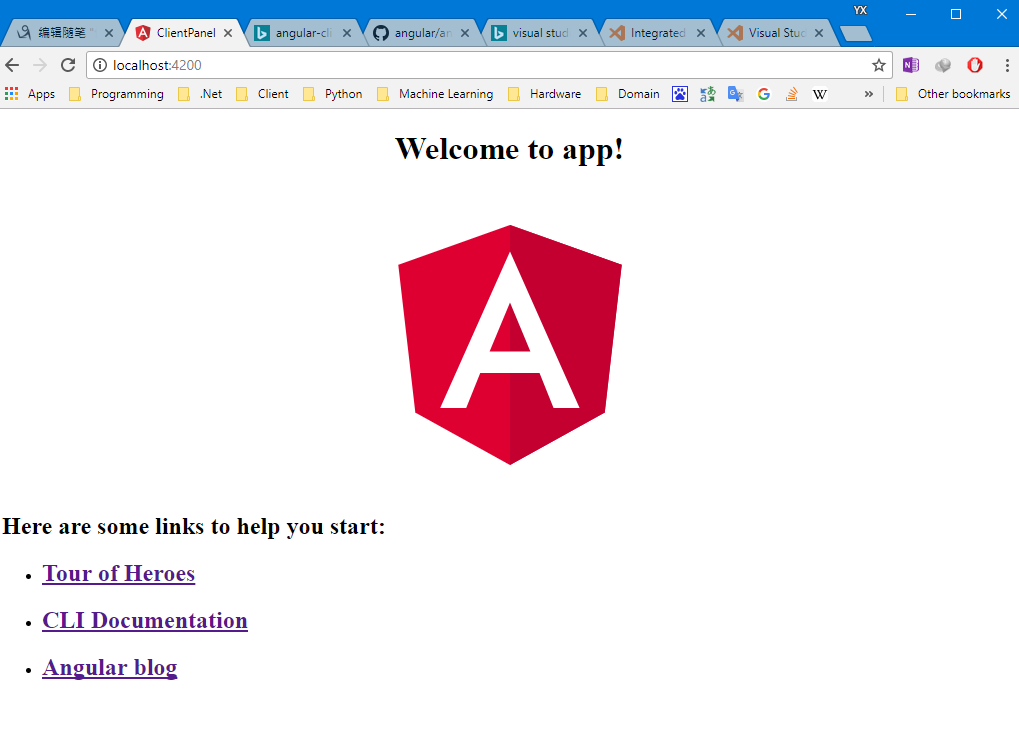
然后试运行一下项目, 在terminal执行 ng serve, 如果没问题的话, 大概是这样:

浏览器运行: http://localhost:4200
安装bootstrap4等:
安装bootstrap4, tether, jquery等:
npm install bootstrap@4.0.0-beta.2 tether jquery --save
安装成功后, 打开 .angular-cli.json, 把相关的css和js添加进去:
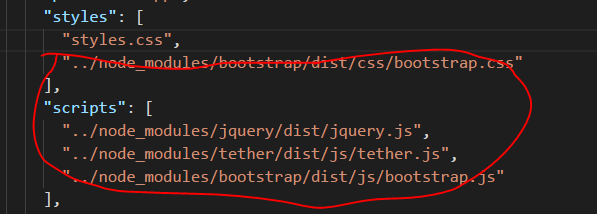
然后在运行试试 ng serve, 刷新:
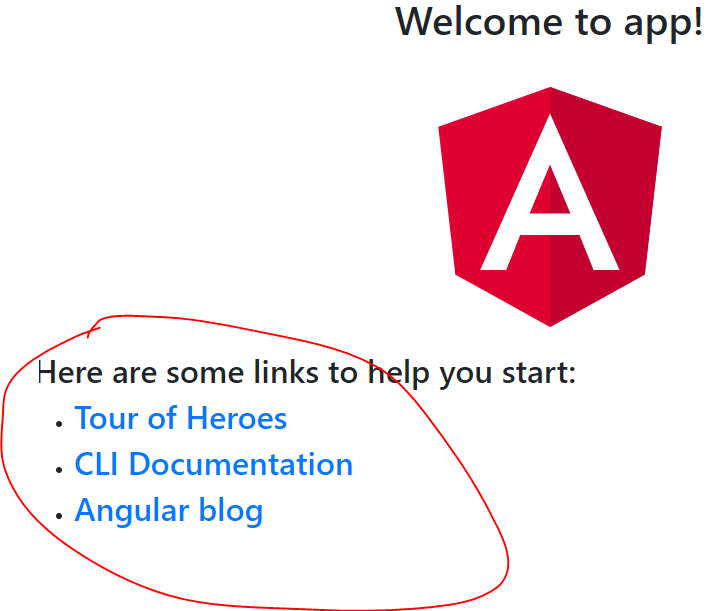
字体已经改变, bootstrap起作用了.
建立Components
建立dashboard:
terminal执行
ng g component components/dashboard
执行成功后会生成4个文件:
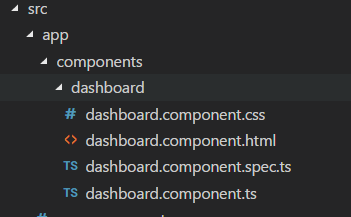
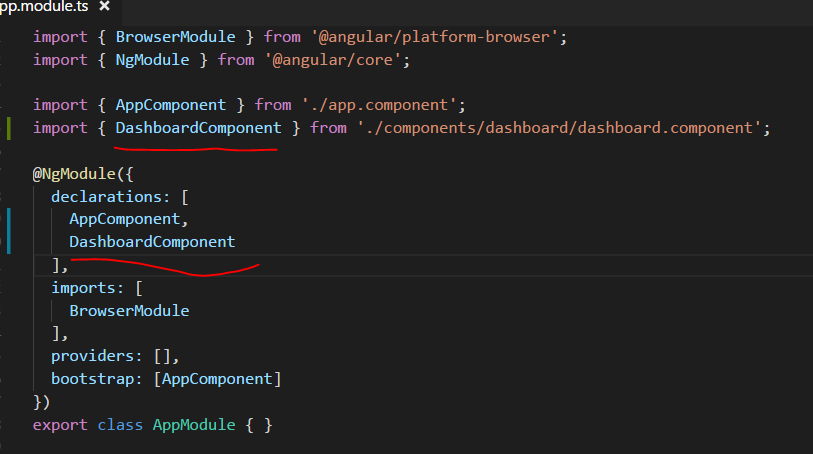
并且会自动在app.module.ts里面声明:
建立其他 components:

ng g component components/clients

ng g component components/clientDetails

ng g component components/addClient

ng g component components/editClient

ng g component components/navbar

ng g component components/sidebar
ng g component components/login
ng g component components/register
ng g component components/settings
ng g component components/pageNotFound


建立Route路由

import { BrowserModule } from '@angular/platform-browser';

import { NgModule } from '@angular/core';

import { RouterModule, Routes } from '@angular/router';

import { AppComponent } from './app.component';

import { DashboardComponent } from './components/dashboard/dashboard.component';

import { ClientsComponent } from './components/clients/clients.component';

import { ClientDetailsComponent } from './components/client-details/client-details.component';

import { AddClientComponent } from './components/add-client/add-client.component';

import { EditClientComponent } from './components/edit-client/edit-client.component';

import { NavbarComponent } from './components/navbar/navbar.component';

import { SidebarComponent } from './components/sidebar/sidebar.component';

import { LoginComponent } from './components/login/login.component';

import { RegisterComponent } from './components/register/register.component';

import { SettingsComponent } from './components/settings/settings.component';

import { PageNotFoundComponent } from './components/page-not-found/page-not-found.component';

const appRoutes: Routes = [

  { path: '', component: DashboardComponent },

  { path: 'register', component: RegisterComponent },

  { path: 'login', component: LoginComponent }

];

@NgModule({

  declarations: [

    AppComponent,

    DashboardComponent,

    ClientsComponent,

    ClientDetailsComponent,

    AddClientComponent,

    EditClientComponent,

    NavbarComponent,

    SidebarComponent,

    LoginComponent,

    RegisterComponent,

    SettingsComponent,

    PageNotFoundComponent

  ],

  imports: [

    BrowserModule,

    RouterModule.forRoot(appRoutes)

  ],

  providers: [],

  bootstrap: [AppComponent]

})

export class AppModule { }

添加router-outlet:
打开app.component.html, 清空内容, 添加一个div(可以输入div.container然后按tab健):
<div class="container">

  <router-outlet></router-outlet>

</div>
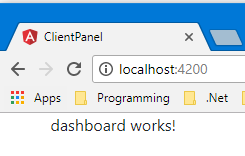
现在刷新浏览器, 大约这样:
添加navbar:
修改navbar.component.html:

<nav class="navbar navbar-expand-md navbar-light bg-light">

  <div class="container">

    <a class="navbar-brand" href="#">Client Panel</a>

    <button class="navbar-toggler" type="button" data-toggle="collapse" data-target="#navbarsExampleDefault" aria-controls="navbarsExampleDefault"

      aria-expanded="false" aria-label="Toggle navigation">

      <span class="navbar-toggler-icon"></span>

    </button>

    <div class="collapse navbar-collapse" id="navbarsExampleDefault">

      <ul class="navbar-nav mr-auto">

        <li class="nav-item">

          <a class="nav-link" href="#" routerLink="/">Dashboard </a>

        </li>

      </ul>

      <ul class="navbar-nav ml-auto">

        <li class="nav-item">

          <a class="nav-link" href="#" routerLink="/register">Register </a>

        </li>

        <li class="nav-item">

          <a class="nav-link" href="#" routerLink="/login">Login </a>

        </li>

      </ul>

    </div>

  </div>

</nav>

修改app.component.html:
<app-navbar></app-navbar>

<div class="container">

  <router-outlet></router-outlet>

</div>
运行:

建立Service
建立一个client.service:
ng g service services/client
然后在app.module.ts添加引用:
// Services Imports

import { ClientService } from "./services/client.service";
并添加在providers里:
  providers: [

    ClientService

  ],
前端先暂时到这, 现在开始搞后端 web api.
建立asp.net core 2.0 的 Web api项目
web api项目源码: https://github.com/solenovex/asp.net-core-2.0-web-api-boilerplate
项目列表如图:
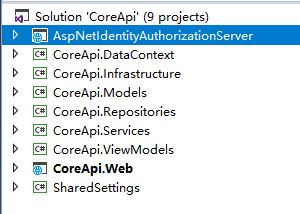
AspNetIdentityAuthorizationServer是一个单独的authorization server, 这里暂时还没用到, 它的端口是5000, 默认不启动.
CoreApi.Infrastructure 里面有一些基类和接口, 还放了一个公共的工具类等.
CoreApi.Models就是 models/entities
CoreApi.DataContext 里面就是DbContext相关的
CoreApi.Repositories 里面是Repositories
CoreApi.Services 里面就是各种services
CoreApi.ViewModels 里面就是各种ViewModels或者叫Dtos
CoreApi.Web是web启动项目.
SharedSettings是横跨authorization server和 web api的一些公共设置.
上面说的这些都没什么用, 下面开始建立Client的api.
建立Client Model(或者叫Entity)
在CoreApi.Models建立文件夹Angular, 然后建立Client.cs:

using CoreApi.Infrastructure.Features.Common;

using Microsoft.EntityFrameworkCore;

using Microsoft.EntityFrameworkCore.Metadata.Builders;

namespace CoreApi.Models.Angular

{

    public class Client : EntityBase

    {

        public decimal Balance { get; set; }

        public string Email { get; set; }

        public string FirstName { get; set; }

        public string LastName { get; set; }

        public string Phone { get; set; }

    }

    public class ClientConfiguration : EntityBaseConfiguration<Client>

    {

        public override void ConfigureDerived(EntityTypeBuilder<Client> builder)

        {

            builder.Property(x => x.Balance).HasColumnType("decimal(18,2)");

            builder.Property(x => x.Email).IsRequired().HasMaxLength(100);

            builder.Property(x => x.FirstName).IsRequired().HasMaxLength(50);

            builder.Property(x => x.LastName).IsRequired().HasMaxLength(50);

            builder.Property(x => x.Phone).HasMaxLength(50);

        }

    }

}

其中父类EntityBase里面含有一些通用属性,Id, CreateUser, UpdateUser, CreateTime, UpdateTime, LastAction, 这些是我公司做项目必须的, 你们随意.
下面ClientConfiguration是针对Client的fluent api配置类. 他的父类EntityBaseConfiguration实现了EF的IEntityTypeConfiguration接口, 并在父类里面针对EntityBase那些属性使用fluent api做了限制:

namespace CoreApi.Infrastructure.Features.Common

{

    public abstract class EntityBaseConfiguration<T> : IEntityTypeConfiguration<T> where T : EntityBase

    {

        public virtual void Configure(EntityTypeBuilder<T> builder)

        {

            builder.HasKey(e => e.Id);

            builder.Property(x => x.CreateTime).IsRequired();

            builder.Property(x => x.UpdateTime).IsRequired();

            builder.Property(x => x.CreateUser).IsRequired().HasMaxLength(50);

            builder.Property(x => x.UpdateUser).IsRequired().HasMaxLength(50);

            builder.Property(x => x.LastAction).IsRequired().HasMaxLength(50);

            ConfigureDerived(builder);

        }

        public abstract void ConfigureDerived(EntityTypeBuilder<T> b);

    }

}

弄完Model和它的配置之后, 就添加到DbContext里面. 打开CoreApi.DataContext的CoreContext, 添加Model和配置:

        protected override void OnModelCreating(ModelBuilder modelBuilder)

        {

            base.OnModelCreating(modelBuilder);

            modelBuilder.HasDefaultSchema(AppSettings.DefaultSchema);

            modelBuilder.ApplyConfiguration(new UploadedFileConfiguration());

            modelBuilder.ApplyConfiguration(new ClientConfiguration());

        }

        public DbSet<UploadedFile> UploadedFiles { get; set; }

        public DbSet<Client> Clients { get; set; }
然后建立ClientRepository
在CoreApi.Repositories里面建立Angular目录, 建立ClientRepository.cs:

namespace CoreApi.Repositories.Angular

{

    public interface IClientRepository : IEntityBaseRepository<Client> { }

    public class ClientRepository : EntityBaseRepository<Client>, IClientRepository

    {

        public ClientRepository(IUnitOfWork unitOfWork) : base(unitOfWork)

        {

        }

    }

}

图省事, 我把repository和它的interface放在一个文件了.
IEntityBaseRepository<T>定义了一些常用的方法:

namespace CoreApi.DataContext.Infrastructure

{

    public interface IEntityBaseRepository<T> where T : class, IEntityBase, new()

    {

        IQueryable<T> All { get; }

        IQueryable<T> AllIncluding(params Expression<Func<T, object>>[] includeProperties);

        int Count();

        Task<int> CountAsync();

        T GetSingle(int id);

        Task<T> GetSingleAsync(int id);

        T GetSingle(Expression<Func<T, bool>> predicate);

        Task<T> GetSingleAsync(Expression<Func<T, bool>> predicate);

        T GetSingle(Expression<Func<T, bool>> predicate, params Expression<Func<T, object>>[] includeProperties);

        Task<T> GetSingleAsync(Expression<Func<T, bool>> predicate, params Expression<Func<T, object>>[] includeProperties);

        IQueryable<T> FindBy(Expression<Func<T, bool>> predicate);

        void Add(T entity);

        void Update(T entity);

        void Delete(T entity);

        void DeleteWhere(Expression<Func<T, bool>> predicate);

        void AddRange(IEnumerable<T> entities);

        void DeleteRange(IEnumerable<T> entities);

        void Attach(T entity);

        void AttachRange(IEnumerable<T> entities);

        void Detach(T entity);

        void DetachRange(IEnumerable<T> entities);

        void AttachAsModified(T entity);

    }

}

EntityBaseRepository<T>是它的实现:

namespace CoreApi.DataContext.Infrastructure

{

    public class EntityBaseRepository<T> : IEntityBaseRepository<T>

        where T : class, IEntityBase, new()

    {

        #region Properties

        protected CoreContext Context { get; }

        public EntityBaseRepository(IUnitOfWork unitOfWork)

        {

            Context = unitOfWork as CoreContext;

        }

        #endregion

        public virtual IQueryable<T> All => Context.Set<T>();

        public virtual IQueryable<T> AllIncluding(params Expression<Func<T, object>>[] includeProperties)

        {

            IQueryable<T> query = Context.Set<T>();

            foreach (var includeProperty in includeProperties)

            {

                query = query.Include(includeProperty);

            }

            return query;

        }

        public virtual int Count()

        {

            return Context.Set<T>().Count();

        }

        public async Task<int> CountAsync()

        {

            return await Context.Set<T>().CountAsync();

        }

        public T GetSingle(int id)

        {

            return Context.Set<T>().FirstOrDefault(x => x.Id == id);

        }

        public async Task<T> GetSingleAsync(int id)

        {

            return await Context.Set<T>().FirstOrDefaultAsync(x => x.Id == id);

        }

        public T GetSingle(Expression<Func<T, bool>> predicate)

        {

            return Context.Set<T>().FirstOrDefault(predicate);

        }

        public async Task<T> GetSingleAsync(Expression<Func<T, bool>> predicate)

        {

            return await Context.Set<T>().FirstOrDefaultAsync(predicate);

        }

        public T GetSingle(Expression<Func<T, bool>> predicate, params Expression<Func<T, object>>[] includeProperties)

        {

            IQueryable<T> query = Context.Set<T>();

            foreach (var includeProperty in includeProperties)

            {

                query = query.Include(includeProperty);

            }

            return query.Where(predicate).FirstOrDefault();

        }

        public async Task<T> GetSingleAsync(Expression<Func<T, bool>> predicate, params Expression<Func<T, object>>[] includeProperties)

        {

            IQueryable<T> query = Context.Set<T>();

            foreach (var includeProperty in includeProperties)

            {

                query = query.Include(includeProperty);

            }

            return await query.Where(predicate).FirstOrDefaultAsync();

        }

        public virtual IQueryable<T> FindBy(Expression<Func<T, bool>> predicate)

        {

            return Context.Set<T>().Where(predicate);

        }

        public virtual void Add(T entity)

        {

            Context.Set<T>().Add(entity);

        }

        public virtual void Update(T entity)

        {

            EntityEntry<T> dbEntityEntry = Context.Entry(entity);

            dbEntityEntry.State = EntityState.Modified;

            dbEntityEntry.Property(x => x.Id).IsModified = false;

            dbEntityEntry.Property(x => x.CreateUser).IsModified = false;

            dbEntityEntry.Property(x => x.CreateTime).IsModified = false;

        }

        public virtual void Delete(T entity)

        {

            Context.Set<T>().Remove(entity);

        }

        public virtual void AddRange(IEnumerable<T> entities)

        {

            Context.Set<T>().AddRange(entities);

        }

        public virtual void DeleteRange(IEnumerable<T> entities)

        {

            foreach (var entity in entities)

            {

                Context.Set<T>().Remove(entity);

            }

        }

        public virtual void DeleteWhere(Expression<Func<T, bool>> predicate)

        {

            IEnumerable<T> entities = Context.Set<T>().Where(predicate);

            foreach (var entity in entities)

            {

                Context.Entry<T>(entity).State = EntityState.Deleted;

            }

        }

        public void Attach(T entity)

        {

            Context.Set<T>().Attach(entity);

        }

        public void AttachRange(IEnumerable<T> entities)

        {

            foreach (var entity in entities)

            {

                Attach(entity);

            }

        }

        public void Detach(T entity)

        {

            Context.Entry<T>(entity).State = EntityState.Detached;

        }

        public void DetachRange(IEnumerable<T> entities)

        {

            foreach (var entity in entities)

            {

                Detach(entity);

            }

        }

        public void AttachAsModified(T entity)

        {

            Attach(entity);

            Update(entity);

        }

    }

}

建立Client的ViewModels
在CoreApi.ViewModels建立Angular文件夹, 分别针对查询, 新增, 修改建立3个ViewModel(Dto):
ClientViewModel:

namespace CoreApi.ViewModels.Angular

{

    public class ClientViewModel : EntityBase

    {

        public decimal Balance { get; set; }

        public string Email { get; set; }

        public string FirstName { get; set; }

        public string LastName { get; set; }

        public string Phone { get; set; }

    }

}

ClientCreationViewModel:

namespace CoreApi.ViewModels.Angular

{

    public class ClientCreationViewModel

    {

        public decimal Balance { get; set; }

        [Required]

        [MaxLength(100)]

        public string Email { get; set; }

        [Required]

        [MaxLength(50)]

        public string FirstName { get; set; }

        [Required]

        [MaxLength(50)]

        public string LastName { get; set; }

        [Required]

        [MaxLength(50)]

        public string Phone { get; set; }

    }

}

ClientModificationViewModel:

namespace CoreApi.ViewModels.Angular

{

    public class ClientModificationViewModel

    {

        public decimal Balance { get; set; }

        [Required]

        [MaxLength(100)]

        public string Email { get; set; }

        [Required]

        [MaxLength(50)]

        public string FirstName { get; set; }

        [Required]

        [MaxLength(50)]

        public string LastName { get; set; }

        [Required]

        [MaxLength(50)]

        public string Phone { get; set; }

    }

}

配置AutoMapper
针对Client和它的Viewmodels, 分别从两个方向进行配置:
DomainToViewModelMappingProfile:

namespace CoreApi.Web.MyConfigurations

{

    public class DomainToViewModelMappingProfile : Profile

    {

        public override string ProfileName => "DomainToViewModelMappings";

        public DomainToViewModelMappingProfile()

        {

            CreateMap<UploadedFile, UploadedFileViewModel>();

            CreateMap<Client, ClientViewModel>();

            CreateMap<Client, ClientModificationViewModel>();

        }

    }

}

ViewModelToDomainMappingProfile:

namespace CoreApi.Web.MyConfigurations

{

    public class ViewModelToDomainMappingProfile : Profile

    {

        public override string ProfileName => "ViewModelToDomainMappings";

        public ViewModelToDomainMappingProfile()

        {

            CreateMap<UploadedFileViewModel, UploadedFile>();

            CreateMap<ClientViewModel, Client>();

            CreateMap<ClientCreationViewModel, Client>();

            CreateMap<ClientModificationViewModel, Client>();

        }

    }

}

注册Repository的DI:
在web项目的StartUp.cs的ConfigureServices里面为ClientRepository注册DI:
services.AddScoped<IClientRepository, ClientRepository>();
建立Controller
在controllers目录建立Angular/ClientController.cs:

namespace CoreApi.Web.Controllers.Angular

{

    [Route("api/[controller]")]

    public class ClientController : BaseController<ClientController>

    {

        private readonly IClientRepository _clientRepository;

        public ClientController(ICoreService<ClientController> coreService,

            IClientRepository clientRepository) : base(coreService)

        {

            _clientRepository = clientRepository;

        }

        [HttpGet]

        public async Task<IActionResult> GetAll()

        {

            var items = await _clientRepository.All.ToListAsync();

            var results = Mapper.Map<IEnumerable<ClientViewModel>>(items);

            return Ok(results);

        }

        [HttpGet]

        [Route("{id}", Name = "GetClient")]

        public async Task<IActionResult> Get(int id)

        {

            var item = await _clientRepository.GetSingleAsync(id);

            if (item == null)

            {

                return NotFound();

            }

            var result = Mapper.Map<ClientViewModel>(item);

            return Ok(result);

        }

        [HttpPost]

        public async Task<IActionResult> Post([FromBody] ClientCreationViewModel clientVm)

        {

            if (clientVm == null)

            {

                return BadRequest();

            }

            if (!ModelState.IsValid)

            {

                return BadRequest(ModelState);

            }

            var newItem = Mapper.Map<Client>(clientVm);

            newItem.SetCreation(UserName);

            _clientRepository.Add(newItem);

            if (!await UnitOfWork.SaveAsync())

            {

                return StatusCode(500, "保存客户时出错");

            }

            var vm = Mapper.Map<ClientViewModel>(newItem);

            return CreatedAtRoute("GetClient", new { id = vm.Id }, vm);

        }

        [HttpPut("{id}")]

        public async Task<IActionResult> Put(int id, [FromBody] ClientModificationViewModel clientVm)

        {

            if (clientVm == null)

            {

                return BadRequest();

            }

            if (!ModelState.IsValid)

            {

                return BadRequest(ModelState);

            }

            var dbItem = await _clientRepository.GetSingleAsync(id);

            if (dbItem == null)

            {

                return NotFound();

            }

            Mapper.Map(clientVm, dbItem);

            dbItem.SetModification(UserName);

            _clientRepository.Update(dbItem);

            if (!await UnitOfWork.SaveAsync())

            {

                return StatusCode(500, "保存客户时出错");

            }

            return NoContent();

        }

        [HttpPatch("{id}")]

        public async Task<IActionResult> Patch(int id, [FromBody] JsonPatchDocument<ClientModificationViewModel> patchDoc)

        {

            if (patchDoc == null)

            {

                return BadRequest();

            }

            var dbItem = await _clientRepository.GetSingleAsync(id);

            if (dbItem == null)

            {

                return NotFound();

            }

            var toPatchVm = Mapper.Map<ClientModificationViewModel>(dbItem);

            patchDoc.ApplyTo(toPatchVm, ModelState);

            TryValidateModel(toPatchVm);

            if (!ModelState.IsValid)

            {

                return BadRequest(ModelState);

            }

            Mapper.Map(toPatchVm, dbItem);

            if (!await UnitOfWork.SaveAsync())

            {

                return StatusCode(500, "更新的时候出错");

            }

            return NoContent();

        }

        [HttpDelete("{id}")]

        public async Task<IActionResult> Delete(int id)

        {

            var model = await _clientRepository.GetSingleAsync(id);

            if (model == null)

            {

                return NotFound();

            }

            _clientRepository.Delete(model);

            if (!await UnitOfWork.SaveAsync())

            {

                return StatusCode(500, "删除的时候出错");

            }

            return NoContent();

        }

    }

}

首先, Controller继承了ControllerBase这个类, ControllerBase是自己写的类, 里面可以放置一些公用的方法或属性, 目前里面的东西都没用:

namespace CoreApi.Web.Controllers.Bases

{

    public abstract class BaseController<T> : Controller

    {

        protected readonly IUnitOfWork UnitOfWork;

        protected readonly ILogger<T> Logger;

        protected readonly IFileProvider FileProvider;

        protected readonly ICoreService<T> CoreService;

        protected BaseController(ICoreService<T> coreService)

        {

            CoreService = coreService;

            UnitOfWork = coreService.UnitOfWork;

            Logger = coreService.Logger;

            FileProvider = coreService.FileProvider;

        }

        #region Current Information

        protected DateTime Now => DateTime.Now;

        protected string UserName => User.Identity.Name ?? "Anonymous";

        #endregion

    }

}

由于父类构造函数依赖的类太多了, 所以我建立了一个CoreService, 里面包含着这些依赖, 然后用一个变量就注入进去了, 这种写法不一定正确:

public interface ICoreService<out T> : IDisposable

    {

        IUnitOfWork UnitOfWork { get; }

        ILogger<T> Logger { get; }

        IFileProvider FileProvider { get; }

    }

Controller里面的方法应该都能看明白吧. 需要提一下的是UnitOfWork.
Unit Of Work
我才用的是UnitOfWork和Repository模式, 多个Repository挂起的数据库操作, 可以使用一个UnitOfWork一次性提交.
由于DBContext已经实现了UnitOfWork模式, 所以可以直接在Controller里面使用DbContext, 但是我还是做了一个接口 IUnitOfWork:

namespace CoreApi.DataContext.Infrastructure

{

    public interface IUnitOfWork: IDisposable

    {

        int SaveChanges();

        int SaveChanges(bool acceptAllChangesOnSuccess);

        Task<int> SaveChangesAsync(bool acceptAllChangesOnSuccess, CancellationToken cancellationToken = default(CancellationToken));

        Task<int> SaveChangesAsync(CancellationToken cancellationToken = default(CancellationToken));

        bool Save();

        bool Save(bool acceptAllChangesOnSuccess);

        Task<bool> SaveAsync(bool acceptAllChangesOnSuccess, CancellationToken cancellationToken = default(CancellationToken));

        Task<bool> SaveAsync(CancellationToken cancellationToken = default(CancellationToken));

    }

}

里面前4个方法就是DbContext内置的方法, 后面4个方法可有可无, 就是上面4个方法的简单变形.
看一下CoreContext:

namespace CoreApi.DataContext.Core

{

    public class CoreContext : DbContext, IUnitOfWork

    {

        public CoreContext(DbContextOptions<CoreContext> options)

            : base(options)

        {

        }

        protected override void OnModelCreating(ModelBuilder modelBuilder)

        {

            base.OnModelCreating(modelBuilder);

            modelBuilder.HasDefaultSchema(AppSettings.DefaultSchema);

            modelBuilder.ApplyConfiguration(new UploadedFileConfiguration());

            modelBuilder.ApplyConfiguration(new ClientConfiguration());

        }

        public DbSet<UploadedFile> UploadedFiles { get; set; }

        public DbSet<Client> Clients { get; set; }

        public bool Save()

        {

            return SaveChanges() >= 0;

        }

        public bool Save(bool acceptAllChangesOnSuccess)

        {

            return SaveChanges(acceptAllChangesOnSuccess) >= 0;

        }

        public async Task<bool> SaveAsync(bool acceptAllChangesOnSuccess, CancellationToken cancellationToken = default(CancellationToken))

        {

            return await SaveChangesAsync(acceptAllChangesOnSuccess, cancellationToken) >= 0;

        }

        public async Task<bool> SaveAsync(CancellationToken cancellationToken = default(CancellationToken))

        {

            return await SaveChangesAsync(cancellationToken) >= 0;

        }

    }

}

差不多了, 开始
迁移数据库
在Package Manager Console分别执行 Add-Migration XXX和 Update-database命令.
注意这个时候 解决方案的启动项目必须是Web项目, 如果设置了多个启动项目, 迁移命令会不太好用.
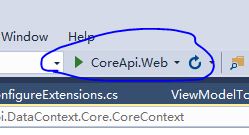
然后运行一下: 选择CoreApi.Web而不是IISExpress, 这样的话端口应该是 http://localhost:5001/api/values
到Swagger里简单测试下
然后进入swagger简单测试一下ClientController: http://localhost:5001/swagger/
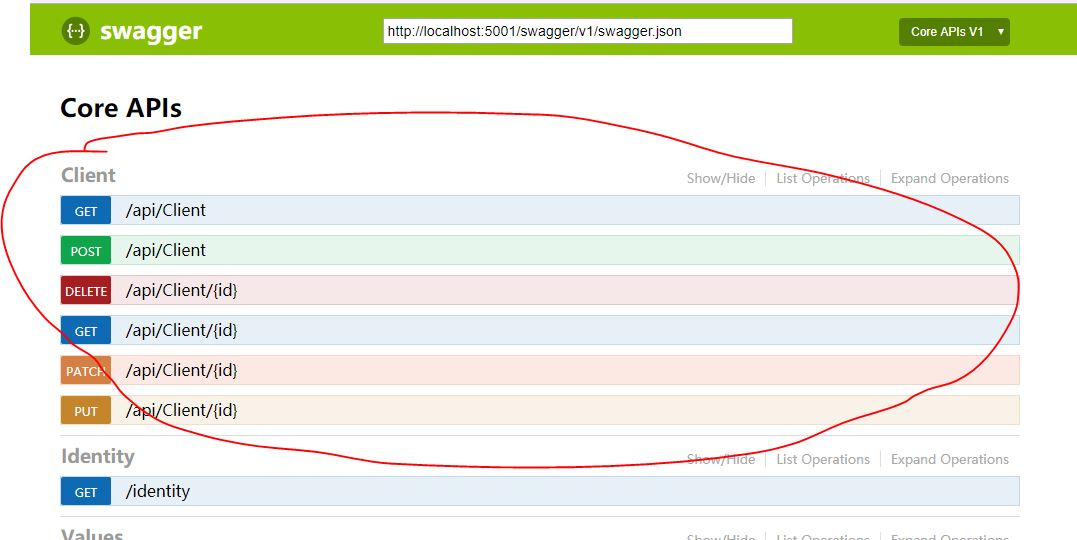
先添加数据 POST:
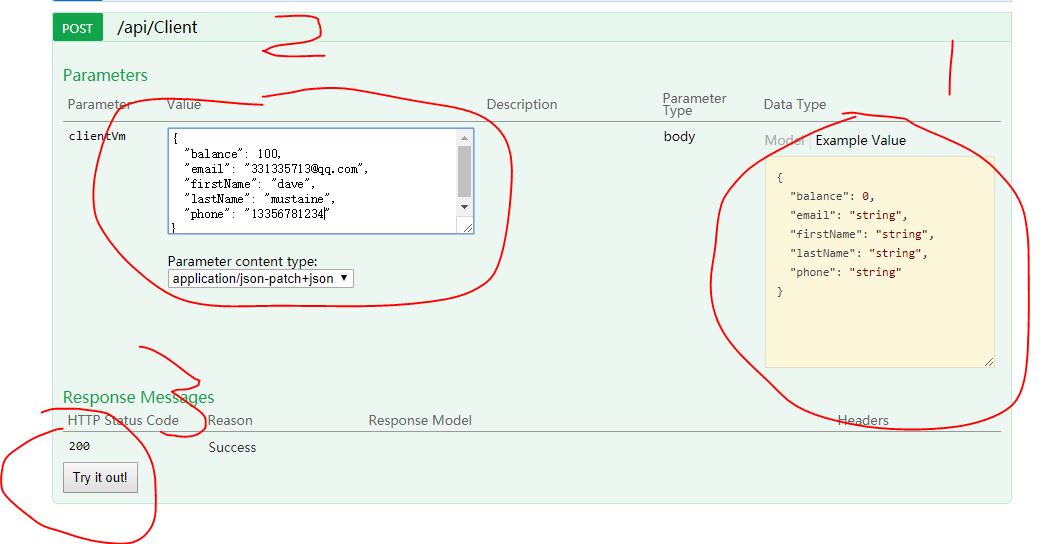
先点击右侧, 然后会把数据的json模板复制到左边的框里, 然后修改值, 然后点击try It out, 结果如下:

然后两个Get, Delete, Put您都应该会测试.
这里试一下 Patch:
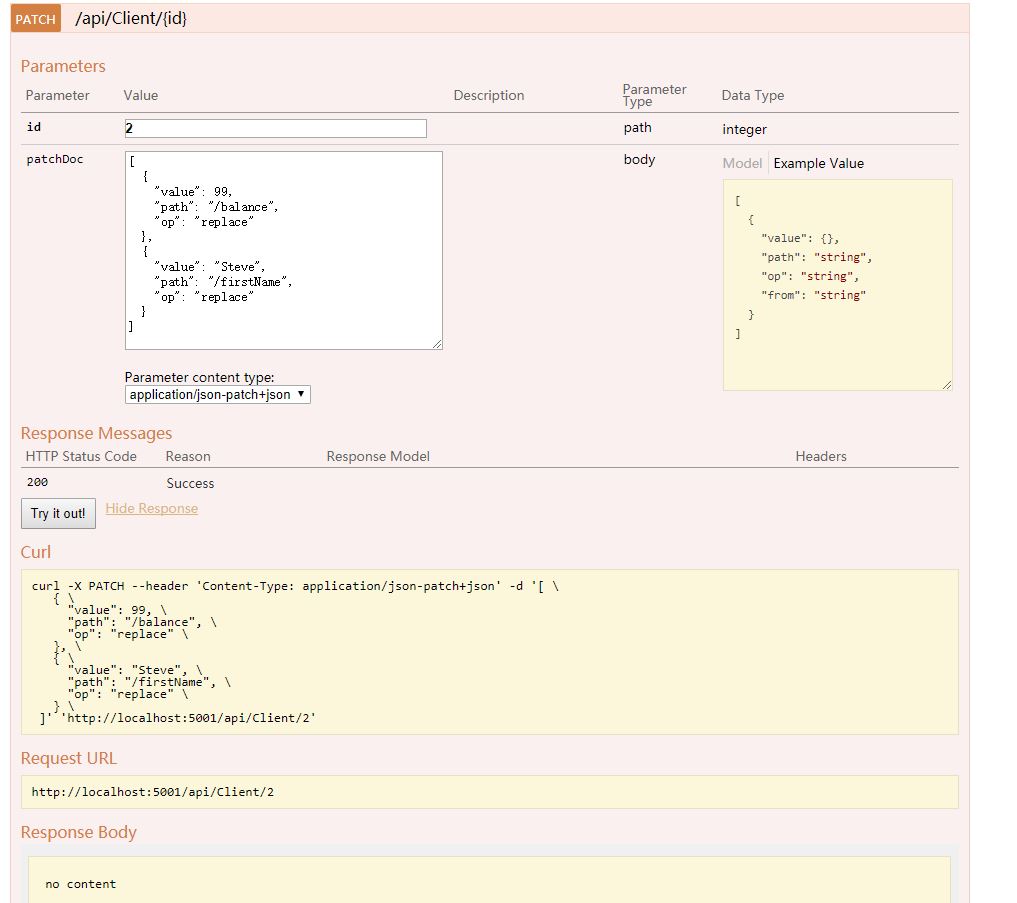
再查询一下, 应该没有什么问题.
先写到这, 明天就能差不多写完了吧.
angular4和asp.net core 2 web api的更多相关文章
- 使用angular4和asp.net core 2 web api做个练习项目(一)
这是一篇学习笔记. angular 5 正式版都快出了, 不过主要是性能升级. 我认为angular 4还是很适合企业的, 就像.net一样. 我用的是windows 10 安装工具: git for ...
- 使用angular4和asp.net core 2 web api做个练习项目(四)
第一部分: http://www.cnblogs.com/cgzl/p/7755801.html 第二部分: http://www.cnblogs.com/cgzl/p/7763397.html 第三 ...
- 使用angular4和asp.net core 2 web api做个练习项目(二), 这部分都是angular
上一篇: http://www.cnblogs.com/cgzl/p/7755801.html 完成client.service.ts: import { Injectable } from '@an ...
- 使用angular4和asp.net core 2 web api做个练习项目(三)
第一部分: http://www.cnblogs.com/cgzl/p/7755801.html 第二部分: http://www.cnblogs.com/cgzl/p/7763397.html 后台 ...
- 温故知新,使用ASP.NET Core创建Web API,永远第一次
ASP.NET Core简介 ASP.NET Core是一个跨平台的高性能开源框架,用于生成启用云且连接Internet的新式应用. 使用ASP.NET Core,您可以: 生成Web应用和服务.物联 ...
- 基于ASP.NET Core 创建 Web API
使用 Visual Studio 创建项目. 文件->新建->项目,选择创建 ASP.NET Core Web 应用程序. 基于 ASP.NET Core 2.0 ,选择API,身份验证选 ...
- ASP.NET Core Restful Web API 相关资源索引
GraphQL 使用ASP.NET Core开发GraphQL服务器 -- 预备知识(上) 使用ASP.NET Core开发GraphQL服务器 -- 预备知识(下) [视频] 使用ASP.NET C ...
- 使用 ASP.NET Core 创建 Web API及链接sqlserver数据库
创建 Web API https://docs.microsoft.com/zh-cn/aspnet/core/tutorials/first-web-api?view=aspnetcore-3.0& ...
- ASP.NET Core 中基于 API Key 对私有 Web API 进行保护
这两天遇到一个应用场景,需要对内网调用的部分 web api 进行安全保护,只允许请求头账户包含指定 key 的客户端进行调用.在网上找到一篇英文博文 ASP.NET Core - Protect y ...
随机推荐
- ACM学习历程—SNNUOJ 1116 A Simple Problem(递推 && 逆元 && 组合数学 && 快速幂)(2015陕西省大学生程序设计竞赛K题)
Description Assuming a finite – radius “ball” which is on an N dimension is cut with a “knife” of N- ...
- 无废话WCF系列教程 -- 李林峰
李林峰的无废话WCF入门教程 无废话WCF入门教程一[什么是WCF] 无废话WCF入门教程二[WCF应用的通信过程] 无废话WCF入门教程三[WCF的宿主] 无废话WCF入门教程四[WCF的配置文件] ...
- rmmod: chdir(/lib/modules): No such file or directory
内核版本:linux3.4.20 交叉编译器:arm-linux-gcc 4.3.3 busybox : busybox 1.20 问题: 使用rmmod会出现 rmmod : chdir(/lib ...
- bzoj4763
$分块$ $一个很有趣的技巧$ $在树上选sqrt(n)个关键点,每两个关键点之间的距离<=sqrt(n),每个关键点属于一条链$ $预处理出每两个关键点的bitset$ $每次询问就暴力向上爬 ...
- SQL DBA 学习
http://www.cnblogs.com/CareySon/category/389500.html SQL Pass(13) SQL SERVER(42) SQL Server DBA生涯(1) ...
- Java日志:集成slf4j和logback
Java日志方案有很多,包括:java.util.logging.Apache的commons-logging和log4j.slf4j以及logback. 一个大型项目会用到众多第三方jar包,这些j ...
- UVaLive 7637 Balanced String (构造)
题意:给定一个括号的序列,原先的序列是碰到左括号加1,碰到右括号减1,然后把序列打乱,让你找出字典序最小的一个答案. 析:直接从第一个括号判断就好了,优先判断左括号,如果不行就加右括号. 代码如下: ...
- 滴滴Booster移动APP质量优化框架 学习之旅 二
推荐阅读: 滴滴Booster移动App质量优化框架-学习之旅 一 Android 模块Api化演练 不一样视角的Glide剖析(一) 续写滴滴Booster移动APP质量优化框架学习之旅,上篇文章分 ...
- Javascript 获取客户端的运营商 IP 地址 等
客户端获取运营商 会弹出安全隐患问题,需要修改IE activx 选项, 非常麻烦,用我的代码可以轻松获取. <script src="JS/jquery-1.4.1.js" ...
- HDU - 6383 百度之星2018初赛B 1004 p1m2(二分答案)
p1m2 Accepts: 1003 Submissions: 4595 Time Limit: 2000/1000 MS (Java/Others) Memory Limit: 131072 ...

