EOS 主节点同步
一.从github克隆主网代码仓库
git clone https://github.com/EOSIO/eos --recursive
二.编译与安装EOS环境
cd ~/eos

./eosio_build.sh
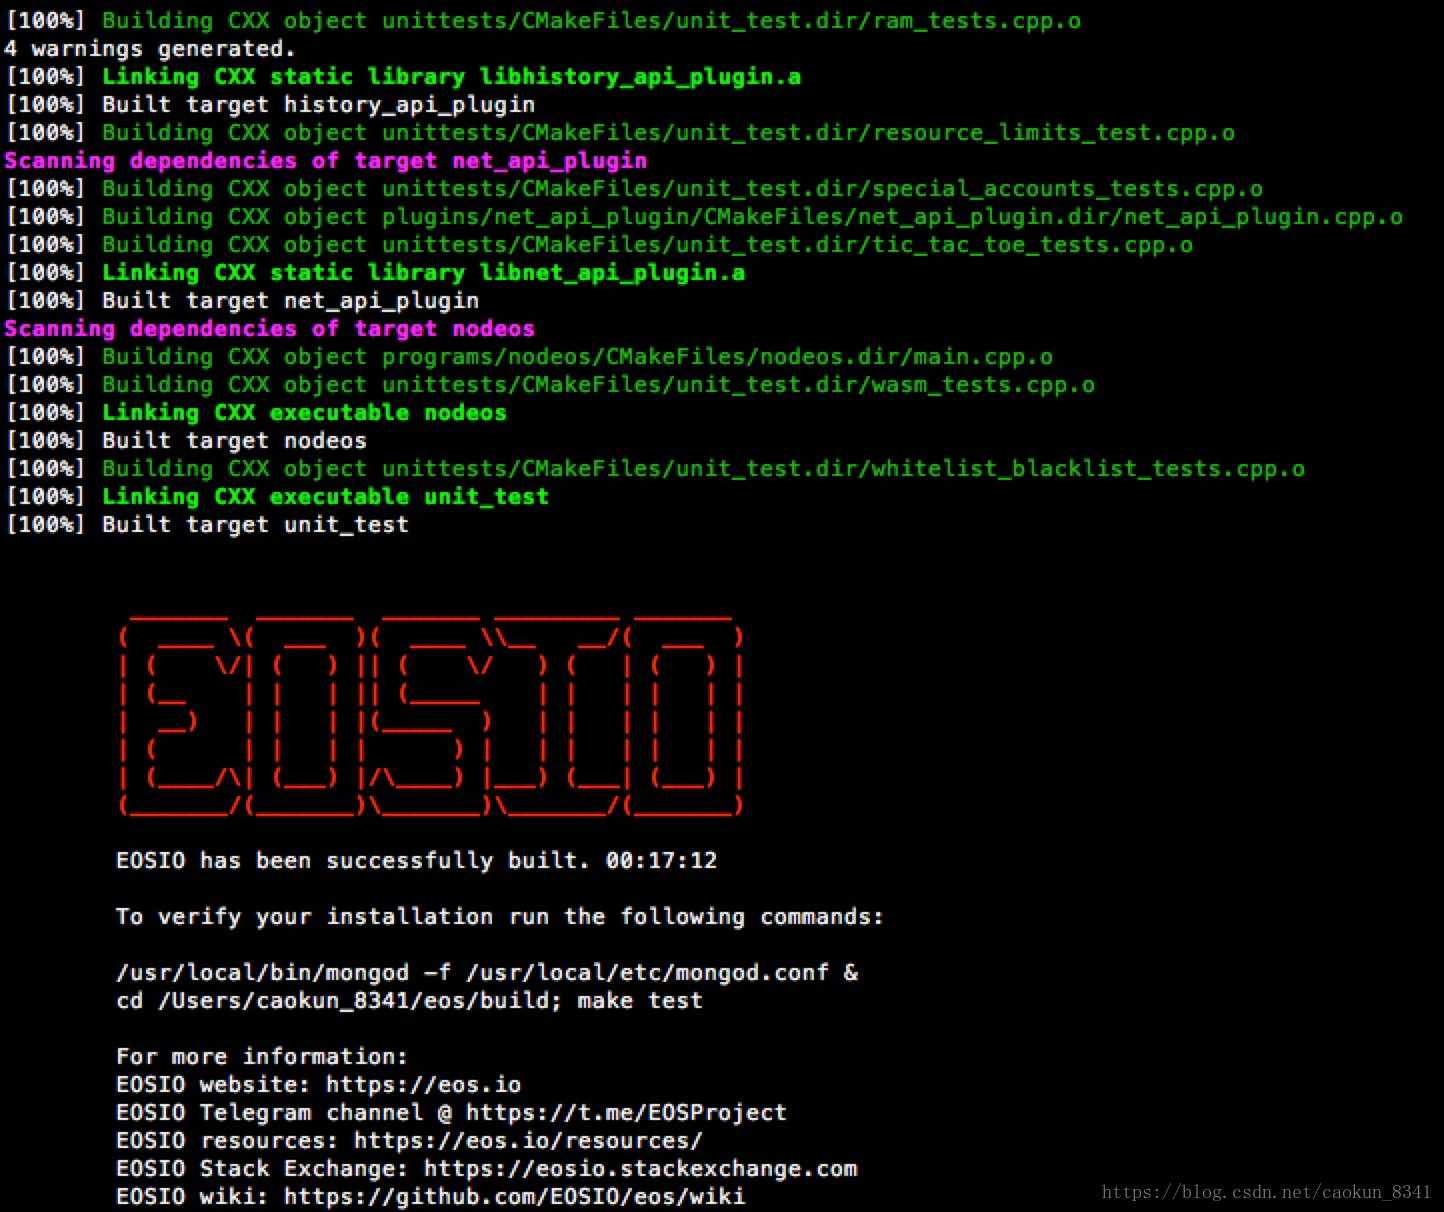
编译成功后会输出如下:

三.设置环境
sudo make install
四.修改配置文件
1.先运行一次 ./nodeos,报错后会产生文件夹 ~/.local 把下面的config.ini文件替换默认的config.ini文件,文件放在 ~/.local/share/eosio/nodeos/config路径下。
# fullnode sample config

blocks-dir = "blocks"

chain-state-db-size-mb =

reversible-blocks-db-size-mb =

contracts-console = false

https-client-validate-peers =

http-server-address = 0.0.0.0:

access-control-allow-credentials = false

p2p-listen-endpoint = 0.0.0.0:

p2p-server-address = 0.0.0.0:

# List of peers

p2p-peer-address = p2p.one.eosdublin.io:

p2p-peer-address = eu-west-nl.eosamsterdam.net:

p2p-peer-address = p2p.mainnet.eosgermany.online:

p2p-peer-address = 35.197.190.234:

p2p-peer-address = p2p.genereos.io:

p2p-peer-address = fullnode.eoslaomao.com:

p2p-peer-address = new.eoshenzhen.io:

p2p-peer-address = node1.eosphere.io:

p2p-peer-address = p2p.meet.one:

p2p-peer-address = bp.eosbeijing.one:

p2p-peer-address = peer1.mainnet.helloeos.com.cn:

p2p-peer-address = p2p-public.hkeos.com:

p2p-peer-address = pub1.eostheworld.io:

p2p-peer-address = eu1.eosdac.io:

p2p-peer-address = peer.eosio.sg:

p2p-max-nodes-per-host =

agent-name = "kevincaokun1"

# allowed-connection can be set to "specified" to use whitelisting with the "peer-key" option

allowed-connection = any

# peer-private-key is needed if you are whitelisting specific peers with the "peer-key" option

peer-private-key = ["EOS6qTvpRYx35aLonqUkWAMwAf3mFVugYfQCbjV67zw2aoe7Vx7qd", "5JroNC1B4pz9gJzNZeU7tkU6YMtoeWRCr4CJJwKsVXnJhRbKXSC"]

max-clients =

connection-cleanup-period =

network-version-match =

sync-fetch-span =

max-implicit-request =

enable-stale-production = false

pause-on-startup = false

max-transaction-time =

max-irreversible-block-age = -

txn-reference-block-lag =

# Plugins used for full nodes

plugin = eosio::chain_api_plugin

plugin = eosio::history_api_plugin

plugin = eosio::chain_plugin

plugin = eosio::history_plugin

plugin = eosio::net_plugin

plugin = eosio::net_api_plugin
2.创建一个创世json文件genesis.json ,放在 ~/eos/build/program/nodeos路径下,文件内容如下:
{

  "initial_timestamp": "2018-06-08T08:08:08.888",

  "initial_key": "EOS7EarnUhcyYqmdnPon8rm7mBCTnBoot6o7fE2WzjvEX2TdggbL3",

  "initial_configuration": {

    "max_block_net_usage": ,

    "target_block_net_usage_pct": ,

    "max_transaction_net_usage": ,

    "base_per_transaction_net_usage": ,

    "net_usage_leeway": ,

    "context_free_discount_net_usage_num": ,

    "context_free_discount_net_usage_den": ,

    "max_block_cpu_usage": ,

    "target_block_cpu_usage_pct": ,

    "max_transaction_cpu_usage": ,

    "min_transaction_cpu_usage": ,

    "max_transaction_lifetime": ,

    "deferred_trx_expiration_window": ,

    "max_transaction_delay": ,

    "max_inline_action_size": ,

    "max_inline_action_depth": ,

    "max_authority_depth":

  }

}
五.启动nodeos
如果使用以前原有的工程,请先清除掉 ~/.local/share/eosio/nodeos/data 文件夹和~/eosio-wallet文件夹,做好准备工作后,启动节点:
cd ~/eos/build/program/nodeos

./nodeos --genesis-json genesis.json
六.查看同步数据
使用命令
cleos get info
输出如下:
hml@Ulord-19:~/.local/share/eosio/nodeos$ cleos get info

{

  "server_version": "c9b7a247",

  "chain_id": "aca376f206b8fc25a6ed44dbdc66547c36c6c33e3a119ffbeaef943642f0e906",

  "head_block_num": 308445,

  "last_irreversible_block_num": 308444,

  "last_irreversible_block_id": "0004b4dcd70b982d37dc2be431ce59c514bb29c6f461449277225dc4aa61956c",

  "head_block_id": "0004b4ddb85592d3625080d80ec1820b06cc3d1a2d11ea4679c16956a6b19ee0",

  "head_block_time": "2018-06-12T05:48:31.500",

  "head_block_producer": "genesisblock",

  "virtual_block_cpu_limit": 200000000,

  "virtual_block_net_limit": 1048576000,

  "block_cpu_limit": 199900,

  "block_net_limit": 1048576

}
其中chain_id的值为aca376f206b8fc25a6ed44dbdc66547c36c6c33e3a119ffbeaef943642f0e906说明已经设置成功了,还可以获取区块191的信息,输入以下命令:
cleos get block
会输出以下内容:
{

  "timestamp": "2018-06-09T11:58:04.500",

  "producer": "eosio",

  "confirmed": ,

  "previous": "000000be7ec418241839c376b35a4ae88b305e045a4f0e779215c5f5f4508e5d",

  "transaction_mroot": "1f09d60c3b791e1fa29e7fe980807ec36fab1c9fbc130f72f492e3b4c965184b",

  "action_mroot": "1ca50b0889e5c6b884e621ff113b17868dfbbc7cd2d4549784c8e50a5114e75c",

  "schedule_version": ,

  "new_producers": null,

  "header_extensions": [],

  "producer_signature": "SIG_K1_K87sojWELjnYSUvpS1Xy1L1P5Etr7xrcnuauqM5zoUYZRTL6eLXA9fZASdvH1ynUq1ZXSceNqWGrcAxj6cZt3ERvgk2aD9",

  "transactions": [{

      "status": "executed",

      "cpu_usage_us": ,

      "net_usage_words": ,

      "trx": {

        "id": "ad77575a8b4f52e477682e712b1cbd884299468db6a94d909f90c6961cea9b02",

        "signatures": [

          "SIG_K1_KfUNC7KHjSGKBrk8FHjq9tqZA12q1aD9pspfBbLW9iw58B6DqoyebmLaEP2VUuJZa2nDZ11YdgEi2VwuqY5sSogh7MaG8p"

        ],

        "compression": "none",

        "packed_context_free_data": "",

        "context_free_data": [],

        "packed_trx": "eac01b5bbd00421775ad000000000100a6823403ea3055000000572d3ccdcd010000000000ea305500000000a8ed3232ba010000000000ea30550000000000004038a08601000000000004454f530000000098014e6576657220646f7562742074686174206120736d616c6c2067726f7570206f662074686f7567687466756c2c20636f6d6d697474656420636974697a656e732063616e206368616e67652074686520776f726c643b20696e646565642c206974277320746865206f6e6c79207468696e672074686174206576657220686173202d20656f7361636b6e6f776c6564676d656e74732e696f00",

        "transaction": {

          "expiration": "2018-06-09T11:58:34",

          "ref_block_num": ,

          "ref_block_prefix": ,

          "max_net_usage_words": ,

          "max_cpu_usage_ms": ,

          "delay_sec": ,

          "context_free_actions": [],

          "actions": [{

              "account": "eosio.token",

              "name": "transfer",

              "authorization": [{

                  "actor": "eosio",

                  "permission": "active"

                }

              ],

              "data": {

                "from": "eosio",

                "to": "b1",

                "quantity": "10.0000 EOS",

                "memo": "Never doubt that a small group of thoughtful, committed citizens can change the world; indeed, it's the only thing that ever has - eosacknowledgments.io"

              },

              "hex_data": "0000000000ea30550000000000004038a08601000000000004454f530000000098014e6576657220646f7562742074686174206120736d616c6c2067726f7570206f662074686f7567687466756c2c20636f6d6d697474656420636974697a656e732063616e206368616e67652074686520776f726c643b20696e646565642c206974277320746865206f6e6c79207468696e672074686174206576657220686173202d20656f7361636b6e6f776c6564676d656e74732e696f"

            }

          ],

          "transaction_extensions": []

        }

      }

    }

  ],

  "block_extensions": [],

  "id": "000000bf87a9db45034a46671514a225cb1a5c30e9b8dc172bc75ef30a812970",

  "block_num": ,

  "ref_block_prefix":

}
发现这个191区块存在这样一笔交易,eosio 账户给 b1账户转了 10个EOS,并且备注了这样一句话:
Never doubt that a small group of thoughtful, committed citizens can change the world; indeed, it's the only thing that ever has - eosacknowledgments.io
翻译成中文是:永远不要怀疑一小群有思想、有责任心的公民能改变世界,事实上,这是唯一的事情。
EOS 主节点同步的更多相关文章
- eos交易同步过程和区块生产过程源码分析
交易同步过程 1 通过命令cleos调用 cleos transfer ${from_account} ${to_account} ${quantity} 发起交易2 eos调用chain_plugi ...
- EOS区块同步源码分析之见证者
调了两天,终于把EOS的出块和DPOS共识机制的代码看了个大概,下面做个小总结.因为这一块是EOS比较核心的代码块,稍微复杂些,如果有理解错误之处,请大家见识并帮我指出来,我也会有可能随时改写这里的内 ...
- MongoDB副本集配置系列十一:MongoDB 数据同步原理和自动故障转移的原理
1:数据同步的原理: 当Primary节点完成数据操作后,Secondary会做出一系列的动作保证数据的同步: 1:检查自己local库的oplog.rs集合找出最近的时间戳. 2:检查Primary ...
- 基于【CentOS-7+ Ambari 2.7.0 + HDP 3.0】搭建HAWQ数据仓库——安装配置NTP服务,保证集群时间保持同步
一.所有节点上使用yum安装配置NTP服务yum install ntp -y 二.选定一台节点作为NTP server, 192.168.58.11修改/etc/ntp.conf vim /etc/ ...
- redis主从同步收到以下参数影响
repl-ping-slave-period主从心跳ping的时间间隔.默认10 repl-timeout 从节点超时时间.默认60 repl-backlog-size 主节点保存操作日志的大 ...
- 搭建PowerDNS+LAP+NFS+MySQL主从半节点同步实现LAMP架构
实验环境:(共7台机器) PowerDNS: 192.168.99.110 两台LAP: 192.168.99.120 和 192.168.99.130 NFS服务器:192.168.99.14 ...
- Redis面试热点工程架构篇之数据同步
温馨提示 更佳阅读体验:[决战西二旗]|Redis面试热点之工程架构篇[2] 前言 前面用了3篇文章介绍了一些底层实现和工程架构相关的问题,鉴于Redis的热点问题还是比较多的,因此今天继续来看工程架 ...
- MySQL主从同步-原理&实践篇
来源:Onegoleya 简栈文化 什么是mysql的主从复制? MySQL 主从复制是指数据可以从一个MySQL数据库服务器主节点复制到一个或多个从节点.MySQL 默认采用异步复制方式,这样从节点 ...
- redis 学习笔记(2)
redis-cluster 简介 redis-cluster是一个分布式.容错的redis实现,redis-cluster通过将各个单独的redis实例通过特定的协议连接到一起实现了分布式.集群化的目 ...
随机推荐
- POJ 1330 Nearest Common Ancestors 【最近公共祖先LCA算法+Tarjan离线算法】
Nearest Common Ancestors Time Limit: 1000MS Memory Limit: 10000K Total Submissions: 20715 Accept ...
- .DS_Store 文件是什么?Mac下面如何禁止.DS_Store生成
.DS_Store是Mac OS保存文件夹的自定义属性的隐藏文件,如文件的图标位置或背景色,相当于Windows的desktop.ini. 1,禁止.DS_store生成:打开 “终端” ,复制黏贴下 ...
- bzoj2309 CTSC2011 字符串重排
题意: 给定n个字符串S1,S2,S3,...,Sn,把它们排序 设排序结果为Sp1,Sp2,Sp3,...,Spn 现在给定q个任务,每个任务的格式都是"要求在排序结果中Sa恰好在Sb前一 ...
- ACM学习历程——NOJ1113 Game I(贪心 || 线段树)
Description 尼克发明了这样一个游戏:在一个坐标轴上,有一些圆,这些圆的圆心都在x轴上,现在给定一个x轴上的点,保证该点没有在这些圆内(以及圆上),尼克可以以这个点为圆心做任意大小的圆,他想 ...
- hive通过spark导入hbase
发现采用shcjar的话,总是执行到某个点就停止了 于是我打算尝试一下直接说哦用org.apache.hadoop.hbase.spark这个datasource看看 确实不行,即使没有createt ...
- WPF ListView VisualPanel
<ItemsPanelTemplate x:Key="ItemsPanelTemplate1"> &l ...
- eclipse 上svn插件的安装,百度知道
打开eclipse -> Help ->Install New Software选项, 点击Add按钮 根据需要,添加自己需要的版本svn控制器的版本,填写name和url,点击ok. ...
- Unique Binary Search Trees-计算表示相同序列的不同BST个数
题目描述: 给定整数n,计算存储序列为1...n的结构唯一的BST的个数 题目来源: http://oj.leetcode.com/problems/unique-binary-search-tree ...
- MFC获取数据的方式
假设输入框ID是:ID_NUMBER1,ID_NUMBER2,ID_NUMBER3. 获取数据的方式是: int number1,number2,number3; number1 = GetDlgIt ...
- git for eclipse 如何取消误操作的忽略(ignore)操作
直接删除ignore文件即可.如下显示: 原文引用:https://blog.csdn.net/exceptionss/article/details/79082601
