yum搭建LAMP环境
LAMP=Linux+Apache(httpd)+Mysql(mariadb)+PHP
Apache HTTP 服务器 2.4 文档:http://httpd.apache.org/docs/2.4/
(1).实验环境
LAMP服务器:youxi1 192.168.5.101
测试主机:youxi2(CentOS7) 192.168.5.102
Windows 192.168.5.1
(2).安装与说明
CentOS6使用如下命令:
yum -y install httpd mysql mysql-server php php-mysql
CentOS7使用如下命令:
[root@youxi1 ~]# yum -y install httpd mariadb mariadb-server php php-mysql
httpd说明:httpd是Apache服务的主程序包,服务器端必须安装。httpd-devel是Apache开发程序包。httpd-manual是Apache手册文档,包含HTML格式的Apache计划的Apache User's Guide说明指南。httpd-tools是Apache相关工具包。
(3).开启服务进行测试
测试httpd和mariadb是否能正常启动,并设置开机自启
[root@youxi1 ~]# systemctl start httpd.service

[root@youxi1 ~]# systemctl enable httpd.service

Created symlink from /etc/systemd/system/multi-user.target.wants/httpd.service to /usr/lib/systemd/system/httpd.service.

[root@youxi1 ~]# systemctl start mariadb.service

[root@youxi1 ~]# systemctl enable mariadb.service

Created symlink from /etc/systemd/system/multi-user.target.wants/mariadb.service to /usr/lib/systemd/system/mariadb.service.
编写php测试文件
[root@youxi1 ~]# vim /var/www/html/index.php

<?php

        phpinfo();

?>
重启httpd
[root@youxi1 ~]# systemctl restart httpd.service
如果防火墙是打开的,还需将端口号加入防火墙中
[root@youxi1 ~]# firewall-cmd --permanent --zone=public --add-port=80/tcp

success

[root@youxi1 ~]# firewall-cmd --reload

success
之后Windows就可以在浏览器中查看了,结果如下: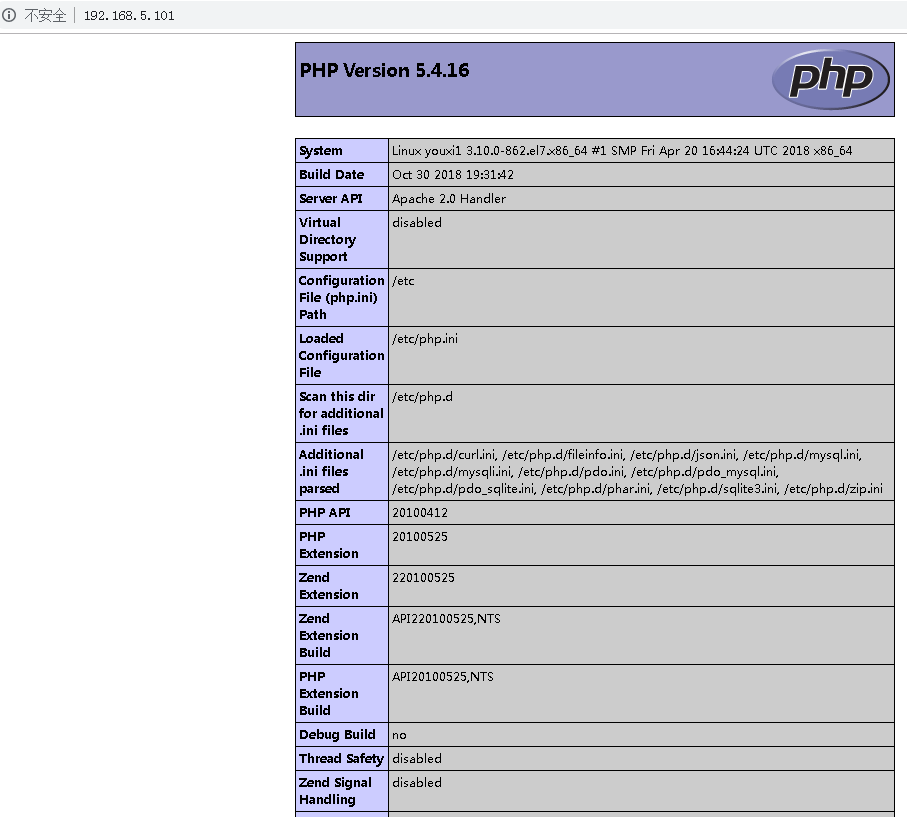
当然也可以使用Linux的elinks(需要安装),当然elinks只能简单查看
[root@youxi1 ~]# yum -y install elinks

(4).httpd主配置文件常用参数说明(2.4版本)
yum安装的httpd主要配置文件是/etc/httpd/conf/httpd.conf。其中比较常用的参数如下:
ServerRoot "/etc/httpd"  //httpd服务的根目录

Timeout 60  //超时时间,默认60秒。默认配置文件中没有,需手动添加

Listen 80  //监听的IP和端口,完整格式为[IP]:[port],IP省略则监听所有本地IP

Include conf.modules.d/*.conf  //conf.modules.d目录下的所有.conf文件都生效,该相对路径以httpd服务的根目录为参照

User apache  //以什么用户运行

Group apache  //以什么组运行

ServerAdmin root@localhost  //设置管理员email地址

#ServerName www.example.com:80  //服务区用于标识自身的主机名和端口号

DocumentRoot "/var/www/html"  //默认的主目录,至少存在一个目录设置相同的<Directory "[dir]">,否则将使用默认参数

<Directory "/var/www/html">  //一旦与DocumentRoot设置的目录相同,将使用内部设置的参数

Options Indexes FollowSymLinks  //当目录没有默认首页时,允许浏览目录结构。为了安全建议禁止浏览目录结构

AllowOverride None  //设置为None则忽略.htaccess

Require all granted  //支持所有访问,Require all denied表示拒绝所有访问

</Directory>

<IfModule dir_module>

DirectoryIndex index.html  //设置目录默认首页,我没改index.php也运行起来了,估计默认index都被扫描了

</IfModule>

LogLevel warn  //日志等级

AddDefaultCharset UTF-8  //支持的编码

IncludeOptional conf.d/*.conf  //conf.d目录下的所有.conf文件也属于有效配置文件,该相对路径以httpd服务的根目录为参照
与Require all granted相关的授权容器详细查看:http://httpd.apache.org/docs/2.4/mod/mod_authz_core.html#require
Require all granted 	//允许所有

Require all denied 	//拒绝所有

Require method http-method [http-method] ... 	//只允许特定的HTTP方法

Require user userid [ userid ] ... 	//只允许特定用户

Require group group-name [group-name] ... 	//只允许特定用户组

Require valid-user 	//只允许有效用户
另特别说明:
<RequireALL>

    Require ip 192.168.5.1  //只允许指定ip访问,空格分隔

    Require not ip 192.168.5.1  //不允许指定ip访问,空格分隔

</RequireALL>
有Require ip可以没有Require not ip。但有Require not ip就必须有Require ip,否则httpd服务报错。
(5).修改配置文件第一次尝试
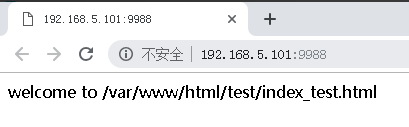
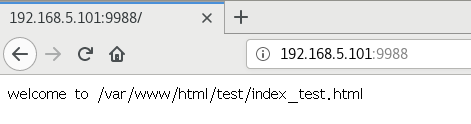
目标:设置超时时间为60s,监听端口9988,邮箱改一下。默认主目录修改为/var/www/html/test,默认首页为index_test.html。
修改配置文件/etc/httpd/conf/httpd.conf的以下参数:
timeout 60    //添加

Listen 9988    //修改

ServerAdmin youxi@163.com    //修改,我这里随便写了

ServerName 192.168.5.101:9988    //可以添加,可以去除注释后修改

DocumentRoot "/var/www/html/test"    //修改

<Directory "/var/www/html/test">    //可以修改,可以新建

    Options Indexes FollowSymLinks  //如果没有默认首页,可以访问目录结构

    AllowOverride None

    Require all granted  //允许所有人访问

</Directory>

<IfModule dir_module>

    DirectoryIndex index_test.html    //修改

</IfModule>
接着取消默认的welcome页面,注释掉/etc/httpd/conf.d/welcome.conf配置文件的所有内容。
然后创建/var/www/html/test目录和目录下的首页index_test.html
[root@youxi1 ~]# mkdir -p /var/www/html/test

[root@youxi1 ~]# vim /var/www/html/test/index_test.html

welcome to /var/www/html/test/index_test.html
重新启动httpd服务
[root@youxi1 ~]# systemctl restart httpd.service
修改防火墙端口设置
[root@youxi1 ~]# firewall-cmd --permanent --zone=public --remove-port=80/tcp

success

[root@youxi1 ~]# firewall-cmd --permanent --zone=public --add-port=9988/tcp

success

[root@youxi1 ~]# firewall-cmd --reload

success

[root@youxi1 ~]# firewall-cmd --zone=public --list-ports

9988/tcp
最后查看了


(6).修改配置文件第二次尝试
目标:限制访问IP,不允许Windows访问
修改配置文件/etc/httpd/conf/httpd.conf的以下参数:
<Directory "/var/www/html/test">    //可以修改,可以新建

    Options Indexes FollowSymLinks  //如果没有默认首页,可以访问目录结构

    AllowOverride None

#    Require all granted  //注释掉

    <RequireALL>  //添加

        Require ip 192.168.5.1 192.168.5.131  //只允许指定的IP访问

        Require not ip 192.168.5.102  //不允许指定的IP访问

    </RequireALL>

</Directory>
重启httpd服务
[root@youxi1 ~]# systemctl restart httpd.service
Windows(192.168.5.1)浏览器查看
youxi2(192.168.5.102)使用elinks查看

又加了一台CentOS7(192.168.5.131),桌面系统
(7).修改配置文件第三次尝试
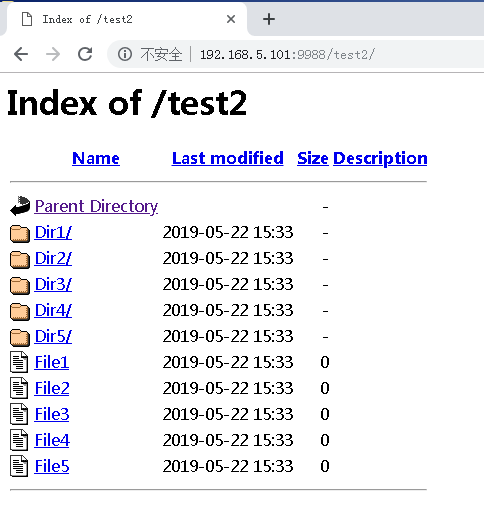
目标:引用主目录外的目录
修改配置文件/etc/httpd/conf/httpd.conf的以下参数:
Alias /test2/ "/test2/"  //添加别名

<Directory "/test2/">  //添加别名的参数

    Options Indexes FollowSymLinks

    AllowOverride None

    Require all granted

</Directory>
注意:<Directory "[dir]"></Directory>间的参数互不影响。
创建/test2/目录和测试文件与目录
[root@youxi1 ~]# mkdir /test2

[root@youxi1 ~]# touch /test2/File{1..5}

[root@youxi1 ~]# mkdir /test2/Dir{1..5}

[root@youxi1 ~]# ls /test2/

Dir1  Dir2  Dir3  Dir4  Dir5  File1  File2  File3  File4  File5
接着重启httpd服务
[root@youxi1 ~]# systemctl restart httpd.service
Windows(192.168.5.1)浏览器访问
youxi2(192.168.5.102)使用elinks访问

(8).修改配置文件第四次尝试
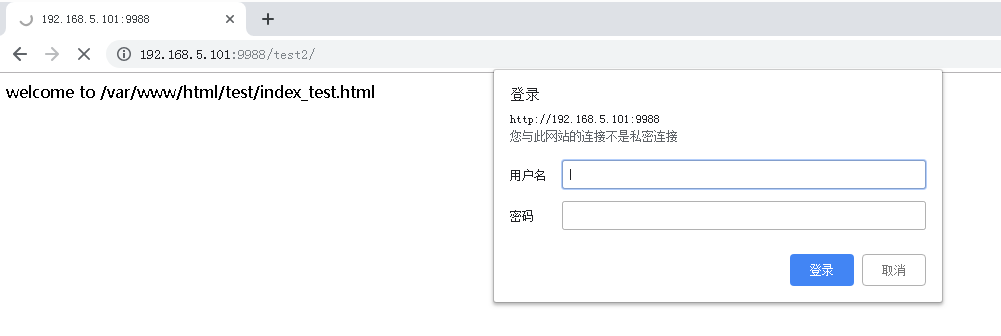
目标:禁止查看目录结构,并使用用户登录
修改配置文件/etc/httpd/conf/httpd.conf的以下参数:
Alias /test2/ "/test2/"

<Directory "/test2/">

#    Options Indexes FollowSymLinks  //注释掉,禁止查看目录结构

    AllowOverride None

#    Require all granted  //注释掉

    authtype basic  //指定认证类型为basic

    authname "my web site"  //认证信息

    authuserfile /etc/httpd/conf/user.passwd  //指定包含用户名和密码的文件

    require valid-user  //只允许有效用户登录

</Directory>
生成存放文件和密码的文件
[root@youxi1 ~]# htpasswd -cm /etc/httpd/conf/user.passwd youxi1

New password:

Re-type new password:

Adding password for user youxi1

[root@youxi1 ~]# htpasswd -m /etc/httpd/conf/user.passwd youxi2

New password:

Re-type new password:

Adding password for user youxi2

[root@youxi1 ~]# cat /etc/httpd/conf/user.passwd

youxi1:$apr1$7AIP0HXy$6wudl4S6Rybz7.T3S8BBv.

youxi2:$apr1$JHX3ZGwB$e5AmRlHr3DN3TUejBOsZ8/
注意:htpasswd命令-c选项是创建一个新的文件,所以除第一次使用外都不能使用,否则会覆盖文件内容。-m选项是使用MD5加密方法。
重启httpd服务
[root@youxi1 ~]# systemctl restart httpd.service
Windows(192.168.5.1)浏览器登录
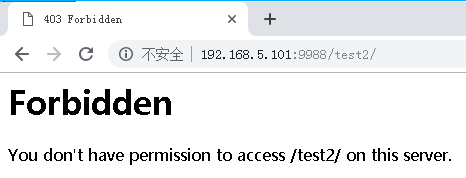
登录后(没有默认页面,也不能查看目录结构)
yum搭建LAMP环境的更多相关文章
- 利用yum搭建lamp环境并进一步创建博客
用yum搭建lamp环境 第一.安装apache yum -y install httpd 第二.安装mariadb Yum -y mariadb mariadb-server 第三.安装php Yu ...
- CentOS 6.6 yum 搭建LAMP环境
CentOS 查看操作系统版本 [root@oa ~]# cat /etc/redhat-releaseCentOS release 6.6 (Final) 参考linux centos yum安装L ...
- yum搭建 Lamp环境
yum搭建Lamp yum install -y httpd yum install -y nano rpm 安装 Php7 相应的 yum源 rpm -Uvh https://dl.fedorapr ...
- centos7用yum搭建LAMP环境
用yum快速搭建LAMP平台 实验环境: [root@nmserver- html]# cat /etc/redhat-release CentOS release (AltArch) [root@n ...
- centos7 yum搭建lamp环境
=============================================== 2018/1/14_第1次修改 ccb_warlock == ...
- CentOS下搭建LAMP环境详解
前言:在这里将介绍如何在CentOS下搭建LAMP环境(全部使用源码编译安装),用于web服务器开发. •LAMP: Linux + Apache + PHP + Mysql. •系统: CentOS ...
- Centos6.4版本下搭建LAMP环境
Centos6.4版本下搭建LAMP环境 配置yum mkdir/mnt/cdrom mount/dev/cdrom /mnt/cdrom 装载光盘 vi /etc/yum.repos.d/Cent ...
- Centos7+Apache2.4+php5.6+mysql5.5搭建Lamp环境——为了wordPress
最近想搭建个人博客玩玩,挑来挑去发现口碑不错的博客程序是wordpress,简称wp.虽然是学java路线的程序员,但因入行时间太短,至今没有发现较为称手开源的博客程序,如果各位大神有好的推荐,也希望 ...
- Linux手动搭建LAMP环境
当你看到标题里的“手动搭建”,你是不是会想,难不成还有“自动搭建”?当然......不是,这里的“手动搭建”是指按部就班的搭建Apache.MySQL.PHP环境,是相对于集成软件包而言的.所以你是不 ...
随机推荐
- ubuntu---github下载太慢的解决办法
git clone --recursive https://github.com/tensorflow/tensorflow 下载太慢了,20:05-21:17 才下载了17%,等的太急人了. ** ...
- Maya mel maya档出现未知插件解决方法
Maya mel maya档出现未知插件解决方法 以下 mel 代码,拷贝到 maya 的脚本编辑器的 mel 中,最好运行两次 string $unknownNodes[] = `ls -type ...
- 甘特图、Data Editors控件新玩法—DevExpress WPF v19.2
通过DevExpress WPF Controls,你能创建有着强大互动功能的XAML基础应用程序,这些应用程序专注于当代客户的需求和构建未来新一代支持触摸的解决方案. 无论是Office办公软件的衍 ...
- python utf8
1. # coding:utf-8 作用是定义源代码的编码. 如果没有定义, 此源码中是不可以包含中文字符串的.PEP 0263 -- Defining Python Source Code Enco ...
- JS 框架安全报告:jQuery 下载次数超过 1.2 亿次
尽管 JavaScript 库 jQuery 仍被使用,但它已不再像以前那样流行.根据开源安全平台 Snyk 统计,目前至少十分之六的网站受到 jQuery XSS 漏洞的影响,甚至用于扩展 jQue ...
- BZOJ 3884——欧拉降幂和广义欧拉降幂
理论部分 欧拉定理:若 $a,n$ 为正整数,且 $a,n$ 互质,则 $a^{\varphi (n)} \equiv 1(mod \ n)$. 降幂公式: $$a^b=\begin{cases}a^ ...
- BZOJ 3672[NOI2014]购票(树链剖分+线段树维护凸包+斜率优化) + BZOJ 2402 陶陶的难题II (树链剖分+线段树维护凸包+分数规划+斜率优化)
前言 刚开始看着两道题感觉头皮发麻,后来看看题解,发现挺好理解,只是代码有点长. BZOJ 3672[NOI2014]购票 中文题面,题意略: BZOJ 3672[NOI2014]购票 设f(i)f( ...
- springAop Schedule,注解annotation 实现任务监控
我们有很多定时任务在任务工程中执行,但是如果我们不加以监控,很有可能定时任务死掉或者卡住我们都不知道. 所以需要做一个任务监控.监控任务当前执行的状态. 还是那样,先让定时任务启动起来,当前我们使用的 ...
- 23、自动装配-Aware注入Spring底层组件&原理
23.自动装配-Aware注入Spring底层组件&原理 Aware 接口,提供了类似回调函数的功能 自定义组件想要使用Spring 容器底层的一些组件(Application Context ...
- IDEA jetbrain Live Template
IDEA(jetbrain通用)优雅级使用教程 IDEA 强大的 Live Templates(转) 官网