Springboot依赖注入笔记
结合Autowired和Service注解
public interface IUser {

    void say();

}

@Service

public class Student implements IUser {

    @Override

    public void say() {

        System.out.println("I'm a student");

    }

}

@Component

@Order(value = 3)

public class Entry implements CommandLineRunner {

    public Log log = LogFactory.getLog(Entry.class);

    @Autowired

    IUser user;

    @Override

    public void run(String... args) throws Exception {

        user.say();

    }

}
如果要在构造函数中就需要访问注入的变量,那么Autowired的位置就要放到构造函数上
@Component

@Order(value = 3)

public class TestService {

    private final IUser user;

    @Autowired

    public void TestService (IUser user) {

        user.say();

    }

}
自定义注入的扫描范围
要注意Springboot扫描包的时候默认是从启动类(一般是Application)目录开始往下扫描,也就意味着如果Bean不在Application目录的下层,是不会被扫描到的。
这种情况会提示:
Description:

Field xxx in xxxxxx required a bean of type 'xxxxxx' that could not be found.

Action:

Consider defining a bean of type 'xxxxxxxxxxxxxx' in your configuration.
不过这也不是无法改变的,我们手动指定扫描范围即可:
@SpringBootApplication

@ComponentScan(basePackages={"springbootdemo.basic","anotherspringbootdemo.basic"})

public class Application {

    public static void main(String[] args) {

        SpringApplication.run(Application.class, args);

    }

}
范围列表中不要忘记添加原来的目录,及启动类的包范围。
另外,这个ComponentScan不是必须放到启动类上,只要可以被扫描到即可。
通过Configuration的方式
通过Configuration也可以实现“跨域”的注入方式(即package不在一个范围内)
/**

* Springboot会扫描标有Configuration注解的类

* 该类中标有Bean注解的方法,返回值会被作为被注入项

* 至于这个Bean的注入项,在方法里面return就是。

*/

@Configuration

public class TestConfig{

    @Bean

    public IUser user(){

        return new Teacher();

    }

    //有依赖关系的Bean也很简单

    //这个IDepartment依赖IUser

    @Bean

    public IDepartment(){

        return new Development(user());

    }

}

/*调用*/

public class TestClass{

    @Autowired

    IUser user;

    public void run(String... args) throws Exception {

        user.say();

    }

}
上面的Configuration虽然解决了“跨域”注入,但Configuration注解还是要求放到调用的项目中。
很多时候当我们需要依赖一个第三方jar包,并想要实现自动注入的时候,我们并不想再去手动写Configuration,毕竟如果多个地方引用这个jar包,每一处都需要这样处理。
能不能一劳永逸呢?
使用Springboot中的框架时,例如使用ES,我们发现虽然并没有声明ElasticSearchTemplate,但是却可以直接使用
这里有一篇不错的讲解 https://www.jianshu.com/p/346cac67bfcc
假设第三方项目是ProjectA,应用方是ProjectB
现在ProjectA有 类TestTemplate
package ProjectA;

public class TestTemplate{

    public void test() {

        System.out.println("GO TEST");

    }

}
ProjectB需要注入并使用TestTemplate,当然肯定要先添加maven的依赖(忽略),调用逻辑
package ProjectB;

import org.springframework.beans.factory.annotation.Autowired;

import org.springframework.boot.CommandLineRunner;

import org.springframework.stereotype.Component;

import springbootdemo.common.TestTemplate;

@Component

public class Entry implements CommandLineRunner {

    @Autowired

    private TestTemplate aa;

    @Override

    public void run(String... args) throws Exception {

        aa.test();

    }

}
这时候运行ProjectB的话肯定是会报错的,因为找不到TestTemplate的注入结果,即使在TestTemplate上添加注解也是一样。
我们直接给出一个简单的解决方案
①在ProjectA中新建一个自动配置类 TestAutoConfiguration
package ProjectA;

import org.springframework.boot.autoconfigure.condition.ConditionalOnMissingBean;

import org.springframework.context.annotation.Bean;

import org.springframework.context.annotation.Configuration;

@Configuration

public class TestAutoConfiguration {

    @Bean

    @ConditionalOnMissingBean

    public TestTemplate testTemplate(){

        return new TestTemplate();

    }

}
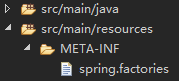
②在ProjectA的资源目录src/main/resources下创建目录META-INF/spring.factories
内容:
org.springframework.boot.autoconfigure.EnableAutoConfiguration=\

ProjectA.TestAutoConfiguration
现在再执行,一切OK!
Springboot依赖注入笔记的更多相关文章
- 跟我猜Spring-boot:依赖注入
依赖注入 引&目标 本篇是<跟我猜Spring-Boot>系列的第二篇(Oh,我竟然已经写了10篇了,真不容易). 在上一篇中,我们实现了Bean的创建,但是仅仅是创建而已,并没有 ...
- Unity依赖注入(笔记)
一.介绍 控制反转(Inversion of Control,简称IoC):整洁架构思想,不允许内部获知外部的存在,这就导致了我们必须在内层定义与外层交互的接口,通过依赖注入的方式将外层实现注入到内部 ...
- Springboot依赖注入 Service类中使用静态变量
@Component public class ServerHandler extends IoHandlerAdapter { @Autowired protected HealthDataServ ...
- .NET CORE学习笔记系列(2)——依赖注入[7]: .NET Core DI框架[服务注册]
原文https://www.cnblogs.com/artech/p/net-core-di-07.html 包含服务注册信息的IServiceCollection对象最终被用来创建作为DI容器的IS ...
- .NET CORE学习笔记系列(2)——依赖注入[6]: .NET Core DI框架[编程体验]
原文https://www.cnblogs.com/artech/p/net-core-di-06.html 毫不夸张地说,整个ASP.NET Core框架是建立在一个依赖注入框架之上的,它在应用启动 ...
- .NET CORE学习笔记系列(2)——依赖注入[5]: 创建一个简易版的DI框架[下篇]
为了让读者朋友们能够对.NET Core DI框架的实现原理具有一个深刻而认识,我们采用与之类似的设计构架了一个名为Cat的DI框架.在上篇中我们介绍了Cat的基本编程模式,接下来我们就来聊聊Cat的 ...
- .NET CORE学习笔记系列(2)——依赖注入[4]: 创建一个简易版的DI框架[上篇]
原文https://www.cnblogs.com/artech/p/net-core-di-04.html 本系列文章旨在剖析.NET Core的依赖注入框架的实现原理,到目前为止我们通过三篇文章从 ...
- .NET CORE学习笔记系列(2)——依赖注入【3】依赖注入模式
原文:https://www.cnblogs.com/artech/p/net-core-di-03.html IoC主要体现了这样一种设计思想:通过将一组通用流程的控制权从应用转移到框架中以实现对流 ...
- .NET CORE学习笔记系列(2)——依赖注入【2】基于IoC的设计模式
原文:https://www.cnblogs.com/artech/p/net-core-di-02.html 正如我们在<控制反转>提到过的,很多人将IoC理解为一种“面向对象的设计模式 ...
随机推荐
- python 通过文件路径获取文件hash值
import hashlib import os,sys def CalcSha1(filepath): with open(filepath,'rb') as f: sha1obj = hashli ...
- python常见模块之序列化(json与pickle以及shelve)
什么是序列化? 我们把对象(变量)从内存中变成可存储或传输的过程称之为序列化,在Python中叫pickling,在其他语言中也被称之为serialization,marshalling,flatte ...
- Python性能优化的20条建议
优化算法时间复杂度 算法的时间复杂度对程序的执行效率影响最大,在Python中可以通过选择合适的数据结构来优化时间复杂度,如list和set查找某一个元素的时间复杂度分别是O(n)和O(1).不同的场 ...
- 常用WebSite Address
百度 魅族深度学习应用大赛 byr论坛 帖子 https://bbs.byr.cn/#!article/ML_DM/24852?p=1 百度 魅族深度学习应用大赛 官网 http://meizu.ba ...
- linux文件编程----系统调用
linux中文件编程可以使用两种方法: 1).linux系统调用 2).C语言库函数 前者依赖于linux系统,后者与操作系统是独立的. 在 linux系统中,所有打开的文件也对应一个数字,这个数字由 ...
- shiro 密码如何验证?
Authentication:身份认证/登录,验证用户是不是拥有相应的身份. Authorization:授权,即权限验证,验证某个已认证的用户是否拥有某个权限:即判断用户是否能做事情. 这里我们主要 ...
- debian7更换gcc版本的二种方法分享
debian7更换gcc版本的二种方法分享 最近在编译qt,之前用的是debian6,gcc版本是gcc-4.4,当使用debian7时,编译遇到了很多跟debian6不一样的问题,debian7 ...
- iClap:更智能的场景化工作方式
8月31日,移动互联网企业运营解决方案整合平台DevStore团队正式推出新品——产品管理系统iClap,iClap集成了智能任务管理.Bug跟踪.简单发布.人才培养等功能,同时推出普通版和旗舰版两个 ...
- 什么是“HTML”?HTML的“标记”是什么?
①文本标记语言 即HTML(Hypertext Markup Language),是用于描述网页文档的一种标记语言. ②HTML 标记标签 通常被称为 HTML 标签 (HTML tag). ③HTM ...
- typeof instanceof 和 obj.constructor
1.typeof用以获取一个变量或者表达式的类型,typeof一般只能返回如下几个结果: 'number','boolean','string','function'(函数),'object'(NU ...