django-应用中和amdin使用富文本编辑器kindeditor
文章描述、新闻详情和产品介绍等,都需要大量的文字描述信息或图片、视频、文字的编辑等,这个时候我们就需要介绍第三方富文本编辑器。
今天介绍的是django中绑定和应用kindeditor编辑器:
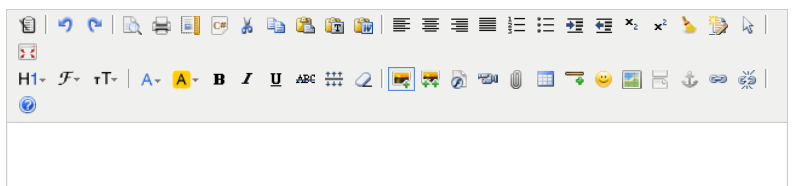
效果如图:

一。应用中使用
第一步:到官网下载 kindeditor
下载好后删除这些没有的文件asp,asp.net,jsp,php.在django中这些都没用。

第二步:将删除后的文件引入自己的项目中。根目录下的static/js/kindeditor/

第三步:
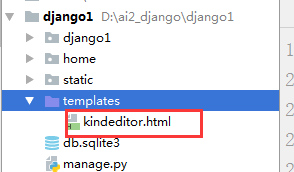
1.创建前端测试展示页kindeditor.html
 <!DOCTYPE html>

 <html lang="en">

 <head>

     <meta charset="UTF-8">

     <title>Title</title>

     <!--载入kindeditor的js-->

      <script src="/static/js/kindeditor/kindeditor-all-min.js"></script>

     <script src="/static/js/kindeditor/lang/zh-CN.js"></script>

     <script src="/static/js/kindeditor/themes/default/default.css"></script>

     <!--载入kindeditor配置-->

      <script>

         KindEditor.ready(function (k) {

             window.editor = k.create('#editor_id',{

                 resizeType:1,

                 allowPreviewEmoticons : false,

                 allowImageRemote : false,

                 {#处理url#}

                 uploadJson : '/upload/kindeditor',

             });

         })

     </script>

 </head>

 <body>

 <!--kindeditor绑定内容:在thml的textarea 中加入一个id=editor_id ,这个就是富文本编辑框。这个id在上一步的js中有用到,这个需要注意下。-->

 <textarea id="editor_id" name="content" style="height: 400px" ></textarea>

 </body>

 </html>
注意:载入js路径根据自己保存的kindeditor的js路径
2.配置路由urls.py和views.py
 from django.conf.urls import url,include

 from django.contrib import admin

 from home import views

 urlpatterns = [

     url(r'^kindeditor/',views.kindeditor),

 ]
urls.py
def kindeditor(request):

    return render(request,'kindeditor.html')
views.py
以上正确配置后,就可以访问http://localhost:8000/kindeditor/
第四步:接下来做django中的配置。(对于文件上传功能的设置)
1. setting.py 文件中配置静态文件上传目录,编辑器中上传的文件将保存在这里。
MEDIA_URL = '/static/media/'

MEDIA_ROOT = os.path.join(BASE_DIR, "static/media")
2. 在自己的应用中创建一个文件名为uploads.py 的模块,
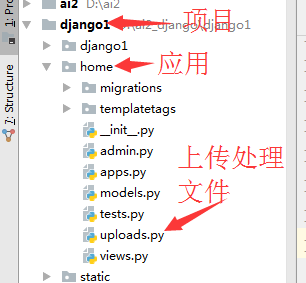
uploads.py代码如下
这里是在我的blog应用中,创建好后将下面这段代码复制到文件中
 #__author__ = 'wuchao'

 from django.http import HttpResponse

 from django.conf import settings

 from django.views.decorators.csrf import csrf_exempt

 import os

 #uuid.uuid1()基于MAC地址,时间戳,随机数来生成唯一的uuid,可以保证全球范围内的唯一性

 import uuid

 import json

 import datetime as dt

 @csrf_exempt

 def upload_image(request, dir_name):

     result = {"error": 1, "message": "上传出错"}

     files = request.FILES.get("imgFile", None)

     if files:

         result = image_upload(files, dir_name)

     return HttpResponse(json.dumps(result), content_type="application/json")

 # 目录创建

 def upload_generation_dir(dir_name):

     today = dt.datetime.today()

     dir_name = dir_name + '/%d/%d/' % (today.year, today.month)

     if not os.path.exists(settings.MEDIA_ROOT + dir_name):

         os.makedirs(settings.MEDIA_ROOT + dir_name)

     return dir_name

 # 图片上传

 def image_upload(files, dir_name):

     # 允许上传文件类型

     allow_suffix = ['jpg', 'png', 'jpeg', 'gif',

                     'bmp', 'zip', "swf", "flv",

                     "mp3", "wav", "wma", "wmv",

                     "mid", "avi", "mpg", "asf",

                     "rm", "rmvb", "doc", "docx",

                     "xls", "xlsx", "ppt", "htm",

                     "html", "txt", "zip", "rar",

                     "gz", "bz2"]

     file_suffix = files.name.split(".")[-1]

     if file_suffix not in allow_suffix:

         return {"error": 1, "message": "图片格式不正确"}

     relative_path_file = upload_generation_dir(dir_name)

     path = os.path.join(settings.MEDIA_ROOT, relative_path_file)

     if not os.path.exists(path):  # 如果目录不存在创建目录

         os.makedirs(path)

     file_name = str(uuid.uuid1()) + "." + file_suffix

     path_file = os.path.join(path, file_name)

     file_url = settings.MEDIA_URL + relative_path_file + file_name

     open(path_file, 'wb').write(files.file.read())

     return {"error": 0, "url": file_url}
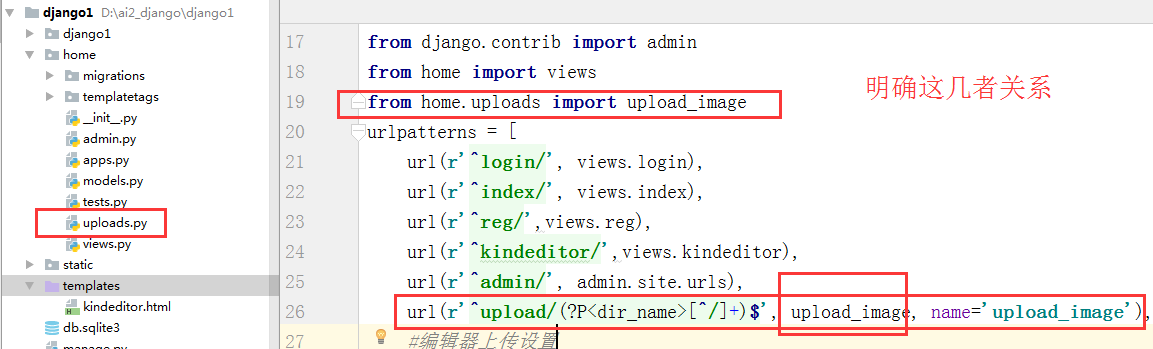
第五步:配置应用中文件上传的url
from home.uploads import upload_image
url(r'^upload/(?P<dir_name>[^/]+)$', upload_image, name='upload_image'),
 from django.conf.urls import url,include

 from django.contrib import admin

 from home import views

 from home.uploads import upload_image

 urlpatterns = [

     url(r'^kindeditor/',views.kindeditor),

     #上传的url配置

     url(r'^upload/(?P<dir_name>[^/]+)$', upload_image, name='upload_image'),

     url(r'^admin/', admin.site.urls),

 ]
urls.py
上面这些步骤富文本编辑器应该可以正常使用了,包括上传图片,视频。
上传文件保存在: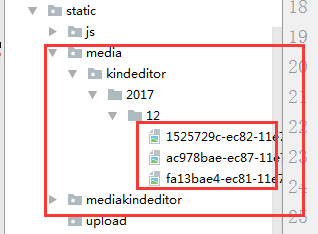
下面我们来看下在admin后台管理中使用
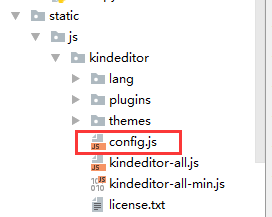
1.首先在我们之前下载的kindeditor 目录下新建一个config.js文件写入这段代码跟之前在应用中使用的是一样的
 KindEditor.ready(function (k) {

      //这个地方需要注意;模型类中使用 text = models.TextField()的话id就是id_text。

     // 如果是提前字段类型可以到浏览器中检查,获取到需要使用富文本编辑器的元素的id

     window.editor = k.create('#id_content',{

         resizeType:1,

         allowPreviewEmoticons : false,

         allowImageRemote : false,

         uploadJson : '/upload/kindeditor', //这个是上传图片后台处理的url

         width:'800px',

         height:'400px',

     });

 })
config.js
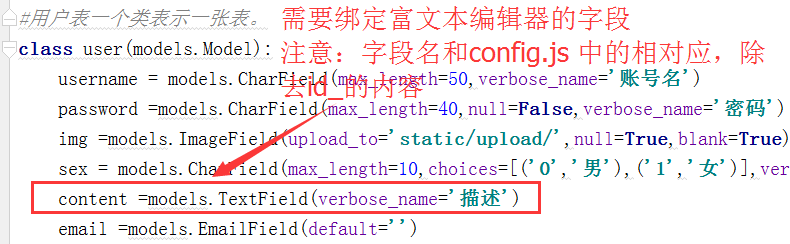
2.在应用的模型层models.py的类中添加 content=TextField()
个人代码如下:
3.接下来就需要去admin.py中注册模型类,将其kindeditor的js文件引入到admin中
class userAdmin(admin.ModelAdmin):

    list_display = ('id','username','email','sex','img_data')

    class Media:

            # 在管理后台的HTML文件中加入js文件, 每一个路径都会追加STATIC_URL/

        js = (

                '/static/js/kindeditor/kindeditor-all-min.js',

                '/static/js/kindeditor/zh_CN.js',

                '/static/js/kindeditor/config.js',

            )

#使用admin.site.register

admin.site.register(models.user,userAdmin)
django-应用中和amdin使用富文本编辑器kindeditor的更多相关文章
- 使用富文本编辑器Kindeditor
今天在做需求的时候,遇到有一个字段,需要保存带有格式的内容,决定使用富文本框编辑器Kindeditor来实现,解决方法如下: 登录官网下载控件包: http://kindeditor.net/down ...
- Django中使用富文本编辑器Uedit
Uedit是百度一款非常好用的富文本编辑器 一.安装及基本配置 官方GitHub(有详细的安装使用教程):https://github.com/zhangfisher/DjangoUeditor 1. ...
- Django使用富文本编辑器
1.下载kindeditor 网址:http://kindeditor.net/demo.php2.解压到项目中 地址:\static\js\kindeditor-4.1.103.删除没用的文件 例如 ...
- Django实现的博客系统中使用富文本编辑器ckeditor
操作系统为OS X 10.9.2,Django为1.6.5. 1.下载和安装 1.1 安装 ckeditor 下载地址 https://github.com/shaunsephton/django-c ...
- Django后台管理admin或者adminx中使用富文本编辑器
在admin或者adminx后台中使用富文本编辑器 一.建立模型:(安装django-tinymce==2.6.0) from django.db import models from tinymce ...
- flask项目中使用富文本编辑器
flask是一个用python编写的轻量级web框架,基于Werkzeug WSGI(WSGI: python的服务器网关接口)工具箱和Jinja2模板,因为它使用简单的核心,用extension增加 ...
- vue+element-ui 使用富文本编辑器
npm安装编辑器组件npm install vue-quill-editor –save 在components文件夹创建ue.vue组件,如下 ue.vue代码如下: <!-- 组件代码如下 ...
- vue中是使用富文本编辑器vue-quill-edit
之前使用的富文本编辑器是uEditor,kindEditor,感觉不太方便 近期项目vue单页面,就使用这个编辑器组件吧! 一.安装 cnpm install vue-quill-editor 二. ...
- webform 使用富文本编辑器
<div class="form-group"> <label class="col-xs-2 control-label text-right&quo ...
随机推荐
- HDU 1978 How many ways DP问题
How many ways Time Limit: 3000/1000 MS (Java/Others) Memory Limit: 32768/32768 K (Java/Others)Tot ...
- SlidingMenu.jar 抽屉使用,避免了使用libaray的不兼容的尴尬
尽管说这个东西出来了一段时间了,可是好东西还是要分享一下的. 之前我们使用的都是libaray.各种出错.团队开发也不好操作.不知道 哪个好心人干脆把这个工具封装成一个jar,真心为你点赞. ...
- Github上fork项目后与原项目保持同步
**步骤** 假设来源为 `https://github.com/_original/_project.git` fork 项目为 `https://github.com/_your/_projec ...
- jquery Ajax Queue 队列实现
有时候我们需要按顺序调用一组ajax,这些ajax需要有先后顺序,类似于同步的ajax,那么我们可以通过以下的方式来实现: (这个Ajax用到jQuery.post) //定义一个AJAX队列 $.n ...
- python的and和or优先级
原题 输入一年份,判断该年份是否是闰年并输出结果.(编程题) 注:凡符合下面两个条件之一的年份是闰年. (1) 能被4整除但不能被100整除. (2) 能被400整除. 答案: def get_yea ...
- display:flex和display:box布局浏览器兼容性分析
display:flex和display:box都可用于弹性布局,不同的是display:box是2009年的命名,已经过时,用的时候需要加上前缀:display:flex是2012年之后的命名.在实 ...
- Mac OSX使用隐藏文件夹
直接修改文件夹名字,前面加个"." 小圆点就隐藏了,下去进入可以在finder图标右键点菜单“前往文件夹...",输入你文件夹的路径即可
- socket.io 中文api
1. 服务端 io.on('connection',function(socket)); 监听客户端连接,回调函数会传递本次连接的socket io.sockets.emit('String',dat ...
- Amazon Virtual Private Cloud(虚拟专有网络)官方文档通读
一.什么是Amazon VPC? 参考资料: 官网文档 https://docs.aws.amazon.com/zh_cn/AmazonVPC/latest/UserGuide/VPC_Introdu ...
- GCD介绍(四): 完结
转自http://www.dreamingwish.com/dream-2012/gcd-four-the-the-odds-and-ends.html Dispatch Queue挂起 dispat ...