MySQL5.7.22版本的安装和调试
1:安装前的准备工作
需要的软件:
boost_1_59_0.tar.gz,cmake-3.6.1.tar.gz,mysql-5.7.22.tar.gz
开始安装MySQL
2.1 检查cmake
[root@oracle cmake-3.6.1]# ./bootstrap && make && make install
2.2 开始编译安装mysql
创建用户和组
[root@oracle cmake-3.6.1]#groupadd mysql
[root@oracle cmake-3.6.1]#useradd -g mysql -s /sbin/nologin -M mysql
创建安装数据库的目录和数据存放目录
[root@oracle src]# mkdir mysql5
[root@oracle src]# mkdir mysql
2.2.1 解压数据库软件
[root@oracle src]# tar -xvf mysql-5.7.22.tar.gz
[root@oracle mysql-5.7.22]# cmake . -DCMAKE_INSTALL_PREFIX=/data/src/mysql -DMYSQL_DATADIR=/data/src/mysql5 -DMYSQL_UNIX_ADDR=/tmp/mysql.sock -DWITH_INNOBASE_STORAGE_ENGINE=1 -DMYSQL_TCP_PORT=3306 -DEXTRA_CHARSETS=all -DDEFAULT_CHARSET=utf8 -DDEFAULT_COLLATION=utf8_general_ci -DWITH_DEBUG=0
[root@oracle mysql-5.7.]# cmake . -DCMAKE_INSTALL_PREFIX=/data/src/mysql -DMYSQL_DATADIR=/data/src/mysql5 -DMYSQL_UNIX_ADDR=/tmp/mysql.sock -DWITH_INNOBASE_STORAGE_ENGINE= -DMYSQL_TCP_PORT= -DEXTRA_CHARSETS=all -DDEFAULT_CHARSET=utf8 -DDEFAULT_COLLATION=utf8_general_ci -DWITH_DEBUG=

-- Running cmake version 3.6.

-- Could NOT find Git (missing:  GIT_EXECUTABLE)

-- Configuring with MAX_INDEXES = 64U

-- The C compiler identification is GNU 4.4.

-- The CXX compiler identification is GNU 4.4.

-- Check for working C compiler: /usr/bin/cc

-- Check for working C compiler: /usr/bin/cc -- works

-- Detecting C compiler ABI info

-- Detecting C compiler ABI info - done

-- Detecting C compile features

-- Detecting C compile features - done

-- Check for working CXX compiler: /usr/bin/c++

-- Check for working CXX compiler: /usr/bin/c++ -- works

-- Detecting CXX compiler ABI info

-- Detecting CXX compiler ABI info - done

-- Detecting CXX compile features

-- Detecting CXX compile features - done

-- CMAKE_GENERATOR: Unix Makefiles

-- Looking for SHM_HUGETLB

-- Looking for SHM_HUGETLB - found

-- Looking for sys/types.h

-- Looking for sys/types.h - found

-- Looking for stdint.h

-- Looking for stdint.h - found

-- Looking for stddef.h

-- Looking for stddef.h - found

-- Check size of void *

-- Check size of void * - done

-- SIZEOF_VOIDP

-- Performing Test HAVE_C_SHIFT_OR_OPTIMIZATION_BUG

-- Performing Test HAVE_C_SHIFT_OR_OPTIMIZATION_BUG - Failed

-- Performing Test HAVE_CXX_SHIFT_OR_OPTIMIZATION_BUG

-- Performing Test HAVE_CXX_SHIFT_OR_OPTIMIZATION_BUG - Failed

-- Performing Test HAVE_C_FLOATING_POINT_FUSED_MADD

-- Performing Test HAVE_C_FLOATING_POINT_FUSED_MADD - Failed

-- Performing Test HAVE_CXX_FLOATING_POINT_FUSED_MADD

-- Performing Test HAVE_CXX_FLOATING_POINT_FUSED_MADD - Failed

-- Performing Test HAVE_C_FP_CONTRACT_FLAG

-- Performing Test HAVE_C_FP_CONTRACT_FLAG - Failed

-- Performing Test HAVE_CXX_FP_CONTRACT_FLAG

-- Performing Test HAVE_CXX_FP_CONTRACT_FLAG - Failed

-- MySQL 5.7.

-- Packaging as: mysql-5.7.-Linux-x86_64

-- Looked for boost/version.hpp in  and

-- BOOST_INCLUDE_DIR BOOST_INCLUDE_DIR-NOTFOUND

-- LOCAL_BOOST_DIR

-- LOCAL_BOOST_ZIP

-- Could not find (the correct version of) boost.

-- MySQL currently requires boost_1_59_0

CMake Error at cmake/boost.cmake: (MESSAGE):

  You can download it with -DDOWNLOAD_BOOST= -DWITH_BOOST=<directory>

  This CMake script will look for boost in <directory>.  If it is not there,

  it will download and unpack it (in that directory) for you.

  If you are inside a firewall, you may need to use an http proxy:

  export http_proxy=http://example.com:80

Call Stack (most recent call first):

  cmake/boost.cmake: (COULD_NOT_FIND_BOOST)

  CMakeLists.txt: (INCLUDE)

-- Configuring incomplete, errors occurred!

See also "/data/src/mysql-5.7.22/CMakeFiles/CMakeOutput.log".

See also "/data/src/mysql-5.7.22/CMakeFiles/CMakeError.log
这个的解决方法是:
在/usr/local下创建一个名为boost的文件夹
- mkdir -p /usr/local/boost
- 把上面的名为boost_1_59_0.tar.gz的压缩包解压就可以了
- tar -xvf boost_1_59_0.tar.gz
继续CMAKE 这里要注意红色的部分
[root@oracle src]# cmake . -DCMAKE_INSTALL_PREFIX=/data/src/mysql -DMYSQL_DATADIR=/data/src/mysql5 -DMYSQL_UNIX_ADDR=/tmp/mysql.sock -DWITH_INNOBASE_STORAGE_ENGINE=1 -DMYSQL_TCP_PORT=3306 -DEXTRA_CHARSETS=all -DDEFAULT_CHARSET=utf8 -DWITH_BOOST=/usr/local/boost -DDEFAULT_COLLATION=utf8_general_ci -DWITH_DEBUG=0 这是根据刚才按装的路径添加的
   sql/CMakeLists.txt:572 (INCLUDE)

 CMake Warning at cmake/bison.cmake:20 (MESSAGE):

   Bison executable not found in PATH

 Call Stack (most recent call first):

   libmysqld/CMakeLists.txt:205 (INCLUDE)

 -- Library mysqlserver depends on OSLIBS -lpthread;m;rt;crypt;dl;aio

 -- MERGE_CONVENIENCE_LIBRARIES TARGET mysqlserver

 -- MERGE_CONVENIENCE_LIBRARIES LIBS dbug;strings;regex;mysys;mysys_ssl;vio;zlib;yassl;taocrypt;crypt;dl;archive_embedded;blackhole_embedded;csv_embedded;federated_embedded;heap_embedded;innobase_embedded;lz4_lib;myisam_embedded;myisammrg_embedded;partition_embedded;ngram_parser_embedded;sql_embedded

 -- MERGE_CONVENIENCE_LIBRARIES MYLIBS dbug;strings;regex;mysys;mysys_ssl;vio;zlib;yassl;taocrypt;archive_embedded;blackhole_embedded;csv_embedded;federated_embedded;heap_embedded;innobase_embedded;lz4_lib;myisam_embedded;myisammrg_embedded;partition_embedded;ngram_parser_embedded;sql_embedded

 -- library target mysqlserver debug_target /data/src/debug/archive_output_directory/libmysqld.a

 -- INSTALL mysqlclient.pc lib/pkgconfig

 -- Skipping deb packaging on unsupported platform .

 -- CMAKE_BUILD_TYPE: RelWithDebInfo

 -- COMPILE_DEFINITIONS: _GNU_SOURCE;_FILE_OFFSET_BITS=64;HAVE_CONFIG_H;HAVE_LIBEVENT1

 -- CMAKE_C_FLAGS:  -Wall -Wextra -Wformat-security -Wvla -Wwrite-strings -Wdeclaration-after-statement

 -- CMAKE_CXX_FLAGS:  -Wall -Wextra -Wformat-security -Wvla -Woverloaded-virtual -Wno-unused-parameter

 -- CMAKE_C_LINK_FLAGS:

 -- CMAKE_CXX_LINK_FLAGS:

 -- CMAKE_C_FLAGS_RELWITHDEBINFO: -O3 -g -fabi-version=2 -fno-omit-frame-pointer -fno-strict-aliasing -DDBUG_OFF

 -- CMAKE_CXX_FLAGS_RELWITHDEBINFO: -O3 -g -fabi-version=2 -fno-omit-frame-pointer -fno-strict-aliasing -DDBUG_OFF

 -- Configuring done

 -- Generating done

 -- Build files have been written to: /data/src/mysql-5.7.22
看到上面的信息就证明cmake 成功了
2.2.2
[root@oracle mysql-5.7.22]# make && make install
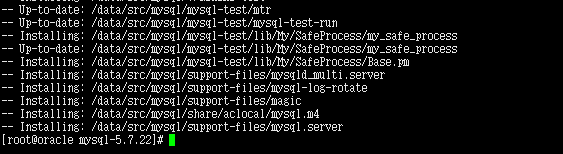
把配置文件拷贝到/etc 下

通过上面的截图我们不难发现 没有我们要找的配置文件,难道5.7.22版本不需要配置文件了吗,我们先不管,接着往下做
[root@oracle mysql-5.7.22]# cp support-files/mysql.server /etc/init.d/mysqld
[root@oracle mysql-5.7.22]# chmod +x /etc/init.d/mysqld
[root@oracle mysql-5.7.22]# chkconfig --add mysqld
初始化MySQL数据库
注:在5.7.22版本中mysql_install_db 被废弃了,取而代之的是 mysqld –initialize
[root@oracle mysql]# bin/mysqld --initialize-insecure --user=mysql --basedir=/data/src/mysql/ --datadir=/data/src/mysql5
2018-05-24T07:07:55.314350Z 0 [Warning] TIMESTAMP with implicit DEFAULT value is deprecated. Please use --explicit_defaults_for_timestamp server option (see documentation for more details).
2018-05-24T07:07:56.262284Z 0 [Warning] InnoDB: New log files created, LSN=45790
2018-05-24T07:07:56.407878Z 0 [Warning] InnoDB: Creating foreign key constraint system tables.
2018-05-24T07:07:56.494757Z 0 [Warning] No existing UUID has been found, so we assume that this is the first time that this server has been started. Generating a new UUID: 2f2eaae3-5f21-11e8-ab77-000c29e94efc.
2018-05-24T07:07:56.497669Z 0 [Warning] Gtid table is not ready to be used. Table 'mysql.gtid_executed' cannot be opened.
2018-05-24T07:07:56.512801Z 1 [Warning] root@localhost is created with an empty password ! Please consider switching off the --initialize-insecure option.
注:这些警告信息不用管,只要没有error 就可以
2.2.3 我们尝试启动MySQL服务
[root@oracle mysql]# /etc/init.d/mysqld start
Starting MySQL.Logging to '/data/src/mysql5/oracle.err'.
SUCCESS!
数据库启动成功,因此 MySQL.5.7.22版本没有配置文件也是可以的。
[root@oracle mysql5]# echo '/data/src/mysql/include/' >> /etc/ld.so.conf
[root@oracle mysql5]# echo '/data/src/mysql/lib/' >> /etc/ld.so.conf
[root@oracle mysql5]# ldconfig
2.2.4 施工后校验,这里是没有初始化用户的

这个比5.6的版本多了sys 库少了test
mysql> show databases;
+--------------------+
| Database |
+--------------------+
| information_schema |
| mysql |
| performance_schema |
| sys |
+--------------------+
4 rows in set (0.00 sec)
mysql> update mysql.user set authentication_string=password('m2i3sc') where user='root' ;
Query OK, 1 row affected, 1 warning (0.01 sec)
Rows matched: 1 Changed: 1 Warnings: 1
mysql> flush privileges;
Query OK, 0 rows affected (0.00 sec)
mysql> exit
Bye
[root@oracle mysql5]# mysql -uroot -pm2i3sc
mysql: [Warning] Using a password on the command line interface can be insecure.
Welcome to the MySQL monitor. Commands end with ; or \g.
Your MySQL connection id is 3
Server version: 5.7.22 Source distribution
Copyright (c) 2000, 2018, Oracle and/or its affiliates. All rights reserved.
Oracle is a registered trademark of Oracle Corporation and/or its
affiliates. Other names may be trademarks of their respective
owners.
Type 'help;' or '\h' for help. Type '\c' to clear the current input statement.
mysql> exit
Bye
[root@oracle mysql5]# mysqladmin -u root password 'm2i3sc'
mysqladmin: connect to server at 'localhost' failed
error: 'Access denied for user 'root'@'localhost' (using password: NO)'
我们现在看一下每个schema的文件和之前有什么不同
[root@oracle mysql5]# ls

auto.cnf  ib_buffer_pool  ibdata1  ib_logfile0  ib_logfile1  ibtmp1  lhh  mysql  oracle.err  oracle.pid  performance_schema  sys

[root@oracle mysql5]# cd lhh

[root@oracle lhh]# ls

db.opt  emp.frm  emp.ibd  test.frm  test.ibd

[root@oracle lhh]#
注意上面标记的红色的部分,这个在以前的5.6的版本中是没有这个文件的,存的表的结构,它所有的数据存在ibdata1 的这个文件中,这也是5.7版本的新特性。
至此,mysql-5.7.22版本的安装就算完成了。
MySQL5.7.22版本的安装和调试的更多相关文章
- Mysql5.7.22版本,插入中文乱码的问题
首先,mysql5.7.22版本的免安装版本的,需要自己配置信息,而且容易出现问题,这里还是建议下载安装版本.msi,按照安装教程进行安装:安装成功后会在数据存储的data文件下找到参数配置文件my. ...
- 升级MySQL5.7.22版本_总结记录
目录 一. mysql5.7安装 0. 背景 1. 准备:下载安装包 2. 安装流程小结 3. 具体步骤 二. mysql5.7的一些变化 一. mysql5.7安装 0. 背景 之前用的5.6版本, ...
- mysql5.7.22的安装与配置(适用mysql5.7.20至mysql5.7.22版本)
一.解压Mysql5.7.20安装包,刚解压是没有 data 这个文件夹的 二.配置mysql环境变量,创建MYSQL_HOME,然后在Path上添加%MYSQL_HOME%\bin; 三.配置m ...
- MySQL5.7.19版本压缩包安装方式的一些坑
ySQL社区版下载地址:https://dev.mysql.com/downloads/mysql/,在这里也可以选择之前的版本下载. MySQL进入5.7.7版本以后,压缩包安装需要注意一些地方: ...
- mysql5.7.22 zip 版安装
2.将zip文件解压到本地,本文解压到如下目录:D:\softwares\mysql-5.7.14-winx64 3.新建一个配置文件(my.ini)用于配置字符集.端口等信息,用以覆盖原始的配置文件 ...
- TensorFlow GPU版本的安装与调试
笔者采用python3.6.7+TensorFlow1.12.0+CUDA10.0+CUDNN7.3.1构建环境 PC端配置为GTX 1050+Intel i7 7700HQ 4核心8线程@2.8GH ...
- MySQL5.5多实例编译安装——多配置文件
一.什么是MySQL多实例?MySQL多实例简单的说就是在一台服务器上安装一套MySQL程序,通过不同的端口对外提供访问,多实例不仅节省物理主机成本,还有效提升了单台物理主机的CPU.磁盘I/O使用效 ...
- mysql-5.6.22的安装步骤
一.环境与下载地址: 1.系统下载地址: http://mirrors.sohu.com/centos/6.6/isos/x86_64/CentOS-6.6-x86_64-bin-DVD1.iso 2 ...
- [转]MySQL5.6.22 安装
原文路径 http://jifeng3321.iteye.com/blog/2181517?utm_source=tuicool 由于一直做银行项目,所以一直在用oracle和db2,但最近自己想 ...
随机推荐
- Java学习---Collection的学习
Collection基本方法的使用 package com.huawei.ftl; import java.io.File; import java.io.FileInputStream; impor ...
- [BZOJ 4010][HNOI 2015] 菜肴制作
4010: [HNOI2015]菜肴制作 Time Limit: 5 Sec Memory Limit: 512 MBSubmit: 1776 Solved: 889[Submit][Status ...
- Java Basic Notes——static修饰符
1.static 在程序中任何变量或者代码都是在编译时由系统自动分配内存来存储的,而所谓静态就是指在编译后所分配的内存会一直存在,直到程序退出内存才会释放这个空间,也就是只要程序在运行,那么这块内存就 ...
- Windows环境下JDK的配置及多版本JDK切换的方法记录
(这里记录了笔者了解的关于JDK环境配置的信息,以及针对系统上存在不同版本JDK时所尝试的解决方案.具体来说,是已安装 JDK 8 后,又安装了 JDK 9 时所遇到的问题和尝试的解决方法.这次记录以 ...
- jq判断鼠标滚轴向上滚动还是向下滚动
$(document).on("mousewheel DOMMouseScroll", function (e) { var delta = (e.originalEvent.wh ...
- css3实现 鼠标经过li时动态画边框(jq库导航)
<!doctype html> <html> <head> <meta charset="utf-8" /> <meta na ...
- SOJ 1089 FatMouse的奶酪 暴力
BackGround FatMouse拥有许多奶酪,所有的奶酪都有一个彼此不同的重量.FatMouse为了控制它自己的体重,在每天早上它都会计算今天应该吃多少奶酪才能无痛苦地减肥. The Probl ...
- 转:日志组件logback的介绍及配置使用方法
转自:http://blog.csdn.net/zgmzyr/article/details/8267072 一.logback的介绍 Logback是由log4j创始人设计的又一个开源日志组件.lo ...
- 让isis支持高德地图
概述 由于项目需要用到地图,虽然isis的插件库里有个现成的地图实现,不过用的google地图,虽然google地图可以不用注册Appkey,但完全打不开.所以打算改成国产地图. 效果 先看下运行效果 ...
- #ifdef 和 #if defined的区别
#ifdef 和 #if defined的区别在于,后者可以组成复杂的预编译条件,比如 #if defined (AAA) && defined (BBB)xxxxxxxxx#endi ...