Spring + mybatis整合方案总结 结合实例应用
Spring + mybatis整合实例应用
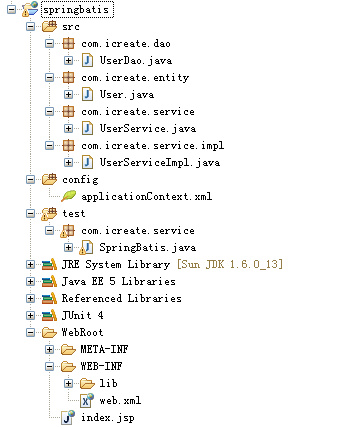
项目结构图 (Spring3.0.2 +mybatis3.0.4)

方案一: 通过配置文件整合Spring和mybatis
应用数据库

--

--数据库 tb_user

--

drop table if exists tb_user;

create table tb_user(

    id int primary key auto_increment comment '主键',

    username varchar(40) not null unique comment '用户名',

    password varchar(40) not null comment '密码',

    email varchar(40) comment '邮件',

    age int  comment '年龄',

    sex char(2) not null comment '性别'

);
对应的实体类
package com.icreate.entity;

/**

 *

 *

 *  @version : 1.0

 *

 *  @author  : 苏若年              <a href="mailto:DennisIT@163.com">发送邮件</a>

 *

 *  @since   : 1.0        创建时间:    2013-4-9    上午11:15:50

 *

 *  @function: TODO

 *

 */

public class User {

    private int id;

    private String username;

    private String password;

    private String sex;

    private String email;

    private int age;

    //getter() and  setter ()

}
数据Dao接口
package com.icreate.dao;

import java.util.List;

import com.icreate.entity.User;

/**

 *

 *

 *  @version : 1.0

 *

 *  @author  : 苏若年              <a href="mailto:DennisIT@163.com">发送邮件</a>

 *

 *  @since   : 1.0        创建时间:    2013-4-9    上午11:36:34

 *

 *  @function: TODO

 *

 */

public interface UserDao {

    public int insert(User user);

    public int update(User user);

    public int delete(String userName);

    public List<User> selectAll();

    public int countAll();

    public User findByUserName(String userName);

}
在config目录下进行Mapper文件配置
<?xml version="1.0" encoding="UTF-8" ?>

<!DOCTYPE mapper PUBLIC "-//mybatis.org//DTD Mapper 3.0//EN" "http://mybatis.org/dtd/mybatis-3-mapper.dtd">

<mapper namespace="com.icreate.dao.UserDao">

    <select id="countAll" resultType="int">  <!-- 查询表中记录总数 -->

        select count(*) c from tb_user;

    </select>

    <select id="selectAll" resultType="com.icreate.entity.User">    <!-- 查询表中的所有用户 -->

        select * from tb_user order by username asc

    </select>

    <insert id="insert" parameterType="com.icreate.entity.User">    <!-- 向数据库中插入用户 -->

        insert into tb_user(username,password,email,sex,age) values(#{username},#{password},#{email},#{sex},#{age})

    </insert>

    <update id="update" parameterType="com.icreate.entity.User">     <!-- 更新库中的用户 -->

        update tb_user set username=#{username},password=#{password},email=#{email},sex=#{sex},age=#{age} where username=#{username}

    </update>

    <delete id="delete" parameterType="String">    <!-- 删除用户 -->

        delete from tb_user where username=#{username}

    </delete>

    <select id="findByUserName" parameterType="String" resultType="com.icreate.entity.User"> <!-- 根据用户名查找用户 -->

        select * from tb_user where username=#{username}

    </select>

</mapper>
Mybatis应用配置文件MyBatis-Configuration.xml
<?xml version="1.0" encoding="UTF-8" ?>

<!DOCTYPE configuration PUBLIC "-//mybatis.org//DTD Config 3.0//EN"

"http://mybatis.org/dtd/mybatis-3-config.dtd">

<configuration>

    <mappers>

        <mapper resource="com/icreate/dao/UserDao.xml"/>

    </mappers>

</configuration>
Spring配置文件,本例中我们放在/WebRoot/WEB-INF/applicationContext.xml
<?xml version="1.0" encoding="UTF-8"?>
<beans
xmlns="http://www.springframework.org/schema/beans"
xmlns:xsi="http://www.w3.org/2001/XMLSchema-instance"
xmlns:p="http://www.springframework.org/schema/p"
xsi:schemaLocation="http://www.springframework.org/schema/beans http://www.springframework.org/schema/beans/spring-beans-3.0.xsd"> <!-- 配置数据源 -->
<bean id="dataSource" class="org.apache.commons.dbcp.BasicDataSource">
<property name="driverClassName" value="com.mysql.jdbc.Driver"></property>
<property name="url" value="jdbc:mysql://localhost:3306/db_mybatis?useUnicode=true&characterEncoding=UTF-8&zeroDateTimeBehavior=convertToNull"></property>
<property name="username" value="root"></property>
<property name="password" value="root"></property>
</bean> <bean id="transactionManager"
class="org.springframework.jdbc.datasource.DataSourceTransactionManager">
<property name="dataSource" ref="dataSource" />
</bean> <bean id="sqlSessionFactory" class="org.mybatis.spring.SqlSessionFactoryBean">
<property name="configLocation" value="classpath:MyBatis-Configuration.xml"></property>
<property name="dataSource" ref="dataSource" />
</bean> <bean id="userDao" class="org.mybatis.spring.mapper.MapperFactoryBean">
<property name="mapperInterface" value="com.icreate.dao.UserDao"></property>
<property name="sqlSessionFactory" ref="sqlSessionFactory"></property>
</bean> <bean id="userService" class="com.icreate.service.impl.UserServiceImpl">
<property name="userDao" ref="userDao"></property>
</bean> </beans>
同目录下的web.xml文件进行如下配置
<?xml version="1.0" encoding="UTF-8"?>

<web-app version="2.5" xmlns="http://java.sun.com/xml/ns/javaee"

    xmlns:xsi="http://www.w3.org/2001/XMLSchema-instance"

    xsi:schemaLocation="http://java.sun.com/xml/ns/javaee

    http://java.sun.com/xml/ns/javaee/web-app_2_5.xsd">

    <context-param>

        <param-name>contextConfigLocation</param-name>

            <!-- applicationContext.xml文件在/WEB-INF/目錄下時可以這樣配置,-->

            <param-value>/WEB-INF/applicationContext.xml</param-value>

    </context-param>

    <!-- 配置上下文监听 -->

    <listener>

        <listener-class>org.springframework.web.context.ContextLoaderListener</listener-class>

    </listener>

    <welcome-file-list>

        <welcome-file>index.jsp</welcome-file>

    </welcome-file-list>

</web-app>
配置说明:
<context-param/> 节点配置contextConfigLocation属性是为了让ContextLoaderListener找到Spring上下文的位置并加载它,如果不指定contextConfigLocation,ContextLoaderListener会到/WEB-INF/目录下找applicationContext.xml来加载。
<listener/> 节点上配了ContextLoaderListener。它实现了ServletContextListener接口,所以web server启动时ContextLoaderListener能读取到ServletContext,也就能通过<context-param/>指定的Spring上下文的路径来找到上下文并加载它。
当然,如果你不需要Spring来管理你的Bean,可以去掉上面两个节点。
定义service接口
package com.icreate.service;

import java.util.List;

import com.icreate.entity.User;

/**

 *

 *

 *  @version : 1.0

 *

 *  @author  : 苏若年              <a href="mailto:DennisIT@163.com">发送邮件</a>

 *

 *  @since   : 1.0        创建时间:    2013-4-9    下午03:52:07

 *

 *  @function: TODO

 *

 */

public interface UserService {

    public int insert(User user);

    public int update(User user);

    public int delete(String userName);

    public List<User> selectAll();

    public int countAll();

    public User findByUserName(String userName);

}
实现service接口,执行dao操作
package com.icreate.service.impl;

import java.util.List;

import com.icreate.dao.UserDao;

import com.icreate.entity.User;

import com.icreate.service.UserService;

/**

 *

 *

 *  @version : 1.0

 *

 *  @author  : 苏若年              <a href="mailto:DennisIT@163.com">发送邮件</a>

 *

 *  @since   : 1.0        创建时间:    2013-4-9    下午03:53:26

 *

 *  @function: TODO

 *

 */

public class UserServiceImpl implements UserService{

    private UserDao userDao;

    public UserDao getUserDao() {

        return userDao;

    }

    public void setUserDao(UserDao userDao) {

        this.userDao = userDao;

    }

    public int countAll() {

        return this.userDao.countAll();

    }

    public int delete(String userName) {

        return this.userDao.delete(userName);

    }

    public User findByUserName(String userName) {

        return this.userDao.findByUserName(userName);

    }

    public int insert(User user) {

        return this.userDao.insert(user);

    }

    public List<User> selectAll() {

        return this.userDao.selectAll();

    }

    public int update(User user) {

         return this.userDao.update(user);

    }

}
接下来写我们的测试用例
package com.icreate.service;

import java.util.List;

import org.junit.Before;

import org.junit.Test;

import org.springframework.context.ApplicationContext;

import org.springframework.context.support.FileSystemXmlApplicationContext;

import com.icreate.entity.User;

/**

 *

 *

 *  @version : 1.0

 *

 *  @author  : 苏若年              <a href="mailto:DennisIT@163.com">发送邮件</a>

 *

 *  @since   : 1.0        创建时间:    2013-4-9    下午05:16:28

 *

 *  @function: TODO

 *

 */

public class SpringBatis {

    ApplicationContext context = null;

    UserService userService = null;

    @Before

    public void initContext(){

        this.context = new FileSystemXmlApplicationContext("WebRoot/WEB-INF/applicationContext.xml");

        this.userService = (UserService) context.getBean("userService");

    }

    @Test

    public void countAll(){

        System.out.println("数据库中的记录条数:"  + userService.countAll());

    }

    @Test

    public void insert(){

        User user = new User();

        user.setUsername("苏若年");

        user.setPassword("passtest");

        user.setEmail("dennisit@163.com");

        user.setSex("男");

        user.setAge(23);

        userService.insert(user);

    }

    @Test

    public void selectAll(){

        List<User> list = userService.selectAll();

        for(int i=0; i<list.size(); i++){

            User user = list.get(i);

            System.out.println("用户名:" + user.getUsername() + "\t密码:" + user.getPassword() + "\t邮箱:" + user.getEmail());

        }

    }

    @Test

    public void update(){

        User user = new User();

        user.setUsername("苏若年");

        user.setPassword("xxxxxxxx");

        user.setEmail("xxxxxx@163xxx");

        user.setSex("男");

        user.setAge(23);

        userService.update(user);

    }

    @Test

    public void delete(){

        userService.delete("苏若年");

    }

    @Test

    public void findByName(){

        User user = userService.findByUserName("苏若年");

        System.out.println("用户名:" + user.getUsername() + "\t密码:" + user.getPassword() + "\t邮箱:" + user.getEmail());

    }

}
方案二:使用注解整合
这次将配置文件放置在config目录下.
数据库表与实体类同上
数据dao接口定义
package com.icreate.dao;

import java.util.List;

import org.apache.ibatis.annotations.Delete;

import org.apache.ibatis.annotations.Insert;

import org.apache.ibatis.annotations.Select;

import org.apache.ibatis.annotations.Update;

import com.icreate.entity.User;

/**

 *

 *

 *  @version : 1.0

 *

 *  @author  : 苏若年              <a href="mailto:DennisIT@163.com">发送邮件</a>

 *

 *  @since   : 1.0        创建时间:    2013-4-9    上午11:36:34

 *

 *  @function: TODO

 *

 */

public interface UserDao {

     @Insert("insert into tb_user(username,password,email,sex,age) values(#{username},#{password},#{email},#{sex},#{age})")

     public int insert(User user);

     @Update("update tb_user set username=#{username},password=#{password},email=#{email},sex=#{sex},age=#{age} where username=#{username}")

     public int update(User user);

     @Delete("delete from tb_user where username=#{username}")

     public int delete(String userName);

     @Select("select * from tb_user ")

     public List<User> selectAll();

     @Select("select count(*) from tb_user")

     public int countAll();

     @Select("select * from tb_user where username=#{username}")

     public User findByUserName(String userName);

}
Service接口与实现不变.
Spring配置文件内容如下
<?xml version="1.0" encoding="UTF-8"?>
<beans
xmlns="http://www.springframework.org/schema/beans"
xmlns:xsi="http://www.w3.org/2001/XMLSchema-instance"
xmlns:p="http://www.springframework.org/schema/p"
xsi:schemaLocation="http://www.springframework.org/schema/beans http://www.springframework.org/schema/beans/spring-beans-3.0.xsd"> <!-- 配置数据源 -->
<bean id="dataSource" class="org.apache.commons.dbcp.BasicDataSource">
<property name="driverClassName" value="com.mysql.jdbc.Driver"></property>
<property name="url" value="jdbc:mysql://localhost:3306/db_mybatis?useUnicode=true&characterEncoding=UTF-8&zeroDateTimeBehavior=convertToNull"></property>
<property name="username" value="root"></property>
<property name="password" value="root"></property>
</bean> <bean id="transactionManager"
class="org.springframework.jdbc.datasource.DataSourceTransactionManager">
<property name="dataSource" ref="dataSource" />
</bean> <bean id="sqlSessionFactory" class="org.mybatis.spring.SqlSessionFactoryBean">
<property name="dataSource" ref="dataSource" />
</bean> <bean id="userDao" class="org.mybatis.spring.mapper.MapperFactoryBean">
<property name="mapperInterface" value="com.icreate.dao.UserDao"></property>
<property name="sqlSessionFactory" ref="sqlSessionFactory"></property>
</bean> <bean id="userService" class="com.icreate.service.impl.UserServiceImpl">
<property name="userDao" ref="userDao"></property>
</bean> </beans>
Web.xml文件配置如下
<?xml version="1.0" encoding="UTF-8"?>

<web-app version="2.5" xmlns="http://java.sun.com/xml/ns/javaee"

    xmlns:xsi="http://www.w3.org/2001/XMLSchema-instance"

    xsi:schemaLocation="http://java.sun.com/xml/ns/javaee

    http://java.sun.com/xml/ns/javaee/web-app_2_5.xsd">

    <context-param>

        <param-name>contextConfigLocation</param-name>

        <!-- applicationContext.xml文件在/WEB-INF/目錄下時可以這樣配置,-->

        <param-value>classpath:applicationContext.xml</param-value>

    </context-param>

    <!-- 配置上下文监听 -->

    <listener>

        <listener-class>org.springframework.web.context.ContextLoaderListener</listener-class>

    </listener>

    <welcome-file-list>

        <welcome-file>index.jsp</welcome-file>

    </welcome-file-list>

</web-app>
测试类大致上没有变化,只是ApplicationContext初始化的方法改变成了下面方式
    ApplicationContext context = null;

    UserService userService = null;

    @Before

    public void initContext(){

        this.context = new ClassPathXmlApplicationContext("applicationContext.xml");

        //this.context = new FileSystemXmlApplicationContext("WebRoot/WEB-INF/applicationContext.xml");

        this.userService = (UserService) context.getBean("userService");

    }
至此我们Spring与mybatis整合实例应用演示完毕
转载:[http://www.cnblogs.com/dennisit/archive/2013/04/10/3012972.html]
Spring + mybatis整合方案总结 结合实例应用的更多相关文章
- SpringMVC+Spring+MyBatis整合完整版Web实例(附数据)
最近段时间正在学习Spring MVC和MyBatis的一些知识.自己也在网络上面找了一些例子来练习.但是都不是很完整.所以,今天,自己也抽空写了个完成的关于Spring MVC + Spring + ...
- 3.springMVC+spring+Mybatis整合Demo(单表的增删该查,这里主要是贴代码,不多解释了)
前面给大家讲了整合的思路和整合的过程,在这里就不在提了,直接把springMVC+spring+Mybatis整合的实例代码(单表的增删改查)贴给大家: 首先是目录结构: 仔细看看这个目录结构:我不详 ...
- Spring+Mybatis+SpringMVC+Maven+MySql搭建实例
林炳文Evankaka原创作品.转载请注明出处http://blog.csdn.net/evankaka 摘要:本文主要讲了如何使用Maven来搭建Spring+Mybatis+SpringMVC+M ...
- SpringMVC+Spring+Mybatis整合
SpringMVC+Spring+Mybatis整合 导包 配置jdbc.properties.log4j.properties jdbc.driver=com.mysql.jdbc.Driver j ...
- SSM 即所谓的 Spring MVC + Spring + MyBatis 整合开发。
SSM 即所谓的 Spring MVC + Spring + MyBatis 整合开发.是目前企业开发比较流行的架构.代替了之前的SSH(Struts + Spring + Hibernate) 计划 ...
- Spring+Mybatis整合时 Failed to read candidate component class,Caused by:IllegalArgumentException
Spring+Mybatis整合时Caused by: java.lang.IllegalArgumentException错误 org.springframework.beans.factory.B ...
- 【转】Spring+Mybatis+SpringMVC+Maven+MySql搭建实例
林炳文Evankaka原创作品.转载请注明出处http://blog.csdn.net/evankaka 摘要:本文主要讲了如何使用Maven来搭建Spring+Mybatis+SpringMVC+M ...
- Springmvc+Spring+Mybatis整合开发(架构搭建)
Springmvc+Spring+Mybatis整合开发(架构搭建) 0.项目结构 Springmvc:web层 Spring:对象的容器 Mybatis:数据库持久化操作 1.导入所有需要的jar包 ...
- SpringMVC + Spring + MyBatis 整合 + Spring shrio + easyUI + 权限管理框架,带shrio session和shrio cache集群实现方案
工作之余先来写了一个不算规范的简单架子 基于spring mvc + spring + mybatis + Spring shrio 基于redis的集群方案 系统权限部分,分成多个机构,其中每个机构 ...
随机推荐
- (转)xml节点和元素的关系 .
XML节点是什么呢?当我们在处理XML文件的时候必须要明白XML节点的概念,那么从这里的讲述,你将会了解XML节点对于XML文件的意义,希望对你有所帮助. 在我们学习LINQ删除XML节点之前我们先来 ...
- Springmvc整合mybatis
http://blog.csdn.net/geloin/article/details/7536968 http://blog.csdn.net/woshi74/article/details/378 ...
- 使用DML语句【weber出品必属精品】
DML语句包含以下语法: INSERT:往一个表中增加新行 DELETE:从一个表中删除掉现有的行 UPDATE:更改一个表中现有的行 INSERT语句语法:INSERT INTO TABLE(COL ...
- Xcode 运行报错:“Your build settings specify a provisioning profile with the UUID ****** however, no such provisioning profile was found”
iOS开发中遇到"Your build settings specify a provisioning profile with the UUID ****** however, no su ...
- Ehcache入门(一)——开发环境的搭建
EhCache 是一个纯Java的进程内缓存框架,具有快速.精干等特点,是Hibernate中默认的CacheProvider. 那么.如何搭建Ehcache的开发环境呢? 1.下载相关的jar包,这 ...
- javascript 正则匹配手机号码
<form class="form-horizontal" name="mobileform" style="padding:10px;&q ...
- php设计模式2策略模式
<?php /** ****************************************************** * 策略模式:策略模式针对一组算法,将每一个算法封装到具有共同接 ...
- Python交互模式下方向键出现乱码
解决办法如下: 1.安装readline模块 readline库是bash shell用的库,包含许多功能,如命令行自动补全等. ubuntu下安装的命令: sudo apt-get instal ...
- SpringMVC——从HelloWorld
学习SpringMVC——从HelloWorld开始 前言: 时隔十二年,中国女排最终过关斩将,用3:1的成绩证明了自己的实力,霸气夺冠,为中国赢得了一枚意义非常的金牌.这是一次全民的狂欢,一场视 ...
- Swift—扩展声明-备
声明扩展的语法格式如下: extension 类型名 { //添加新功能 } 声明扩展的关键字是extension,“类型名”是Swift中已有的类型,包括类.结构体和枚举,但是我们仍然可以扩展整型. ...