为Android系统内置Java应用程序测试Application Frameworks层的硬件服务
我们在Android系统增加硬件服务的目的是为了让应用层的APP能够通过Java接口来访问硬件服务。那么, APP如何通过Java接口来访问Application Frameworks层提供的硬件服务呢?在这一篇文章中,我们将在Android系统的应用层增加一个内置的应用程序,这个内置的应用程序通过 ServiceManager接口获取指定的服务,然后通过这个服务来获得硬件服务。
一. 参照在Ubuntu上为Android系统的Application Frameworks层增加硬件访问服务一文,在Application Frameworks层定义好自己的硬件服务HelloService,并提供IHelloService接口提供访问服务。
二. 为 了方便开发,我们可以在IDE环境下使用Android SDK来开发Android应用程序。开发完成后,再把程序源代码移植到Android源代码工程目录中。使用Eclipse的Android插件ADT 创建Android工程很方便,这里不述,可以参考网上其它资料。工程名称为Hello,下面主例出主要文件:
主程序是src/shy/luo/hello/Hello.java:
- package shy.luo.hello;
- import shy.luo.hello.R;
- import android.app.Activity;
- import android.os.ServiceManager;
- import android.os.Bundle;
- import android.os.IHelloService;
- import android.os.RemoteException;
- import android.util.Log;
- import android.view.View;
- import android.view.View.OnClickListener;
- import android.widget.Button;
- import android.widget.EditText;
- public class Hello extends Activity implements OnClickListener {
- private final static String LOG_TAG = "shy.luo.renju.Hello";
- private IHelloService helloService = null;
- private EditText valueText = null;
- private Button readButton = null;
- private Button writeButton = null;
- private Button clearButton = null;
- /** Called when the activity is first created. */
- @Override
- public void onCreate(Bundle savedInstanceState) {
- super.onCreate(savedInstanceState);
- setContentView(R.layout.main);
- helloService = IHelloService.Stub.asInterface(
- ServiceManager.getService("hello"));
- valueText = (EditText)findViewById(R.id.edit_value);
- readButton = (Button)findViewById(R.id.button_read);
- writeButton = (Button)findViewById(R.id.button_write);
- clearButton = (Button)findViewById(R.id.button_clear);
- readButton.setOnClickListener(this);
- writeButton.setOnClickListener(this);
- clearButton.setOnClickListener(this);
- Log.i(LOG_TAG, "Hello Activity Created");
- }
- @Override
- public void onClick(View v) {
- if(v.equals(readButton)) {
- try {
- int val = helloService.getVal();
- String text = String.valueOf(val);
- valueText.setText(text);
- } catch (RemoteException e) {
- Log.e(LOG_TAG, "Remote Exception while reading value from device.");
- }
- }
- else if(v.equals(writeButton)) {
- try {
- String text = valueText.getText().toString();
- int val = Integer.parseInt(text);
- helloService.setVal(val);
- } catch (RemoteException e) {
- Log.e(LOG_TAG, "Remote Exception while writing value to device.");
- }
- }
- else if(v.equals(clearButton)) {
- String text = "";
- valueText.setText(text);
- }
- }
- }
程序通过ServiceManager.getService("hello")来获得HelloService,接着通过 IHelloService.Stub.asInterface函数转换为IHelloService接口。其中,服务名字“hello”是系统启动时加 载HelloService时指定的,而IHelloService接口定义在android.os.IHelloService中,具体可以参考在Ubuntu上为Android系统的Application Frameworks层增加硬件访问服务一文。这个程序提供了简单的读定自定义硬件有寄存器val的值的功能,通过IHelloService.getVal和IHelloService.setVal两个接口实现。
- <?xml version="1.0" encoding="utf-8"?>
- <LinearLayout xmlns:android="http://schemas.android.com/apk/res/android"
- android:orientation="vertical"
- android:layout_width="fill_parent"
- android:layout_height="fill_parent">
- <LinearLayout
- android:layout_width="fill_parent"
- android:layout_height="wrap_content"
- android:orientation="vertical"
- android:gravity="center">
- <TextView
- android:layout_width="wrap_content"
- android:layout_height="wrap_content"
- android:text="@string/value">
- </TextView>
- <EditText
- android:layout_width="fill_parent"
- android:layout_height="wrap_content"
- android:id="@+id/edit_value"
- android:hint="@string/hint">
- </EditText>
- </LinearLayout>
- <LinearLayout
- android:layout_width="fill_parent"
- android:layout_height="wrap_content"
- android:orientation="horizontal"
- android:gravity="center">
- <Button
- android:id="@+id/button_read"
- android:layout_width="wrap_content"
- android:layout_height="wrap_content"
- android:text="@string/read">
- </Button>
- <Button
- android:id="@+id/button_write"
- android:layout_width="wrap_content"
- android:layout_height="wrap_content"
- android:text="@string/write">
- </Button>
- <Button
- android:id="@+id/button_clear"
- android:layout_width="wrap_content"
- android:layout_height="wrap_content"
- android:text="@string/clear">
- </Button>
- </LinearLayout>
- </LinearLayout>
- <?xml version="1.0" encoding="utf-8"?>
- <resources>
- <string name="app_name">Hello</string>
- <string name="value">Value</string>
- <string name="hint">Please input a value...</string>
- <string name="read">Read</string>
- <string name="write">Write</string>
- <string name="clear">Clear</string>
- </resources>
- <?xml version="1.0" encoding="utf-8"?>
- <manifest xmlns:android="http://schemas.android.com/apk/res/android"
- package="shy.luo.hello"
- android:versionCode="1"
- android:versionName="1.0">
- <application android:icon="@drawable/icon" android:label="@string/app_name">
- <activity android:name=".Hello"
- android:label="@string/app_name">
- <intent-filter>
- <action android:name="android.intent.action.MAIN" />
- <category android:name="android.intent.category.LAUNCHER" />
- </intent-filter>
- </activity>
- </application>
- </manifest>
三. 将Hello目录拷贝至packages/experimental目录,新增Android.mk文件:
USER-NAME@MACHINE-NAME:~/Android/packages/experimental$ vi Android.mk
Android.mk的文件内容如下:
四. 编译:
五. 重新打包系统镜像文件system.img:
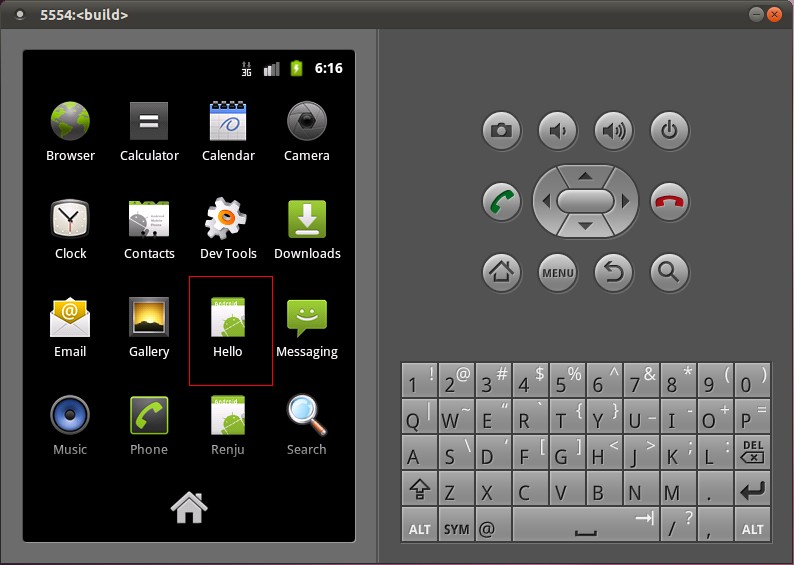
重新打包后的system.img文件就内置了Hello.apk文件了。

此,我们就完整地学习了在Android的Linux内核空间添加硬件驱动程序、在Android的硬件抽象层添加硬件接口、在Android的
Application
Frameworks层提供硬件服务以及在Android的应用层调用硬件服务的整个过程了,希望能为读者进入Android系统提供入门帮助。重新学习
整个过程,请参考Android硬件抽象层(HAL)概要介绍和学习计划。
为Android系统内置Java应用程序测试Application Frameworks层的硬件服务的更多相关文章
- 在Ubuntu上为Android系统内置Java应用程序测试Application Frameworks层的硬件服务(老罗学习笔记6)
一:Eclipse下 1.创建工程: ---- 2.创建后目录 3.添加java函数 4.在src下创建package,在package下创建file 5.res---layout下创建xml文件,命 ...
- 在Ubuntu上为Android系统的Application Frameworks层增加硬件访问服务(老罗学习笔记5)
在数字科技日新月异的今天,软件和硬件的完美结合,造就了智能移动设备的流行.今天大家对iOS和Android系统的趋之若鹜,一定程度上是由于这两个系统上有着丰富多彩的各种应用软件.因此,软件和硬件的关系 ...
- 在Ubuntu上为Android系统的Application Frameworks层增加硬件访问服务
文章转载至CSDN社区罗升阳的安卓之旅,原文地址:http://blog.csdn.net/luoshengyang/article/details/6578352 在数字科技日新月异的今天,软件和硬 ...
- 为Android系统的Application Frameworks层增加硬件访问服务
在数字科技日新月异的今天,软件和硬件的完美结合,造就了智能移动设备的流行.今天大家对iOS和Android系统的趋之若鹜,一定程度上是由于这两 个系统上有着丰富多彩的各种应用软件.因此,软件和硬件的关 ...
- 在Ubuntu上为Android系统的Application Frameworks层增加硬件访问服务【转】
本文转载自:http://blog.csdn.net/luoshengyang/article/details/6578352 在数字科技日新月异的今天,软件和硬件的完美结合,造就了智能移动设备的流行 ...
- 开发Android系统内置应用小记
Android系统内置应用可以使用更多的API.更高的权限,与开发普通应用最大的差别在于编译,内置应用编译需要用到Android.mk文件.下面是我在开发过程中的一些小记. 1.在AndroidMai ...
- 《Java应用程序(Application)》
在编写Java应用程序(Application)时可以这样: 1,定义包名. 2, 导入相关的包. 3, 定义一个类. 4,定义相关变量. 5,定义构造函数.(在构造函数内调用init()方法和add ...
- 《java小应用程序(Applet)和java应用程序(Application)分别编写的简单计算器》
Application和Java Applet的区别.Java语言是一种半编译半解释的语言.Java的用户程序分为两类:Java Application和Java Applet.这两类程序在组成结构和 ...
- 在Ubuntu上为Android系统内置C可执行程序测试Linux内核驱动程序(老罗学习笔记2)
在前一篇文章中,我们介绍了如何在Ubuntu上为Android系统编写Linux内核驱动程序.在这个名为hello的Linux内核驱动程序中,创建三个不同的文件节点来供用户空间访问,分别是传统的设备文 ...
随机推荐
- super在构造函数中的运用
package example;//在子类构造对象时,访问子类构造函数时候,父类也运行.//原因是:在子类的构造函数中第一行有一个默认的隐式语句super();/* 构造函数不能覆盖 子类的实例化过程 ...
- C 小问题集锦
摘要:在学习 C 语言编程中遇到的一些容易混淆出错的问题,记录下来备忘. C语言学习 小问题集锦 作者:乌龙哈里 时间:2015-11-24 平台:Window7 64bit,C# :Visual S ...
- was性能调优前期准备
http://www.ibm.com/developerworks/cn/websphere/library/techarticles/0707_wudan/#resources was应用服务器环境 ...
- HDU2571 命运 动态规划
好久没更新博客了. 校内练习的一道水题 HDU2571 命运. 简单DP. 穿过幽谷意味着离大魔王lemon已经无限接近了! 可谁能想到,yifenfei在斩杀了一些虾兵蟹将后,却再次面临命运大迷宫 ...
- linux虚拟机正常安装完成后获取不到IP的解决办法
通常正常情况下安装完linux虚拟机,只需要使用桥接并修改配置文件/etc/sysconfig/network-scripts/ifcfg-eth0,将如下参数值改为如下: ONBOOT=yes NM ...
- python 强制结束线程的坑
网上流传了两种能强制结束线程的错误姿势 第一种:通过setDaemon来结束线程 http://www.cnblogs.com/jefferybest/archive/2011/10/09/22040 ...
- Ubuntu下NFS,TFTP服务搭建
环境:Ubuntu 一. 搭建NFS服务器 (1)安装: sudo apt-get install nfs-kernel-server #安装NFS服务器端 sudo apt-get instal ...
- 常用JavaScript字符串方法简述
网址来源:http://www.html-js.com/article/JS-rookie-in-the-rookie-to-start-learning-to-fly-the-commonly-us ...
- ORACLE 11g dblink 配置升级
1.如果需要创建全局 DBLink,则需要先确定用户有创建 dblink 的权限: select * from user_sys_privs where privilege like upper('% ...
- Nodejs(待补充)
Nodejs从入门到精通(待补充) 首先安装n模块: npm install -g n 第二步: 升级node.js到最新稳定版 n stable 是不是很简单?! n后面也可以跟随版本号比如: n ...