Flutter 实现酷炫的3D效果

老孟导读:此文讲解3个酷炫的3D动画效果。
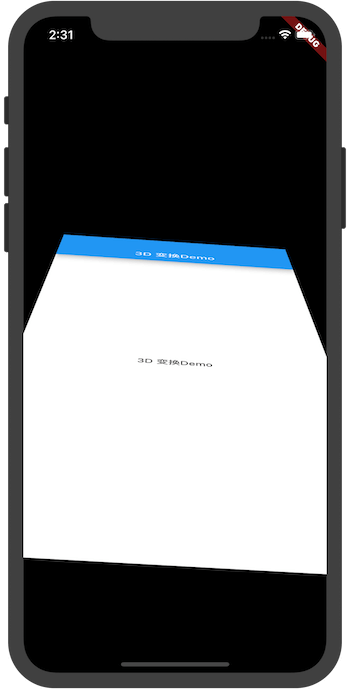
下面是要实现的效果:
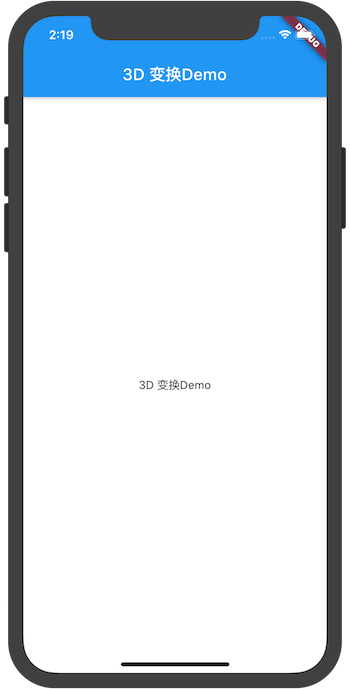
Flutter 中3D效果是通过 Transform 组件实现的,没有变换效果的实现:
class TransformDemo extends StatelessWidget {

  @override

  Widget build(BuildContext context) {

    return Scaffold(

      appBar: AppBar(

        title: Text('3D 变换Demo'),

      ),

      body: Container(

        alignment: Alignment.center,

        color: Colors.white,

        child: Text('3D 变换Demo'),

      ),

    );

  }

}
通过 GestureDetector 组件添加滑动事件监听:
@override

Widget build(BuildContext context) {

  return Scaffold(

    appBar: AppBar(

      title: Text('3D 变换Demo'),

    ),

    body: GestureDetector(

      onPanUpdate: (details) {

        print('$details');

      },

      child: Container(

        alignment: Alignment.center,

        color: Colors.white,

        child: Text('3D 变换Demo'),

      ),

    ),

  );

}
添加 Transform 对组件进入旋转:
@override

Widget build(BuildContext context) {

  return Transform(

      transform: Matrix4.identity()

        ..setEntry(3, 2, 0.001)

        ..rotateX(pi/6)

        ..rotateY(pi/6),

      alignment: Alignment.center,

      child: Scaffold(

        appBar: AppBar(

          title: Text('3D 变换Demo'),

        ),

        body: GestureDetector(

          onPanUpdate: (details) {

          },

          child: Container(

            alignment: Alignment.center,

            color: Colors.white,

            child: Text('3D 变换Demo'),

          ),

        ),

      ));

}

将滑动的偏移和旋转进行关联:
class TransformDemo extends StatefulWidget {

  @override

  _TransformDemoState createState() => _TransformDemoState();

}

class _TransformDemoState extends State<TransformDemo> {

  double _rotateX = .0;

  double _rotateY = .0;

  @override

  Widget build(BuildContext context) {

    return Transform(

        transform: Matrix4.identity()

          ..rotateX(_rotateX)

          ..rotateY(_rotateY),

        alignment: Alignment.center,

        child: Scaffold(

          appBar: AppBar(

            title: Text('3D 变换Demo'),

          ),

          body: GestureDetector(

            onPanUpdate: (details) {

              setState(() {

                _rotateX += details.delta.dy * .01;

                _rotateY += details.delta.dx * -.01;

              });

            },

            child: Container(

              alignment: Alignment.center,

              color: Colors.white,

              child: Text('3D 变换Demo'),

            ),

          ),

        ));

  }

}
基本已经实现了3D效果,但效果比较生硬,尤其垂直方向旋转的时候远点和近点在屏幕上的宽度是一样,
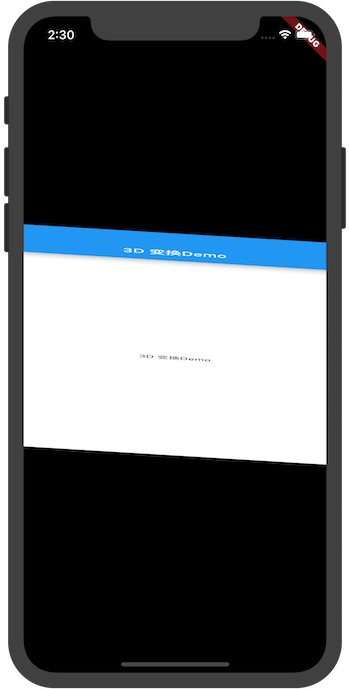
添加近大远小的效果:
Transform(

    transform: Matrix4.identity()

      ..setEntry(3, 2, 0.001)

      ..rotateX(_rotateX)

      ..rotateY(_rotateY),

  ...
翻书效果
上面的效果类似于翻书的效果。
实现的原理:
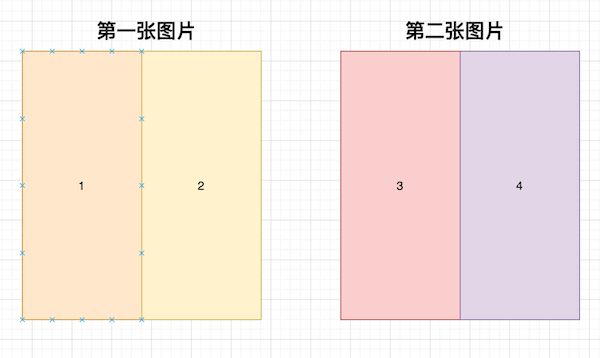
将图片左右切割为两部分,两张图片共分割为4个新的组件,如下图,分别为1、2、3、4
代码实现:
_child1 = ClipRect(

  child: Align(

    alignment: Alignment.centerLeft,

    widthFactor: 0.5,

    child: child1,

  ),

);

_child2 = ClipRect(

  child: Align(

    alignment: Alignment.centerRight,

    widthFactor: 0.5,

    child: child1,

  ),

);

_child3 = ClipRect(

  child: Align(

    alignment: Alignment.centerLeft,

    widthFactor: 0.5,

    child: child2,

  ),

);

_child4 = ClipRect(

  child: Align(

    alignment: Alignment.centerRight,

    widthFactor: 0.5,

    child: child2,

  ),

);
将第一张图片放在第二种图片的上面,先旋转 组件2 从 0度到 90度,然后再旋转 组件3 从 -90度到0度,代码实现:
Row(

  mainAxisAlignment: MainAxisAlignment.center,

  children: <Widget>[

    Stack(

      children: [

        _child1,

        Transform(

          alignment: Alignment.centerRight,

          transform: Matrix4.identity()

            ..setEntry(3, 2, 0.001)

            ..rotateY(_animation1.value),

          child: _child3,

        ),

      ],

    ),

    Container(

      width: 3,

      color: Colors.white,

    ),

    Stack(

      children: [

        _child4,

        Transform(

          alignment: Alignment.centerLeft,

          transform: Matrix4.identity()

            ..setEntry(3, 2, 0.001)

            ..rotateY(_animation.value),

          child: _child2,

        )

      ],

    )

  ],

)
动画控制器设置:
@override

void initState() {

  init();

  _controller =

      AnimationController(vsync: this, duration: Duration(seconds: 5))

        ..addListener(() {

          setState(() {});

        });

  _animation = Tween(begin: .0, end: pi / 2)

      .animate(CurvedAnimation(parent: _controller, curve: Interval(.0, .5)));

  _animation1 = Tween(begin: -pi / 2, end: 0.0).animate(

      CurvedAnimation(parent: _controller, curve: Interval(.5, 1.0)));

  _controller.forward();

  super.initState();

}
其中 child1, child2为两种图片,代码如下:
_FlipUpDemoState(

    Container(

      width: 300,

      height: 400,

      child: Image.asset(

        'assets/images/b.jpg',

        fit: BoxFit.cover,

      ),

    ),

    Container(

      width: 300,

      height: 400,

      child: Image.asset(

        'assets/images/c.jpeg',

        fit: BoxFit.cover,

      ),

    ))
最后生成的效果就是开始的翻书效果。
上面是左右翻页效果,同理换成上下翻页效果:
@override

Widget build(BuildContext context) {

  return Scaffold(

    appBar: AppBar(),

    body: Column(

      mainAxisAlignment: MainAxisAlignment.center,

      children: <Widget>[

        Stack(

          children: [

            _upperChild1,

            Transform(

              alignment: Alignment.bottomCenter,

              transform: Matrix4.identity()

                ..setEntry(3, 2, 0.003)

                ..rotateX(_animation1.value),

              child: _upperChild2,

            ),

          ],

        ),

        SizedBox(

          height: 2,

        ),

        Stack(

          children: [

            _lowerChild2,

            Transform(

              alignment: Alignment.topCenter,

              transform: Matrix4.identity()

                ..setEntry(3, 2, 0.003)

                ..rotateX(_animation.value),

              child: _lowerChild1,

            )

          ],

        )

      ],

    ),

  );

}
交流
老孟Flutter博客地址(330个控件用法):http://laomengit.com
欢迎加入Flutter交流群(微信:laomengit)、关注公众号【老孟Flutter】:
 |
 |
Flutter 实现酷炫的3D效果的更多相关文章
- 使用Three.js网页引擎创建酷炫的3D效果的标签墙
使用Three.js引擎(这是开源的webgl三维引擎,gitgub)进行一个简单应用. 做一个酷炫的3d效果的标签墙(已经放在我的博客首页,大屏幕可见), 去我的博客首页看看实际效果 www.son ...
- 【CSS进阶】试试酷炫的 3D 视角
写这篇文章的缘由是因为看到了这个页面: 戳我看看(移动端页面,使用模拟器观看) 运用 CSS3 完成的 3D 视角,虽然有一些晕3D,但是使人置身于其中的交互体验感觉非常棒,运用在移动端制作一些 H5 ...
- 15个来自 CodePen 的酷炫 CSS 动画效果【下篇】
CodePen 是一个在线的前端代码编辑和展示网站,能够编写代码并即时预览效果.你在上面可以在线分享自己的 Web 作品,也可以欣赏到世界各地的优秀开发者在网页中实现的各种令人惊奇的效果. 今天这篇文 ...
- 赞!15个来自 CodePen 的酷炫 CSS 动画效果
CodePen 是一个在线的前端代码编辑和展示网站,能够编写代码并即时预览效果.你在上面可以在线分享自己的 Web 作品,也可以欣赏到世界各地的优秀开发者在网页中实现的各种令人惊奇的效果. 今天这篇文 ...
- 酷炫的3D照片墙
今天给大家分享的案例是酷炫的3D照片墙 这个案例主要是通过 CSS3 和原生的 JS 来实现的,接下来我给大家分享一下这个效果实现的过程.博客上不知道怎么放本地视频,所以只能放两张效果截图了. 1.实 ...
- 一分钟搞定触手app主页酷炫滑动切换效果
代码地址如下:http://www.demodashi.com/demo/12826.html 前言: 前几天在看手机直播的时候,自己就用上了触手app.一进到主页就看上了里面页面切换的效果,自己想这 ...
- css3实现酷炫的3D盒子翻转效果
简介 运用css3先在平面空间组成立方体盒子,再让整个盒子翻转起来,先来张效果图: 步骤 1.先用css将6张图片摆成下图的样子: 下面就是通过css3的3D变换将每个面进行翻转,使之成为一个立体的盒 ...
- 【CSS3进阶】酷炫的3D旋转透视
之前学习 react+webpack ,偶然路过 webpack 官网 ,看到顶部的 LOGO ,就很感兴趣. 最近觉得自己 CSS3 过于薄弱,想着深入学习一番,遂以这个 LOGO 为切入口,好好研 ...
- photoshop打造超酷炫火焰人像效果
效果图看上去非常的酷.制作方法跟火焰字过程差不多.唯一不同的是前期的处理,需要用滤镜把人物轮廓路径找出来,去色后再用制作火焰的过程制作.最后把最好的火焰叠加到人物上面,适当用蒙版控制区域即可.原图 最 ...
随机推荐
- 入门大数据---Hadoop是什么?
简单概括:Hadoop是由Apache组织使用Java语言开发的一款应对大数据存储和计算的分布式开源框架. Hadoop的起源 2003-2004年,Google公布了部分GFS和MapReduce思 ...
- jQuery制作div板块拖动层排序
html结构: <!DOCTYPE html PUBLIC "-//W3C//DTD XHTML 1.0 Transitional//EN" "http://www ...
- Java工具类——数学相关的类
Java工具类--数学相关的类 在上一篇文章中,我们系统学习了 Java 里面的包装类,那么这篇文章,我们就来学习一下Java提供好的类--数学相关的类. 一.数学类介绍 在最早期学习 Java 基础 ...
- Syntax error, insert "}" to complete MethodBody
jsp中代码在Eclipse中打开正常,导入项目导入MyEclipse后显示如下异常: Syntax error, insert "}" to complete MethodBod ...
- Material Component--mdcChipSet使用
<div mdcChipSet="choice"> <div mdcChip *ngFor="let item of ywDicTypes" ...
- Write a program to copy its input to its output, replacing each tab by \t, each backspace by \b, and each backslash by \\. This makes tabs and backspa
#include <stdio.h> #define DBS '\\' void main() { int c; while((c=getchar())!=EOF) { if(c=='\t ...
- Mac上使用Docker Desktop启动Kubernetes,踩坑后终于搞掂
1 前言 Kubernetes又简称k8s,是Google开源的容器集群管理系统,最近也是火热.闲来无事(为了发文),捣鼓了一下,在Mac上搭建Kubernetes,遇到一些坑,也记录一下. 另外,D ...
- sun.reflect.generics.reflectiveObjects.TypeVariableImpl cannot be cast to java.lang.Class
1.首先,问题出现的点是在泛型 我出现问题的原因是,和泛型有关系,要调整泛型 2.我把问题出现的过程描述一哈子 1.基础类 @tk.mybatis.mapper.annotation.Register ...
- Buy A Ticket(图论)
Buy A Ticket 题目大意 每个点有一个点权,每个边有一个边权,求对于每个点u的\(min(2*d(u,v)+val[v])\)(v可以等于u) solution 想到了之前的虚点,方便统计终 ...
- 线性dp—奶牛渡河
题目 Farmer John以及他的N(1 <= N <= 2,500)头奶牛打算过一条河,但他们所有的渡河工具,仅仅是一个木筏. 由于奶牛不会划船,在整个渡河过程中,FJ必须始终在木筏上 ...