springcloud系列三 搭建服务模块
搭建服务模块为了模拟正式开发环境,只是少写了service层直接在controller里面直接引用,直接上图和代码:更为方便:
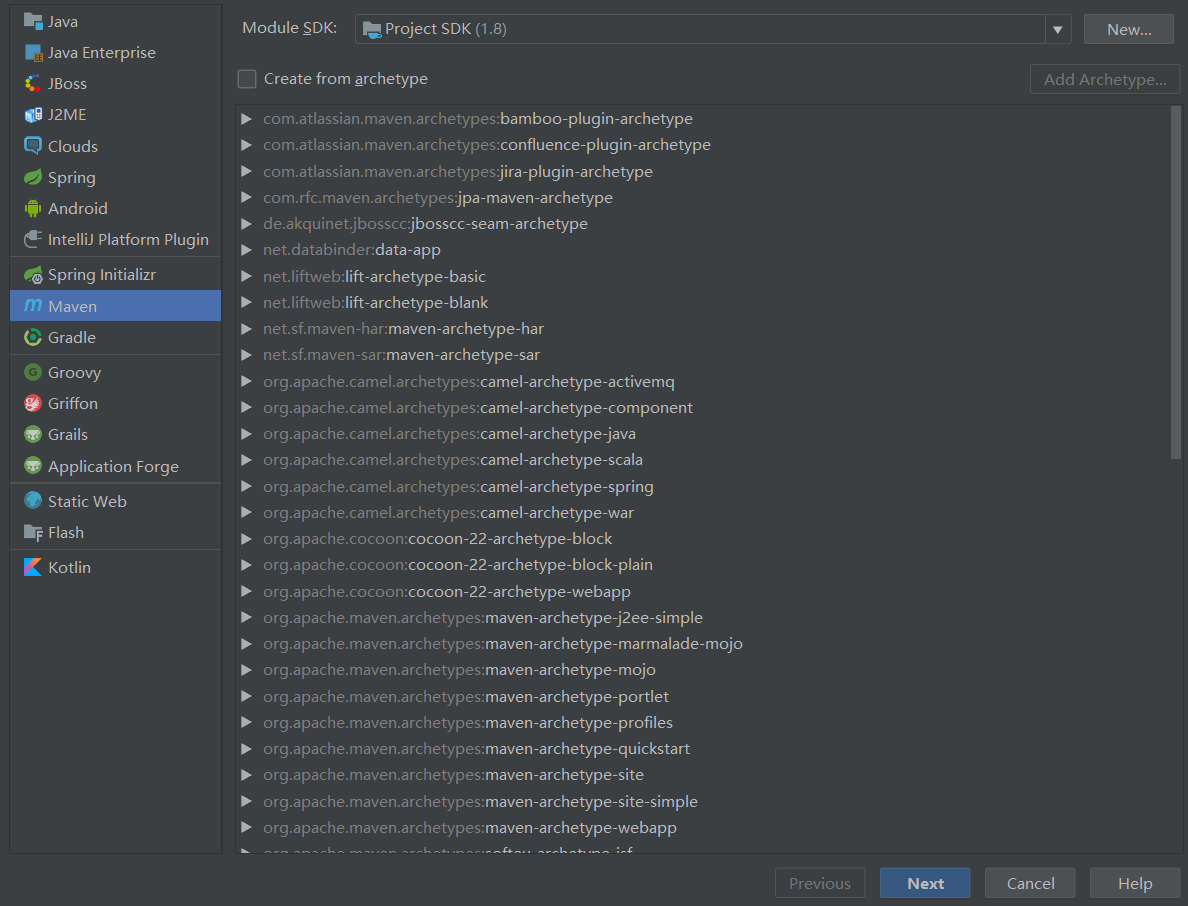
创建完成之后加入配置:
pom.xml文件:
<?xml version="1.0" encoding="UTF-8"?>

<project xmlns="http://maven.apache.org/POM/4.0.0"

         xmlns:xsi="http://www.w3.org/2001/XMLSchema-instance"

         xsi:schemaLocation="http://maven.apache.org/POM/4.0.0 http://maven.apache.org/xsd/maven-4.0.0.xsd">

    <parent>

        <artifactId>springcloud-parent</artifactId>

        <groupId>com.cxy</groupId>

        <version>0.0.-SNAPSHOT</version>

    </parent>

    <modelVersion>4.0.</modelVersion>

    <packaging>jar</packaging>

    <artifactId>spring-person</artifactId>

    <dependencies>

        <dependency>

            <groupId>org.springframework.cloud</groupId>

            <!--千万注意,不要写成spring-cloud-netflix-eureka-client,写成这样不会报错,但是注册不了服务-->

            <artifactId>spring-cloud-starter-netflix-eureka-client</artifactId>

        </dependency>

        <dependency>

            <groupId>org.mybatis.spring.boot</groupId>

            <artifactId>mybatis-spring-boot-starter</artifactId>

            <version>2.0.</version>

        </dependency>

        <dependency>

            <groupId>mysql</groupId>

            <artifactId>mysql-connector-java</artifactId>

            <version>5.1.</version>

        </dependency>

        <dependency>

            <groupId>org.springframework.boot</groupId>

            <artifactId>spring-boot-starter-web</artifactId>

        </dependency>

    </dependencies>

    <build>

        <plugins>

            <plugin>

                <groupId>org.springframework.boot</groupId>

                <artifactId>spring-boot-maven-plugin</artifactId>

            </plugin>

            <plugin>

                <groupId>org.mybatis.generator</groupId>

                <artifactId>mybatis-generator-maven-plugin</artifactId>

                <version>1.3.</version>

                <dependencies>

                    <dependency>

                        <groupId>org.mybatis.generator</groupId>

                        <artifactId>mybatis-generator-core</artifactId>

                        <version>1.3.</version>

                    </dependency>

                    <dependency>

                        <groupId>mysql</groupId>

                        <artifactId>mysql-connector-java</artifactId>

                        <version>5.1.</version>

                    </dependency>

                </dependencies>

                <executions>

                    <execution>

                        <id>mybatis generator</id>

                        <phase>package</phase>

                        <goals>

                            <goal>generate</goal>

                        </goals>

                    </execution>

                </executions>

                <configuration>

                    <!--允许移动生产的文件-->

                    <verbose>true</verbose>

                    <!--允许自动覆盖文件,在开发者不可以设置为true-->

                    <overwrite>true</overwrite>

                    <!--制定生产文件的位置-->

                    <configurationFile>

                        src/main/resources/mybatis_generator.xml

                    </configurationFile>

                </configuration>

            </plugin>

        </plugins>

    </build>

</project>
这个插件中加入了自动生成代码插件:
mybatis_generator.xml
<?xml version="1.0" encoding="UTF-8" ?>
<!DOCTYPE generatorConfiguration PUBLIC
"-//mybatis.org//DTD MyBatis Generator Configuration 1.0//EN"
"http://mybatis.org/dtd/mybatis-generator-config_1_0.dtd" >
<generatorConfiguration>
<!--驱动包的路径-->
<!--<classPathEntry location="F:\maven\repos\mysql\mysql-connector-java\5.1.34\mysql-connector-java-5.1.34.jar"/>-->
<context id="DB2Tables" targetRuntime="MyBatis3">
<!--注释-->
<commentGenerator>
<property name="suppressAllComments" value="true"/>
<property name="suppressDate" value="true"/>
</commentGenerator>
<!--数据库连接-->
<jdbcConnection driverClass="com.mysql.jdbc.Driver"
connectionURL="jdbc:mysql://127.0.0.1:3306/fr_db?zeroDateTimeBehavior=convertToNull&
autoReconnect=true&useUnicode=true&characterEncoding=utf-"
userId="root"
password=""/> <javaTypeResolver>
<property name="forceBigDecimals" value="false"/>
</javaTypeResolver> <!--生成Model类存放位置-->
<javaModelGenerator targetPackage="com.cxy.dataObject" targetProject="src/main/java">
<!--是否对model添加构造函数-->
<property name="constructorBased" value="false"/>
<!--是否允许子包-->
<property name="enableSubPackages" value="true"/>
<!--建立的model对象是否不可变,也就是生成的model没有setter方法-->
<property name="immutable" value="false"/>
<property name="trimStrings" value="false"/>
</javaModelGenerator> <!--生成映射文件存放位置-->
<sqlMapGenerator targetPackage="mapping" targetProject="src/main/resources">
<property name="enableSubPackages" value="true"/>
</sqlMapGenerator> <!--生成Mapper类存放位置-->
<javaClientGenerator type="XMLMAPPER" targetPackage="com.cxy.dao" targetProject="src/main/java">
<property name="enableSubPackages" value="true"/>
</javaClientGenerator> <!--生成与表对应的类名-->
<table tableName="person" domainObjectName="PersonDo" enableCountByExample="false"
enableDeleteByExample="false"
enableSelectByExample="false" enableUpdateByExample="false" selectByExampleQueryId="false"></table> </context> </generatorConfiguration>
yml文件:
eureka:

  client:

    serviceUrl:

     defaultZone: http://127.0.0.1:8761/eureka/  #eureka注册中心地址

spring:

  application:

    name: cxy-person-service #应用名

 #datasource,数据连接

  datasource:

    driver-class-name: com.mysql.jdbc.Driver

    url : jdbc:mysql://127.0.0.1:3306/fr_db?zeroDateTimeBehavior=convertToNull&autoReconnect=true&useUnicode=true&characterEncoding=utf-8

    password:

    username: root

 #mybatis

mybatis:

    type-aliases-package: com.cxy.dataObject #实体类映射文件包

    mapper-locations: classpath:mapping/*.xml #生成的sql语句

server:

  port: 8081
笔者在这个文件配置时候出现很多问题,慢慢的解决了,
注意yml文件格式
启动类:
package com.cxy;

import org.mybatis.spring.annotation.MapperScan;

import org.springframework.boot.SpringApplication;

import org.springframework.boot.autoconfigure.SpringBootApplication;

import org.springframework.boot.autoconfigure.jdbc.DataSourceAutoConfiguration;

import org.springframework.cloud.netflix.eureka.EnableEurekaClient;

/***

 * @ClassName: PersonApplication

 * @Description:

 * @Auther: 陈绪友

 * @Date: 2019/1/2816:30

 * @version : V1.0

 */

@SpringBootApplication

@EnableEurekaClient  //开启注解,注册服务

@MapperScan("com.cxy.dao")

public class PersonApplication {

    public static void main(String[] args) {

        SpringApplication.run(PersonApplication.class,args);

    }

}
controller
package com.cxy.controller;

import com.cxy.dao.PersonDoMapper;

import com.cxy.dataObject.PersonDo;

import org.springframework.beans.factory.annotation.Autowired;

import org.springframework.web.bind.annotation.PathVariable;

import org.springframework.web.bind.annotation.RequestMapping;

import org.springframework.web.bind.annotation.RequestMethod;

import org.springframework.web.bind.annotation.RestController;

/***

 * @ClassName: PersonController

 * @Description:

 * @Auther: 陈绪友

 * @Date: 2019/1/2816:31

 * @version : V1.0

 */

@RequestMapping("/person")

@RestController

public class PersonController {

    @Autowired

    private PersonDoMapper personDoMapper;

    @RequestMapping(value = "{id}",method = RequestMethod.GET)

  public PersonDo selectPersonDoByid(@PathVariable Integer id){

    return personDoMapper.selectByPrimaryKey(id); }
  @RequestMapping(value = "{id}",method = RequestMethod.DELETE)

  public Integer deletePersonDoByid(@PathVariable Integer id){

    return personDoMapper.deleteByPrimaryKey(id); } }
dao
package com.cxy.dao;

import com.cxy.dataObject.PersonDo;

import org.apache.ibatis.annotations.Mapper;

@Mapper

public interface PersonDoMapper {

    int deleteByPrimaryKey(Integer id);

    int insert(PersonDo record);

    int insertSelective(PersonDo record);

    PersonDo selectByPrimaryKey(Integer id);

    int updateByPrimaryKeySelective(PersonDo record);

    int updateByPrimaryKey(PersonDo record);

}
pojo:个人喜欢叫做数据库数据模型,在正式开发中和这个是不可以直接返回给前端的,是需要进行封装给前端的
po,对应的数据库数据模型
dto 返回给前端的数据模型,即就是页面展示的模型
vo 是前端传输过来给后台的模型
package com.cxy.dataObject;

public class PersonDo {

    private Integer id;

    private String name;

    private Integer age;

    private String address;

    public Integer getId() {

        return id;

    }

    public void setId(Integer id) {

        this.id = id;

    }

    public String getName() {

        return name;

    }

    public void setName(String name) {

        this.name = name;

    }

    public Integer getAge() {

        return age;

    }

    public void setAge(Integer age) {

        this.age = age;

    }

    public String getAddress() {

        return address;

    }

    public void setAddress(String address) {

        this.address = address;

    }

}
xml.
<?xml version="1.0" encoding="UTF-8"?>

<!DOCTYPE mapper PUBLIC "-//mybatis.org//DTD Mapper 3.0//EN" "http://mybatis.org/dtd/mybatis-3-mapper.dtd">

<mapper namespace="com.cxy.dao.PersonDoMapper">

  <resultMap id="BaseResultMap" type="com.cxy.dataObject.PersonDo">

    <id column="id" jdbcType="INTEGER" property="id" />

    <result column="name" jdbcType="VARCHAR" property="name" />

    <result column="age" jdbcType="INTEGER" property="age" />

    <result column="address" jdbcType="VARCHAR" property="address" />

  </resultMap>

  <sql id="Base_Column_List">

    id, name, age, address

  </sql>

  <select id="selectByPrimaryKey" parameterType="java.lang.Integer" resultMap="BaseResultMap">

    select

    <include refid="Base_Column_List" />

    from person

    where id = #{id,jdbcType=INTEGER}

  </select>

  <delete id="deleteByPrimaryKey" parameterType="java.lang.Integer">

    delete from person

    where id = #{id,jdbcType=INTEGER}

  </delete>

  <insert id="insert" parameterType="com.cxy.dataObject.PersonDo">

    insert into person (id, name, age,

      address)

    values (#{id,jdbcType=INTEGER}, #{name,jdbcType=VARCHAR}, #{age,jdbcType=INTEGER},

      #{address,jdbcType=VARCHAR})

  </insert>

  <insert id="insertSelective" parameterType="com.cxy.dataObject.PersonDo">

    insert into person

    <trim prefix="(" suffix=")" suffixOverrides=",">

      <if test="id != null">

        id,

      </if>

      <if test="name != null">

        name,

      </if>

      <if test="age != null">

        age,

      </if>

      <if test="address != null">

        address,

      </if>

    </trim>

    <trim prefix="values (" suffix=")" suffixOverrides=",">

      <if test="id != null">

        #{id,jdbcType=INTEGER},

      </if>

      <if test="name != null">

        #{name,jdbcType=VARCHAR},

      </if>

      <if test="age != null">

        #{age,jdbcType=INTEGER},

      </if>

      <if test="address != null">

        #{address,jdbcType=VARCHAR},

      </if>

    </trim>

  </insert>

  <update id="updateByPrimaryKeySelective" parameterType="com.cxy.dataObject.PersonDo">

    update person

    <set>

      <if test="name != null">

        name = #{name,jdbcType=VARCHAR},

      </if>

      <if test="age != null">

        age = #{age,jdbcType=INTEGER},

      </if>

      <if test="address != null">

        address = #{address,jdbcType=VARCHAR},

      </if>

    </set>

    where id = #{id,jdbcType=INTEGER}

  </update>

  <update id="updateByPrimaryKey" parameterType="com.cxy.dataObject.PersonDo">

    update person

    set name = #{name,jdbcType=VARCHAR},

      age = #{age,jdbcType=INTEGER},

      address = #{address,jdbcType=VARCHAR}

    where id = #{id,jdbcType=INTEGER}

  </update>

</mapper>
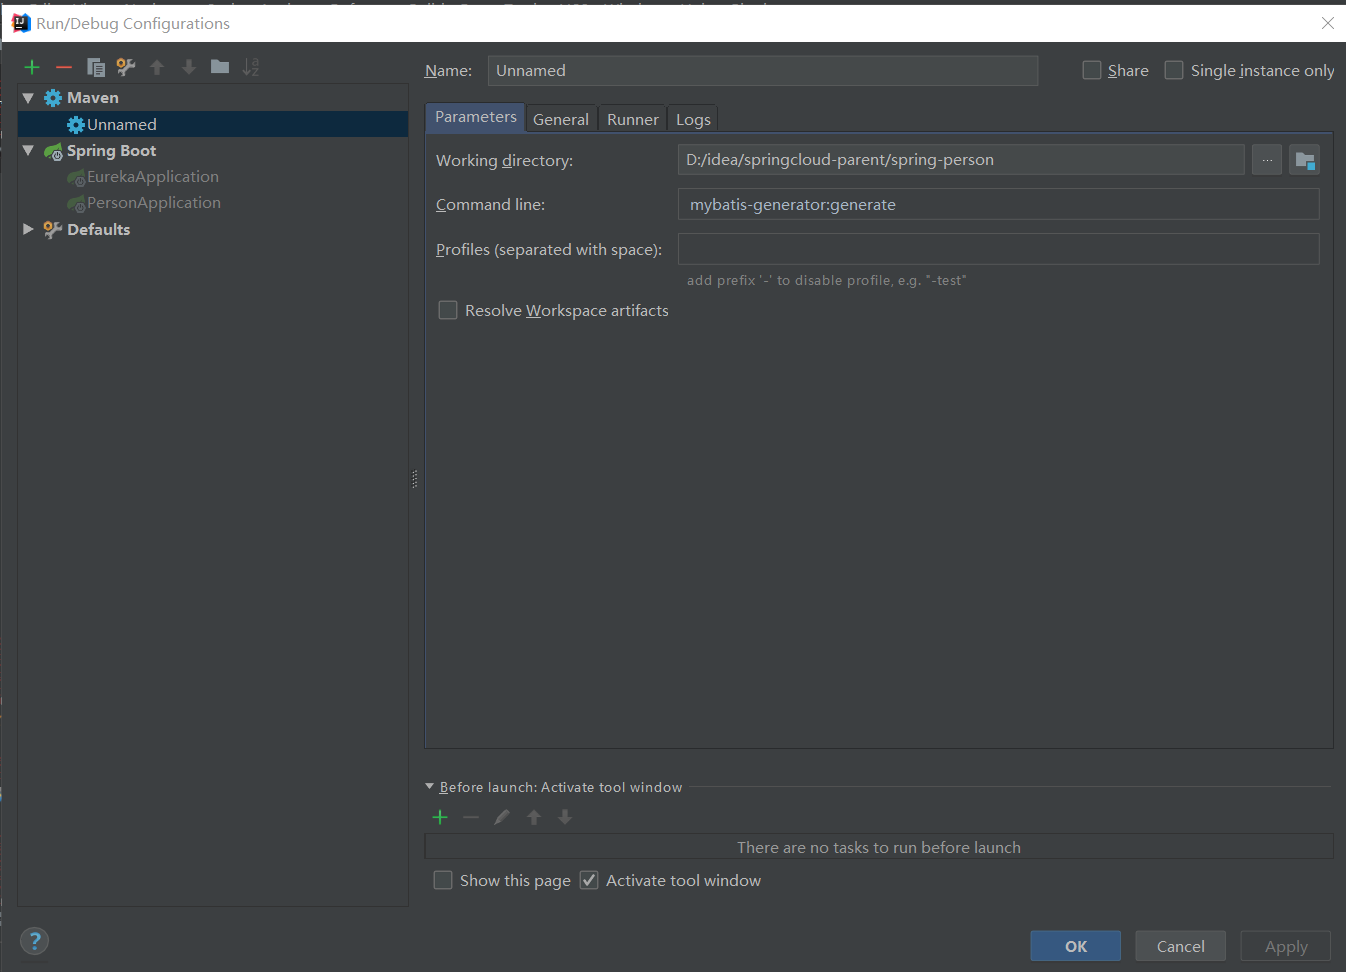
这个是代码生成命令的截图
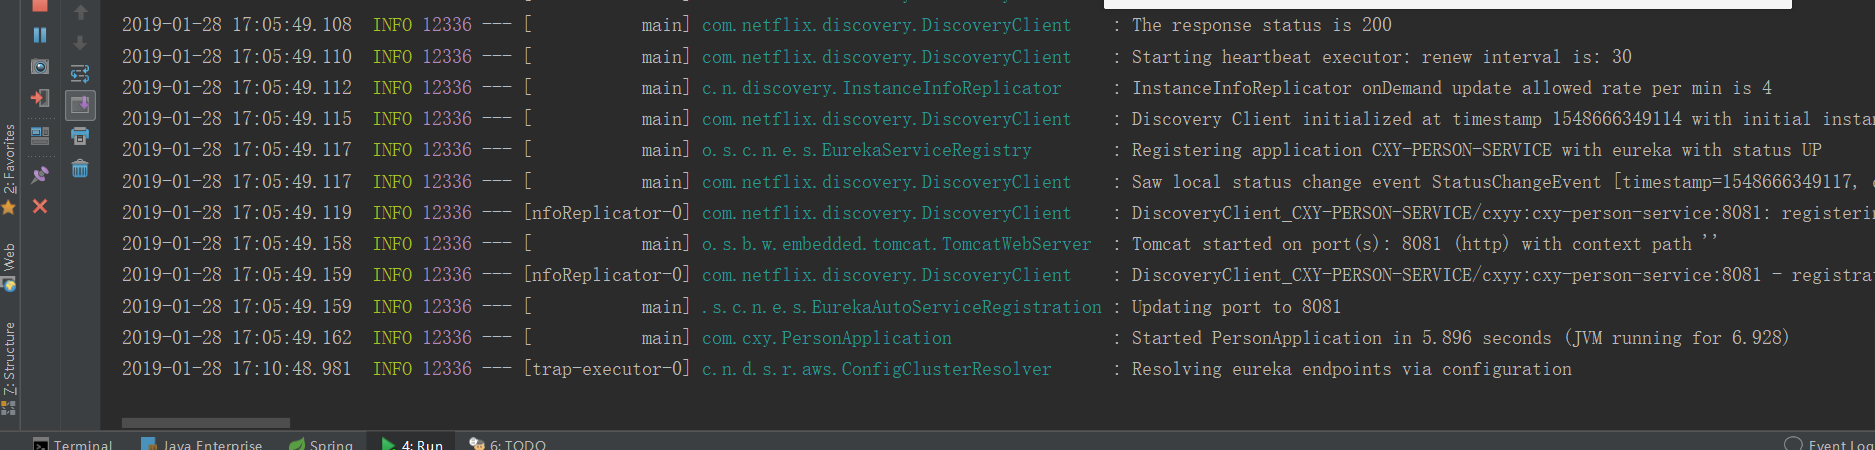
启动服务:
进入注册中心查看:
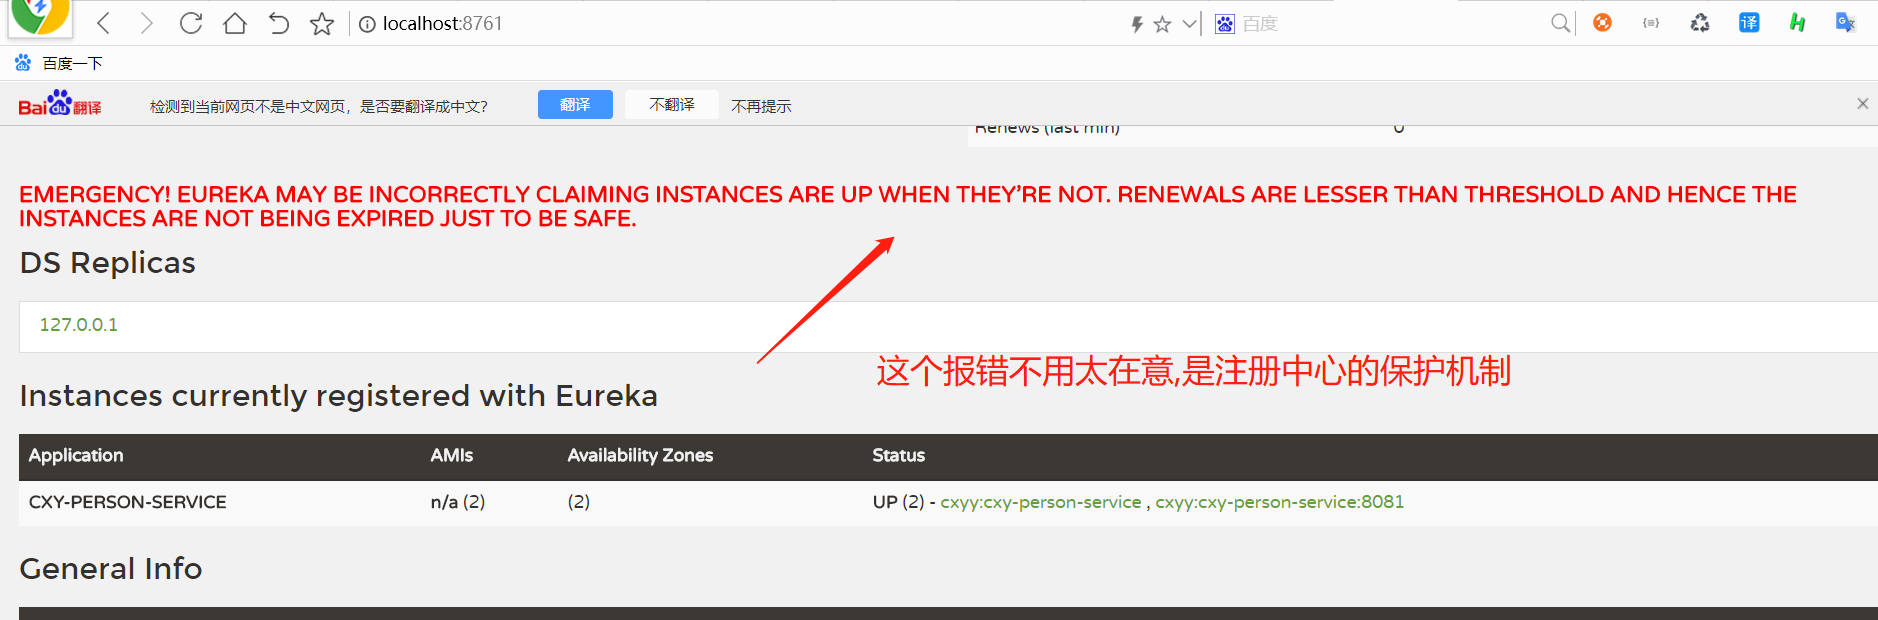
在此服务注册就完成了,那么远程是如何进行调用的呢,下接将会整合opnfeign进行服务调用,当然传统的httpclient,restemplate都是可以进行服务调用的
传统的方法就不调用了,比较繁琐,
springcloud系列三 搭建服务模块的更多相关文章
- springcloud系列四 搭建服务模块重点讲解
首先这个服务地址:一定不要写错,是自己注册中心开启的地址 如果注意到这些了,可以简单的进行操作,也可以不需要mybatis与数据库连接,在controller里直接返回相应的数据可以了,不用这么幸苦的 ...
- 学习一下 SpringCloud (三)-- 服务调用、负载均衡 Ribbon、OpenFeign
(1) 相关博文地址: 学习一下 SpringCloud (一)-- 从单体架构到微服务架构.代码拆分(maven 聚合): https://www.cnblogs.com/l-y-h/p/14105 ...
- SpringCloud系列三:SpringSecurity 安全访问(配置安全验证、服务消费端处理、无状态 Session 配置、定义公共安全配置程序类)
1.概念:SpringSecurity 安全访问 2.具体内容 所有的 Rest 服务最终都是暴露在公网上的,也就是说如果你的 Rest 服务属于一些你自己公司的私人业务,这样的结果会直接 导致你信息 ...
- SpringCloud系列三:将微服务注册到Eureka Server上
1. 回顾 通过上篇博客的讲解,我们知道硬编码提供者地址的方式有不少问题.要想解决这些问题,服务消费者需要一个强大的服务发现机制,服务消费者使用这种机制获取服务提供者的网络信息.不仅如此,即使服务提供 ...
- springcloud系列二 搭建注册中心启动
创建modul 然后就创建完成了 添加yml文件: server: port: eureka: client: register-with-eureka: false #单机版建议设置为false,设 ...
- Eureka系列(三)获取服务Client端具体实现
获取服务Client 端流程 我们先看下面这张图片,这张图片简单描述了下我们Client是如何获取到Server已续约实例信息的流程: 从图片中我们可以知晓大致流程就是Client会自己开启一个 ...
- 学习一下 SpringCloud (四)-- 服务降级、熔断 Hystrix、Sentinel
(1) 相关博文地址: 学习一下 SpringCloud (一)-- 从单体架构到微服务架构.代码拆分(maven 聚合): https://www.cnblogs.com/l-y-h/p/14105 ...
- 跟我学SpringCloud | 第三篇:服务的提供与Feign调用
跟我学SpringCloud | 第三篇:服务的提供与Feign调用 上一篇,我们介绍了注册中心的搭建,包括集群环境吓注册中心的搭建,这篇文章介绍一下如何使用注册中心,创建一个服务的提供者,使用一个简 ...
- springCloud系列教程01:Eureka 注册中心集群搭建
springCloud系列教程包含如下内容: springCloud系列教程01:Eureka 注册中心集群搭建 springCloud系列教程02:ConfigServer 配置中心server搭建 ...
随机推荐
- 2015.1.31 DataGridView自动滚动到某行
方法一.dv.CurrentCell = dv.Rows[i].Cells[2] 但此cell不能是隐藏cell 方法二. if (dgr.Index < dv_sel_aw.FirstDisp ...
- 什么是SPU、SKU、SKC、ARPU
首先,搞清楚商品与单品的区别.例如,iphone是一个单品,但是在淘宝上当很多商家同时出售这个产品的时候,iphone就是一个商品了. 商品:淘宝叫item,京东叫product,商品特指与商家有关的 ...
- loop
-- ------------------------loop---------------------------delimiter $DROP PROCEDURE IF EXISTS my_cou ...
- Eclipse Maven 编译错误 Dynamic Web Module 3.0 requires Java 1.6 or newer 解决方案
Eclipse Maven 开发一个 jee 项目时,编译时遇到以下错误:Description Resource Path Location TypeDynamic Web Module 3.0 r ...
- 未找到与约束contractname Microsoft.VisualStudio.Utilities.IContentTypeRegistryService...匹配的导出
***以下操作后一定要重启VS,重启VS,重启VS重要的事情说三遍*** //************************************************************* ...
- maven 配置说明
1.坐标 1.1 每一jar文件都有一个唯一坐标.通过坐标可以精确确定是哪个jar 1.2 坐标组成 1.2.1 Group ID : 公司名.公司网址倒写 1.2.2 Artifact ID : 项 ...
- C++数组对象和构造函数
定义数组对象以后,对数组中的对象初始化的方式分为两种: 一种方式是在定义的时候用列表初始化 A a[5] = {A(1),A(2),A(3),A(4),A(5)}; 一种方式是在定义了数组对象以后,再 ...
- 【摘自张宴的"实战:Nginx"】使用nginx的fastcgi_cache缓存php输出的内容
亲自测试发现,fastcgi_cache虽然可以缓存生成的php输出的文件,但是有个弊端,在缓存的失效时间之内,你继续访问这个地址,输出的内容没有发生变化,即使数据库新增了数据或者删除了数据,所以不适 ...
- 9.Delegate类
Concepts 不像MVC模式,Model/View模式并没有单独用来处理事件和用户交互的组件(controller).通常,视图负责向用户呈现模型中的数据,并处理用户的输入.有时,为了让 ...
- javax.swing.Timer
javax.swing 类 Timer java.lang.Object javax.swing.Timer 所有已实现的接口: Serializable public class Timerexte ...