Oz 创建CentOS6镜像
参考
http://linuxblind.blog.51cto.com/7616603/1655550/
http://www.chenshake.com/oz-making-centos-mirror/
http://www.bubuko.com/infodetail-2167558.html
http://zhanguo1110.blog.51cto.com/5750817/1627500
https://www.tianmaying.com/tutorial/oz
http://www.cnblogs.com/kevingrace/p/5821823.html
http://dl528888.blog.51cto.com/2382721/1862568
安装
yum -y install oz
装完后,你最好就重启机器,你用ifconfig,可以看到virbr0这个网络,不然你就安装失败。
配置Oz
默认Oz是使用raw格式,我的习惯是使用qcow2格式,
[paths]

output_dir = /data/nvme0n1/oz

data_dir = /var/lib/oz

screenshot_dir = /var/lib/oz/screenshots

# sshprivkey = /etc/oz/id_rsa-icicle-gen

[libvirt]

uri = qemu:///system

image_type = raw

# type = kvm

# bridge_name = virbr0

# cpus = 1

# memory = 1024

[cache]

original_media = yes

modified_media = no

jeos = no

[icicle]

safe_generation = no

[timeouts]

install = 3600

inactivity = 300

boot = 300

shutdown = 90
oz.cfg
这个就是Oz的配置文件,我把默认文件格式改成qcow2.
Oz支持的系统
目前EPEL的源,已经更新到最新的版本,支持Centos 6.5。
创建配置文件
我们需要两个配置文件,centos65.tdl 和centos6.ks
看一个具体的Oz的tdl文件,就全部明白
<template>

  <name>qemu-centos65</name>

  <os>

    <name>CentOS-6</name>

    <version>5</version>

    <arch>x86_64</arch>

    <install type='iso'>

      <iso>file:///data/md0/iso/CentOS-6.5-x86_64-minimal.iso</iso>

    </install>

    <rootpw>123123</rootpw>

  </os>

  <disk>

    <size>20</size>

  </disk>

  <description>CentOS 6.5 x86_64</description>

  <packages>

    <package name='acpid'/>

    <package name='cloud-utils-growpart'/>

    <package name='cloud-init'/>

    <package name='parted'/>

    <package name='unzip'/>

    <package name='NetworkManager-*'/>

  </packages>

  <repositories>

    <repository name='aliyun-Base'>

      <url>http://mirrors.aliyun.com/centos/$releasever/os/$basearch/</url>

      <signed>no</signed>

    </repository>

    <repository name='epel'>

      <url>http://mirrors.aliyun.com/epel/6/$basearch</url>

      <signed>no</signed>

    </repository>

  </repositories>

  <commands>

    <command name='install_qga'>

cd /root

tar xf qga.20171124.tar.gz

cd qga

bash ./install_qga_local.sh

    </command>

    <command name='install_linux_root_resize'>

cd /root

unzip linux-rootfs-resize-master.zip

cd linux-rootfs-resize-master

bash ./install

   </command>

   <command name='profile'>

echo "NOZEROCONF=yes" >> /etc/sysconfig/network

ln -s /boot/grub/grub.conf /etc/grub.conf

rm -rf /etc/udev/rules.d/70-persistent-net.rules

touch /etc/udev/rules.d/75-persistent-net-generator.rules

chmod +x /var/lib/cloud/scripts/per-boot/resetroot

   </command>

   <command name='services'>

service sshd restart

service iptables stop

service ip6tables stop

service acpid start

service NetworkManager start

chkconfig iptables off

chkconfig ip6tables off

chkconfig acpid on

chkconfig NetworkManager on

chkconfig cloud-init on

chkconfig cloud-final on

chkconfig cloud-config on

chkconfig cloud-init-local on

   </command>

   <command name='clear-logs'>

rm -rf /root/*

rm -rf /var/log/anaconda*

rm -rf /var/log/message

rm -rf /var/log/messages

rm -rf /etc/yum.repos.d/aliyun-Base.repo

rm -rf /etc/yum.repos.d/epel.repo

yum clean all

yum makecache

>/var/log/boot.log

>/var/log/messages

>/var/log/cloud-init-output.log

>/var/log/yum.log

   </command>

  </commands>

    <files>

        <file name="/root/qga.20171124.tar.gz" type="url">

            file:///data/nvme0n1/OZ-build-image/scripts/qga.20171124.tar.gz

        </file>

        <file name="/root/linux-rootfs-resize-master.zip" type="url">

            file:///data/nvme0n1/OZ-build-image/scripts/linux-rootfs-resize-master.zip

        </file>

        <file name="/var/lib/cloud/scripts/per-boot/resetroot" type="url">

            file:///data/nvme0n1/OZ-build-image/scripts/resetroot

        </file>

        <file name="/etc/cloud/cloud.cfg" type="url">

            file:///data/nvme0n1/OZ-build-image/scripts/cloud.cfg_centos6

        </file>

    </files>

</template>
centos65.tdl
执行安装程序,默认安装,会自动划分lvm分区,如果指定分区需修改ks文件
补充ks文件,centos6通用。
install

text

key --skip

keyboard us

lang en_US.UTF-8

skipx

rootpw Ct@2017Yun!@$%.CN

firewall --disabled

authconfig --enableshadow --enablemd5

selinux --disabled

logging --level=info

reboot

services --disabled="avahi-daemon,iscsi,iscsid,firstboot,kdump" --enabled="network,sshd,rsyslog,tuned"

timezone --utc Asia/Shanghai

network  --bootproto=dhcp --device=eth0 --onboot=on

bootloader --location=mbr --append="console=tty0 console=ttyS0,115200" --location=mbr --driveorder="sda" --timeout=1

zerombr yes

clearpart --all

part / --fstype ext4 --size=2048 --grow

%post

cat > /etc/sysconfig/network-scripts/ifcfg-eth0 << EOF

DEVICE="eth0"

BOOTPROTO="dhcp"

ONBOOT="yes"

TYPE="Ethernet"

USERCTL="yes"

PEERDNS="yes"

IPV6INIT="no"

PERSISTENT_DHCLIENT="1"

EOF

echo "ttyS0" >> /etc/securetty

cat <<EOF > /etc/init/ttyS0.conf

start on stopped rc RUNLEVEL=[2345]

stop on starting runlevel [016]

respawn

instance /dev/ttyS0

exec /sbin/agetty /dev/ttyS0 115200 vt100-nav

EOF

#sed_profile

sed -i 's/#PermitRootLogin yes/PermitRootLogin yes/g' /etc/ssh/sshd_config

sed -i 's/#UseDNS yes/UseDNS no/g' /etc/ssh/sshd_config

sed -i 's/GSSAPIAuthentication yes/GSSAPIAuthentication no/g' /etc/ssh/sshd_config

#yum clean all

rm -rf /root/*

rm -rf /var/log/anaconda*

rm -rf /var/log/message

>/var/log/boot.log

>/var/log/messages

>/var/log/cloud-init-output.log

>/var/log/yum.log

%end

%packages --nobase --excludedocs
centos6.ks
oz-install -p -u -d3 -a centos65.ks centos65.tdl -x centos65-libvirt.xml
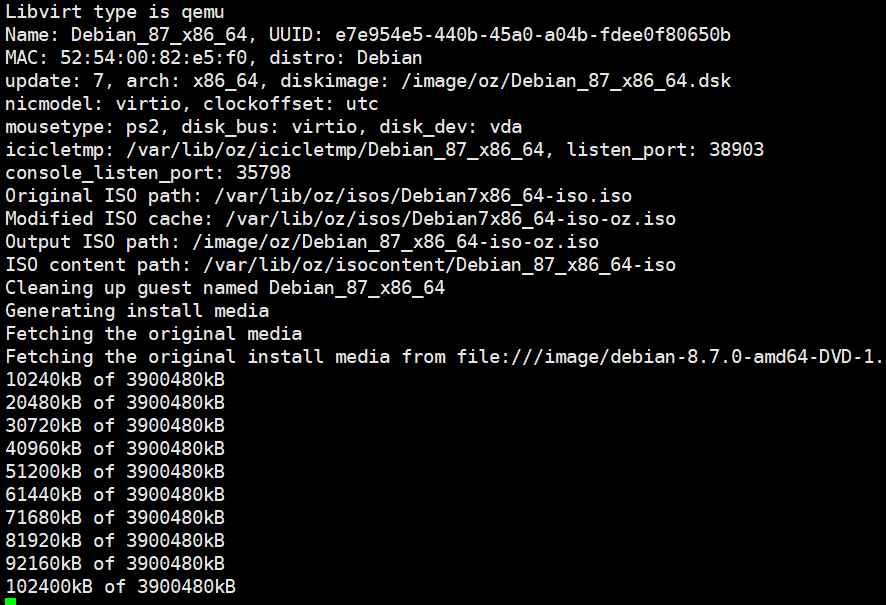
安装程序截图,跑完执行virsh list会看到生成的running的虚机,并生成虚机的xml文件
<domain type="kvm">

  <name>centos65-openstack</name>

  <memory>1048576</memory>

  <currentMemory>1048576</currentMemory>

  <uuid>712aa3fa-b07c-42be-a024-3fde453a3d01</uuid>

  <clock offset="utc"/>

  <vcpu>1</vcpu>

  <features>

    <acpi/>

    <apic/>

    <pae/>

  </features>

  <os>

    <type>hvm</type>

    <boot dev="hd"/>

  </os>

  <on_poweroff>destroy</on_poweroff>

  <on_reboot>destroy</on_reboot>

  <on_crash>destroy</on_crash>

  <devices>

    <graphics type="vnc" port="-1" listen="0.0.0.0"/>

    <interface type="bridge">

      <source bridge="virbr0"/>

      <mac address="52:54:00:2b:03:04"/>

      <model type="virtio"/>

    </interface>

    <input bus="ps2" type="mouse"/>

    <serial type="pty">

      <target port="0"/>

    </serial>

    <serial type="tcp">

      <source host="127.0.0.1" mode="bind" service="47017"/>

      <protocol type="raw"/>

      <target port="1"/>

    </serial>

    <disk device="disk" type="file">

      <target bus="virtio" dev="vda"/>

      <source file="/data/nvme0n1/oz/images/centos65-openstack.dsk"/>

      <driver type="raw" name="qemu"/>

    </disk>

    <channel type="unix">

      <source path="/var/lib/libvirt/qemu/org.qemu.guest_agent.0.centos65-openstack.sock" mode="bind"/>

      <target type="virtio" name="org.qemu.guest_agent.0"/>

    </channel>

  </devices>

</domain>
centos65-libvirt.xml

Oz 创建CentOS6镜像的更多相关文章
- Oz 创建CentOS7镜像
参考链接: https://github.com/clalancette/oz/wiki/Oz-template-description-language https://github.com/cla ...
- Oz 创建Windows2008R2镜像
此tdl和auto文件只可定义windows disk bus以ide模式启动,不支持virtio. <template> <name>Windows-gushiren< ...
- Oz 创建Debian8镜像
<template> <name>Debian8.7-zxy</name> <os> <name>Debian</name> & ...
- Oz 创建Ubuntu镜像
参考链接: http://blog.csdn.net/gcogle/article/details/52767135http://tlinux.blog.51cto.com/7288656/17497 ...
- docker创建nginx镜像
注意:此处不是用的dockerfile创建的镜像,只是用来搞一搞 首先你的系统里面要安装docker,这里就不重复介绍了,可以看之前的文章: 然后再搞一个基础镜像 docker pull regist ...
- 03-docker入门-创建 docker 镜像
方法1:从运行的容器创建方法2:编写 DockFile 文件创建 方法1: 打包镜像 docker commit -m "Test a change" 610 ubuntu:tes ...
- 如何使用win7自带的备份还原以及创建系统镜像------傻瓜式教程
对于经常鼓捣电脑的童鞋来说,装系统是一件极其平常的事情,不过系统装多了之后,我们会感到比较烦躁,因为每一次装系统意味着驱动的重新安装,程序的重新安装,每次这么鼓捣几次,半天时间就花在这上面了,效率是在 ...
- 基于Dockerfile创建docker镜像
0.先创建一个文件夹img mkdir img 1.Linux上新建3个文件 2.文件内容分别写入 (1)Dockerfile中 # 基于的基础镜像centos FROM centos # 维护该镜像 ...
- Mycat 镜像-创建 Docker 镜像
将 Mycat-server 创建到镜像,使其能够进行容器化部署,我们需要创建 Dockerfile 并在文件中安装其依赖项,使用 centos 做为 base 镜像,并安装 jdk 依赖即可,因此创 ...
随机推荐
- Nginx+Tomcat+memcached高可用会话保持
Nginx+Tomcat+memcached高可用会话保持 文章来源dyc2005 一.概述 之前文章已经描述了企业高可用负载相关的架构及实现,其中常用的nginx或haproxy,LVS结合ke ...
- IOError: [Errno 22] invalid mode ('rb') or filename: 'C
dataset = scipy.io.loadmat('F:\test_data.mat') 报错 IOError: [Errno ] invalid mode ('rb') or filename: ...
- 树状数组区间修改and查询和
在差分数组上稍加改变,就可以实现这个骚操作 首先我们先来看一看普通的树状数组(基于差分)怎么暴力的求解区间和就是询问区间长度次和 \(\sum^{i=1}_{len}\sum^{j=1}_{i}bas ...
- 居中未知元素(翻译https://css-tricks.com/centering-in-the-unknown/)
在web开发中,当你遇到居中元素时,知道越多关于元素本身和父级元素的信息,居中做起来就很轻松.但是,当遇到你一点都不知道的元素该怎么办? It's still kinda doable. 不会很难:已 ...
- 1.vue脚手架搭建项目
前言: 在使用Vue-cli脚手架搭建项目之前,需要安装node.js和npm以及vue-cli. 开始搭建项目: 1.打开cmd win+R 2.转到要搭建的项目路径: g: cd Webapp/v ...
- Java日志框架介绍
一.序言 日志为系统的必不可少的一部分,通过输出的日志我们可以排查线上出现的各种问题,就像断案的线索一样.我们还可以通过日志数据分析用户的行为习惯做大数据分析. 二.日志框架分类及其历史 框架的种类: ...
- BZOJ1004: [HNOI2008]Cards(Burnside引理 背包dp)
Time Limit: 10 Sec Memory Limit: 162 MBSubmit: 4255 Solved: 2582[Submit][Status][Discuss] Descript ...
- CCS选择器基础
上周学习了HTML和css的一些基础,今天来夯实一下基础 选择器有: 1.标签选择器 :就是HTML 中的标签 如<p> <h1> <body>等 2.类选择器: ...
- 带搜索框的select下拉框
利用select2制作带有搜索功能的select下拉框 1.引入线上css和js <link href="https://cdnjs.cloudflare.com/ajax/libs/ ...
- (转)想从事游戏开发,1 年内能精通 C++ 吗,还需要学习什么?
本人大约从20多年前开始学习及使用C++,但仍未达到我认为「精通」的阶段,甚至对于C++11的各种新特性也未掌握.然而因为我是在读书时自学C++的,也是游戏程序员(原问题中提到题主想从事游戏开发),觉 ...
