【转载】springMVC表单校验+全注解
我们将创建一个包含一个学生注册表格的简单应用,用户输入表单提交验证通过 JSR303 的验证注释验证,通过覆盖属性文件可使用国际验证消息的默认消息,还访问静态资源(如应用引导CSS到网页中)。
请注意,JSR303是一种规范,hibernate-validator是我们在这篇文章中使用的一种实现,它也提供了几个不包含在规范中自己的验证注释。
使用以下技术:
- Spring 4.0.6.RELEASE
- validation-api 1.1.0.Final
- hibernate-validator 5.1.2.Final
- Bootstrap v3.1.0
- Maven 3
- JDK 1.6
- Tomcat 7.0.54
- Eclipse JUNO Service Release 2
我们现在开始!
<?xml version="1.0"?>

<project xsi:schemaLocation="http://maven.apache.org/POM/4.0.0 http://maven.apache.org/xsd/maven-4.0.0.xsd"

	xmlns="http://maven.apache.org/POM/4.0.0" xmlns:xsi="http://www.w3.org/2001/XMLSchema-instance">

	<modelVersion>4.0.0</modelVersion>

	<groupId>com.yiibai.springmvc</groupId>

	<artifactId>Spring4MVCFormValidationExample</artifactId>

	<packaging>war</packaging>

	<version>1.0.0</version>

	<name>Spring4MVCFormValidationExample</name>

	<properties>

		<springframework.version>4.0.6.RELEASE</springframework.version>

		<hibernate.validator.version>5.1.2.Final</hibernate.validator.version>

		<javax.validation.version>1.1.0.Final</javax.validation.version>

	</properties>

	<dependencies>

		<!-- Spring dependencies -->

		<dependency>

			<groupId>org.springframework</groupId>

			<artifactId>spring-core</artifactId>

			<version>${springframework.version}</version>

		</dependency>

		<dependency>

			<groupId>org.springframework</groupId>

			<artifactId>spring-web</artifactId>

			<version>${springframework.version}</version>

		</dependency>

		<dependency>

			<groupId>org.springframework</groupId>

			<artifactId>spring-webmvc</artifactId>

			<version>${springframework.version}</version>

		</dependency>

		<!-- jsr303 validation dependencies-->

		<dependency>

			<groupId>javax.validation</groupId>

			<artifactId>validation-api</artifactId>

			<version>${javax.validation.version}</version>

		</dependency>

		<dependency>

			<groupId>org.hibernate</groupId>

			<artifactId>hibernate-validator</artifactId>

			<version>${hibernate.validator.version}</version>

		</dependency>

		<!-- Servlet dependencies -->

		<dependency>

			<groupId>javax.servlet</groupId>

			<artifactId>javax.servlet-api</artifactId>

			<version>3.1.0</version>

		</dependency>

		<dependency>

			<groupId>javax.servlet.jsp</groupId>

			<artifactId>javax.servlet.jsp-api</artifactId>

			<version>2.3.1</version>

		</dependency>

		<dependency>

		    <groupId>javax.servlet</groupId>

		    <artifactId>jstl</artifactId>

		    <version>1.2</version>

		</dependency>

	</dependencies>

	<build>

		<pluginManagement>

			<plugins>

				<plugin>

					<groupId>org.apache.maven.plugins</groupId>

					<artifactId>maven-war-plugin</artifactId>

					<version>2.4</version>

					<configuration>

						<warSourceDirectory>src/main/webapp</warSourceDirectory>

						<warName>Spring4MVCFormValidationExample</warName>

						<failOnMissingWebXml>false</failOnMissingWebXml>

					</configuration>

				</plugin>

			</plugins>

		</pluginManagement>

		<finalName>Spring4MVCFormValidationExample</finalName>

	</build>

</project>
首先要注意这里是 maven-war-plugin 插件声明。由于我们使用的是全注解配置,我们甚至不包括在 web.xml 中,所以我们需要配置这个插件,以避免Maven构建war包失败。在验证部分 validation-api 代表规范, 而hibernate-validator是本规范的一个实现。hibernate-validator还提供了一些它自己的注解(@Email,@NotEmpty等)不属于规范的一部分。
伴随着这一点,我们也包括JSP/Servlet/Jstl 的依赖关系,也将需要为使用 servlet API和JSTL视图在我们的代码中。在一般情况下,容器可能已经包含了这些库,从而在pom.xml中我们可以设置范围作为“provided”。
访问的对象将充当一个辅助bean的形式保存用户提供签证申请表提交的数据。我们将注释,以验证属性(使用验证注释)。
com.yiibai.springmvc.model.Student
package com.yiibai.springmvc.model;

import java.io.Serializable;

import java.util.ArrayList;

import java.util.Date;

import java.util.List;

import javax.validation.constraints.NotNull;

import javax.validation.constraints.Past;

import javax.validation.constraints.Size;

import org.hibernate.validator.constraints.Email;

import org.hibernate.validator.constraints.NotEmpty;

import org.springframework.format.annotation.DateTimeFormat;

public class Student implements Serializable {

	@Size(min=3, max=30)

	private String firstName;

	@Size(min=3, max=30)

	private String lastName;

	@NotEmpty

	private String sex;

	@DateTimeFormat(pattern="yyyy-MM-dd")

	@Past @NotNull

	private Date dob;

	@Email @NotEmpty

	private String email;

	@NotEmpty

	private String section;

	@NotEmpty

	private String country;

	private boolean firstAttempt;

	@NotEmpty

	private List<String> subjects = new ArrayList<String>();

	public String getFirstName() {

		return firstName;

	}

	public void setFirstName(String firstName) {

		this.firstName = firstName;

	}

	public String getLastName() {

		return lastName;

	}

	public void setLastName(String lastName) {

		this.lastName = lastName;

	}

	public String getSex() {

		return sex;

	}

	public void setSex(String sex) {

		this.sex = sex;

	}

	public Date getDob() {

		return dob;

	}

	public void setDob(Date dob) {

		this.dob = dob;

	}

	public String getEmail() {

		return email;

	}

	public void setEmail(String email) {

		this.email = email;

	}

	public String getSection() {

		return section;

	}

	public void setSection(String section) {

		this.section = section;

	}

	public String getCountry() {

		return country;

	}

	public void setCountry(String country) {

		this.country = country;

	}

	public boolean isFirstAttempt() {

		return firstAttempt;

	}

	public void setFirstAttempt(boolean firstAttempt) {

		this.firstAttempt = firstAttempt;

	}

	public List<String> getSubjects() {

		return subjects;

	}

	public void setSubjects(List<String> subjects) {

		this.subjects = subjects;

	}

	@Override

	public String toString() {

		return "Student [firstName=" + firstName + ", lastName=" + lastName

				+ ", sex=" + sex + ", dob=" + dob + ", email=" + email

				+ ", section=" + section + ", country=" + country

				+ ", firstAttempt=" + firstAttempt + ", subjects=" + subjects

				+ "]";

	}

}
在上面的代码中:@Size, @Past & @NotNull 是标准的标注,而@NotEmpty&@Emailare是规范的一部分。
com.yiibai.springmvc.controller.HelloWorldController
package com.yiibai.springmvc.controller;

import java.util.ArrayList;

import java.util.List;

import javax.validation.Valid;

import org.springframework.stereotype.Controller;

import org.springframework.ui.ModelMap;

import org.springframework.validation.BindingResult;

import org.springframework.web.bind.annotation.ModelAttribute;

import org.springframework.web.bind.annotation.RequestMapping;

import org.springframework.web.bind.annotation.RequestMethod;

import com.websystique.springmvc.model.Student;

@Controller

@RequestMapping("/")

public class HelloWorldController {

	/*

	 * This method will serve as default GET handler.

	 *

	 */

	@RequestMapping(method = RequestMethod.GET)

	public String newRegistration(ModelMap model) {

		Student student = new Student();

		model.addAttribute("student", student);

		return "enroll";

	}

	/*

	 * This method will be called on form submission, handling POST request

	 * It also validates the user input

	 */

	@RequestMapping(method = RequestMethod.POST)

	public String saveRegistration(@Valid Student student, BindingResult result, ModelMap model){

		if(result.hasErrors()) {

		        return "enroll";

		}

		model.addAttribute("success", "Dear "+ student.getFirstName()+" , your Registration completed successfully");

		return "success";

	}

	/*

	 * Method used to populate the Section list in view.

	 * Note that here you can call external systems to provide real data.

	 */

	@ModelAttribute("sections")

	public List<String> initializeSections() {

		List<String> sections = new ArrayList<String>();

		sections.add("Graduate");

		sections.add("Post Graduate");

		sections.add("Research");

 		return sections;

	}

	/*

	 * Method used to populate the country list in view.

	 * Note that here you can call external systems to provide real data.

	 */

	@ModelAttribute("countries")

	public List<String> initializeCountries() {

		List<String> countries = new ArrayList<String>();

		countries.add("USA");

		countries.add("CHINA");

		countries.add("FRANCE");

		countries.add("GERMANY");

		countries.add("ITALY");

		countries.add("OTHER");

 		return countries;

	}

	/*

	 * Method used to populate the subjects list in view.

	 * Note that here you can call external systems to provide real data.

	 */

	@ModelAttribute("subjects")

	public List<String> initializeSubjects() {

		List<String> subjects = new ArrayList<String>();

		subjects.add("Physics");

		subjects.add("Chemistry");

		subjects.add("Life Science");

		subjects.add("Political Science");

		subjects.add("Computer Science");

		subjects.add("Mathmatics");

 		return subjects;

	}

}
@Controller表明这个类是一个控制器在处理具有模式映射的@RequestMapping请求。这里使用 ‘/’, 它被作为默认的控制器。方法newRegistration是相当简单的,注解为@ RequestMethod.GET服务默认是GET请求,使用模型对象,以服务为形式的数据,并呈现包含空白表单的网页。
方法saveRegistration 标注有@ RequestMethod.POST,并将处理表单提交POST请求。注意本方法的参数和它们的顺序。
@Valid要求spring来验证相关的对象(学生)。 BindingResult包含此验证,并可能在此验证过程中发生(产生)任何错误的结果。请注意,BindingResult一定要在之后立即生效对象,否则spring将无法验证并且将一个异常抛出。
注意,在校验失败后,默认/广义错误消息显示在屏幕上这可能不是所期望的。相反,可以重写此行为提供具体到每个字段中国际化消息。为了做到这一点,我们需要配置 MessageSource 在应用程序配置类,并提供包含我们下一步将配置实际的信息属性文件。
com.yiibai.springmvc.configuration.HelloWorldConfiguration
package com.yiibai.springmvc.configuration;

import org.springframework.context.MessageSource;

import org.springframework.context.annotation.Bean;

import org.springframework.context.annotation.ComponentScan;

import org.springframework.context.annotation.Configuration;

import org.springframework.context.support.ResourceBundleMessageSource;

import org.springframework.web.servlet.ViewResolver;

import org.springframework.web.servlet.config.annotation.EnableWebMvc;

import org.springframework.web.servlet.config.annotation.ResourceHandlerRegistry;

import org.springframework.web.servlet.config.annotation.WebMvcConfigurerAdapter;

import org.springframework.web.servlet.view.InternalResourceViewResolver;

import org.springframework.web.servlet.view.JstlView;

@Configuration

@EnableWebMvc

@ComponentScan(basePackages = "com.yiibai.springmvc")

public class HelloWorldConfiguration extends WebMvcConfigurerAdapter {

	/*

	 * Configure View Resolver

	 */

	@Bean

	public ViewResolver viewResolver() {

		InternalResourceViewResolver viewResolver = new InternalResourceViewResolver();

		viewResolver.setViewClass(JstlView.class);

		viewResolver.setPrefix("/WEB-INF/views/");

		viewResolver.setSuffix(".jsp");

		return viewResolver;

	}

	/*

	 * Configure ResourceHandlers to serve static resources like CSS/ Javascript etc...

	 *

	 */

	@Override

	public void addResourceHandlers(ResourceHandlerRegistry registry) {

	    registry.addResourceHandler("/static/**").addResourceLocations("/static/");

	}

	/*

	 * Configure MessageSource to provide internationalized messages

	 *

	 */

	@Bean

	public MessageSource messageSource() {

	    ResourceBundleMessageSource messageSource = new ResourceBundleMessageSource();

	    messageSource.setBasename("messages");

	    return messageSource;

	}

}
@Configuration指示该类包含注解为@Bean生产Bean管理是由Spring容器的一个或多个 bean 的方法。@EnableWebMvc 等效于 mvc:annotation-driven 在XML文件中。它能够为使用@RequestMapping 向特定的方法传入的请求映射@Controller-annotated类。 @ComponentScan 等效于 context:component-scan base-package="..." 提供具有到哪里查找管理Spring beans/类。
方法 ViewResolver 配置一个 ViewResolver 用来找出真正的视图。方法 addResourceHandlers 配置 ResourceHandler 静态资源。CSS, JavaScript, images 等都是静态的资源在你的页面里。上面的配置表示,所有的资源请求开始/static/,将从webapps文件夹下提供/static/。在这个例子中,我们把所有的css文件放在 Web应用程序的 /static/css 目录中。注意,此方法在 WebMvcConfigurerAdapter 中定义,因此我们需要扩展这个类来注册我们的静态资源覆盖此方法。
方法为 messageSource 配置消息包,以支持[国际化]消息属性文件。请注意方法 baseName 提供的参数(消息)。Spring 将搜索应用程序类路径中一个名为messages.properties文件。让我们添加的文件:
src/main/resources/messages.properties
Size.student.firstName=First Name must be between {2} and {1} characters long

Size.student.lastName=Last Name must be between {2} and {1} characters long

NotEmpty.student.sex=Please specify your gender

NotNull.student.dob=Date of birth can not be blank

Past.student.dob=Date of birth must be in the past

Email.student.email=Please provide a valid Email address

NotEmpty.student.email=Email can not be blank

NotEmpty.student.country=Please select your country

NotEmpty.student.section=Please select your section

NotEmpty.student.subjects=Please select at least one subject

typeMismatch=Invalid format
{ValidationAnnotationClass}.{modelObject}.{fieldName}
此外,根据具体的注释(如@Size),也可以用传递参数给这些消息:{0},{1},..{i}
<beans xmlns="http://www.springframework.org/schema/beans"

    xmlns:context="http://www.springframework.org/schema/context"

    xmlns:xsi="http://www.w3.org/2001/XMLSchema-instance"

    xmlns:mvc="http://www.springframework.org/schema/mvc"

    xsi:schemaLocation="http://www.springframework.org/schema/beans http://www.springframework.org/schema/beans/spring-beans-4.0.xsd

    http://www.springframework.org/schema/mvc http://www.springframework.org/schema/mvc/spring-mvc-4.0.xsd

    http://www.springframework.org/schema/context http://www.springframework.org/schema/context/spring-context-4.0.xsd">

    <context:component-scan base-package="com.yiibai.springmvc" />

    <mvc:annotation-driven/>

    <mvc:resources mapping="/static/**" location="/static/" />

    <mvc:default-servlet-handler />

    <bean id="messageSource" class="org.springframework.context.support.ResourceBundleMessageSource">

        <property name="basename">

            <value>messages</value>

        </property>

    </bean>

    <bean class="org.springframework.web.servlet.view.InternalResourceViewResolver">

        <property name="prefix">

            <value>/WEB-INF/views/</value>

        </property>

        <property name="suffix">

            <value>.jsp</value>

        </property>

    </bean>

</beans>
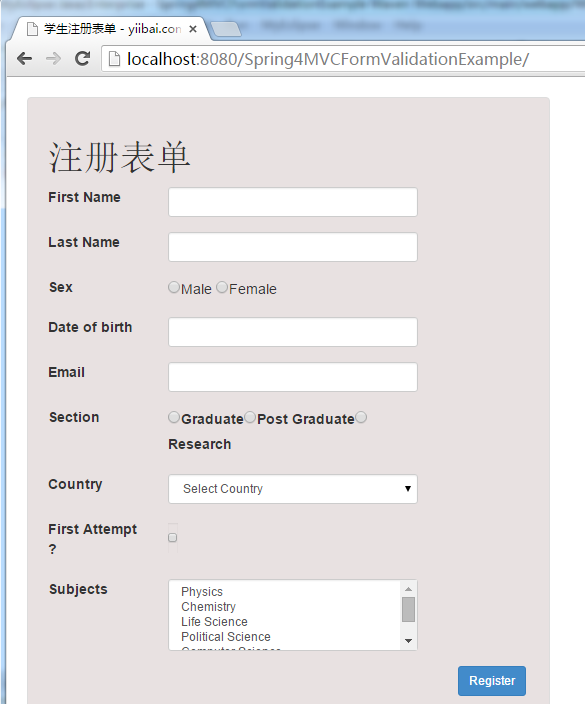
我们将添加两个简单的JSP页面。第一个将包含一个表单,从用户接收输入, 而第二个在当表单输入验证成功时会显示成功消息给用户。
<link href="<c:url value='/static/css/bootstrap.css' />" rel="stylesheet"></link>
注意静态资源路径。既然我们已经在前面的步骤配置资源处理程序 /static/**, css文件将搜索 /static/文件夹。
WEB-INF/views/enroll.jsp
<%@ page language="java" contentType="text/html; charset=utf-8"

    pageEncoding="utf-8"%>

<%@ taglib prefix="form" uri="http://www.springframework.org/tags/form"%>

<%@ taglib prefix="c" uri="http://java.sun.com/jsp/jstl/core" %>

<html>

<head>

	<meta http-equiv="Content-Type" content="text/html; charset=utf-8">

	<title>Student Enrollment Form</title>

	<link href="<c:url value='/static/css/bootstrap.css' />" rel="stylesheet"></link>

	<link href="<c:url value='/static/css/custom.css' />" rel="stylesheet"></link>

</head>

<body>

 	<div class="form-container">

 	<h1>Enrollment Form</h1>

	<form:form method="POST" modelAttribute="student" class="form-horizontal">

		<div class="row">

			<div class="form-group col-md-12">

				<label class="col-md-3 control-lable" for="firstName">First Name</label>

				<div class="col-md-7">

					<form:input type="text" path="firstName" id="firstName" class="form-control input-sm"/>

					<div class="has-error">

						<form:errors path="firstName" class="help-inline"/>

					</div>

				</div>

			</div>

		</div>

		<div class="row">

			<div class="form-group col-md-12">

				<label class="col-md-3 control-lable" for="lastName">Last Name</label>

				<div class="col-md-7">

					<form:input type="text" path="lastName" id="lastName" class="form-control input-sm"/>

					<div class="has-error">

						<form:errors path="lastName" class="help-inline"/>

					</div>

				</div>

			</div>

		</div>

		<div class="row">

			<div class="form-group col-md-12">

				<label class="col-md-3 control-lable" for="sex">Sex</label>

				<div class="col-md-7" class="form-control input-sm">

					<form:radiobutton path="sex" value="M" />Male

	    			<form:radiobutton path="sex" value="F" />Female

					<div class="has-error">

						<form:errors path="sex" class="help-inline"/>

					</div>

				</div>

			</div>

		</div>

		<div class="row">

			<div class="form-group col-md-12">

				<label class="col-md-3 control-lable" for="dob">Date of birth</label>

				<div class="col-md-7">

					<form:input type="text" path="dob" id="dob" class="form-control input-sm"/>

					<div class="has-error">

						<form:errors path="dob" class="help-inline"/>

					</div>

				</div>

			</div>

		</div>

		<div class="row">

			<div class="form-group col-md-12">

				<label class="col-md-3 control-lable" for="email">Email</label>

				<div class="col-md-7">

					<form:input type="text" path="email" id="email" class="form-control input-sm"/>

					<div class="has-error">

						<form:errors path="email" class="help-inline"/>

					</div>

				</div>

			</div>

		</div>

		<div class="row">

			<div class="form-group col-md-12">

				<label class="col-md-3 control-lable" for="section">Section</label>

				<div class="col-md-7" class="form-control input-sm">

					<form:radiobuttons path="section" items="${sections}" />

					<div class="has-error">

						<form:errors path="section" class="help-inline"/>

					</div>

				</div>

			</div>

		</div>

		<div class="row">

			<div class="form-group col-md-12">

				<label class="col-md-3 control-lable" for="country">Country</label>

				<div class="col-md-7">

					<form:select path="country" id="country" class="form-control input-sm">

				        <form:option value="">Select Country</form:option>

			    	    <form:options items="${countries}" />

				    </form:select>

					<div class="has-error">

						<form:errors path="country" class="help-inline"/>

					</div>

				</div>

			</div>

		</div>

		<div class="row">

			<div class="form-group col-md-12">

				<label class="col-md-3 control-lable" for="firstAttempt">First Attempt ?</label>

				<div class="col-md-1">

					<form:checkbox path="firstAttempt" class="form-control input-sm"/>

					<div class="has-error">

						<form:errors path="firstAttempt" class="help-inline"/>

					</div>

				</div>

			</div>

		</div>

		<div class="row">

			<div class="form-group col-md-12">

				<label class="col-md-3 control-lable" for="subjects">Subjects</label>

				<div class="col-md-7">

					<form:select path="subjects" items="${subjects}" multiple="true" class="form-control input-sm"/>

					<div class="has-error">

						<form:errors path="subjects" class="help-inline"/>

					</div>

				</div>

			</div>

		</div>

		<div class="row">

			<div class="form-actions floatRight">

				<input type="submit" value="Register" class="btn btn-primary btn-sm">

			</div>

		</div>

	</form:form>

	</div>

</body>

</html>
WEB-INF/views/success.jsp
<%@ page language="java" contentType="text/html; charset=ISO-8859-1"

    pageEncoding="ISO-8859-1"%>

<%@ taglib prefix="c" uri="http://java.sun.com/jsp/jstl/core" %>

<html>

<head>

	<meta http-equiv="Content-Type" content="text/html; charset=ISO-8859-1">

	<title>Student Enrollment Detail Confirmation</title>

	<link href="<c:url value='/static/css/custom.css' />" rel="stylesheet"></link>

</head>

<body>

	<div class="success">

		Confirmation message : ${success}

		<br>

		We have also sent you a confirmation mail to your email address : ${student.email}.

	</div>

</body>

</html>
com.yiibai.springmvc.configuration.HelloWorldInitializer
package com.yiibai.springmvc.configuration;

import javax.servlet.ServletContext;

import javax.servlet.ServletException;

import javax.servlet.ServletRegistration;

import org.springframework.web.WebApplicationInitializer;

import org.springframework.web.context.support.AnnotationConfigWebApplicationContext;

import org.springframework.web.servlet.DispatcherServlet;

public class HelloWorldInitializer implements WebApplicationInitializer {

	public void onStartup(ServletContext container) throws ServletException {

		AnnotationConfigWebApplicationContext ctx = new AnnotationConfigWebApplicationContext();

		ctx.register(HelloWorldConfiguration.class);

		ctx.setServletContext(container);

		ServletRegistration.Dynamic servlet = container.addServlet(

				"dispatcher", new DispatcherServlet(ctx));

		servlet.setLoadOnStartup(1);

		servlet.addMapping("/");

	}

}
内容上面类似之前教程的 web.xml 文件内容,因为我们使用的是前端控制器的DispatcherServlet,分配映射(URL模式的XML)和而不是提供给Spring配置文件(spring-servlet.xml)的路径,在这里,我们使用注册配置类。
更新:请注意,上面的类可以写成更加简洁[和这是最佳方法],通过扩展 AbstractAnnotationConfigDispatcherServletInitializer 基类,如下所示:
package com.websystique.springmvc.configuration;

import org.springframework.web.servlet.support.AbstractAnnotationConfigDispatcherServletInitializer;

public class HelloWorldInitializer extends AbstractAnnotationConfigDispatcherServletInitializer {

	@Override

	protected Class<?>[] getRootConfigClasses() {

		return new Class[] { HelloWorldConfiguration.class };

	}

	@Override

	protected Class<?>[] getServletConfigClasses() {

		return null;

	}

	@Override

	protected String[] getServletMappings() {

		return new String[] { "/" };

	}

}
有一点要记住,如:WebApplicationInitializer,Spring 基于Java 配置API是依赖Servlet3.0容器的。所以一定要确保你没有使用 Servlet 声明任何在 web.xml 小于3.0。对于我们的情况,我们要从应用程序中删除 web.xml 文件。
现在构建war 或通过Maven 命令行(mvn clean install)。 部署 war 到Servlet3.0容器。


到这里,完成!
代码下载:http://pan.baidu.com/s/1nukn6HV
【转载】springMVC表单校验+全注解的更多相关文章
- (转载)SPRINGMVC表单标签简介
SpringMVC表单标签简介 在使用SpringMVC的时候我们可以使用Spring封装的一系列表单标签,这些标签都可以访问到ModelMap中的内容.下面将对这些标签一一介绍. 在正式介绍Spri ...
- SpringMVC 表单验证
SpringMVC 表单验证 本章节内容很丰富,主要有基本的表单操作,数据的格式化,数据的校验,以及提示信息的国际化等实用技能. 首先看效果图 项目结构图 接下来用代码重点学习SpringMVC的表单 ...
- Promise实现子组件的多表单校验并反馈结果给父组件
全手打原创,转载请标明出处:https://www.cnblogs.com/dreamsqin/p/11529207.html,多谢,=.=~ 本文中多表单验证主要用到Promise.all()实现多 ...
- Spring MVC 文件上传、Restful、表单校验框架
目录 文件上传 Restful Restful 简介 Rest 行为常用约定方式 Restful开发入门 表单校验框架 表单校验框架介绍 快速入门 多规则校验 嵌套校验 分组校验 综合案例 实用校验范 ...
- AngularJS 1.2.x 学习笔记(表单校验篇)
https://my.oschina.net/cokolin/blog/526911 摘要: 本文首发于 blog.csdn.net/vipshop_ebs/article/details/39472 ...
- Vue.js + Nuxt.js 项目中使用 Vee-validate 表单校验
vee-validate 是为 Vue.js 量身打造的表单校验框架,允许您校验输入的内容并显示对应的错误提示信息.它内置了很多常见的校验规则,可以组合使用多种校验规则,大部分场景只需要配置就能实现开 ...
- Vee-validate 父组件获取子组件表单校验结果
vee-validate 是为 Vue.js 量身打造的表单校验框架,允许您校验输入的内容并显示对应的错误提示信息.它内置了很多常见的校验规则,可以组合使用多种校验规则,大部分场景只需要配置就能实现开 ...
- SpringMVC表单或Json中日期字符串与JavaBean的Date类型的转换
SpringMVC表单或Json中日期字符串与JavaBean的Date类型的转换 场景一:表单中的日期字符串和JavaBean的Date类型的转换 在使用SpringMVC的时候,经常会遇到表单中的 ...
- 利用jquery.validate以及bootstrap的tooltip开发气泡式的表单校验组件
表单校验是页面开发中非常常见的一类需求,相信每个前端开发人员都有这方面的经验.网上有很多成熟的表单校验框架,虽然按照它们默认的设计,用起来没有多大的问题,但是在实际工作中,表单校验有可能有比较复杂的个 ...
随机推荐
- 通知(Notification) 、 应用间通信(一)
1 使用通知中心发送消息 1.1 问题 当一个对象需要向多个接受者发送消息的,或者不用知道消息的接收者是谁,就可以使用IOS提供的NSNotificationCenter通知中心,本案例使NSNoti ...
- shell脚本 gawk语言 综采话单 对账 字段核对
今天被分配到对账组下的字段程序的了解和修改,在 SecureCRT 下的 run.sh 是字段对账的主程序,其中run.sh文件中含有gawk的代码. 程序的主要功能为 有两个文件夹 source存的 ...
- 【题解】【矩阵】【DP】【Leetcode】Minimum Path Sum
Given a m x n grid filled with non-negative numbers, find a path from top left to bottom right which ...
- USB 描述符
标准的USB设备有5种USB描述符:设备描述符,配置描述符,字符串描述符,接口描述符,端点描述符. // Standard Device Descriptor typedef struct { u8 ...
- 162. Find Peak Element
A peak element is an element that is greater than its neighbors. Given an input array where num[i] ≠ ...
- List-ApI及详解
1.API : add(Object o) remove(Object o) clear() indexOf(Object o) get(int i) size() iterator() isEmpt ...
- js刷新当前页面
a href="javascript:window.location.href=location.href"
- Jlink V7在MDK下使用Cortex-M3-Jlink模式开发STM32的说明
Jlink V7在MDK下使用Cortex-M3-Jlink模式开发STM32的说明 开发环境:STM32F103RB(128K Flash 20K RAM)+MDK3.50+JLINK V7(v ...
- scala言语基础学习五
extends override 和super方法 override field 父类不是val对象不能覆盖field isInstanceOf和asInstanceOf(isInstanceOf是用 ...
- 浅谈 Active Learning
1. Active Query Driven by Uncertainty and Diversity for Incremental Multi-Label Learning The key tas ...