【水滴石穿】react-native-book
先推荐一个学习的地址:https://ke.qq.com/webcourse/index.html#cid=203313&term_id=100240778&taid=1277855849978417&vid=s14139cbg2q
我看了一下,挺全的,我接下来应该会根据这个视频自己做一个App?
这个链接也是我在GitHub上面学习各位可爱的程序员的开源项目的时候看到的,接下来我们先来看这个博主的项目吧~
先放github地址:https://github.com/linchengzzz/rnTest
接下来我们来分析项目
项目运行出来的效果,应该是接口有些问题


接下来我们简单看看代码,发现亮点
//index.js

//这个是根入口文件

/**

 * @format

 * @lint-ignore-every XPLATJSCOPYRIGHT1

 */

import {AppRegistry} from 'react-native';

// import App from './App';

import App from './views/main.js';

import {name as appName} from './app.json';

AppRegistry.registerComponent(appName, () => App);
我们接下来看main.js
//views/main.js

import React, { Component } from 'react';

import { Icon } from 'react-native-elements';

//引入页面

import AboutPage from './book/about';

import BookPage from './book/index';

import MoviePage from './movie/index';

import BookDetailsPage from './book/detail';

import MovieDetailsPage from './common/webpage';

import { createStackNavigator, createBottomTabNavigator, createAppContainer } from "react-navigation";

//定义切换页面

const bottomTabNavigator = createBottomTabNavigator({

        Book: BookPage,

        Movie: MoviePage,

        About: AboutPage

    }, {

        defaultNavigationOptions: ({ navigation }) => ({

            tabBarIcon: ({ focused, tintColor }) => {

                const { routeName } = navigation.state;

                let iconName;

                if (routeName === 'Book') {

                    iconName = focused ? 'book' : 'book' ; //可以根据focused更换图标

                } else if (routeName === 'Movie') {

                    iconName = 'movie';

                }else{

                    iconName = 'stars';

                }

                return <Icon name={iconName} size={25} color={tintColor} />;

            },

        }),

        //定义激活颜色,有的是直接改变图片

        tabBarOptions: {

            //根据是否激活,改变颜色

            activeTintColor: 'tomato',

            inactiveTintColor: 'gray',

        }

    });

    // 定义对应页面

const AppStack = createStackNavigator(

    {

        bottomTabNavigator: {

            screen: bottomTabNavigator

        },

        Details: {

            screen: BookDetailsPage,

            // navigationOptions: {

            //     title: "图书详情"

            // }

        },

        MovieDetails:{

            screen: MovieDetailsPage,

        }

    }, {

        initialRouteName: "bottomTabNavigator",

        // 默认header bar样式配置

        defaultNavigationOptions: {

            headerTintColor: '#fff',

            headerStyle: {

                backgroundColor: '#2596f3',

                height: 0 //影藏header

            }

        },

    });

const AppContainer = createAppContainer(AppStack);

export default class App extends Component {

    render() {

        return (

            <AppContainer />

        );

    }

}
分析对应页面
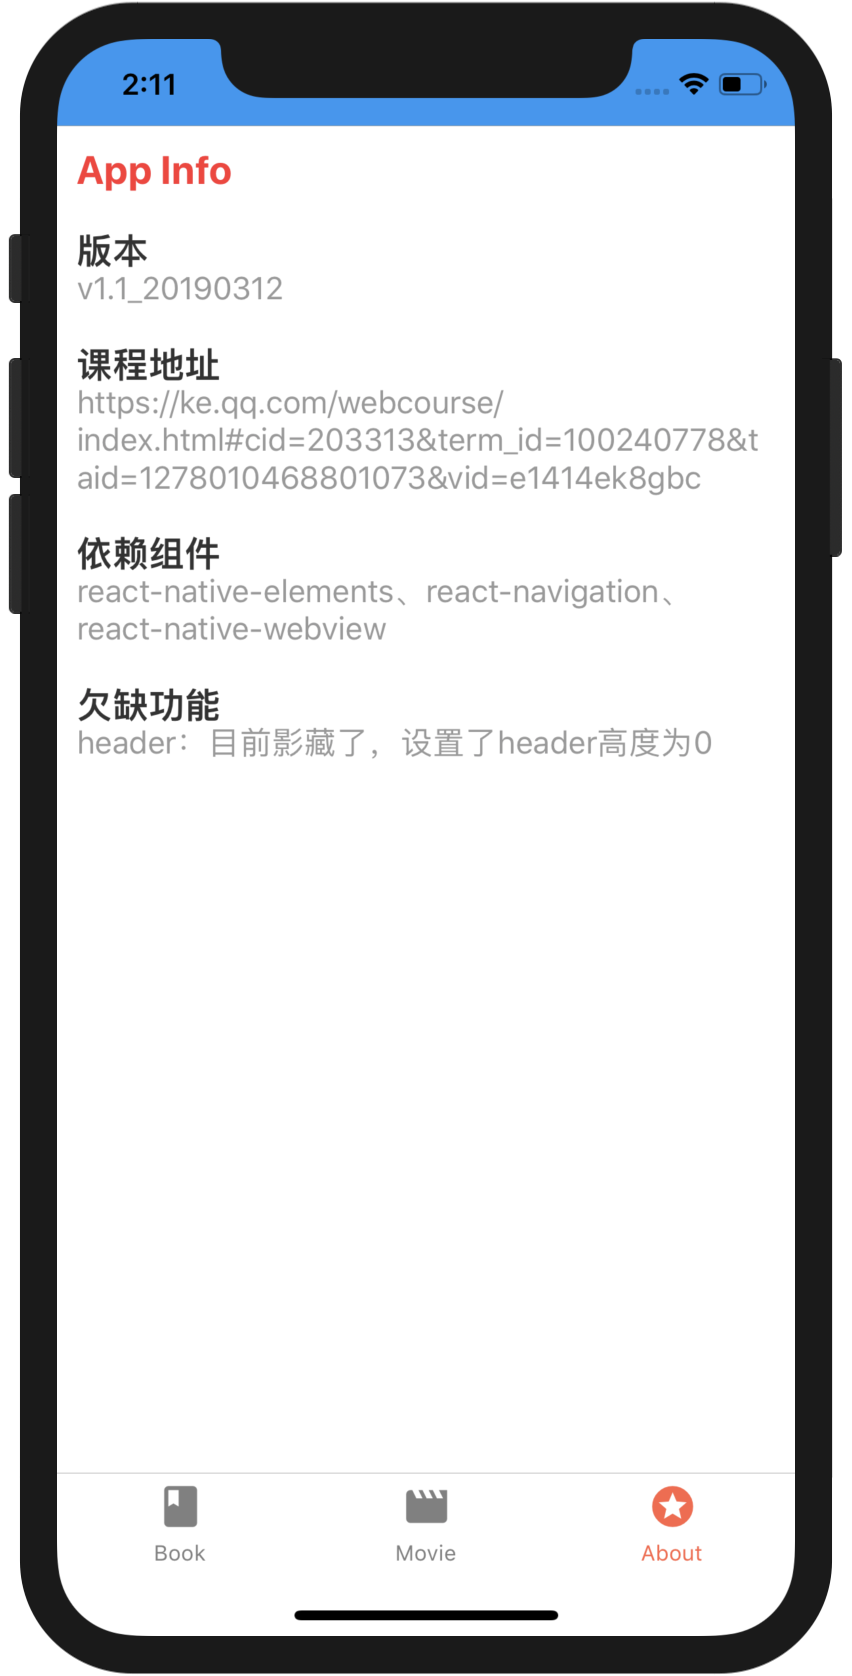
//views/book/about.js

import React, { Component } from 'react';

import { Text, View, ScrollView, StyleSheet } from 'react-native';

export default class About extends Component {

    render(){

        return (

            <ScrollView>

                <View style={styles.container}>

                    <Text style={styles.title}>

                        App Info

                    </Text>

                    <View style={styles.box}>

                        <Text style={styles.leftTitle}>版本</Text>

                        <Text style={styles.rightContent}>

                            v1.1_20190312

                        </Text>

                    </View>

                    <View style={styles.box}>

                        <Text style={styles.leftTitle}>课程地址</Text>

                        <Text style={styles.rightContent}>

                            https://ke.qq.com/webcourse/index.html#cid=203313&term_id=100240778&taid=1278010468801073&vid=e1414ek8gbc

                        </Text>

                    </View>

                    <View style={styles.box}>

                        <Text style={styles.leftTitle}>依赖组件</Text>

                        <Text style={styles.rightContent}>

                            react-native-elements、react-navigation、react-native-webview

                        </Text>

                    </View>

                    <View style={styles.box}>

                        <Text style={styles.leftTitle}>欠缺功能</Text>

                        <Text style={styles.rightContent}>

                            header:目前影藏了,设置了header高度为0

                        </Text>

                    </View>

                </View>

            </ScrollView>

        )

    }

}

var styles = StyleSheet.create({

    container: {

        flex: 1,

        padding: 10,

        marginTop: 0,

        lineHeight:30

    },

    title: {

        fontWeight: "bold",

        color: "#f33",

        fontSize: 20

    },

    box:{

        marginTop:20,

        flex:1

    },

    leftTitle:{

        fontSize:18,

        color:"#333",

        fontWeight:"800",

    },

    rightContent:{

        fontSize:16,

        color:"#999"

    }

})
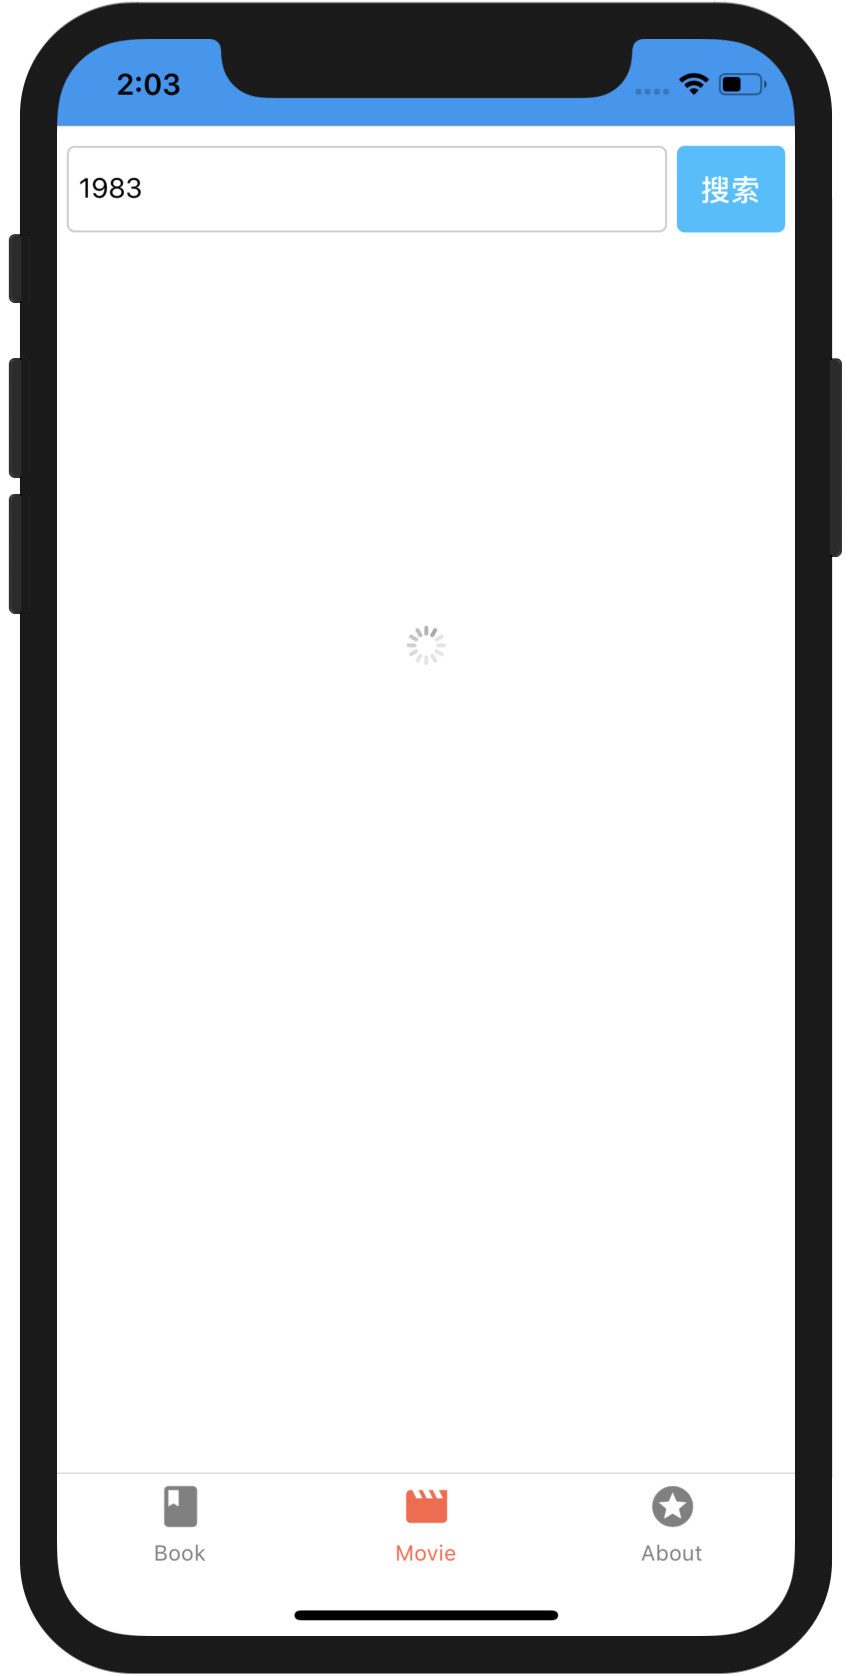
//封装的searchBar

//views/common/searchbar.js

import React, { Component } from 'react';

import { Text, View,TextInput, StyleSheet, TouchableOpacity } from 'react-native';

export default class SearchBar extends Component {

    render() {

        return (

            <View style={styles.container}>

                <View style={styles.inputContainer}>

                    <TextInput style={styles.input} {...this.props} />

                </View>

                <TouchableOpacity style={styles.btn} {...this.props}>

                    <Text style={styles.search}>搜索</Text>

                </TouchableOpacity>

            </View>

        );

    }

}

var styles = StyleSheet.create({

    container:{

        flexDirection:"row",

        justifyContent:"flex-end",

        alignItems:"center",

        height:44,

        marginTop:10

    },

    inputContainer:{

        flex:1,

        marginLeft:5

    },

    input:{

        flex:1,

        height:44,

        borderWidth:1,

        borderRadius:4,

        borderColor:"#ccc",

        paddingLeft:5

    },

    btn:{

        width:55,

        height:44,

        marginLeft:5,

        marginRight:5,

        backgroundColor:"#23beff",

        borderRadius:4,

        justifyContent:"center",

        alignItems:"center"

    },

    search:{

        flex:1,

        color:"#fff",

        fontSize:15,

        fontWeight:"bold",

        textAlign:"center",

        lineHeight:44

    }

})
//views/book/index.js

import React, { Component } from 'react';

import { Text, View, ScrollView, Image, StyleSheet,TouchableOpacity } from 'react-native';

import SearchBar from '../common/searchbar';

import Util from '../common/util';

import Api from '../common/api';

export default class index extends Component {

    constructor(props) {

        super(props);

        this.state = {

            data: [],

            show: true,

            keyword: 'react'

        };

    }

    componentDidMount(){

        // 初次请求数据

        this.getData();

    }

    updateSearch = search => {

        this.setState({ keyword: search });

    }

    //获取数据

    searchText=()=>{

        this.getData();

    }

    // 以下写法报错,不识别this

    // searchText (){

    //     this.getData();

    // }

    // Util.loading 工具函数定义的loading

    getData(){

        // 显示loading

        this.setState({

            show: false

        });

        // 请求数据

        var that = this;

        var url = Api.book_search + '?count=20&q=' + this.state.keyword;

        Util.getRequest(url, function (response) {

            // 请求成功

            if (!response.books || response.books.length == 0) {

                return alert("未查询到数据");

            }

            // 显示loading,将请求结果赋值给data

            that.setState({

                show: true,

                data: response.books

            });

        }, function (error) {

            // 请求失败

            alert(error);

        });

    }

    render() {

        return (

            <ScrollView>

                {/* 封装的搜索头部 */}

                <SearchBar

                    placeholder="请输入关键词(书名、作者)..."

                    onChangeText={this.updateSearch}

                    onPress={this.searchText}

                />

                {

                    // 请求数据时显示loading,请求成功显示列表

                    this.state.show ?

                        <View style={styles.container} >

                            {

                                this.state.data.map((item, i) => {

                                    return (

                                        <TouchableOpacity style={styles.list} key={i} onPress={() => this.props.navigation.push('Details', { 'bookID': item.id })}

                                            activeOpacity={0.5}>

                                            <Image source={{ uri: item.images.small }} style={styles.images} />

                                            <View style={styles.rightbox}>

                                                <Text style={styles.title}>{item.title}</Text>

                                                <Text>价格:{item.price ? item.price : '暂无'}</Text>

                                                <Text>作者:{

                                                    item.author.map(

                                                        function(vo){

                                                            return vo + ' ';

                                                        }

                                                        )

                                                    }</Text>

                                                <Text>{item.publisher} {item.pubdate}</Text>

                                                <Text>{item.pages ? item.pages : '未知'} 页</Text>

                                            </View>

                                        </TouchableOpacity>

                                    );

                                })

                            }

                        </View>

                    : Util.loading

                }

            </ScrollView>

        )

    }

}

var styles = StyleSheet.create({

    container: {

        flex: 1,

        alignItems: 'center',

        justifyContent: "center",

        padding:10,

        marginTop: 0

    },

    btn:{

        width:100,

        height:30

    },

    images: { width: 80, height: 100 },

    title:{

        fontWeight:"bold",

        color:"#f33"

    },

    rightbox:{

        flex:1,

        marginLeft:10

    },

    list:{

        flex: 1,

        flexDirection: "row",

        borderBottomColor: "#ccc",

        borderBottomWidth: 1,

        paddingTop:10,

        paddingBottom:10

    }

})
关于详情页
//views/book/detail.js

import React, { Component } from 'react';

import { Text, View, ScrollView, Image, StyleSheet } from 'react-native';

import { Icon,Header,Button } from 'react-native-elements';

import Util from '../common/util';

import Api from '../common/api';

import { TouchableHighlight, TouchableOpacity } from 'react-native-gesture-handler';

export default class BookDetail extends Component {

    constructor(props) {

        super(props);

        this.state = {

            bookID: '',

            bookData: null

        };

    }

    componentDidMount(){

        // bookID = this.props.navigation.getParam('bookID', 26378583);

        // this.setState({

        //     bookID: bookID

        // })

        this.getData();

    }

    getData(){

        //这个是从后端获取的数据

        // var url = Api.book_detail_id + this.state.bookID;

        var url = Api.book_detail_id + this.props.navigation.getParam('bookID', 26378583);

        var that = this;

        Util.getRequest(url,function(data){

            that.setState({

                bookData: data

            })

        },function(error){

            alert(error);

        })

    }

    render(){

        var bookData = this.state.bookData;

        return (

            <ScrollView>

                {

                    bookData != null ?

                    <View>

                            {/* <Button

                                icon={{

                                    name: "assignment-return",

                                    size: 15,

                                    color: "white"

                                }}

                                onPress={() => this.props.navigation.goBack()}

                                title="返回"

                            />   */}

                            <View style={styles.list}>

                                <Image source={{ uri: bookData.images.small }} style={styles.images} />

                                <View style={styles.rightbox}>

                                    <Text style={styles.title}>{bookData.title}</Text>

                                    <Text>价格:{bookData.price ? bookData.price : '暂无'}</Text>

                                    <Text>作者:{

                                        bookData.author.map(

                                            function (vo) {

                                                return vo + ' ';

                                            }

                                        )

                                    }</Text>

                                    <Text>{bookData.publisher} {bookData.pubdate}</Text>

                                    <Text>{bookData.pages ? bookData.pages : '未知'} 页</Text>

                                </View>

                            </View>

                            <View style={{ marginTop: 10 }}>

                                <Text>图书简介</Text>

                                <Text>{bookData.summary}</Text>

                            </View>

                            <View style={{marginTop:10}}>

                                <Text>作者简介</Text>

                                <Text>{bookData.author_intro}</Text>

                            </View>

                    </View>

                    : Util.loading

                }

            </ScrollView>

        )

    }

}

var styles = StyleSheet.create({

    container: {

        flex: 1,

        alignItems: 'center',

        justifyContent: "center",

        padding: 10,

        marginTop: 0

    },

    btn: {

        width: 100,

        height: 30

    },

    images: { width: 80, height: 100 },

    title: {

        fontWeight: "bold",

        color: "#f33"

    },

    rightbox: {

        flex: 1,

        marginLeft: 10

    },

    list: {

        flex: 1,

        flexDirection: "row",

        borderBottomColor: "#ccc",

        borderBottomWidth: 1,

        paddingTop: 10,

        paddingBottom: 10

    }

})
【水滴石穿】react-native-book的更多相关文章
- 基于React Native的58 APP开发实践
React Native在iOS界早就炒的火热了,随着2015年底Android端推出后,一套代码能运行于双平台上,真正拥有了Hybrid框架的所有优势.再加上Native的优秀性能,让越来越多的公司 ...
- React Native 之 Text的使用
前言 学习本系列内容需要具备一定 HTML 开发基础,没有基础的朋友可以先转至 HTML快速入门(一) 学习 本人接触 React Native 时间并不是特别长,所以对其中的内容和性质了解可能会有所 ...
- React Native环境配置之Windows版本搭建
接近年底了,回想这一年都做了啥,学习了啥,然后突然发现,这一年买了不少书,看是看了,就没有完整看完的.悲催. 然后,最近项目也不是很紧了,所以抽空学习了H5.自学啃书还是很无趣的,虽然Head Fir ...
- 史上最全Windows版本搭建安装React Native环境配置
史上最全Windows版本搭建安装React Native环境配置 配置过React Native 环境的都知道,在Windows React Native环境配置有很多坑要跳,为了帮助新手快速无误的 ...
- 【腾讯Bugly干货分享】React Native项目实战总结
本文来自于腾讯bugly开发者社区,非经作者同意,请勿转载,原文地址:http://dev.qq.com/topic/577e16a7640ad7b4682c64a7 “8小时内拼工作,8小时外拼成长 ...
- React Native环境搭建以及几个基础控件的使用
之前写了几篇博客,但是没有从最基础的开始写,现在想了想感觉不太合适,所以现在把基础的一些东西给补上,也算是我从零开始学习RN的经验吧! 一.环境搭建 首先声明一下,本人现在用的编辑器是SublimeT ...
- React Native组件介绍
1.React Native目前已有的组件 ActivityIndicatorIOS:标准的旋转进度轮; DatePickerIOS:日期选择器: Image:图片控件: ListView:列表控件: ...
- React Native图片控件的使用
首先定义组件 import { AppRegistry, StyleSheet, Text, View, Image,} from 'react-native'; 然后将render返回中的模版增加I ...
- react-native学习笔记--史上最详细Windows版本搭建安装React Native环境配置
参考:http://www.lcode.org/react-native/ React native中文网:http://reactnative.cn/docs/0.23/android-setup. ...
- windows 7下React Native环境配置
React Native 是 Facebook 推出的一个用 Java 语言就能同时编写 ios,android,以及后台的一项技术,它可以做到实时热更新 .FaceBook 也号称这们技术是 “Le ...
随机推荐
- 将wordpress中的文章导出为markdown
一.进入wordpress后台,选择工具-导出数据,选择你需要导出的内容.文章等,会下载一个xml文件到本地电脑 二.使用一个名为wordpress-to-markdown的工具 源码地址:wordp ...
- 快速I/O 51node 1406
#include <bits/stdc++.h> using namespace std; #define LL long long typedef pair<int,int> ...
- tDQSS
tDQSS - DQS latching rising transitions to associated clock edges, as described on Table 41/42 of JE ...
- 【2019云栖大会】这一场,我们好好聊聊5G和边缘计算
一年一度的科技盛会杭州云栖大会Apsara Conference就要来了9月25-27日数万名开发者将齐聚杭州云栖小镇共同探索人类科技演进的脉搏聚焦面向未来的创新.热点技术话题 5G和边缘计算是201 ...
- JavaSE_05_反射
1.什么是反射? Java反射说的是在运行状态中,对于任何一个类,我们都能够知道这个类有哪些方法和属性.对于任何一个对象,我们都能够对它的方法和属性进行调用.我们把这种动态获取对象信息和调用对象方法的 ...
- MICROSOFT SQL SERVER 2012 序列号
MICROSOFT SQL SERVER DEVELOPER 版(开发版) 序列号:YQWTX-G8T4R-QW4XX-BVH62-GP68Y MICROSOFT SQL SERVER ENTERPR ...
- jmeter设置代理
JMeter设置Http代理对web或者app进行录制 一.录制web 1.首先保证JMeter的安装环境都正确.启动JMeter:在安装路径的bin目录下双击jmeter.bat (例如:D:\ap ...
- qml获取实际渲染的字体
当设置qml的Text元素的字体时,如果系统中不存在设置的字体,qml会根据匹配算法自动选取系统中存在的一种字体.比如:设置font.family: "微软雅黑",但系统中根本没有 ...
- 『Power AI by AI』 PAI-AutoML2.0重磅发布
PAI-AutoML调参服务是通过算法的方式解放用户调节算法参数的工作.自2018年8月发布PAI-AutoML1.0版本以来,该功能已经帮助众多PAI的中小企业用户提升了模型的准确性,得到了不错的反 ...
- HDU3486 RMQ
/*多么变态的一道题,交了18次*/ #include<cstdio> #include<cstring> #include<cmath> #define max( ...