LNMP环境配置(2)
php-fpm配置,Nginx配置
Nginx配置
默认虚拟主机
修改主配置文件
# vi /usr/local/nginx/conf/nginx.conf
在最后 } 符号上面写入 include vhost/*.conf;
设置默认虚拟主机
# mkdir /usr/local/nginx/conf/vhost
# cd /usr/local/nginx/conf/vhost
# vi default.conf
server
{
listen 80 default_server; 标记为默认虚拟主机
server_name aaa.com;
index index.html index.htm index.php;
root /data/nginx/default;
}
重新加载配置文件
# /usr/local/nginx/sbin/nginx -t
nginx: the configuration file /usr/local/nginx/conf/nginx.conf syntax is ok
nginx: configuration file /usr/local/nginx/conf/nginx.conf test is successful
# /usr/local/nginx/sbin/nginx -s reload
创建索引页
# mkdir -p /data/nginx/default/
# echo "default_server" > /data/nginx/default/index.html
测试

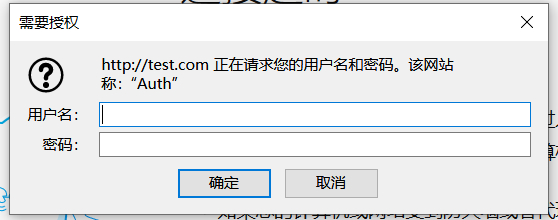
用户认证
创建一个新的虚拟主机
# cd /usr/local/nginx/conf/vhost/
# vi test.com.conf
server
{
listen 80;
server_name test.com;
index index.html index.htm index.php;
root /data/nginx/test.com;
location /
{
auth_basic "Auth"; 打开认证
auth_basic_user_file /usr/local/nginx/conf/htpasswd; 指定用户密码文件
}
}
安装httpd
# yum install -y httpd
创建用户
# htpasswd -c /usr/local/nginx/conf/htpasswd tuitui

重新加载配置文件
# /usr/local/nginx/sbin/nginx -t
nginx: the configuration file /usr/local/nginx/conf/nginx.conf syntax is ok
nginx: configuration file /usr/local/nginx/conf/nginx.conf test is successful
# /usr/local/nginx/sbin/nginx -s reload
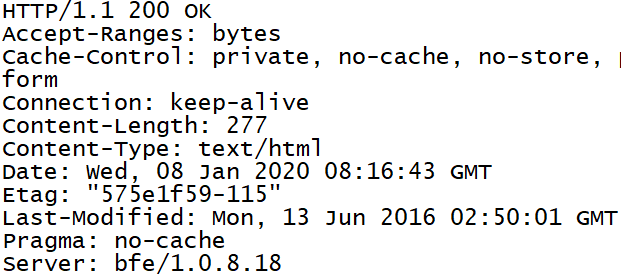
测试
# mkdir /data/nginx/test.com
# echo "test.com" > /data/nginx/test.com/index.html
# curl -I -x127.0.0.1:80 test.com
出现状态码401表示该网站需要认证
# systemctl stop firewalld 关闭防火墙
编辑Windows的hosts文件,最后一行加入 192.168.89.128 test.com
浏览器访问
如果要对某个目录做用户认证,修改location后面的路径
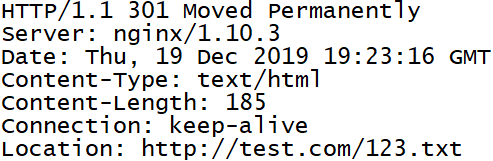
域名重定向
配置文件
# cd /usr/local/nginx/conf/vhost/
# vi test.com.conf
server
{
listen 80;
server_name test.com test1.com test2.com;
index index.html index.htm index.php;
root /data/nginx/test.com;
if ($host != 'test.com' )
{
rewrite ^/(.*)$ http://test.com/$1 permanent; 永久重定向
}
}
重新加载配置文件
# /usr/local/nginx/sbin/nginx -t
nginx: the configuration file /usr/local/nginx/conf/nginx.conf syntax is ok
nginx: configuration file /usr/local/nginx/conf/nginx.conf test is successful
# /usr/local/nginx/sbin/nginx -s reload
# curl -x127.0.0.1:80 test1.com/123.txt -I
Nginx的访问日志
查看日志格式
# grep -A2 log_format /usr/local/nginx/conf/nginx.conf

指定访问日志的路径
# vi test.com.conf
server
{
listen 80;
server_name test.com test1.com test2.com;
index index.html index.htm index.php;
root /data/nginx/test.com;
if ($host != 'test.com' )
{
rewrite ^/(.*)$ http://test.com/$1 permanent;
}
access_log /tmp/1.log combined_realip;
}
重新加载配置文件
# /usr/local/nginx/sbin/nginx -t
nginx: the configuration file /usr/local/nginx/conf/nginx.conf syntax is ok
nginx: configuration file /usr/local/nginx/conf/nginx.conf test is successful
# /usr/local/nginx/sbin/nginx -s reload
测试
# curl -x127.0.0.1:80 test.com/111

# cat /tmp/1.log

日志切割脚本
# vi /usr/local/sbin/nginx_log_rotate.sh
写入以下内容
#! /bin/bash
d=`date -d "-1 day" +%Y%m%d`
logdir="/data/logs"
nginx_pid="/usr/local/nginx/logs/nginx.pid"
cd $logdir
for log in `ls *.log`
do
mv $log $log-$d
done
/bin/kill -HUP `cat $nginx_pid`
0 0 * * * /bin/bash /usr/local/sbin/nginx_log_rotate.sh
配置静态文件不记录日志并添加过期时间
配置文件
# vi test.com.conf
server
{
listen 80;
server_name test.com test1.com test2.com;
index index.html index.htm index.php;
root /data/nginx/test.com;
if ($host != 'test.com' )
{
rewrite ^/(.*)$ http://test.com/$1 permanent;
}
location ~ .*\.(gif|jpg|jpeg|png|bmp|swf)$
{
expires 7d;
access_log off;
}
location ~ .*\.(js|css)$
{
expires 12h;
access_log off;
}
access_log /tmp/1.log combined_realip;
}
重新加载配置文件
# /usr/local/nginx/sbin/nginx -t
nginx: the configuration file /usr/local/nginx/conf/nginx.conf syntax is ok
nginx: configuration file /usr/local/nginx/conf/nginx.conf test is successful
测试过程
创建js文件
# echo "11111111" > /data/nginx/test.com/1.js
创建jpg文件
# echo "22222222" > /data/nginx/test.com/2.jpg
创建一个对比的文件
# touch /data/nginx/test.com/1.jss
访问js类型的文件,缓存过期时间为12小时
# curl -I -x127.0.0.1:80 test.com/1.js

访问jpg类型的文件,缓存过期时间为7小时
# curl -I -x127.0.0.1:80 test.com/2.jpg
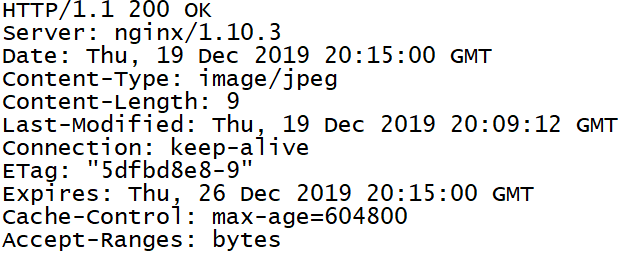
对比Cache-control对应的时间大小
# curl -I -x127.0.0.1:80 test.com/1.jss

查看访问日志
# cat /tmp/1.log

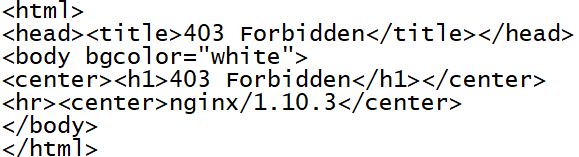
Nginx防盗链
和日志部分合在一起配置文件
# vi test.com.conf
server
{
listen 80;
server_name test.com test1.com test2.com;
index index.html index.htm index.php;
root /data/nginx/test.com;
if ($host != 'test.com' )
{
rewrite ^/(.*)$ http://test.com/$1 permanent;
}
location ~* ^.+\.(gif|jpg|png|swf|flv|rar|zip|doc|pdf|gz|bz2|jpeg|bmp|xls)$
{
expires 7d;
valid_referers none blocked server_names *.test.com;
if ($invalid_referer)
{
return 403;
}
}
access_log off;
}
重新加载配置文件
# /usr/local/nginx/sbin/nginx -t
nginx: the configuration file /usr/local/nginx/conf/nginx.conf syntax is ok
nginx: configuration file /usr/local/nginx/conf/nginx.conf test is successful
# /usr/local/nginx/sbin/nginx -s reload
测试
# curl -x127.0.0.1:80 -I -e "http://aaa.com/1.txt" test.com/2.jpg

# curl -x127.0.0.1:80 -I -e "http://test.com/1.txt" test.com/2.jpg

同时有过期时间和防盗链功能
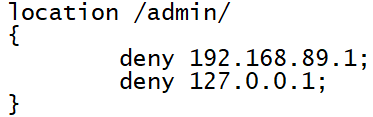
访问控制
配置文件
(使能访问admin目录的请求只允许192.168.89.1和127.0.0.1访问)
# vi test.com.conf
server
{
listen 80;
server_name test.com test1.com test2.com;
index index.html index.htm index.php;
root /data/nginx/test.com;
if ($host != 'test.com' )
{
rewrite ^/(.*)$ http://test.com/$1 permanent;
}
location /admin/
{
allow 192.168.89.1;
allow 127.0.0.1;
deny all;
}
}
重新加载配置文件
# /usr/local/nginx/sbin/nginx -t
nginx: the configuration file /usr/local/nginx/conf/nginx.conf syntax is ok
nginx: configuration file /usr/local/nginx/conf/nginx.conf test is successful
# /usr/local/nginx/sbin/nginx -s reload
测试
# mkdir /data/nginx/test.com/admin
# echo "123" > /data/nginx/test.com/admin/1.html
# curl -x127.0.0.1:80 test.com/admin/1.html

# curl -x192.168.89.128:80 test.com/admin/1.html
拒绝某几个IP
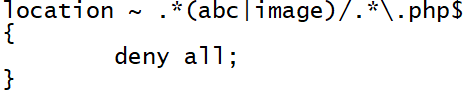
限制解析PHP
限制user_agent
# vi test.com.conf
server
{
listen 80;
server_name test.com test1.com test2.com;
index index.html index.htm index.php;
root /data/nginx/test.com;
if ($host != 'test.com' )
{
rewrite ^/(.*)$ http://test.com/$1 permanent;
}
if ($http_user_agent ~ 'Spider/3.0|YoudaoBot|Tomato')
{
return 403;
}
}
重新加载配置文件
# /usr/local/nginx/sbin/nginx -t
nginx: the configuration file /usr/local/nginx/conf/nginx.conf syntax is ok
nginx: configuration file /usr/local/nginx/conf/nginx.conf test is successful
# /usr/local/nginx/sbin/nginx -s reload
Nginx解析PHP
配置文件
# vi test.com.conf
server
{
listen 80;
server_name test.com test1.com test2.com;
index index.html index.htm index.php;
root /data/nginx/test.com;
if ($host != 'test.com' )
{
rewrite ^/(.*)$ http://test.com/$1 permanent;
}
location ~ \.php$
{
include fastcgi_params;
fastcgi_pass unix:/tmp/php-fcgi.sock;
fastcgi_index index.php;
fastcgi_param SCRIPT_FILENAME /data/nginx/test.com$fastcgi_script_name;
}
access_log /tmp/1.log combined_realip;
}
重新加载配置文件
# /usr/local/nginx/sbin/nginx -t
nginx: the configuration file /usr/local/nginx/conf/nginx.conf syntax is ok
nginx: configuration file /usr/local/nginx/conf/nginx.conf test is successful
# /usr/local/nginx/sbin/nginx -s reload
Nginx代理
配置文件
# cd /usr/local/nginx/conf/vhost/
# ping ask.apelearn.com 获取proxy_pass
# vi proxy.conf
server
{
listen 80;
server_name ask.apelearn.com;
location /
{
proxy_pass http://47.104.7.242/;
proxy_set_header Host $host;
proxy_set_header X-Real-IP $remote_addr;
proxy_set_header X-Forwarded-For $proxy_add_x_forwarded_for;
}
}
重新加载配置文件
# /usr/local/nginx/sbin/nginx -t
nginx: the configuration file /usr/local/nginx/conf/nginx.conf syntax is ok
nginx: configuration file /usr/local/nginx/conf/nginx.conf test is successful
# /usr/local/nginx/sbin/nginx -s reload
测试
# curl -x127.0.0.1:80 ask.apelearn.com -I

# curl ask.apelearn.com -I

负载均衡
# yum install -y bind-utils 安装dig命令
# dig www.baidu.com 查看域名对应的IP
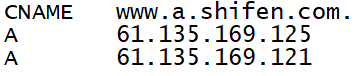
测试
# curl -x61.135.169.125:80 www.baidu.com -I
# curl -x61.135.169.121:80 www.baidu.com -I

配置文件
# vi /usr/local/nginx/conf/vhost/load.conf
upstream baidu_com
{
ip_hash;
server 61.135.169.125:80;
server 61.135.169.121:80;
}
server
{
listen 80;
server_name www.baidu.com;
location /
{
proxy_pass http://baidu_com;
proxy_set_header Host $host;
proxy_set_header X-Real-IP $remote_addr;
proxy_set_header X-Forwarded-For $proxy_add_x_forwarded_for;
}
}
重新加载配置文件
# /usr/local/nginx/sbin/nginx -t
nginx: the configuration file /usr/local/nginx/conf/nginx.conf syntax is ok
nginx: configuration file /usr/local/nginx/conf/nginx.conf test is successful
# /usr/local/nginx/sbin/nginx -s reload
测试
# curl -x127.0.0.1:80 www.baidu.com -I

Nginx配置SSL
生成自定义的SSL证书
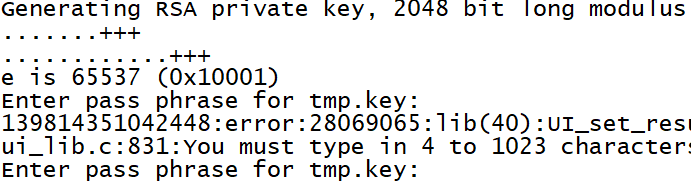
生成私钥
# openssl genrsa -des3 -out tmp.key 2048
删除密码
# openssl rsa -in tmp.key -out aminglinux.key

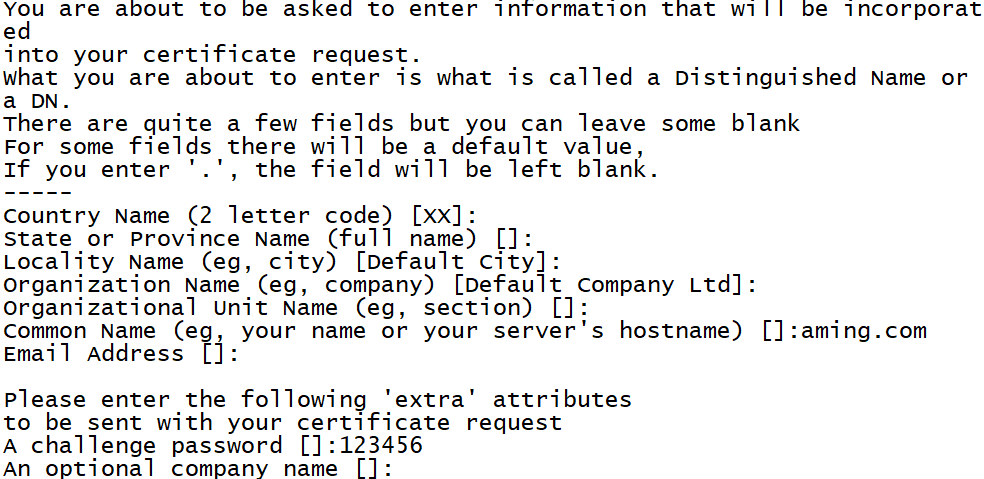
生成证书请求文件
# openssl req -new -key aminglinux.key -out aminglinux.csr
生成GRT证书文件
# openssl x509 -req -days 365 -in aminglinux.csr -signkey aminglinux.key -out aminglinux.crt

编译Nginx
# cd /usr/local/src/nginx-1.10.3
# ./configure --prefix=/usr/local/nginx/ --with-http_ssl_module
# make
# make install
配置文件
# vi /usr/local/nginx/conf/vhost/ssl.conf
server
{
listen 443;
server_name aming.com;
index index.html index.php;
root /data/nginx/aming.com;
ssl on;
ssl_certificate aminglinux.crt;
ssl_certificate_key aminglinux.key;
ssl_protocols TLSv1 TLSv1.1 TLSv1.2;
location ~ \.php$
{
include fastcgi_params;
fastcgi_pass unix:/tmp/php-fcgi.sock;
fastcgi_index index.php;
fastcgi_param SCRIPT_FILENAME /data/nginx/aming.com$fastcgi_script_name;
}
access_log /tmp/1.log combined_realip;
}
重新加载配置文件
# /usr/local/nginx/sbin/nginx -t
nginx: the configuration file /usr/local/nginx/conf/nginx.conf syntax is ok
nginx: configuration file /usr/local/nginx/conf/nginx.conf test is successful
# /usr/local/nginx/sbin/nginx -s reload
创建对应的目录和测试文件
# mkdir /data/nginx/aming.com
# echo "<?php phpinfo(); ?>" > /data/nginx/aming.com/1.php
# /etc/init.d/nginx restart

测试
到真实电脑上修改hosts,把网站域名指向Linux机器

在最下面增加一行 192.168.89.128 aming.com
用浏览器访问https://aming.com/1.php

php-fpm配置
php-fpm的pool
修改配置文件
# vi /usr/local/php-fpm/etc/php-fpm.conf

创建配置文件目录和子配置文件
# mkdir /usr/local/php-fpm/etc/php-fpm.d
# cd /usr/local/php-fpm/etc/php-fpm.d
# vi www.conf
[www]
listen=/tmp/www.sock
listen.mode=666
user=php-fpm
group=php-fpm
pm=dynamic 定义php-fpm的子进程启动模式,dynamic为动态模式
pm.max_children=50
pm.start_servers=20 定义php-fpm服务在启动服务时产生的子进程数量
pm.min_spare_servers=5 定义在空闲时段子进程数的最少数量
pm.max_spare_servers=35 定义在空闲时段子进程数的最大值
pm.max_requests=500 定义一个子进程最多处理的请求数
rlimit_files=1024
# vi aming.conf
[aming]
listen=/tmp/aming.sock
listen.mode=666
user=php-fpm
group=php-fpm
pm=dynamic
pm.max_children=50
pm.start_servers=20
pm.min_spare_servers=5
pm.max_spare_servers=35
pm.max_requests=500
rlimit_files=1024
两个pool互不影响
检验配置
# /usr/local/php-fpm/sbin/php-fpm -t
[20-Dec-2019 09:19:12] NOTICE: configuration file /usr/local/php-fpm/etc/php-fpm.conf test is successful
重启服务
# /etc/init.d/php-fpm restart

查看sock文件
# ls /tmp/*.sock

php-fpm的慢执行日志
编辑配置文件
# vi /usr/local/php-fpm/etc/php-fpm.d/www.conf
在最后加
request_slowlog_timeout=1
slowlog=/usr/local/php-fpm/var/log/www-slow.log
检验配置
# /usr/local/php-fpm/sbin/php-fpm -t
[20-Dec-2019 09:19:12] NOTICE: configuration file /usr/local/php-fpm/etc/php-fpm.conf test is successful
php-fpm定义open_basedir
编辑配置文件
# vi /usr/local/php-fpm/etc/php-fpm.d/www.conf
在最后加
php_admin_value[open_basedir]=/data/www/:/tmp/
检验配置
# /usr/local/php-fpm/sbin/php-fpm -t
[20-Dec-2019 09:19:12] NOTICE: configuration file /usr/local/php-fpm/etc/php-fpm.conf test is successful
LNMP环境配置(2)的更多相关文章
- CentOS 下 LNMP 环境配置
安装配置 Nginx 安装配置 MySQL 安装配置 PHP Nginx 与 PHP-FPM 集成 环境配置验证 LNMP 环境代表 Linux 系统下 Nginx + MySQL + PHP 网 ...
- WIN10 vagrant和virtualbox虚拟机和一键搭建lnmp环境配置thinkphp虚拟主机
版本:win10系统 virtualbox:5.1.26 vagrant :1.9.7 centos 7.0 xshell/git 首先下载好对应版本的软件 配置vagrant和virtualbox ...
- VM虚拟机 Centos7 lnmp环境 配置域名问题 windows浏览器访问的问题
CentOS7 ip地址为 192.168.0.155 搭有 LNMP集成环境 执行 lnmp vhost add 配置服务器 指定目录的域名 mark.com 这时windows 机器的 浏览器想 ...
- LNMP环境配置(1)
安装Nginx.MySQL.PHP 概念 LNMP是Linux Nginx MySQL PHP 的简写,把Nginx.MySQL以及PHP安装在Linux系统上,组成一个环境来运行PHP的脚本语言. ...
- CentOS 7 lnmp环境配置laravel项目的问题总结!
一.最常见的几个问题 1.部署好站点后,访问站点的时候始终是“File Not Found”!(nginx中的路由配置问题) 2.除了根目录可以访问其它的访问全是403问题!(权限问题) 3.除了根目 ...
- [LNMP]——LNMP环境配置
LNMP=Linux+Nginx+Mysql+PHP Install Nginx //安装依赖包 # yum install openssl openssl-devel zlib-devel //安装 ...
- LNMP环境配置SSL证书 lnmp ssl add
.4新增的添加SSL功能 lnmp ssl add 如果需要添加输入 y ,不添加输入 n 回车. 选择了添加SSL会提示 有两个选项,1 选项为使用自己准备好的SSL证书和key. > &g ...
- 【Linux运维】LNMP环境配置
安装准备: Centos7.3 MYSQL5.6 PHP5.6 NGINX1.10.3 一.安装Mysql mysql:[root@host129 src]#cd /usr/local/src/ [r ...
- vmware搭建lnmp环境配置域名
找到nginx配置文件,修改server_name 然后找到/etc/hosts文件 修改成如下 之后在Windows本地的C盘的hosts文件中添加解析 好了,这样就可以访问了 通往牛逼的路上,在意 ...
随机推荐
- 了解EBP指针
在寄存器里面有很多寄存器虽然他们的功能和使用没有任何的区别,但是在长期的编程和使用中,在程序员习惯中已经默认的给每个寄存器赋上了特殊的含义,比如:EAX一般用来做返回值,ECX用于记数等等.在win3 ...
- C语言学习笔记--void
void真正发挥的作用在于: (1) 对函数返回的限定: (2) 对函数参数的限定. 先给一个例子 定义函数返回值 函数名(参数1,参数2,参数3,.......){内容}int sum(int a ...
- Linux的总结
Linux学习总结: 1.需要熟练掌握各种命令,这是保证工作效率的基础.经常使用的命令 1)tar 解压 2)pwd查看所在的根目录 3)mkdir touch cp cat... 4) mv 移 ...
- https原理总结
博客搬家: https原理总结 最近在公司项目的服务器上做一些内部接口,要求使用https,于是花时间研究了一波.我们熟知的http在传输时未对数据进行加密,在传输一些敏感信息时存在着不小的安全隐患. ...
- ARTS Week 5
Nov 25, 2019 ~ Dec 1, 2019 Algorithm 深度优先搜索--书籍分配 题目描述:有b1-b5五本书,要分配给五个学生,分别是a1-a5.但每个学生都有其喜欢的书,要检查是 ...
- 高软期末考试 B2C模式
一.软件工程知识点 简要总结 1.软件基础知识 瀑布模型: 我感觉整个<软件工程>书的布局就是按照瀑布模型来的,上面右图少个运维. 2.UML图 2.1 用例图 UseCase Diagr ...
- Go语言实现:【剑指offer】构建乘积数组
该题目来源于牛客网<剑指offer>专题. 给定一个数组A[0,1,-,n-1],请构建一个数组B[0,1,-,n-1],其中B中的元素B[i]=A[0] * A[1] * - * A[i ...
- Nginx总结(八)Nginx服务器的日志管理及配置
前面讲了如何配置Nginx虚拟主机,大家可以去这里看看nginx系列文章:https://www.cnblogs.com/zhangweizhong/category/1529997.html 今天要 ...
- FFmpeg命令读取RTMP流如何设置超时时间
子标题:FFmpeg命令录制RTMP流为FLV文件时如何设置超时时间 | FFmpeg命令如何解决录制产生阻塞的问题0x001: 前言 今天在测试程序时遇到两个问题.Q1:ffmpeg录制RTMP流并 ...
- docker:搭建ELK 开源日志分析系统
ELK 是由三部分组成的一套日志分析系统, Elasticsearch: 基于json分析搜索引擎,Elasticsearch是个开源分布式搜索引擎,它的特点有:分布式,零配置,自动发现,索引自动分片 ...