Ubuntu16.04下沙盒数据导入到 Neo4j 数据库(图文详解)
不多说,直接上干货!
参考博客
http://blog.csdn.net/u012318074/article/details/72793914 (表示感谢)
前期博客
Neo4j沙盒实验申请过程步骤(图文详解)
Ubuntu16.04下Neo4j图数据库官网安装部署步骤(图文详解)(博主推荐)
首先,查看下你的操作系统的版本。
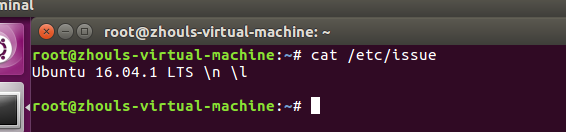
root@zhouls-virtual-machine:~# cat /etc/issue

Ubuntu 16.04.1 LTS \n \l

root@zhouls-virtual-machine:~#
这篇文章就来介绍一下我将 Neo4j 沙盒中的数据导入到自己的 Neo4j 数据库的方法。大家可以清楚的看到沙盒数据公开了很多,我这里,仅此network-management。


使用 github 上的源数据:https://github.com/neo4j-contrib/sandbox-guides

Neo4j browser guides for sandbox instances
Available Use Cases
- us-elections-2016
- blank-sandbox
Render / deploy guides for a use case
Clone this repo
git clone git@github.com:neo4j-contrib/sandbox-guides.gitcd sandbox-guidesgit submodule initgit submodule updateEdit
{USE-CASE}/{GUIDE-NAME-HERE}.adoc{USE-CASE}/render.sh [publish]Open Neo4j Browser and run
:play http://localhost:8001/{USE-CASE}
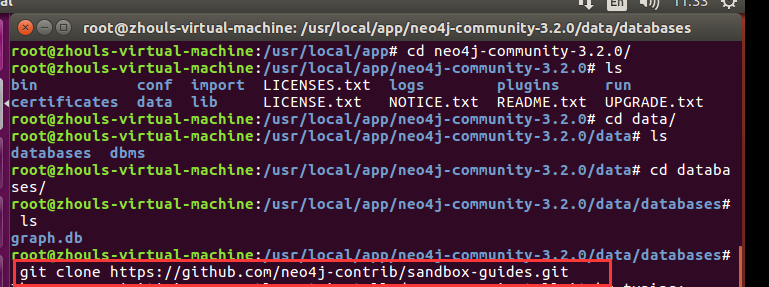
第一步:克隆下载
Clone this repo
git clone git@github.com:neo4j-contrib/sandbox-guides.git
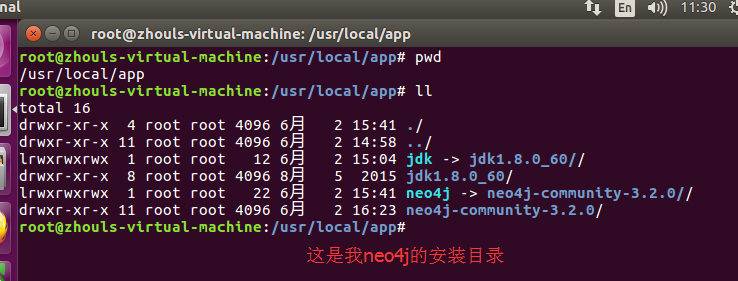
选择一个要存放这个数据的文件夹,我存放的目录为/usr/local/app/neo4j-community-3.2.0/data/databases,使用 Git 方法下载文件,在目录下执行
root@zhouls-virtual-machine:/usr/local/app/neo4j-community-3.2.0/data/databases# git clone https://github.com/neo4j-contrib/sandbox-guides.git
root@zhouls-virtual-machine:/usr/local/app# cd neo4j-community-3.2./

root@zhouls-virtual-machine:/usr/local/app/neo4j-community-3.2.# ls

bin           conf  import  LICENSES.txt  logs        plugins     run

certificates  data  lib     LICENSE.txt   NOTICE.txt  README.txt  UPGRADE.txt

root@zhouls-virtual-machine:/usr/local/app/neo4j-community-3.2.# cd data/

root@zhouls-virtual-machine:/usr/local/app/neo4j-community-3.2./data# ls

databases  dbms

root@zhouls-virtual-machine:/usr/local/app/neo4j-community-3.2./data# cd databases/

root@zhouls-virtual-machine:/usr/local/app/neo4j-community-3.2./data/databases# ls

graph.db

root@zhouls-virtual-machine:/usr/local/app/neo4j-community-3.2./data/databases# git clone https://github.com/neo4j-contrib/sandbox-guides.git
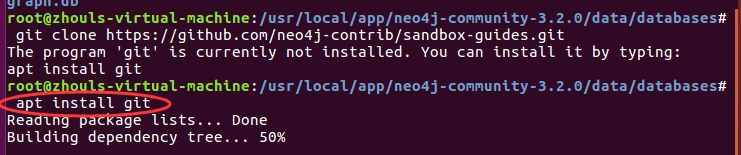
再次执行即可,这个很简单。
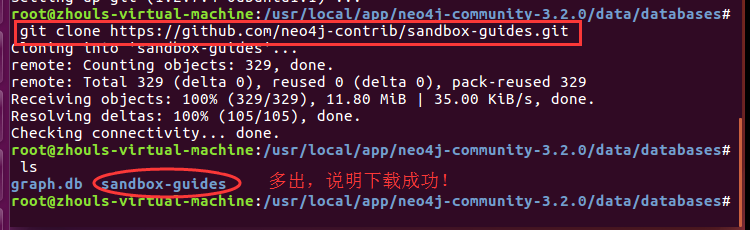
root@zhouls-virtual-machine:/usr/local/app/neo4j-community-3.2./data/databases# git clone https://github.com/neo4j-contrib/sandbox-guides.git

Cloning into 'sandbox-guides'...

remote: Counting objects: , done.

remote: Total  (delta ), reused  (delta ), pack-reused

Receiving objects: % (/), 11.80 MiB | 35.00 KiB/s, done.

Resolving deltas: % (/), done.

Checking connectivity... done.

root@zhouls-virtual-machine:/usr/local/app/neo4j-community-3.2./data/databases# ls

graph.db  sandbox-guides
第二步:切换到刚下载的sandbox-guides目录
cd sandbox-guides
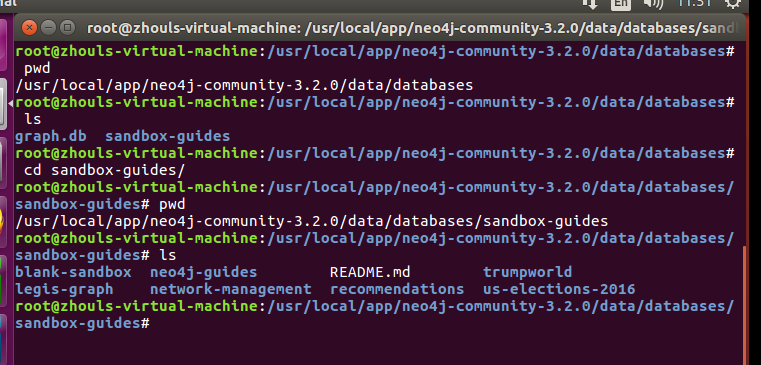
root@zhouls-virtual-machine:/usr/local/app/neo4j-community-3.2./data/databases# pwd

/usr/local/app/neo4j-community-3.2./data/databases

root@zhouls-virtual-machine:/usr/local/app/neo4j-community-3.2./data/databases# ls

graph.db  sandbox-guides

root@zhouls-virtual-machine:/usr/local/app/neo4j-community-3.2./data/databases# cd sandbox-guides/

root@zhouls-virtual-machine:/usr/local/app/neo4j-community-3.2./data/databases/sandbox-guides# pwd

/usr/local/app/neo4j-community-3.2./data/databases/sandbox-guides

root@zhouls-virtual-machine:/usr/local/app/neo4j-community-3.2./data/databases/sandbox-guides# ls

blank-sandbox  neo4j-guides        README.md        trumpworld

legis-graph    network-management  recommendations  us-elections-

root@zhouls-virtual-machine:/usr/local/app/neo4j-community-3.2./data/databases/sandbox-guides#
第三步: 初始化
git submodule init

root@zhouls-virtual-machine:/usr/local/app/neo4j-community-3.2./data/databases/sandbox-guides# git submodule init

Submodule 'neo4j-guides' (https://github.com/neo4j-contrib/neo4j-guides.git) registered for path 'neo4j-guides'

root@zhouls-virtual-machine:/usr/local/app/neo4j-community-3.2./data/databases/sandbox-guides#
第四步:升级
git submodule update

root@zhouls-virtual-machine:/usr/local/app/neo4j-community-3.2./data/databases/sandbox-guides# git submodule update

Cloning into 'neo4j-guides'...

remote: Counting objects: , done.

remote: Total  (delta ), reused  (delta ), pack-reused

Receiving objects: % (/), 156.09 KiB | 5.00 KiB/s, done.

Resolving deltas: % (/), done.

Checking connectivity... done.

Submodule path 'neo4j-guides': checked out '89201c7651b679fb9a487169389ac39ec9cbc00f'

root@zhouls-virtual-machine:/usr/local/app/neo4j-community-3.2./data/databases/sandbox-guides# ls

blank-sandbox  neo4j-guides        README.md        trumpworld

legis-graph    network-management  recommendations  us-elections-

root@zhouls-virtual-machine:/usr/local/app/neo4j-community-3.2./data/databases/sandbox-guides#
第五步
Edit {USE-CASE}/{GUIDE-NAME-HERE}.adoc
这里,跳过
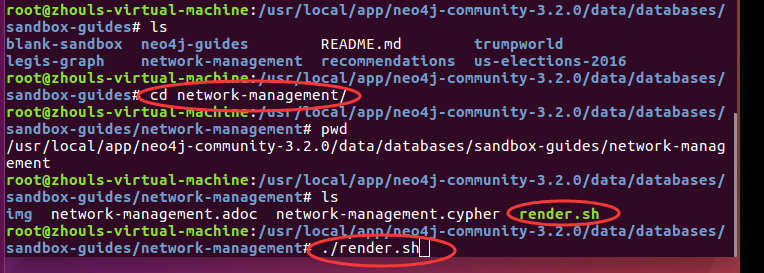
第六步:执行脚本
{USE-CASE}/render.sh [publish]
我这里主要是获取“network-management”数据,所以进入“network-management”文件夹,目录和命令为:

当然,大家也可以进入其他目录下,我这里仅以network-management为例。
root@zhouls-virtual-machine:/usr/local/app/neo4j-community-3.2./data/databases/sandbox-guides# ls

blank-sandbox  neo4j-guides        README.md        trumpworld

legis-graph    network-management  recommendations  us-elections-

root@zhouls-virtual-machine:/usr/local/app/neo4j-community-3.2./data/databases/sandbox-guides# cd network-management/

root@zhouls-virtual-machine:/usr/local/app/neo4j-community-3.2./data/databases/sandbox-guides/network-management# pwd

/usr/local/app/neo4j-community-3.2./data/databases/sandbox-guides/network-management

root@zhouls-virtual-machine:/usr/local/app/neo4j-community-3.2./data/databases/sandbox-guides/network-management# ls

img  network-management.adoc  network-management.cypher  render.sh

root@zhouls-virtual-machine:/usr/local/app/neo4j-community-3.2./data/databases/sandbox-guides/network-management# ./render.sh
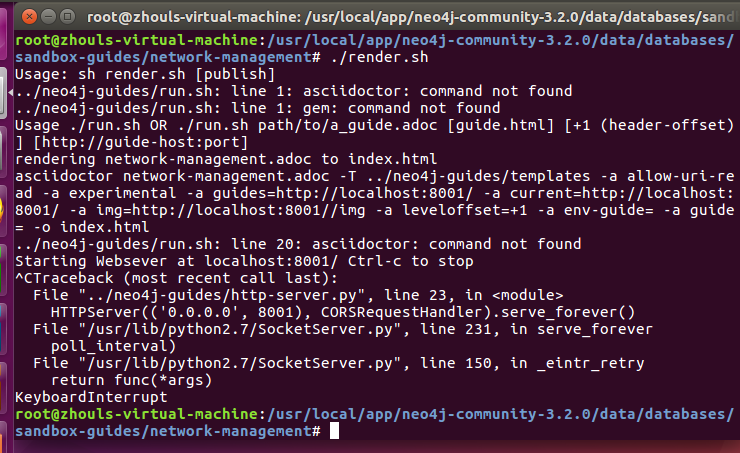
root@zhouls-virtual-machine:/usr/local/app/neo4j-community-3.2.0/data/databases/sandbox-guides/network-management# ./render.sh
Usage: sh render.sh [publish]
../neo4j-guides/run.sh: line 1: asciidoctor: command not found
../neo4j-guides/run.sh: line 1: gem: command not found
Usage ./run.sh OR ./run.sh path/to/a_guide.adoc [guide.html] [+1 (header-offset)] [http://guide-host:port]
rendering network-management.adoc to index.html
asciidoctor network-management.adoc -T ../neo4j-guides/templates -a allow-uri-read -a experimental -a guides=http://localhost:8001/ -a current=http://localhost:8001/ -a img=http://localhost:8001//img -a leveloffset=+1 -a env-guide= -a guide= -o index.html
../neo4j-guides/run.sh: line 20: asciidoctor: command not found
Starting Websever at localhost:8001/ Ctrl-c to stop
^CTraceback (most recent call last):
File "../neo4j-guides/http-server.py", line 23, in <module>
HTTPServer(('0.0.0.0', 8001), CORSRequestHandler).serve_forever()
File "/usr/lib/python2.7/SocketServer.py", line 231, in serve_forever
poll_interval)
File "/usr/lib/python2.7/SocketServer.py", line 150, in _eintr_retry
return func(*args)
KeyboardInterrupt
root@zhouls-virtual-machine:/usr/local/app/neo4j-community-3.2.0/data/databases/sandbox-guides/network-management#
那么就根据提示信息安装“asciidoctor”和“tilt”
在新的命令窗口使用 root 权限执行
apt-get install asciidoctor

gem install tilt

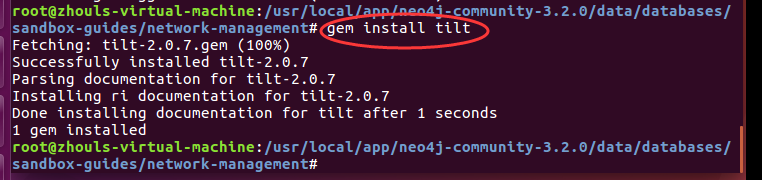
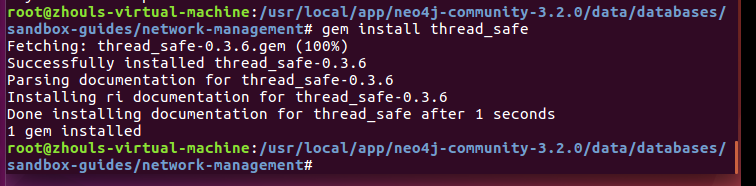
gem install thread_safe
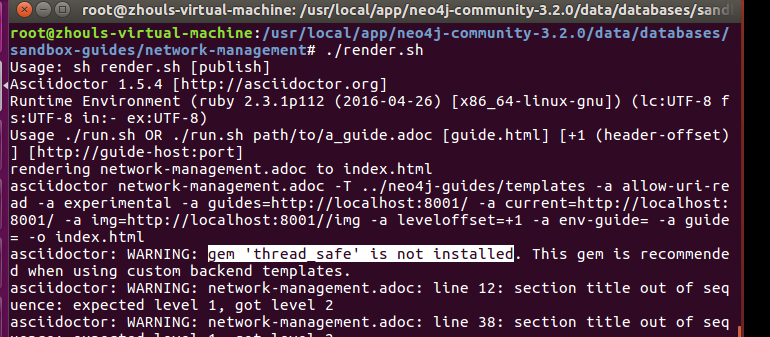
然后,再次执行。
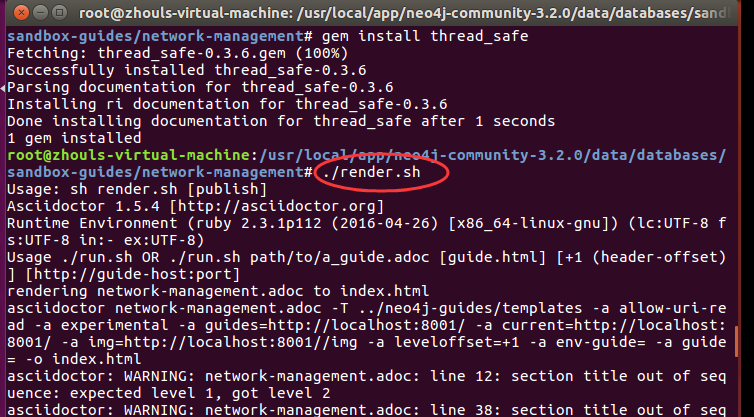
root@zhouls-virtual-machine:/usr/local/app/neo4j-community-3.2./data/databases/sandbox-guides/network-management# ./render.sh

Usage: sh render.sh [publish]

Asciidoctor 1.5. [http://asciidoctor.org]

Runtime Environment (ruby 2.3.1p112 (--) [x86_64-linux-gnu]) (lc:UTF- fs:UTF- in:- ex:UTF-)

Usage ./run.sh OR ./run.sh path/to/a_guide.adoc [guide.html] [+ (header-offset)] [http://guide-host:port]

rendering network-management.adoc to index.html

asciidoctor network-management.adoc -T ../neo4j-guides/templates -a allow-uri-read -a experimental -a guides=http://localhost:8001/ -a current=http://localhost:8001/ -a img=http://localhost:8001//img -a leveloffset=+1 -a env-guide= -a guide= -o index.html

asciidoctor: WARNING: network-management.adoc: line : section title out of sequence: expected level , got level

asciidoctor: WARNING: network-management.adoc: line : section title out of sequence: expected level , got level

asciidoctor: WARNING: network-management.adoc: line : section title out of sequence: expected level , got level

asciidoctor: WARNING: network-management.adoc: line : section title out of sequence: expected level , got level

asciidoctor: WARNING: network-management.adoc: line : section title out of sequence: expected level , got level

asciidoctor: WARNING: network-management.adoc: line : section title out of sequence: expected level , got level

asciidoctor: WARNING: network-management.adoc: line : section title out of sequence: expected level , got level

asciidoctor: WARNING: network-management.adoc: line : section title out of sequence: expected level , got level

asciidoctor: WARNING: network-management.adoc: line : section title out of sequence: expected level , got level

asciidoctor: WARNING: network-management.adoc: line : section title out of sequence: expected level , got level

asciidoctor: WARNING: network-management.adoc: line : section title out of sequence: expected level , got level

asciidoctor: WARNING: network-management.adoc: line : section title out of sequence: expected level , got level

asciidoctor: WARNING: network-management.adoc: line : section title out of sequence: expected level , got level

asciidoctor: WARNING: network-management.adoc: line : section title out of sequence: expected level , got level

asciidoctor: WARNING: network-management.adoc: line : section title out of sequence: expected level , got level

asciidoctor: WARNING: network-management.adoc: line : section title out of sequence: expected level , got level

asciidoctor: WARNING: network-management.adoc: line : section title out of sequence: expected level , got level

 Network Management - Introduction

 Modeling

 DataCenter

 Network Exploration: DataCenter and Zones

 Network Exploration: Racks

 Network Connectivity

 Machine types

 Machines

 Software: Operating Systems and Applications

 Software: Running on Machines

 Dependency Analysis

 Configuration Management

 Upgrade OS Version and its Dependencies for a Version Range

 IT-Monitoring and Governance

 Examples for graph based Network Management Solutions

 Monitoring Use-Cases

 For instance, minimal, average and maximal runtimes of software instances per type

 Data Transer Volume between Interfaces

 Resource Management Graph

 References

Starting Websever at localhost:/ Ctrl-c to stop

127.0.0.1 - - [/Jun/ ::] "GET / HTTP/1.1"  -

127.0.0.1 - - [/Jun/ ::] "GET //img/Network-Management-Model.svg HTTP/1.1"  -

127.0.0.1 - - [/Jun/ ::] "GET //img/network-schema-arrows.jpg HTTP/1.1"  -

127.0.0.1 - - [/Jun/ ::] "GET //img/network-zones.jpg HTTP/1.1"  -

127.0.0.1 - - [/Jun/ ::] "GET //img/network-rack.jpg HTTP/1.1"  -

127.0.0.1 - - [/Jun/ ::] "GET //img/network-alternative-routes.jpg HTTP/1.1"  -

127.0.0.1 - - [/Jun/ ::] "GET //img/network-8000-machines.jpg HTTP/1.1"  -

127.0.0.1 - - [/Jun/ ::] "GET //img/network-rack-machines-type.jpg HTTP/1.1"  -

127.0.0.1 - - [/Jun/ ::] "GET //img/network-software-arrows.jpg HTTP/1.1"  -

127.0.0.1 - - [/Jun/ ::] "GET //img/network-software-machine.jpg HTTP/1.1"  -

127.0.0.1 - - [/Jun/ ::] code , message File not found

127.0.0.1 - - [/Jun/ ::] "GET /favicon.ico HTTP/1.1"  -

127.0.0.1 - - [/Jun/ ::] code , message File not found

127.0.0.1 - - [/Jun/ ::] "GET /favicon.ico HTTP/1.1"  -
如果还是报错,可以根据提示信息进行处理。我这里是已经成功了。
第七步:打开 web 界面
Open Neo4j Browser and run :play http://localhost:8001/{USE-CASE}
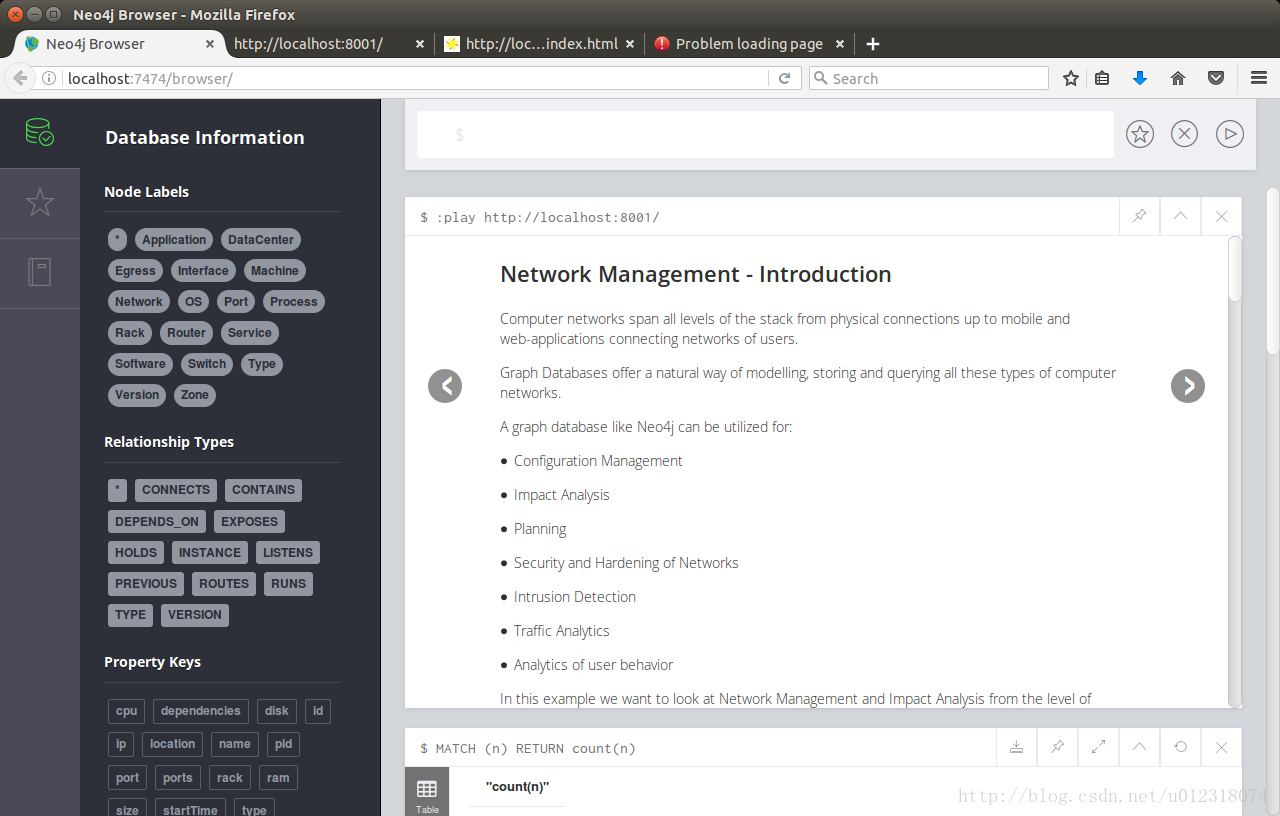
当上一步启动完成后,在浏览器中打开http://localhost:8001/,正常情况下会出现
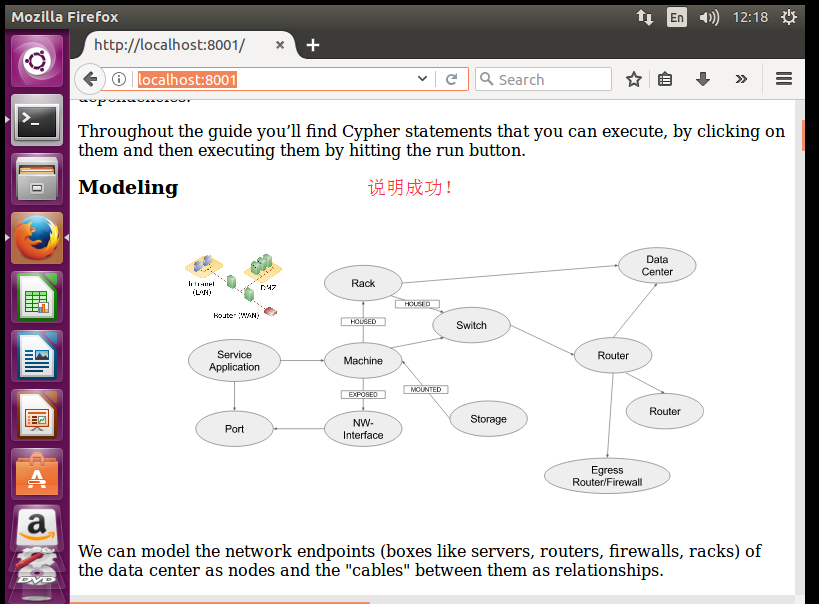
如果看到这个页面,表示说明介绍页面已经正常了,可能会出现乱码,这无所谓,后面会说明如何使用,到时就不会有乱码了。
第八步:导入数据
这一步是关键,也是目的所在,也与 GitHub 上的步骤不同。
我在使用 Neo4j 页面导入的时候会报错,经查找通过 shell 方式导入数据就不会报错,于是采用以下方式:
在 Neo4j 安装目录的bin文件夹中进入cypher-shell,我的具体目录和命令为

root@zhouls-virtual-machine:/usr/local/app/neo4j-community-3.2.# pwd

/usr/local/app/neo4j-community-3.2.

root@zhouls-virtual-machine:/usr/local/app/neo4j-community-3.2.# ls

bin           conf  import  LICENSES.txt  logs        plugins     run

certificates  data  lib     LICENSE.txt   NOTICE.txt  README.txt  UPGRADE.txt

root@zhouls-virtual-machine:/usr/local/app/neo4j-community-3.2.# cd bin/

root@zhouls-virtual-machine:/usr/local/app/neo4j-community-3.2./bin# ls

cypher-shell  neo4j  neo4j-admin  neo4j-import  neo4j-shell  tools

root@zhouls-virtual-machine:/usr/local/app/neo4j-community-3.2./bin# ./cypher-shell
Ubuntu16.04下Neo4j图数据库官网安装部署步骤(图文详解)(博主推荐)
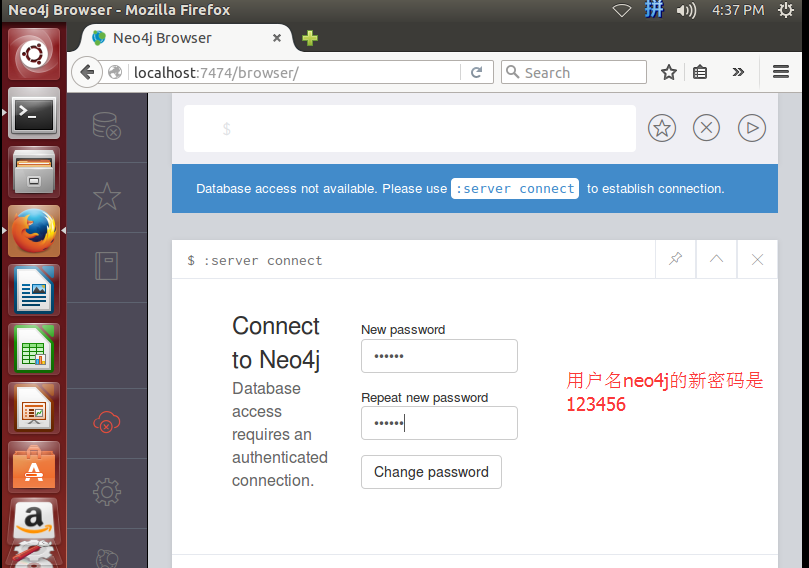
然后输入用户名和密码连接到 Neo4j 数据库。可以参考我上面的这篇博客。
如果大家,遇到如下的问题,请移步
Neo4j下执行cypher-shell时,Connection refused问题解决?
大家,可以看看,沙盒数据里,所带的
root@zhouls-virtual-machine:/usr/local/app/neo4j-community-3.2./data/databases/sandbox-guides# ls
blank-sandbox neo4j-guides README.md trumpworld
legis-graph network-management recommendations us-elections-
root@zhouls-virtual-machine:/usr/local/app/neo4j-community-3.2./data/databases/sandbox-guides# cd network-management/
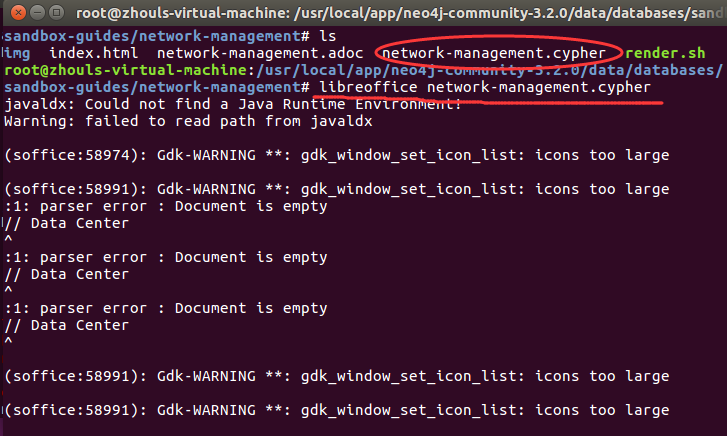
root@zhouls-virtual-machine:/usr/local/app/neo4j-community-3.2./data/databases/sandbox-guides/network-management# ls
img index.html network-management.adoc network-management.cypher render.sh
root@zhouls-virtual-machine:/usr/local/app/neo4j-community-3.2./data/databases/sandbox-guides/network-management# libreoffice network-management.cypher
javaldx: Could not find a Java Runtime Environment!
Warning: failed to read path from javaldx (soffice:): Gdk-WARNING **: gdk_window_set_icon_list: icons too large (soffice:): Gdk-WARNING **: gdk_window_set_icon_list: icons too large
:: parser error : Document is empty
// Data Center
^
:: parser error : Document is empty
// Data Center
^
:: parser error : Document is empty
// Data Center
^
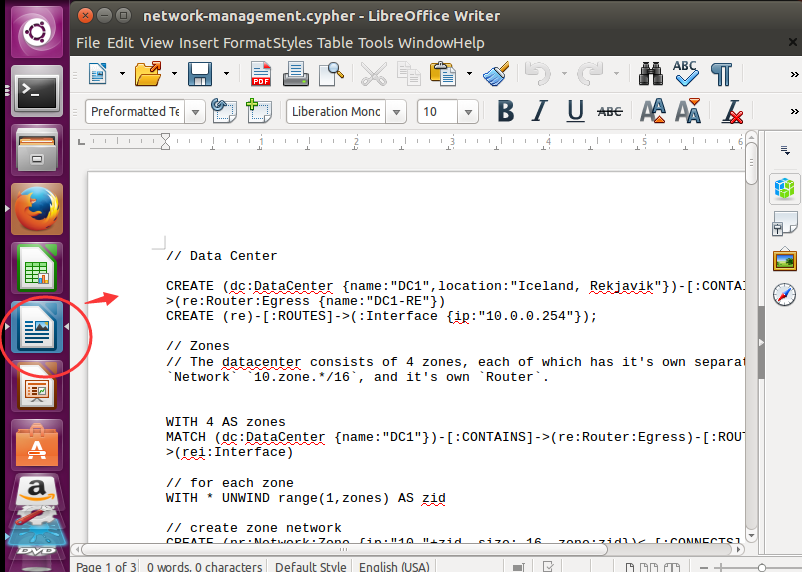
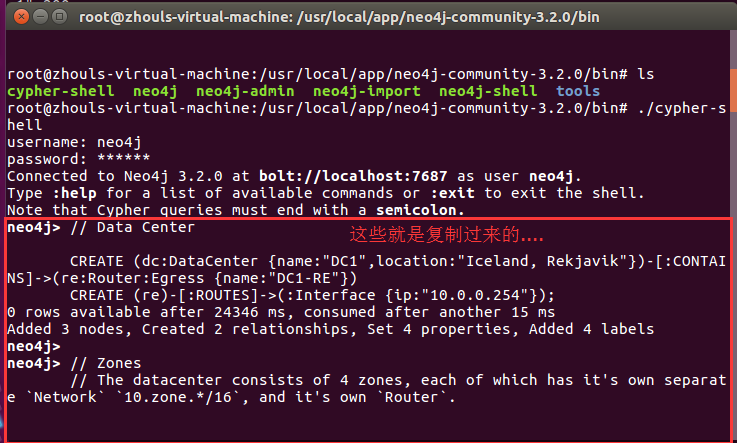
然后复制/usr/local/app/neo4j-community-3.2.0/data/databases/sandbox-guides/network-management/network-management.cypher”这个文件里的全部内容到neo4j>,这样就可以顺利创建数据了
按Ctrl + c 复制,粘贴到neo4j>
root@zhouls-virtual-machine:/usr/local/app/neo4j-community-3.2./bin# ls

cypher-shell  neo4j  neo4j-admin  neo4j-import  neo4j-shell  tools

root@zhouls-virtual-machine:/usr/local/app/neo4j-community-3.2./bin# ./cypher-shell

username: neo4j

password: ******

Connected to Neo4j 3.2. at bolt://localhost:7687 as user neo4j.

Type :help for a list of available commands or :exit to exit the shell.

Note that Cypher queries must end with a semicolon.

neo4j> // Data Center

       CREATE (dc:DataCenter {name:"DC1",location:"Iceland, Rekjavik"})-[:CONTAINS]->(re:Router:Egress {name:"DC1-RE"})

       CREATE (re)-[:ROUTES]->(:Interface {ip:"10.0.0.254"});

 rows available after  ms, consumed after another  ms

Added  nodes, Created  relationships, Set  properties, Added  labels

neo4j>

neo4j> // Zones

       // The datacenter consists of 4 zones, each of which has it's own separate `Network` `10.zone.*/16`, and it's own `Router`.

       WITH  AS zones

       MATCH (dc:DataCenter {name:"DC1"})-[:CONTAINS]->(re:Router:Egress)-[:ROUTES]->(rei:Interface)

       // for each zone

       WITH * UNWIND range(,zones) AS zid

       // create zone network

       CREATE (nr:Network:Zone {ip:"10."+zid, size: , zone:zid})<-[:CONNECTS]-(rei)

       // create router in DC, connect it via an interface to the zone network

       CREATE (dc)-[:CONTAINS]->(r:Router {name:"DC1-R-"+zid, zone:zid})-[:ROUTES]->(ri:Interface {ip:nr.ip+".0.254"})-[:CONNECTS]->(nr);

 rows available after  ms, consumed after another  ms

Added  nodes, Created  relationships, Set  properties, Added  labels

neo4j>

neo4j>

neo4j> // Racks

       WITH  as racks

       MATCH (dc:DataCenter {name:"DC1"})

       MATCH (nr:Network:Zone) // one per zone

       WITH * UNWIND range(,racks) AS rackid

       CREATE (dc)-[:CONTAINS]->(rack:Rack {name:"DC1-RCK-"+nr.zone+"-"+rackid, rack:rackid, zone:nr.zone})-[:HOLDS]->(s:Switch {ip:nr.ip+"."+rackid, rack:rackid})-[:ROUTES]->(si:Interface {ip:s.ip+".254"})<-[:ROUTES]-(nr);

 rows available after  ms, consumed after another  ms

Added  nodes, Created  relationships, Set  properties, Added  labels

neo4j>

neo4j> // Machine types

       // Similar to the machines you can rent on AWS we use machine types, for which we auto-create some reasonable capacities for CPU, RAM and DISK.

       WITH ["xs","s","m","l","xl","xxl"] as typeNames

       UNWIND range(,size(typeNames)-) as idx

       CREATE (t:Type {id:idx, cpu: toInt(^idx), ram:toInt(^idx), disk:toInt(^idx), type: typeNames[idx]})

          SET t.name = typeNames[idx]+"-"+t.cpu + "/"+t.ram+"/"+t.disk

       RETURN t.name, t.id, t.cpu, t.ram, t.disk;

+----------------------------------------------------+

| t.name             | t.id | t.cpu | t.ram | t.disk |

+----------------------------------------------------+

| "xs-1/1/1"         |     |      |      |       |

| "s-2/4/5"          |     |      |      |       |

| "m-4/16/25"        |     |      |     |      |

| "l-8/64/125"       |     |      |     |     |

| "xl-16/256/625"    |     |     |    |     |

| "xxl-32/1024/3125" |     |     |   |    |

+----------------------------------------------------+

 rows available after  ms, consumed after another  ms

Added  nodes, Set  properties, Added  labels

neo4j>

neo4j>

neo4j> // Machines

       // Each Rack contains 200 machines of the types we just introduced, so that in total we get 8000 servers in our datacenter.

       // The distribution of the types is inverse to their capabilities.

       MATCH (t:Type)

       WITH collect(t) as types,  as machines

       MATCH (rack:Rack)-[:HOLDS]->(s:Switch)-[:ROUTES]->(si:Interface)

       UNWIND (range(,machines)) AS machineid

       CREATE (rack)-[:HOLDS]->(m:Machine {id:rack.id *  + machineid, name: rack.name + "-M-" +machineid })-[:ROUTES]->(i:Interface {ip:s.ip+"."+machineid})-[:CONNECTS]->(si)

       WITH m,types,size(types)-toInt(log(machines - machineid + )) - as idx

       WITH m, types[idx] as t

       CREATE (m)-[:TYPE]->(t);

 rows available after  ms, consumed after another  ms

Added  nodes, Created  relationships, Set  properties, Added  labels

neo4j>

neo4j>

neo4j> // Create OS and Software

       // https://en.wikipedia.org/wiki/Red_Hat_Enterprise_Linux#Version_history

       // https://wiki.ubuntu.com/Releases

       // https://en.wikipedia.org/wiki/Debian_version_history

       WITH

            [{name:"RHEL",versions:["7.1","7.2","7.3"]},{name:"Ubuntu",versions:["14.04","16.04","16.10","17.04"]},{name:"Debian",versions:["6-Squeeze","7-Wheezy","8-Jessie"]}] as osNames,

            [

             {name:"java",versions:[""]},

             {name:"neo4j",ports:[,,],versions:["3.0","3.1"],dependencies:["java/8"]},

             {name:"postgres",ports:[],versions:["9.4","9.5","9.6"]},

             {name:"couchbase",ports:[,,,,,,,,,,],versions:["3.0","4.0","4.5","4.6"]},

             {name:"elasticsearch",ports:[,,,],versions:["2.4","5.0","5.1","5.2"],dependencies:["java/8"]}

            ] as services,

            [{name:"webserver",ports:[,],dependencies:["postgres/9.4"]},

             {name:"crm",ports:[,],dependencies:["java/8","neo4j/3.1"]},

             {name:"cms",ports:[],dependencies:["php","webserver","couchbase"]},

             {name:"webapp",ports:[],dependencies:["java","neo4j"]},

             {name:"logstash",ports:[],dependencies:["elasticsearch/5.2"]}

            ] as applications

       UNWIND osNames + services + applications AS sw

       CREATE (s:Software) SET s = sw

       FOREACH (sw in filter(x IN osNames where x.name = sw.name) | SET s:OS)

       FOREACH (sw in filter(x IN services where x.name = sw.name) | SET s:Service)

       FOREACH (sw in filter(x IN applications where x.name = sw.name) | SET s:Application)

       FOREACH (idx in range(,size(coalesce(sw.versions,[]))-) |

         MERGE (s)-[:VERSION]->(v0:Version {name:sw.versions[idx]})

         MERGE (s)-[:VERSION]->(v:Version {name:sw.versions[idx+]})

         MERGE (v0)<-[:PREVIOUS]-(v)

       )

       WITH *

       UNWIND sw.dependencies as dep

       WITH *,split(dep,"/") as parts

       MERGE (d:Software {name:parts[]})

       FOREACH (v IN case size(parts) when  then [] else [parts[]] end |

          MERGE (d)-[:VERSION]->(:Version {name:v})

       )

       WITH *

       OPTIONAL MATCH (d)-[:VERSION]->(v:Version {name:parts[]})

       WITH s, coalesce(v,d) as d

       MERGE (s)-[:DEPENDS_ON]->(d);

 rows available after  ms, consumed after another  ms

Added  nodes, Created  relationships, Set  properties, Added  labels

neo4j>

neo4j>

neo4j> // Install Software

       create index on :Software(name);

 rows available after  ms, consumed after another  ms

Added  indexes

neo4j>

neo4j> WITH [(:Software:OS)-[:VERSION]->(v) | v] as osVersions

       MATCH (a:Application:Software)

       WITH osVersions, collect(a) as apps

       MATCH (m:Machine)-[:ROUTES]->(i:Interface)

       WITH m,i, osVersions[toInt(rand()*size(osVersions))] as os, apps[toInteger(rand()*size(apps))] as app

       CREATE (m)-[:RUNS]->(op:OS:Process {name:os.name, startTime:timestamp() - toInteger( (rand() *  + ) ***)})-[:INSTANCE]->(os)

       CREATE (m)-[:RUNS]->(ap:Application:Process {name: app.name, pid: toInt(rand()*), startTime:timestamp() - toInteger(rand() * ***) })-[:INSTANCE]->(app)

       FOREACH (portNo in app.ports |

          MERGE (port:Port {port:portNo})<-[:EXPOSES]-(i)

          CREATE (ap)-[:LISTENS]->(port)

       )

       WITH *

       MATCH (app)-[:DEPENDS_ON]->(dep)

       CREATE (m)-[:RUNS]->(dp:Service:Process {name: dep.name, pid: toInt(rand()*), startTime:timestamp() - toInteger(rand() * ***) })-[:INSTANCE]->(dep)

       CREATE (ap)-[:DEPENDS_ON]->(dp)

       FOREACH (portNo in dep.ports |

          MERGE (port:Port {port:portNo})<-[:EXPOSES]-(i)

          CREATE (dp)-[:LISTENS]->(port)

       );
创建完成后的信息提示如下图
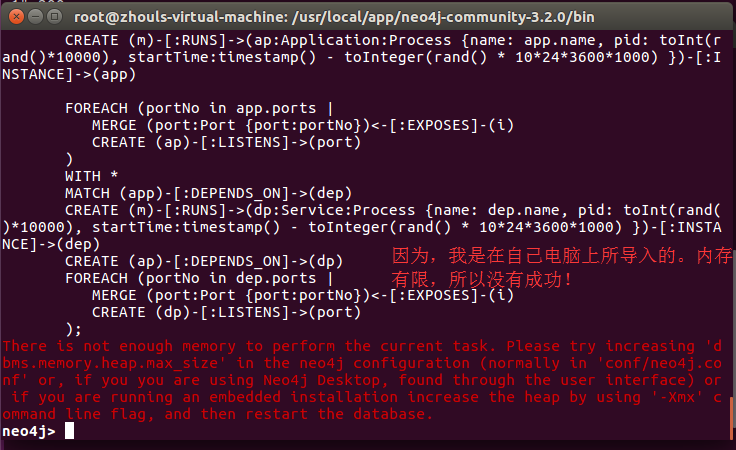
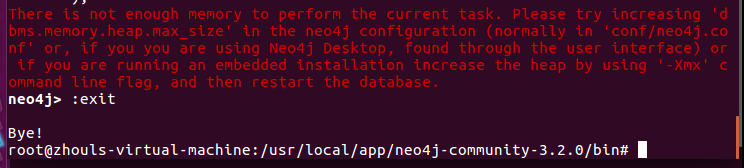
There is not enough memory to perform the current task.
 Please try increasing 'dbms.memory.heap.max_size' in the neo4j configuration (normally in 'conf/neo4j.conf' or,
 if you you are using Neo4j Desktop, found through the user interface)
or if you are running an embedded installation increase the heap by using '-Xmx' command line flag,
and then restart the database.
为此,我按: exit退出,进行内存大小调整。
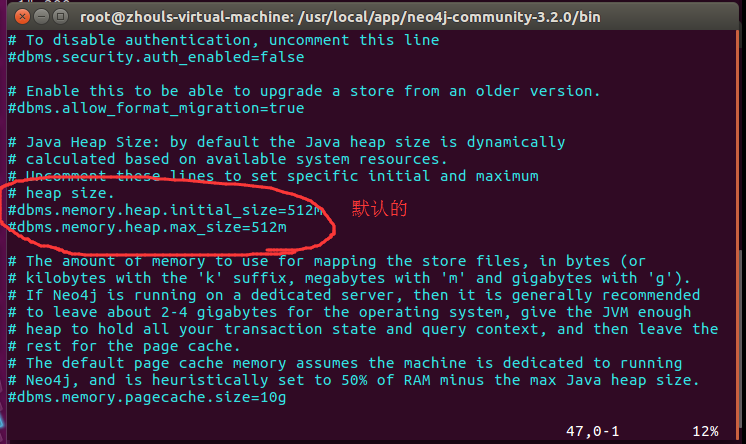
我这里,自行调整内存大小来试试,比如。改为2G吧,来试试!

dbms.memory.heap.max_size=2g
查看导入到Neo4j数据库后的沙盒数据之network-management
启动 Neo4j
root@zhouls-virtual-machine:/usr/local/app/neo4j-community-3.2./bin# ./neo4j console
在浏览器中打开:http://localhost:7474/ 进入 Neo4j 的 web 界面,
点击左上角的数据库图标就会显示刚才导入的数据节点标签、关系等信息。
在命令行中输入:play http://localhost:8001/会显示在第 4 步中显示的介绍说明信息,这时可以按照说明信息查看操作。
成功!
Ubuntu16.04下沙盒数据导入到 Neo4j 数据库(图文详解)的更多相关文章
- Ubuntu14.04下沙盒数据导入到 Neo4j 数据库(图文详解)
不多说,直接上干货! 参考博客 http://blog.csdn.net/u012318074/article/details/72793914 (表示感谢) 前期博客 Neo4j沙盒实验申请过程 ...
- Ubuntu16.04下Mongodb官网卸载部署步骤(图文详解)(博主推荐)
不多说,直接上干货! 前期博客 Ubuntu16.04下Mongodb官网安装部署步骤(图文详解)(博主推荐) https://docs.mongodb.com/manual/tutorial/ins ...
- Ubuntu16.04下Mongodb官网安装部署步骤(图文详解)(博主推荐)
不多说,直接上干货! 在这篇博客里,我采用了非官网的安装步骤,来进行安装.走了弯路,同时,也是不建议.因为在大数据领域和实际生产里,还是要走正规的为好. Ubuntu16.04下Mongodb(离线安 ...
- Ubuntu14.04下Mongodb官网卸载部署步骤(图文详解)(博主推荐)
不多说,直接上干货! 前期博客 Ubuntu14.04下Mongodb官网安装部署步骤(图文详解)(博主推荐) https://docs.mongodb.com/manual/tutorial/ins ...
- Neo4j沙盒实验申请过程步骤(图文详解)
不多说,直接上干货! 参考博客 http://blog.csdn.net/u012318074/article/details/72793632 (对此表示感谢) 前期博客 我暂时是将Neo4j ...
- Ubuntu14.04下Mongodb官网安装部署步骤(图文详解)(博主推荐)
不多说,直接上干货! 在这篇博客里,我采用了非官网的安装步骤,来进行安装.走了弯路,同时,也是不建议.因为在大数据领域和实际生产里,还是要走正规的为好. Ubuntu14.04下Mongodb(离线安 ...
- CentOS 6.3下Samba服务器的安装与配置方法(图文详解)
这篇文章主要介绍了CentOS 6.3下Samba服务器的安装与配置方法(图文详解),需要的朋友可以参考下 一.简介 Samba是一个能让Linux系统应用Microsoft网络通讯协议的软件, ...
- 全网最详细的IDEA里如何正确新建普通的Java web项目并发布到Tomcat上运行成功【博主强烈推荐】(类似eclipse里同一个workspace下【一个子项目】并存)(图文详解)
不多说,直接上干货! 首先,大家要明确,IDEA.Eclipse和MyEclipse等编辑器之间的新建和运行手法是不一样的. 如果是在Myeclipse里,则是File -> new -> ...
- Windows 7操作系统下PHP 7的安装与配置(图文详解)
前提博客 Windows 7操作系统下Apache的安装与配置(图文详解) 从官网下载 PHP的官网 http://www.php.net/ 特意,新建这么一个目录 ...
随机推荐
- Static variables in JavaScript
function MyClass () { // constructor function var privateVariable = "foo"; //NO:obj.privat ...
- axis2服务器搭建
一. axis2服务器搭建 简单起见, axis2r搭建采用较为简单的一种方式, 即将服务类和services.xml打成.aar包发布. 1. 下载部署axis2 http://axis.apach ...
- 几个方便编程的C++特性
前言: C++11的自动化特性给编程提供了不少方便,同时也给调试增加了很多负担,至于取舍看程序员的风格和侧重而定. auto:自动类型推断 在C++11之前,auto关键字用来指定存储期.在新标准中, ...
- 三维投影总结:数学原理、投影几何、OpenGL教程、我的方法
如果要得到pose视图,除非有精密的测量方法,否则进行大量的样本采集时很耗时耗力的.可以采取一些取巧的方法,正如A Survey on Partial of 3d shapes,描述的,可以利用已得到 ...
- RGB_D_开发征程(使用Kinect)
学习历程依此为纲! Kinect学习资料: kinect和openNI开发资料汇总:http://blog.csdn.net/chenli2010/article/details/6887646 原始 ...
- App测试- adb monkey测试
一. 安装和配置SDK 1. 下载Android SDK并解压.如下图:(如果不存在tool和platform_tool,请点击SDK Manager在线下载和更新) 2.下载完成后,配置SDK环境变 ...
- 初步学习Axure---整理了一下自己两周的学习成果:动态面板
自己无意间发现了做原型设计的工具--Axure,所以就自学了一点皮毛.最近时间比较充裕,就把自己现学现卖的东西整一整. 作品比较简单,没有技术可言,根据用户和开发需求,利用动态面板和一些点击事件完成了 ...
- Ad_hoc_polymorphism 备份
https://en.wikipedia.org/wiki/Polymorphism_(computer_science) https://en.wikipedia.org/wiki/Ad_hoc_p ...
- VS Code中编写html(4) 标签的宽高颜色背景设置
1 <!+Tab键--> <!--有两个div标签时,分别设置style,有两种方法--> <div id="div1">第一个div标签:& ...
- php 的多进程
php的多进程处理依赖于pcntl扩展,通过pcntl_fork创建子进程来进行并行处理 例子1: <?php $pid = pcntl_fork(); if($pid == -1) { //错 ...