【Android开发VR实战】三.开发一个寻宝类VR游戏TreasureHunt
转载请注明出处:http://blog.csdn.net/linglongxin24/article/details/53939303
本文出自【DylanAndroid的博客】
【Android开发VR实战】三.开发一个寻宝类VR游戏TreasureHunt
VR即Virtual Reality虚拟现实。虚拟现实技术是一种能够创建和体验虚拟世界的计算机仿真系统它利用计算机生成一种模拟环境是一种多源信息融合的交互式的三维动态视景和实体行为的系统仿真使用户沉浸到该环境中。
那么,怎样在Android中去开发VR功能的APP呢?我们利用谷歌提供的开源SDK去实现一个360°全景游戏的功能。
接下来主要是针对谷歌提供的开发VR的SDK中的游戏样例进行翻译。
CardBoard:卡纸板,google早期推出的VR 开发集合,封装改动了Activity。GLSurfaceView 以及 Render等标准类的一层API,当中详细仔细的实现封在so库中。用户使用CardBoard提供的jar包以及so,依照API的规则使用OPENGL实现特定函数就可以开发VR程序
DayDream:白日梦,在CardBoard基础上的专业版,实现了很多其它的VR特性功能,如3D音效,全景视图,全景视频播放。控制器,封装的API和so也对应的增多。API更加有结构模块化。
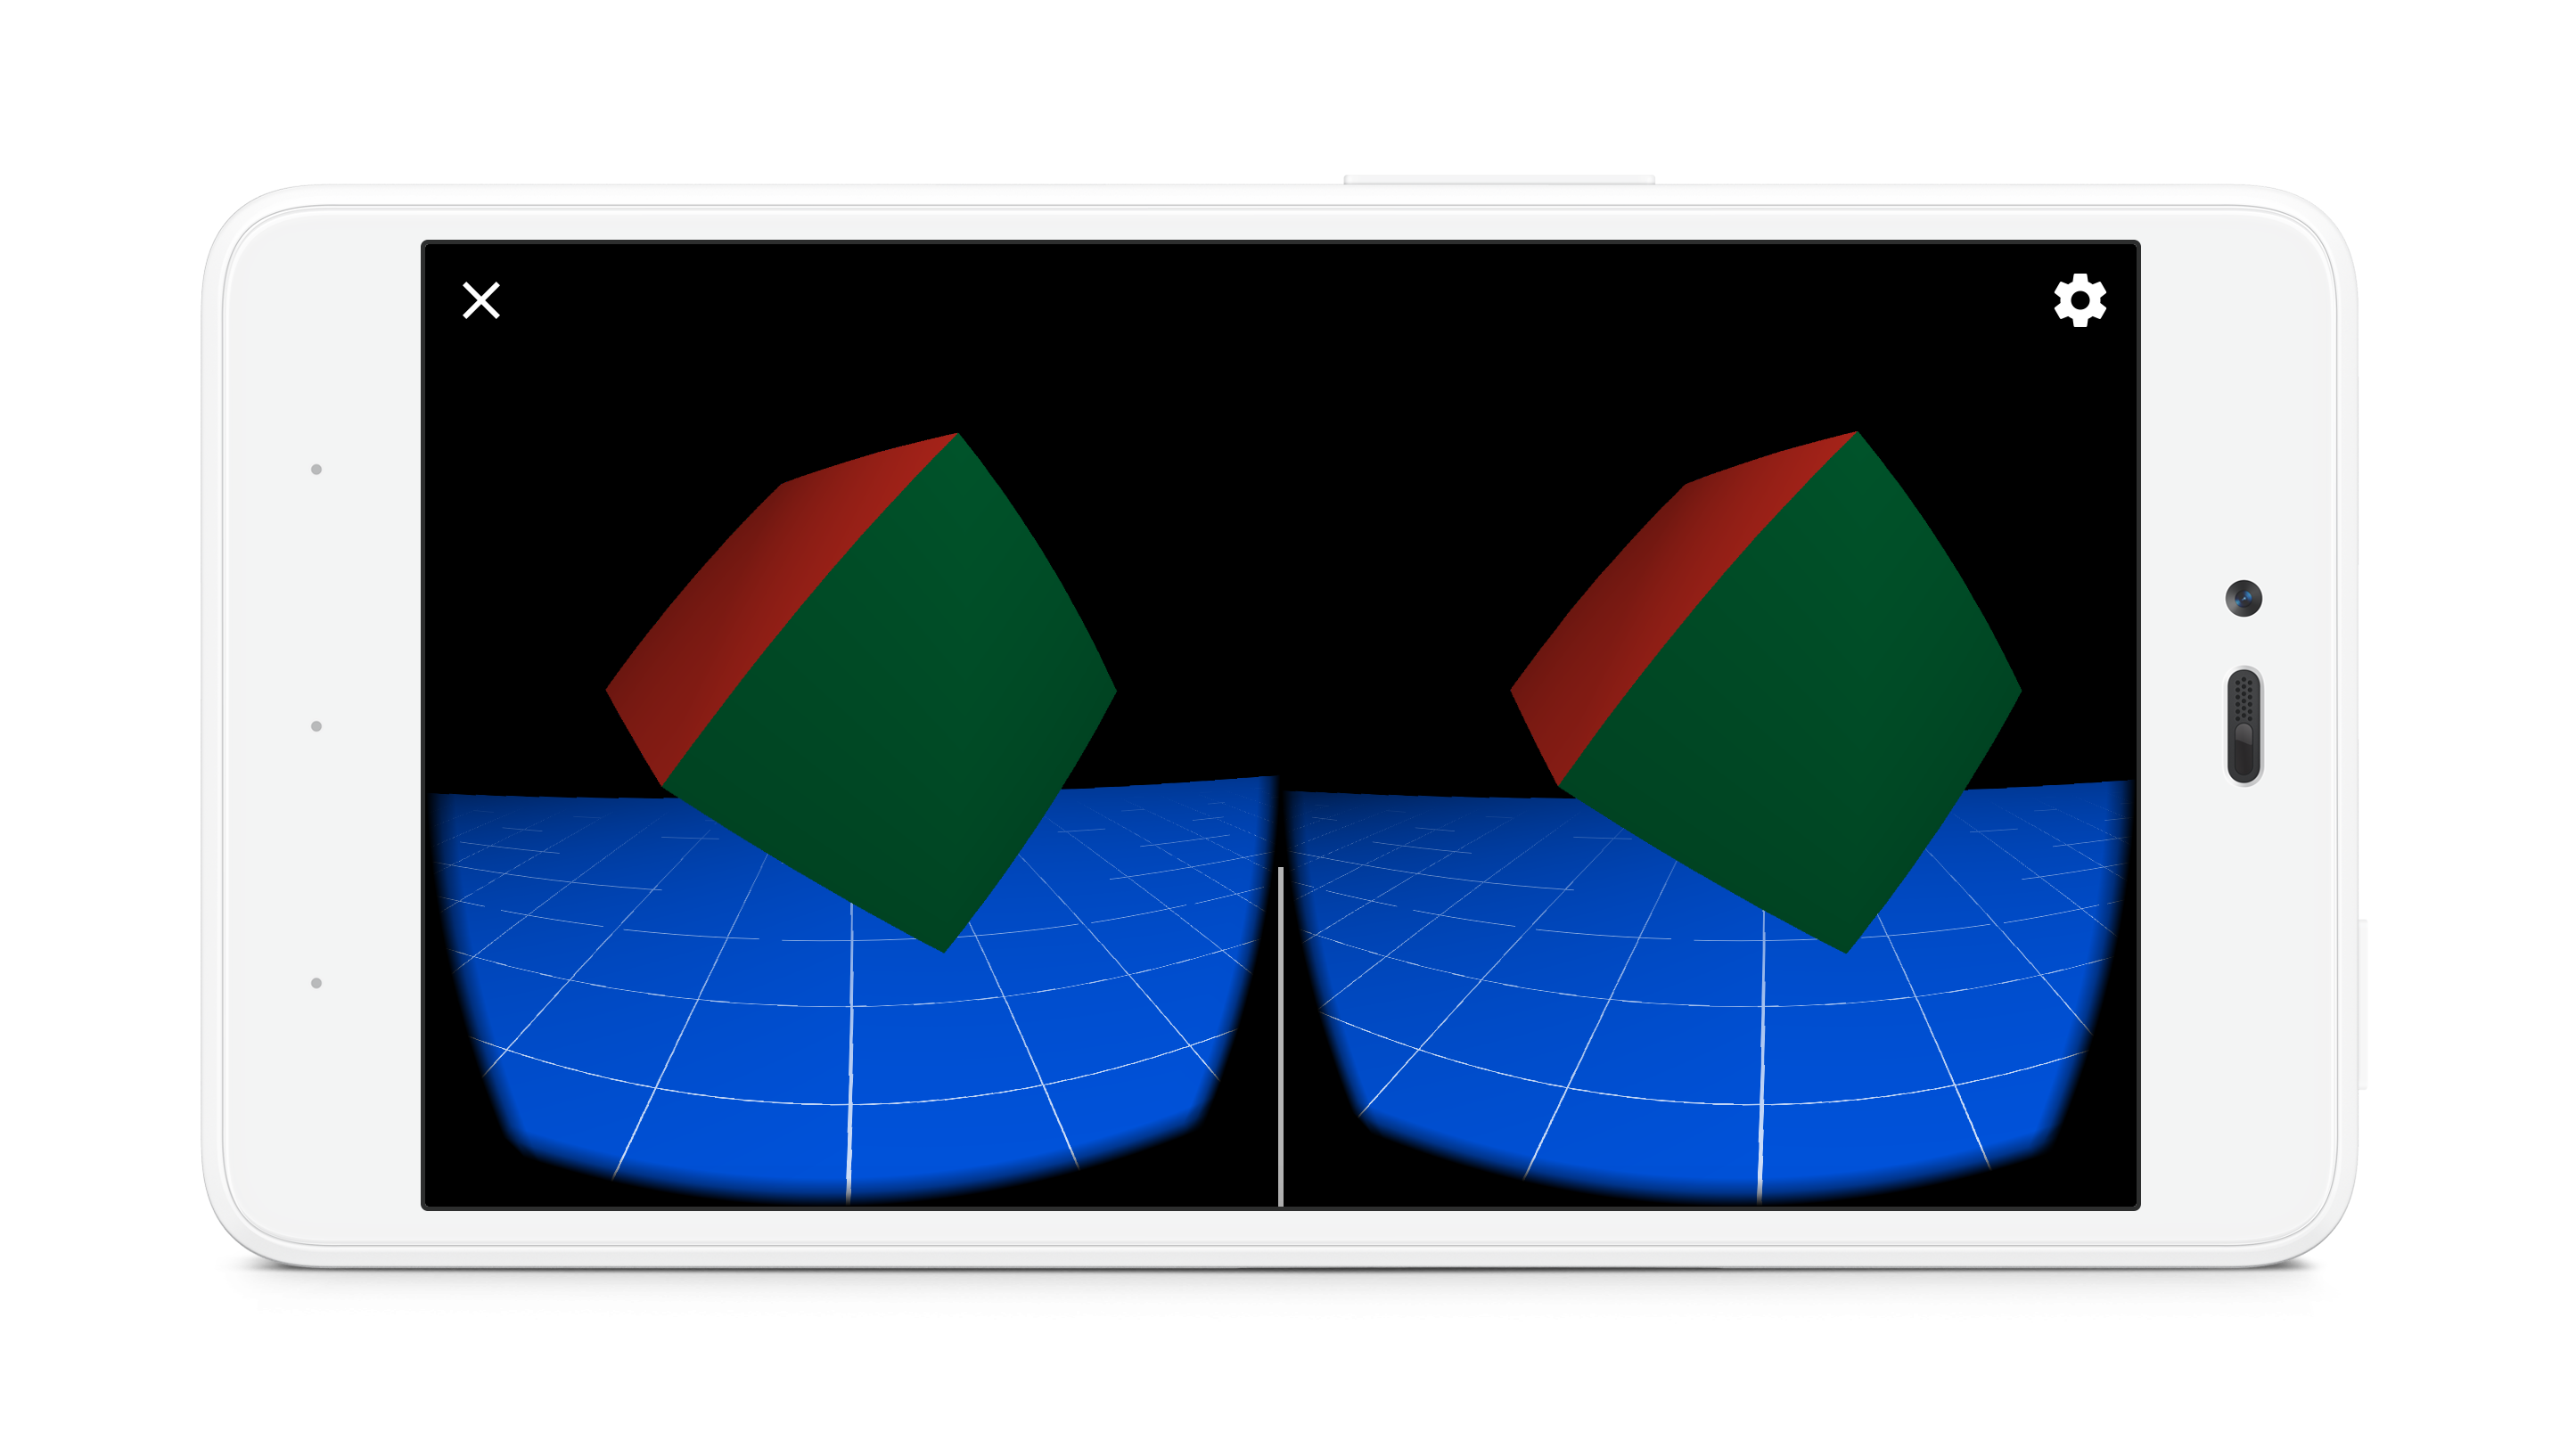
TreasureHunt游戏场景包含一个平面接地网格和一个浮动 “宝藏”多维数据集。
当用户观看立方体时,立方体将变成金色。 用户能够直接激活Cardboard触发器在其Cardboard查看器上使用触摸触发器,或使用白日梦基于控制器的触发器仿真。 然后激活触发器,点击寻找宝藏,宝藏消失后随机又一次定位立方体。
一.在build.gradle中引入谷歌VR的SDK依赖
compile 'com.google.vr:sdk-audio:1.10.0'compile 'com.google.vr:sdk-base:1.10.0'
二.注意支持的最小SDK
minSdkVersion 19targetSdkVersion 25
三.界面布局文件
<?xml version="1.0" encoding="utf-8"?><RelativeLayout xmlns:android="http://schemas.android.com/apk/res/android"android:id="@+id/ui_layout"android:orientation="vertical"android:layout_width="fill_parent"android:layout_height="fill_parent" ><com.google.vr.sdk.base.GvrViewandroid:id="@+id/gvr_view"android:layout_width="fill_parent"android:layout_height="fill_parent"android:layout_alignParentTop="true"android:layout_alignParentLeft="true" /></RelativeLayout>
四.绘制TreasureHunt的VR游戏界面代码
/*** 将视图设置为我们的GvrView并初始化我们将用于渲染我们的场景的转换矩阵。*/@Overridepublic void onCreate(Bundle savedInstanceState) {super.onCreate(savedInstanceState);initializeGvrView();modelCube = new float[16];camera = new float[16];view = new float[16];modelViewProjection = new float[16];modelView = new float[16];modelFloor = new float[16];tempPosition = new float[4];// Model first appears directly in front of user.modelPosition = new float[]{0.0f, 0.0f, -MAX_MODEL_DISTANCE / 2.0f};headRotation = new float[4];headView = new float[16];vibrator = (Vibrator) getSystemService(Context.VIBRATOR_SERVICE);// Initialize 3D audio engine.gvrAudioEngine = new GvrAudioEngine(this, GvrAudioEngine.RenderingMode.BINAURAL_HIGH_QUALITY);}/*** 初始化VR显示界面*/public void initializeGvrView() {setContentView(R.layout.common_ui);GvrView gvrView = (GvrView) findViewById(R.id.gvr_view);gvrView.setEGLConfigChooser(8, 8, 8, 8, 16, 8);/**设置渲染器**/gvrView.setRenderer(this);gvrView.setTransitionViewEnabled(true);/**使用Daydream耳机启用Cardboard触发反馈。* 这是一种使用现有Cardboard触发器API支持Daydream控制器输入进行基本交互的简单方法。**/gvrView.enableCardboardTriggerEmulation();if (gvrView.setAsyncReprojectionEnabled(true)) {/**异步投影,沉浸式,性能模式**/AndroidCompat.setSustainedPerformanceMode(this, true);}setGvrView(gvrView);}@Overridepublic void onPause() {gvrAudioEngine.pause();super.onPause();}@Overridepublic void onResume() {super.onResume();gvrAudioEngine.resume();}@Overridepublic void onRendererShutdown() {Log.i(TAG, "onRendererShutdown");}@Overridepublic void onSurfaceChanged(int width, int height) {Log.i(TAG, "onSurfaceChanged");}/*** 创建用于存储有关3D界面的信息的缓冲区。* <p>* <p>OpenGL不使用Java数组。而是须要能够理解的格式的数据。因此我们使用ByteBuffers。** @param config The EGL configuration used when creating the surface.*/@Overridepublic void onSurfaceCreated(EGLConfig config) {Log.i(TAG, "onSurfaceCreated");GLES20.glClearColor(0.1f, 0.1f, 0.1f, 0.5f); // Dark background so text shows up well.ByteBuffer bbVertices = ByteBuffer.allocateDirect(WorldLayoutData.CUBE_COORDS.length * 4);bbVertices.order(ByteOrder.nativeOrder());cubeVertices = bbVertices.asFloatBuffer();cubeVertices.put(WorldLayoutData.CUBE_COORDS);cubeVertices.position(0);ByteBuffer bbColors = ByteBuffer.allocateDirect(WorldLayoutData.CUBE_COLORS.length * 4);bbColors.order(ByteOrder.nativeOrder());cubeColors = bbColors.asFloatBuffer();cubeColors.put(WorldLayoutData.CUBE_COLORS);cubeColors.position(0);ByteBuffer bbFoundColors =ByteBuffer.allocateDirect(WorldLayoutData.CUBE_FOUND_COLORS.length * 4);bbFoundColors.order(ByteOrder.nativeOrder());cubeFoundColors = bbFoundColors.asFloatBuffer();cubeFoundColors.put(WorldLayoutData.CUBE_FOUND_COLORS);cubeFoundColors.position(0);ByteBuffer bbNormals = ByteBuffer.allocateDirect(WorldLayoutData.CUBE_NORMALS.length * 4);bbNormals.order(ByteOrder.nativeOrder());cubeNormals = bbNormals.asFloatBuffer();cubeNormals.put(WorldLayoutData.CUBE_NORMALS);cubeNormals.position(0);// make a floorByteBuffer bbFloorVertices = ByteBuffer.allocateDirect(WorldLayoutData.FLOOR_COORDS.length * 4);bbFloorVertices.order(ByteOrder.nativeOrder());floorVertices = bbFloorVertices.asFloatBuffer();floorVertices.put(WorldLayoutData.FLOOR_COORDS);floorVertices.position(0);ByteBuffer bbFloorNormals = ByteBuffer.allocateDirect(WorldLayoutData.FLOOR_NORMALS.length * 4);bbFloorNormals.order(ByteOrder.nativeOrder());floorNormals = bbFloorNormals.asFloatBuffer();floorNormals.put(WorldLayoutData.FLOOR_NORMALS);floorNormals.position(0);ByteBuffer bbFloorColors = ByteBuffer.allocateDirect(WorldLayoutData.FLOOR_COLORS.length * 4);bbFloorColors.order(ByteOrder.nativeOrder());floorColors = bbFloorColors.asFloatBuffer();floorColors.put(WorldLayoutData.FLOOR_COLORS);floorColors.position(0);int vertexShader = loadGLShader(GLES20.GL_VERTEX_SHADER, R.raw.light_vertex);int gridShader = loadGLShader(GLES20.GL_FRAGMENT_SHADER, R.raw.grid_fragment);int passthroughShader = loadGLShader(GLES20.GL_FRAGMENT_SHADER, R.raw.passthrough_fragment);cubeProgram = GLES20.glCreateProgram();GLES20.glAttachShader(cubeProgram, vertexShader);GLES20.glAttachShader(cubeProgram, passthroughShader);GLES20.glLinkProgram(cubeProgram);GLES20.glUseProgram(cubeProgram);checkGLError("Cube program");cubePositionParam = GLES20.glGetAttribLocation(cubeProgram, "a_Position");cubeNormalParam = GLES20.glGetAttribLocation(cubeProgram, "a_Normal");cubeColorParam = GLES20.glGetAttribLocation(cubeProgram, "a_Color");cubeModelParam = GLES20.glGetUniformLocation(cubeProgram, "u_Model");cubeModelViewParam = GLES20.glGetUniformLocation(cubeProgram, "u_MVMatrix");cubeModelViewProjectionParam = GLES20.glGetUniformLocation(cubeProgram, "u_MVP");cubeLightPosParam = GLES20.glGetUniformLocation(cubeProgram, "u_LightPos");checkGLError("Cube program params");floorProgram = GLES20.glCreateProgram();GLES20.glAttachShader(floorProgram, vertexShader);GLES20.glAttachShader(floorProgram, gridShader);GLES20.glLinkProgram(floorProgram);GLES20.glUseProgram(floorProgram);checkGLError("Floor program");floorModelParam = GLES20.glGetUniformLocation(floorProgram, "u_Model");floorModelViewParam = GLES20.glGetUniformLocation(floorProgram, "u_MVMatrix");floorModelViewProjectionParam = GLES20.glGetUniformLocation(floorProgram, "u_MVP");floorLightPosParam = GLES20.glGetUniformLocation(floorProgram, "u_LightPos");floorPositionParam = GLES20.glGetAttribLocation(floorProgram, "a_Position");floorNormalParam = GLES20.glGetAttribLocation(floorProgram, "a_Normal");floorColorParam = GLES20.glGetAttribLocation(floorProgram, "a_Color");checkGLError("Floor program params");Matrix.setIdentityM(modelFloor, 0);Matrix.translateM(modelFloor, 0, 0, -floorDepth, 0); // Floor appears below user.// Avoid any delays during start-up due to decoding of sound files.new Thread(new Runnable() {@Overridepublic void run() {// Start spatial audio playback of OBJECT_SOUND_FILE at the model position. The// returned sourceId handle is stored and allows for repositioning the sound object// whenever the cube position changes.gvrAudioEngine.preloadSoundFile(OBJECT_SOUND_FILE);sourceId = gvrAudioEngine.createSoundObject(OBJECT_SOUND_FILE);gvrAudioEngine.setSoundObjectPosition(sourceId, modelPosition[0], modelPosition[1], modelPosition[2]);gvrAudioEngine.playSound(sourceId, true /* looped playback */);// Preload an unspatialized sound to be played on a successful trigger on the cube.gvrAudioEngine.preloadSoundFile(SUCCESS_SOUND_FILE);}}).start();updateModelPosition();checkGLError("onSurfaceCreated");}/*** 将保存为资源的原始文本文件转换为OpenGL ES着色器。** @param type The type of shader we will be creating.* @param resId The resource ID of the raw text file about to be turned into a shader.* @return The shader object handler.*/private int loadGLShader(int type, int resId) {String code = readRawTextFile(resId);int shader = GLES20.glCreateShader(type);GLES20.glShaderSource(shader, code);GLES20.glCompileShader(shader);// Get the compilation status.final int[] compileStatus = new int[1];GLES20.glGetShaderiv(shader, GLES20.GL_COMPILE_STATUS, compileStatus, 0);// If the compilation failed, delete the shader.if (compileStatus[0] == 0) {Log.e(TAG, "Error compiling shader: " + GLES20.glGetShaderInfoLog(shader));GLES20.glDeleteShader(shader);shader = 0;}if (shader == 0) {throw new RuntimeException("Error creating shader.");}return shader;}/*** 检查我们在OpenGL ES中是否有错误,假设有错误查看错误。** @param label Label to report in case of error.*/private static void checkGLError(String label) {int error;while ((error = GLES20.glGetError()) != GLES20.GL_NO_ERROR) {Log.e(TAG, label + ": glError " + error);throw new RuntimeException(label + ": glError " + error);}}/*** 更新立方体的位置。*/protected void updateModelPosition() {Matrix.setIdentityM(modelCube, 0);Matrix.translateM(modelCube, 0, modelPosition[0], modelPosition[1], modelPosition[2]);// Update the sound location to match it with the new cube position.if (sourceId != GvrAudioEngine.INVALID_ID) {gvrAudioEngine.setSoundObjectPosition(sourceId, modelPosition[0], modelPosition[1], modelPosition[2]);}checkGLError("updateCubePosition");}/*** 将原始文本文件转换为字符串。** @param resId 要转换为着色器的原始文本文件的资源ID。* @return 文本文件的上下文。或者在出现错误的情况下为null。*/private String readRawTextFile(int resId) {InputStream inputStream = getResources().openRawResource(resId);try {BufferedReader reader = new BufferedReader(new InputStreamReader(inputStream));StringBuilder sb = new StringBuilder();String line;while ((line = reader.readLine()) != null) {sb.append(line).append("\n");}reader.close();return sb.toString();} catch (IOException e) {e.printStackTrace();}return null;}/*** 在绘制视图之前准备OpenGL ES。** @param headTransform 新帧中的头变换。*/@Overridepublic void onNewFrame(HeadTransform headTransform) {setCubeRotation();// Build the camera matrix and apply it to the ModelView.Matrix.setLookAtM(camera, 0, 0.0f, 0.0f, CAMERA_Z, 0.0f, 0.0f, 0.0f, 0.0f, 1.0f, 0.0f);headTransform.getHeadView(headView, 0);// Update the 3d audio engine with the most recent head rotation.headTransform.getQuaternion(headRotation, 0);gvrAudioEngine.setHeadRotation(headRotation[0], headRotation[1], headRotation[2], headRotation[3]);// Regular update call to GVR audio engine.gvrAudioEngine.update();checkGLError("onReadyToDraw");}/*** 设置立方体旋转矩阵*/protected void setCubeRotation() {Matrix.rotateM(modelCube, 0, TIME_DELTA, 0.5f, 0.5f, 1.0f);}/*** 为我们的视野画每一帧图。** @param eye 视图呈现。 包含全部必需的转换。*/@Overridepublic void onDrawEye(Eye eye) {GLES20.glEnable(GLES20.GL_DEPTH_TEST);GLES20.glClear(GLES20.GL_COLOR_BUFFER_BIT | GLES20.GL_DEPTH_BUFFER_BIT);checkGLError("colorParam");// Apply the eye transformation to the camera.Matrix.multiplyMM(view, 0, eye.getEyeView(), 0, camera, 0);// Set the position of the lightMatrix.multiplyMV(lightPosInEyeSpace, 0, view, 0, LIGHT_POS_IN_WORLD_SPACE, 0);// Build the ModelView and ModelViewProjection matrices// for calculating cube position and light.float[] perspective = eye.getPerspective(Z_NEAR, Z_FAR);Matrix.multiplyMM(modelView, 0, view, 0, modelCube, 0);Matrix.multiplyMM(modelViewProjection, 0, perspective, 0, modelView, 0);drawCube();// Set modelView for the floor, so we draw floor in the correct locationMatrix.multiplyMM(modelView, 0, view, 0, modelFloor, 0);Matrix.multiplyMM(modelViewProjection, 0, perspective, 0, modelView, 0);drawFloor();}@Overridepublic void onFinishFrame(Viewport viewport) {}/*** 绘制立方体。* <p>* <p>设置了全部的转换矩阵。简单地将它们传递给着色器。*/public void drawCube() {GLES20.glUseProgram(cubeProgram);GLES20.glUniform3fv(cubeLightPosParam, 1, lightPosInEyeSpace, 0);// Set the Model in the shader, used to calculate lightingGLES20.glUniformMatrix4fv(cubeModelParam, 1, false, modelCube, 0);// Set the ModelView in the shader, used to calculate lightingGLES20.glUniformMatrix4fv(cubeModelViewParam, 1, false, modelView, 0);// Set the position of the cubeGLES20.glVertexAttribPointer(cubePositionParam, COORDS_PER_VERTEX, GLES20.GL_FLOAT, false, 0, cubeVertices);// Set the ModelViewProjection matrix in the shader.GLES20.glUniformMatrix4fv(cubeModelViewProjectionParam, 1, false, modelViewProjection, 0);// Set the normal positions of the cube, again for shadingGLES20.glVertexAttribPointer(cubeNormalParam, 3, GLES20.GL_FLOAT, false, 0, cubeNormals);GLES20.glVertexAttribPointer(cubeColorParam, 4, GLES20.GL_FLOAT, false, 0,isLookingAtObject() ? cubeFoundColors : cubeColors);// Enable vertex arraysGLES20.glEnableVertexAttribArray(cubePositionParam);GLES20.glEnableVertexAttribArray(cubeNormalParam);GLES20.glEnableVertexAttribArray(cubeColorParam);GLES20.glDrawArrays(GLES20.GL_TRIANGLES, 0, 36);// Disable vertex arraysGLES20.glDisableVertexAttribArray(cubePositionParam);GLES20.glDisableVertexAttribArray(cubeNormalParam);GLES20.glDisableVertexAttribArray(cubeColorParam);checkGLError("Drawing cube");}/*** 画地板。* <p>* <p>这将底层的数据馈入着色器。注意。这不会输入关于灯的位置的数据,因此。假设我们重写我们的代码来绘制地板。照明可能* 看起来非常奇怪。*/public void drawFloor() {GLES20.glUseProgram(floorProgram);// Set ModelView, MVP, position, normals, and color.GLES20.glUniform3fv(floorLightPosParam, 1, lightPosInEyeSpace, 0);GLES20.glUniformMatrix4fv(floorModelParam, 1, false, modelFloor, 0);GLES20.glUniformMatrix4fv(floorModelViewParam, 1, false, modelView, 0);GLES20.glUniformMatrix4fv(floorModelViewProjectionParam, 1, false, modelViewProjection, 0);GLES20.glVertexAttribPointer(floorPositionParam, COORDS_PER_VERTEX, GLES20.GL_FLOAT, false, 0, floorVertices);GLES20.glVertexAttribPointer(floorNormalParam, 3, GLES20.GL_FLOAT, false, 0, floorNormals);GLES20.glVertexAttribPointer(floorColorParam, 4, GLES20.GL_FLOAT, false, 0, floorColors);GLES20.glEnableVertexAttribArray(floorPositionParam);GLES20.glEnableVertexAttribArray(floorNormalParam);GLES20.glEnableVertexAttribArray(floorColorParam);GLES20.glDrawArrays(GLES20.GL_TRIANGLES, 0, 24);GLES20.glDisableVertexAttribArray(floorPositionParam);GLES20.glDisableVertexAttribArray(floorNormalParam);GLES20.glDisableVertexAttribArray(floorColorParam);checkGLError("drawing floor");}/*** 当点击或拉动Cardboard触发器时调用。*/@Overridepublic void onCardboardTrigger() {Log.i(TAG, "onCardboardTrigger");if (isLookingAtObject()) {successSourceId = gvrAudioEngine.createStereoSound(SUCCESS_SOUND_FILE);gvrAudioEngine.playSound(successSourceId, false /* looping disabled */);hideObject();}// Always give user feedback.vibrator.vibrate(50);}/*** 方法作用:隐藏物体即为对象找到一个新的随机位置。* <p>* 方法说明:我们将环绕Y轴旋转它,使它看不见,然后向上或向下一点点。*/protected void hideObject() {float[] rotationMatrix = new float[16];float[] posVec = new float[4];// First rotate in XZ plane, between 90 and 270 deg away, and scale so that we vary// the object's distance from the user.float angleXZ = (float) Math.random() * 180 + 90;Matrix.setRotateM(rotationMatrix, 0, angleXZ, 0f, 1f, 0f);float oldObjectDistance = objectDistance;objectDistance =(float) Math.random() * (MAX_MODEL_DISTANCE - MIN_MODEL_DISTANCE) + MIN_MODEL_DISTANCE;float objectScalingFactor = objectDistance / oldObjectDistance;Matrix.scaleM(rotationMatrix, 0, objectScalingFactor, objectScalingFactor, objectScalingFactor);Matrix.multiplyMV(posVec, 0, rotationMatrix, 0, modelCube, 12);float angleY = (float) Math.random() * 80 - 40; // Angle in Y plane, between -40 and 40.angleY = (float) Math.toRadians(angleY);float newY = (float) Math.tan(angleY) * objectDistance;modelPosition[0] = posVec[0];modelPosition[1] = newY;modelPosition[2] = posVec[2];updateModelPosition();}/*** 通过计算对象在眼睛空间中的位置来检查用户是否正在查看对象。** @return 假设用户正在查看对象。则为true。*/private boolean isLookingAtObject() {// Convert object space to camera space. Use the headView from onNewFrame.Matrix.multiplyMM(modelView, 0, headView, 0, modelCube, 0);Matrix.multiplyMV(tempPosition, 0, modelView, 0, POS_MATRIX_MULTIPLY_VEC, 0);float pitch = (float) Math.atan2(tempPosition[1], -tempPosition[2]);float yaw = (float) Math.atan2(tempPosition[0], -tempPosition[2]);return Math.abs(pitch) < PITCH_LIMIT && Math.abs(yaw) < YAW_LIMIT;}
五.GitHub
【Android开发VR实战】三.开发一个寻宝类VR游戏TreasureHunt的更多相关文章
- Cocos2dx游戏开发系列笔记13:一个横版拳击游戏Demo完结篇
懒骨头(http://blog.csdn.net/iamlazybone QQ:124774397 ) 写下这些东西的同时 旁边放了两部电影 周星驰的<还魂夜> 甄子丹的<特殊身份& ...
- 《ASP.NET Core应用开发入门教程》与《ASP.NET Core 应用开发项目实战》正式出版
“全书之写印,实系初稿.有时公私琐务猬集,每写一句,三搁其笔:有时兴会淋漓,走笔疾书,絮絮不休:有时意趣萧索,执笔木坐,草草而止.每写一段,自助覆阅,辄摇其首,觉有大不妥者,即贴补重书,故剪刀浆糊乃不 ...
- Unity 游戏开发技巧集锦之制作一个望远镜与查看器摄像机
Unity 游戏开发技巧集锦之制作一个望远镜与查看器摄像机 Unity中制作一个望远镜 本节制作的望远镜,在鼠标左键按下时,看到的视图会变大:当不再按下的时候,会慢慢缩小成原来的视图.游戏中时常出现的 ...
- 【C语言探索之旅】 第一部分第八课:第一个C语言小游戏
内容简介 1.课程大纲 2.第一部分第八课:第一个C语言小游戏 3.第一部分第九课预告: 函数 课程大纲 我们的课程分为四大部分,每一个部分结束后都会有练习题,并会公布答案.还会带大家用C语言编写 ...
- 【Android开发VR实战】二.播放360°全景视频
转载请注明出处:http://blog.csdn.net/linglongxin24/article/details/53924006 本文出自[DylanAndroid的博客] [Android开发 ...
- 浅析Android Camera开发中的三个尺寸和三种变形 (贡献一个自适配Picturesize和Previewsize的工具类)
转至 (http://blog.csdn.net/yanzi1225627/article/details/17652643) 经常听人问Camera开发中,各种变形问题,今天有空就在此梳理总结下. ...
- Android快乐贪吃蛇游戏实战项目开发教程-01项目概述与目录
一.项目简介 贪吃蛇是一个很经典的游戏,也很适合用来学习.本教程将和大家一起做一个Android版的贪吃蛇游戏. 我已经将做好的案例上传到了应用宝,无病毒.无广告,大家可以放心下载下来把玩一下.应用宝 ...
- android游戏物理引擎开发——粒子系统(三)
生病了,医院躺了几天,动了个小手术,动手术之后的几天在医院看了几本<大众软件>,又想到自己必须得买台台式机了,这破笔记本实在用不下去了,然后开始喜欢看些硬件的东西,等我熟悉了以后,写几个硬 ...
- 玩转Android之MVVM开发模式实战,炫酷的DataBinding!
C# 很早就有了MVVM的开发模式,Android手机中的MVVM一直到去年Google的I\O大会上才推出,姗姗来迟.MVVM这中开发模式的优点自不必多说,可以实现视图和逻辑代码的解耦,而且,按照G ...
随机推荐
- [laravel]用户异地登录后踢掉之前的登录
不同用户和服务器之间由一个唯一的session来区分,但是一般情况下不同的session对应的用户model可以是同一个. 为了实现只能同时在一个地方登陆,可以在用户的字段里增加一个last_sess ...
- (一)Python 学习第一天--基础知识,列表
1. .pyc文件 .pyc文件:在python3中,当模块运行时会自动生成在_pycache_文件夹中,其中c为compiled的缩写. Python是一门现编译后解释的语言,在运行时首先寻找.py ...
- C# textbox 获得焦点
this.ActiveControl = txt_core;
- 基于python xlsxwriter、xlrd 生成测试报告
import xlsxwriter,xlrd ''' 思路: 1.获取数据 2.整合数据 3.写入文件 ''' #筛选 def filt(category,table,filt_name=None,r ...
- 取三级分销上下级用户id
//取上三级的用户idpublic function _get_up_third_id($member_id){ $up_id=array(); $invite_id=dbselect('invite ...
- S-HR之OSF
1):getWorkDayCount ->ArrayList data = (ArrayList) com.kingdee.shr.rpts.ctrlreport.osf.OSFExecutor ...
- 奇怪的print progname ":\n"日志
[root@xxxxxxxx /home/ahao.mah] #tail /var/log/messages -f Feb 10 10:01:01 csaccurate-49-5011 } Feb 1 ...
- json 添加 和删除两种方法
<script> var test = { name: "name", age: "12" }; var countrys = { "ne ...
- 使用官方组件下载图片,保存到MySQL数据库,保存到MongoDB数据库
需要学习的地方,使用官方组件下载图片的用法,保存item到MySQL数据库 需要提前创建好MySQL数据库,根据item.py文件中的字段信息创建相应的数据表 1.items.py文件 from sc ...
- 《零压力学Python》 之 第二章知识点归纳
第二章(数字)知识点归纳 要生成非常大的数字,最简单的办法是使用幂运算符,它由两个星号( ** )组成. 如: 在Python中,整数是绝对精确的,这意味着不管它多大,加上1后都将得到一个新的值.你将 ...