源码安装LNMP环境
新装CentOS 6.7,安装默认服务版本basic server
安装顺序linux(忽略...)--> Nginx--> Mariadb--> PHP
为了不影响测试效果,首先关闭selinux及iptables。校对系统时间。
iptables -F

chkconfig iptables off

vi /etc/selinux/config

将

     SELINUX=enforcing

更改为

     SELINUX=disabled

修改时区

cp /usr/share/zoneinfo/Asia/Shanghai /etc/localtime

安装rz上传组件:

yum install lrzsz -y
1、安装Nginx:
安装依赖,新建文件夹,rz上传nginx安装包。
mkdir packet

cd packet/
groupadd -r nginx

useradd -r -g nginx nginx
tar xf nginx-1.11.5.tar.gz

cd nginx-1.11.5

./configure --prefix=/usr/local/nginx   --sbin-path=/usr/local/nginx/sbin/nginx   --conf-path=/etc/nginx/nginx.conf   --error-log-path=/var/log/nginx/error.log   --http-log-path=/var/log/nginx/access.log   --pid-path=/var/run/nginx/nginx.pid    --lock-path=/var/lock/nginx.lock   --user=nginx   --group=nginx   --with-http_ssl_module   --with-http_flv_module   --with-http_stub_status_module   --with-http_gzip_static_module   --http-client-body-temp-path=/var/tmp/nginx/client/   --http-proxy-temp-path=/var/tmp/nginx/proxy/   --http-fastcgi-temp-path=/var/tmp/nginx/fcgi/   --http-uwsgi-temp-path=/var/tmp/nginx/uwsgi   --http-scgi-temp-path=/var/tmp/nginx/scgi   --with-pcre

make && make install
nginx="/usr/local/nginx/sbin/nginx" (configure参数中--sbin-path参数)

NGINX_CONF_FILE="/etc/nginx/nginx.conf"(nginx配置文件,configure参数中 --conf-path参数)

vi /etc/rc.d/init.d/nginx

#!/bin/sh

#

# nginx - this script starts and stops the nginx daemon

#

# chkconfig:   - 85 15

# description:  Nginx is an HTTP(S) server, HTTP(S) reverse \

#               proxy and IMAP/POP3 proxy server

# processname: nginx

# config:      /etc/nginx/nginx.conf

# config:      /etc/sysconfig/nginx

# pidfile:     /var/run/nginx.pid

# Source function library.

. /etc/rc.d/init.d/functions

# Source networking configuration.

. /etc/sysconfig/network

# Check that networking is up.

[ "$NETWORKING" = "no" ] && exit 0

nginx="/usr/local/nginx/sbin/nginx"

prog=$(basename $nginx)

NGINX_CONF_FILE="/etc/nginx/nginx.conf"

[ -f /etc/sysconfig/nginx ] && . /etc/sysconfig/nginx

lockfile=/var/lock/subsys/nginx

make_dirs() {

   # make required directories

   user=`$nginx -V 2>&1 | grep "configure arguments:" | sed 's/[^*]*--user=\([^ ]*\).*/\1/g' -`

   options=`$nginx -V 2>&1 | grep 'configure arguments:'`

   for opt in $options; do

       if [ `echo $opt | grep '.*-temp-path'` ]; then

           value=`echo $opt | cut -d "=" -f 2`

           if [ ! -d "$value" ]; then

               # echo "creating" $value

               mkdir -p $value && chown -R $user $value

           fi

       fi

   done

}

start() {

    [ -x $nginx ] || exit 5

    [ -f $NGINX_CONF_FILE ] || exit 6

    make_dirs

    echo -n $"Starting $prog: "

    daemon $nginx -c $NGINX_CONF_FILE

    retval=$?

    echo

    [ $retval -eq 0 ] && touch $lockfile

    return $retval

}

stop() {

    echo -n $"Stopping $prog: "

    killproc $prog -QUIT

    retval=$?

    echo

    [ $retval -eq 0 ] && rm -f $lockfile

    return $retval

}

restart() {

    configtest || return $?

    stop

    sleep 1

    start

}

reload() {

    configtest || return $?

    echo -n $"Reloading $prog: "

    killproc $nginx -HUP

    RETVAL=$?

    echo

}

force_reload() {

    restart

}

configtest() {

  $nginx -t -c $NGINX_CONF_FILE

}

rh_status() {

    status $prog

}

rh_status_q() {

    rh_status >/dev/null 2>&1

}

case "$1" in

    start)

        rh_status_q && exit 0

        $1

        ;;

    stop)

        rh_status_q || exit 0

        $1

        ;;

    restart|configtest)

        $1

        ;;

    reload)

        rh_status_q || exit 7

        $1

        ;;

    force-reload)

        force_reload

        ;;

    status)

        rh_status

        ;;

    condrestart|try-restart)

        rh_status_q || exit 0

            ;;

    *)

        echo $"Usage: $0 {start|stop|status|restart|condrestart|try-restart|reload|force-reload|configtest}"

        exit 2

esac
chmod +x /etc/rc.d/init.d/nginx
chkconfig --add nginx

chkconfig nginx on

service nginx start
mkdir -p /mydata/data

fdisk /dev/sdb
mkfs.ext4 /dev/sdb1
vi /etc/fstab

/dev/sdb1               /mydata/data            ext4    defaults        0 0

挂载

mount -a
groupadd -r mysql

useradd -g mysql -r -s /sbin/nologin -M -d /mydata/data mysql
tar xf mariadb-10.1.18-linux-x86_64.tar.gz

ln -sv /root/packet/mariadb-10.1.18-linux-x86_64 /usr/local/mysql
cd /usr/local/mysql
chown -R mysql:mysql .
scripts/mysql_install_db --user=mysql --datadir=/mydata/data
chown -R root .
cp /usr/local/mysql/support-files/my-large.cnf /etc/my.cnf
vi /etc/my.cnf

# Try number of CPU's*2 for thread_concurrency (CPU数量*2)

thread_concurrency = 2

datadir = /mydata/data
cp /usr/local/mysql/support-files/mysql.server /etc/rc.d/init.d/mysqld

chkconfig --add mysqld

chkconfig mysqld on
vi /etc/man.config

新增行

MANPATH  /usr/local/mysql/man
mysql的头文件输出至系统的头文件
ln -sv /usr/local/mysql/include /usr/include/mysql
echo '/usr/local/mysql/lib' > /etc/ld.so.conf.d/mysql.conf
ldconfig
vi /etc/profile

末尾新增行

PATH=/usr/local/mysql/bin:$PATH

export PATH
source /etc/profile
service mysqld start
yum -y groupinstall "X Software Development"

yum -y install libxml2 libxml2-devel bzip2-devel curl-devel libjpeg-devel libpng-devel freetype-devel
rz上传php,解压并编译安装
tar xf php-5.6.27.tar.bz2

cd php-5.6.27

./configure --prefix=/usr/local/php --with-config-file-path=/etc --with-bz2 --with-curl --enable-ftp --enable-sockets --disable-ipv6 --with-gd --with-jpeg-dir=/usr/local --with-png-dir=/usr/local --with-freetype-dir=/usr/local --enable-gd-native-ttf --with-iconv-dir=/usr/local --enable-mbstring --enable-calendar --with-gettext --with-libxml-dir=/usr/local --with-zlib --with-pdo-mysql=mysqlnd --with-mysqli=mysqlnd --with-mysql=mysqlnd --enable-dom --enable-xml --enable-fpm --with-libdir=lib64 --enable-bcmath

make && make test && make install
cp packet/php-5.6.27/php.ini-production /etc/php.ini
cp packet/php-5.6.27/sapi/fpm/init.d.php-fpm /etc/rc.d/init.d/php-fpm

chmod +x /etc/rc.d/init.d/php-fpm

chkconfig --add php-fpm

chkconfig php-fpm on
cp /usr/local/php/etc/php-fpm.conf.default /usr/local/php/etc/php-fpm.conf
vi /usr/local/php/etc/php-fpm.conf

pm.max_children = 150

pm.start_servers = 8

pm.min_spare_servers = 5

pm.max_spare_servers = 10

pid = /usr/local/php/var/run/php-fpm.pid
service php-fpm start
vi /etc/nginx/nginx.conf

添加index.php

 location / {

            root   html;

            index  index.html index.htm index.php;

        }

启用php

location ~ \.php$ {

            root           html;

            fastcgi_pass   127.0.0.1:9000;

            fastcgi_index  index.php;

            fastcgi_param  SCRIPT_FILENAME  /scripts$fastcgi_script_name;

            include        fastcgi_params;

        }
vi /etc/nginx/fastcgi_params

fastcgi_param  GATEWAY_INTERFACE  CGI/1.1;

fastcgi_param  SERVER_SOFTWARE    nginx;

fastcgi_param  QUERY_STRING       $query_string;

fastcgi_param  REQUEST_METHOD     $request_method;

fastcgi_param  CONTENT_TYPE       $content_type;

fastcgi_param  CONTENT_LENGTH     $content_length;

fastcgi_param  SCRIPT_FILENAME    $document_root$fastcgi_script_name;

fastcgi_param  SCRIPT_NAME        $fastcgi_script_name;

fastcgi_param  REQUEST_URI        $request_uri;

fastcgi_param  DOCUMENT_URI       $document_uri;

fastcgi_param  DOCUMENT_ROOT      $document_root;

fastcgi_param  SERVER_PROTOCOL    $server_protocol;

fastcgi_param  REMOTE_ADDR        $remote_addr;

fastcgi_param  REMOTE_PORT        $remote_port;

fastcgi_param  SERVER_ADDR        $server_addr;

fastcgi_param  SERVER_PORT        $server_port;

fastcgi_param  SERVER_NAME        $server_name;
service nginx reload
cd /usr/local/nginx/ html/
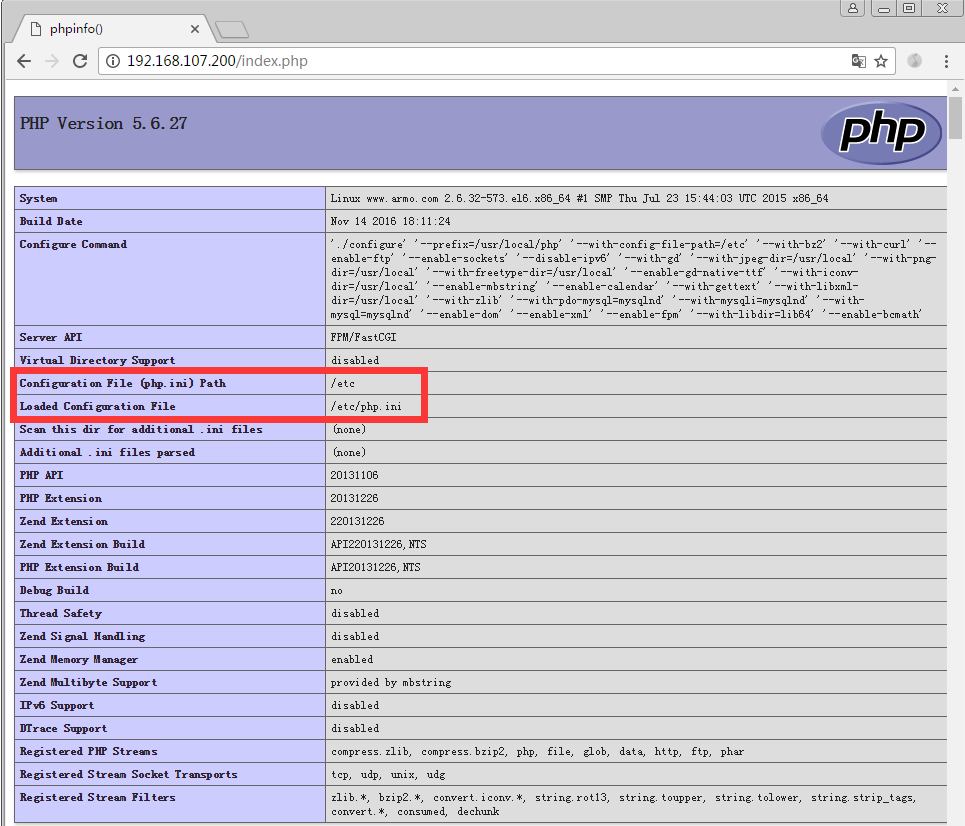
vi index.php
<?php
phpinfo();
?>
[root@localhost ~]# netstat -antp

Active Internet connections (servers and established)

Proto Recv-Q Send-Q Local Address               Foreign Address             State       PID/Program name

tcp        0      0 127.0.0.1:9000              0.0.0.0:*                   LISTEN      2201/php-fpm

tcp        0      0 0.0.0.0:80                  0.0.0.0:*                   LISTEN      2715/nginx

tcp        0      0 127.0.0.1:34197             0.0.0.0:*                   LISTEN      2903/sshd

tcp        0      0 127.0.0.1:34198             0.0.0.0:*                   LISTEN      2903/sshd

tcp        0      0 0.0.0.0:22                  0.0.0.0:*                   LISTEN      2225/sshd

tcp        0      0 127.0.0.1:631               0.0.0.0:*                   LISTEN      2020/cupsd

tcp        0      0 127.0.0.1:25                0.0.0.0:*                   LISTEN      2585/master

tcp        0      0 172.28.1.8:10051            172.28.1.5:51231            TIME_WAIT   -

tcp        0     52 172.28.1.8:22               172.28.1.5:51242            ESTABLISHED 2903/sshd

tcp        0      0 :::3306                     :::*                        LISTEN      2444/mysqld

tcp        0      0 ::1:34197                   :::*                        LISTEN      2903/sshd

tcp        0      0 ::1:34198                   :::*                        LISTEN      2903/sshd

tcp        0      0 :::22                       :::*                        LISTEN      2225/sshd

tcp        0      0 ::1:631                     :::*                        LISTEN      2020/cupsd

tcp        0      0 ::1:25                      :::*                        LISTEN      2585/master

[root@localhost ~]#

源码安装LNMP环境的更多相关文章
- ubuntu 源码安装 lnmp 环境
准备篇 下载软件包 1.下载nginx http://nginx.org/download/nginx-1.2.0.tar.gz 2.下载pcre (支持nginx伪静态) ftp://ftp.cs ...
- linux 手动源码安装lnmp(亲测)
linux 手动源码安装lnmp笔记(亲测)<pre>先安装这2个yum install gccyum install g++</pre><pre>先在linux ...
- CENTOS6.5源码安装LNMP
CENTOS6.5源码安装LNMP 一.安装前准备 ########################################################################## ...
- 在CENTOS上源码搭建LNMP环境
前言 1.操作前提: CentOS Linux release 7.5.1804: sudo用户(需要root权限): 2.需要安装的组件: nginx稳定版:nginx-1.14.0: MariaD ...
- 终于完成了 源码 编译lnmp环境
经过了大概一个星期的努力,终于按照海生的编译流程将lnmp环境源码安装出来了 nginx 和php 主要参考 http://hessian.cn/p/1273.html mysql 主要参考 http ...
- 源码安装LNMP与搭建Zabbix
系统环境:CentOS release 6.5 (Final) 搭建Zabbix 3.0对PHP环境要求>= 5.4 一.下载NMP的软件包: N:wget http://nginx.org/d ...
- 用源码搭建LNMP环境+部署WordPress
首先要做的是就是关闭Centos7.4的防火墙及selinux #systemctl stop firewalld #systemctl disable firewalld #sed -ri 's/^ ...
- CentOS 7 源码搭建LNMP环境
搭建 LNMP 环境 源码包版本 : CentOS Linux 7 nginx-1.15.1.tar.gz mysql-boost-5.7.21.tar.gz php-7.2.7.tar.gz ...
- CentOS 下源码安装LAMP环境
一.简介 什么是LAMP LAMP是一种Web网络应用和开发环境,是Linux, Apache, MySQL, Php/Perl的缩写,每一个字母代表了一个组件,每个组件就其本身而言都是在它所代 ...
随机推荐
- [.NET] 《Effective C#》快速笔记 - C# 高效编程要点补充
<Effective C#>快速笔记 - C# 高效编程要点补充 目录 四十五.尽量减少装箱拆箱 四十六.为应用程序创建专门的异常类 四十七.使用强异常安全保证 四十八.尽量使用安全的代码 ...
- Linux下的Jenkins+Tomcat+Maven+Gitlab+Shell环境的搭建使用(jenkins自动化部署)
jenkins自动化部署 目标:jenkins上点构建(也可以自动检查代码变化自动构建)>>>项目部署完成. 一.安装jenkins 1.下载jenkins 这里我选择的是war包安 ...
- JAVA中断机制详解
Java提供了中断机制,可以使用它来结束一个线程.这种机制要求线程检查它是否被中断了,然后决定是不是响应这个中断请求.线程允许忽略中断请求并继续执行.Java的中断是一种协作机制.也就是说调用线程对象 ...
- CompletionService 简介
以下是jdk关于CompletionService的简介: public interface CompletionService<V> 将生产新的异步任务与使用已完成任务的结果分离开来的服 ...
- web乱码解决了
web容易乱码,最近有乱码了,透死了! 搞了半天,终于好了: String comment = new String(request.getParameter("comment") ...
- TCP协议随笔
传输控制协议TCP是面向连接.保证高可靠性(数据无丢失.数据无失序.数据无错误.数据无重复到达)传输层协议.TCP/IP结构对应OSITCP/IP ...
- (HTTPS)web 项目如何实现https
HTTPS实际是SSL over HTTP, 该协议通过SSL在发送方把原始数据进行加密,在接收方解密,因此,所传送的数据不容易被网络黑客截获和破解.本文介绍HTTPS的三种实现方法.方法一 静态超链 ...
- GRPC在NET上的实践(记录篇)
GRPC是什么? GRPC是一个开源RPC框架,于2015年3月开源,其由Google主要面向移动应用开发并基于HTTP/2协议标准而设计,基于Protobuf 3.0(Protocol Buffer ...
- 刨根究底字符编码之五——简体汉字编码方案(GB2312、GBK、GB18030、GB13000)以及全角、半角、CJK
简体汉字编码方案(GB2312.GBK.GB18030.GB13000)以及全角.半角.CJK 一.概述 1. 英文字母再加一些其他标点字符之类的也不会超过256个,用一个字节来表示一个字符就足够 ...
- Principal Components Regression, Pt.1: The Standard Method
In this note, we discuss principal components regression and some of the issues with it: The need fo ...