部署redis4.0-cluster
一、部署环境
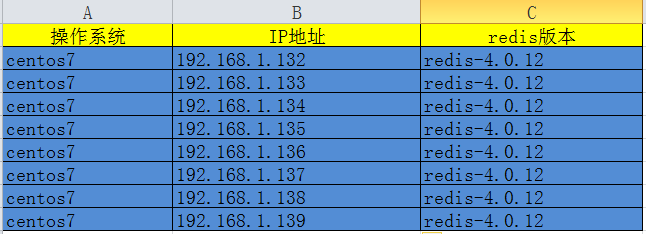
.关闭iptables(firewalld)或添加放行规则

.关闭selinux
3.部署redis实例,参考:https://www.cnblogs.com/panwenbin-logs/p/10242027.html
二、部署Cluster
1.修改redis配置文件,开启cluster(六台机器上)
[root@redis-master ~]# grep "^[a-Z]" /etc/redis/redis_6379.conf #可以直接copy使用

bind 0.0.0.0

protected-mode yes

port

tcp-backlog

timeout

tcp-keepalive

daemonize yes

supervised no

pidfile /var/run/redis_6379.pid

loglevel notice

logfile /var/log/redis/redis_6379.log

databases

always-show-logo yes

save

save

save

stop-writes-on-bgsave-error yes

rdbcompression yes

rdbchecksum yes

dbfilename dump.rdb

dir /var/redis

slave-serve-stale-data yes

slave-read-only yes

repl-diskless-sync no

repl-diskless-sync-delay

repl-disable-tcp-nodelay no

slave-priority

lazyfree-lazy-eviction no

lazyfree-lazy-expire no

lazyfree-lazy-server-del no

slave-lazy-flush no

appendonly yes

appendfilename "appendonly.aof"

appendfsync everysec

no-appendfsync-on-rewrite no

auto-aof-rewrite-percentage

auto-aof-rewrite-min-size 64mb

aof-load-truncated yes

aof-use-rdb-preamble no

lua-time-limit

cluster-enabled yes    #开启cluster

cluster-config-file /etc/redis-cluster/node-.conf  #存放cluster信息

cluster-node-timeout 15000 #节点超时时间

slowlog-log-slower-than

slowlog-max-len

latency-monitor-threshold

notify-keyspace-events ""

hash-max-ziplist-entries

hash-max-ziplist-value

list-max-ziplist-size -

list-compress-depth

set-max-intset-entries

zset-max-ziplist-entries

zset-max-ziplist-value

hll-sparse-max-bytes

activerehashing yes

client-output-buffer-limit normal

client-output-buffer-limit slave 256mb 64mb

client-output-buffer-limit pubsub 32mb 8mb

hz

aof-rewrite-incremental-fsync yes

[root@redis-master ~]# mkdir -p /etc/redis-cluster  #创建cluster和log文件存放目录
[root@redis-master ~# mkdir -p /var/log/redis
2、安装ruby依赖(参考:https://www.cnblogs.com/ding2016/p/7903147.html)
#只需要安装一台服务器即可
[root@redis-master ~]#gpg --keyserver hkp://keys.gnupg.net --recv-keys 409B6B1796C275462A1703113804BB82D39DC0E3 7D2BAF1CF37B13E2069D6956105BD0E739499BDB

[root@redis-master ~]#curl -sSL https://get.rvm.io | bash -s stable

[root@redis-master ~]#source  /etc/profile.d/rvm.sh

[root@redis-master ~]#rvm install 2.2.

[root@redis-master ~]#gem install redis
3、创建cluster(先使用六个节点创建)
[root@redis-master ~]#cd /usr/local/redis-4.0./src/

[root@redis-master ~]# systemctl start redis #启动redis服务器,清空数据

127.0.0.1:>  flushall

OK

127.0.0.1:> cluster reset

OK

127.0.0.1:> exit

[root@redis-master ~]#./redis-trib.rb create --replicas  192.168.1.132: 192.168.1.133: 192.168.1.134: 192.168.1.135: 192.168.1.136: 192.168.1.137:6379 #创建集群

>>> Creating cluster

>>> Performing hash slots allocation on  nodes...

Using  masters:     #显示创建的master及地址

192.168.1.132:

192.168.1.133:

192.168.1.134:

Adding replica 192.168.1.136: to 192.168.1.132:6379   #master对应的slave

Adding replica 192.168.1.137: to 192.168.1.133:

Adding replica 192.168.1.135: to 192.168.1.134:

M: a0fcce870bed5b4d8bc81467e39d55e5ff4be7e8 192.168.1.132:

   slots:- ( slots) master

M: 7e07bd4d8656672b0da7add910bfdba49106def3 192.168.1.133:

   slots:- ( slots) master

M: 0b5efedf68451a48fa40270ff67e84c03faee56e 192.168.1.134:

   slots:- ( slots) master

S: 5b82091b9078ebfb265eedd1b65bf7222a143cd7 192.168.1.135:

   replicates 0b5efedf68451a48fa40270ff67e84c03faee56e

S: e19150bf1bbc621dde7bd94d9efde3170f211591 192.168.1.136:

   replicates a0fcce870bed5b4d8bc81467e39d55e5ff4be7e8

S: 7e9e756bcebe8225089dc8652a60c26522b653ff 192.168.1.137:

   replicates 7e07bd4d8656672b0da7add910bfdba49106def3

Can I set the above configuration? (type 'yes' to accept): yes    #输入yes

>>> Nodes configuration updated

>>> Assign a different config epoch to each node

>>> Sending CLUSTER MEET messages to join the cluster

Waiting for the cluster to join...

>>> Performing Cluster Check (using node 192.168.1.132:)

M: a0fcce870bed5b4d8bc81467e39d55e5ff4be7e8 192.168.1.132:

   slots:- ( slots) master

    additional replica(s)

S: 7e9e756bcebe8225089dc8652a60c26522b653ff 192.168.1.137:

   slots: ( slots) slave

   replicates 7e07bd4d8656672b0da7add910bfdba49106def3

M: 7e07bd4d8656672b0da7add910bfdba49106def3 192.168.1.133:

   slots:- ( slots) master

    additional replica(s)

M: 0b5efedf68451a48fa40270ff67e84c03faee56e 192.168.1.134:

   slots:- ( slots) master

    additional replica(s)

S: 5b82091b9078ebfb265eedd1b65bf7222a143cd7 192.168.1.135:

   slots: ( slots) slave

   replicates 0b5efedf68451a48fa40270ff67e84c03faee56e

S: e19150bf1bbc621dde7bd94d9efde3170f211591 192.168.1.136:

   slots: ( slots) slave

   replicates a0fcce870bed5b4d8bc81467e39d55e5ff4be7e8

[OK] All nodes agree about slots configuration.

>>> Check for open slots...

>>> Check slots coverage...

[OK] All  slots covered.
三、测试cluster相关功能
1、实验多master写入
[root@redis-master ~]# redis-cli -h 192.168.1.132 -p 6379 #连接至一台master上

192.168.1.132:> set k1 v1

(error) MOVED  192.168.1.134:

192.168.1.132:> set k2 v2

OK

192.168.1.132:> set k3 v3

OK

192.168.1.132:> set k4 v4

(error) MOVED  192.168.1.133:

192.168.1.132:> exit

[root@redis-master ~]# redis-cli -h 192.168.1.133 -p 6379 #连接到133上验证132的错误提示

192.168.1.133:> set k1 v1

(error) MOVED  192.168.1.134:

192.168.1.133:> set k4 v4

OK

192.168.1.133:> get k2

(error) MOVED  192.168.1.132:

192.168.1.132:> exit

报错原因:

#在redis cluster写入数据的时候,其实可以将请求发送到任意一个master上去执行

但是,每个master都会计算这个key对应的CRC16值,然后对16384个hashslot取模,找到key对应的hashslot,找到hashslot对应的master

如果对应的master就在自己本地的话,set mykey1 v1,mykey1这个key对应的hashslot就在自己本地,那么自己就处理掉

但是如果计算出来的hashslot在其他master上,那么就会给客户端返回一个moved error,告诉你,你得到哪个master上去执行这条写入的命令

什么叫做多master的写入,就是每条数据只能存在于一个master上,不同的master负责存储不同的数据,分布式的数据存储
2、实验不同master各自的slave读取 -> 读写分离
[root@redis-master ~]# redis-cli -h 192.168.1.132 -p

192.168.1.132:> get k2

"v2"

192.168.1.132:> info replication  #查看自己的slave节点地址

# Replication

role:master

connected_slaves:

slave0:ip=192.168.1.136,port=,state=online,offset=,lag=0  #slave地址

192.168.1.132:> exit

[root@redis-master ~]# redis-cli -h 192.168.1.136 -p 6379 #连接到对应的slave上

192.168.1.136:> get k2

(error) MOVED  192.168.1.132:

192.168.1.136:> readonly   #如果slave节点需要可以查询数据,需要设置readonly

OK

192.168.1.136:> get k2

"v2"

[root@redis-master ~]# redis-cli -c -h 192.168.1.132 -p 6379   #使用-c参数,可以让cluster自动进行命令重定向的操作

192.168.1.132:> set k1 va

-> Redirected to slot [] located at 192.168.1.134:

OK

#在redis cluster中,如果你要在slave读取数据,那么需要带上readonly指令,get k2

redis-cli -c启动,就会自动进行各种底层的重定向的操作

实验redis cluster的读写分离的时候,会发现有一定的限制性,默认情况下,redis cluster的核心的理念,主要是用slave做高可用的,每个master挂一两个slave,主要是做数据的热备,还有master故障时的主备切换,实现高可用的

redis cluster默认是不支持slave节点读或者写的,跟我们手动基于replication搭建的主从架构不一样的

slave node,readonly,get,这个时候才能在slave node进行读取,默认的话就是读和写都到master上去执行的

核心的思路,就是说,redis cluster的时候,就没有所谓的读写分离的概念了

读写分离,是为了什么,主要是因为要建立一主多从的架构,才能横向任意扩展slave node去支撑更大的读吞吐量

redis cluster的架构下,实际上本身master就是可以任意扩展的,你如果要支撑更大的读吞吐量,或者写吞吐量,或者数据量,都可以直接对master进行横向扩展就可以了

也可以实现支撑更高的读吞吐的效果
3、实验自动故障切换 -> 高可用性
[root@redis-master src]# redis-trib.rb check 192.168.1.132:6379 #检查集群的信息

[root@redis-master ~]# redis-cli -h 192.168.1.132 -p

192.168.1.132:> info replication #查看对应的slaveIP

192.168.1.132:> exit

[root@redis-master src]# redis-trib.rb check 192.168.1.132:

>>> Performing Cluster Check (using node 192.168.1.132:)

M: a0fcce870bed5b4d8bc81467e39d55e5ff4be7e8 192.168.1.132:

   slots:- ( slots) master

    additional replica(s)

S: 7e9e756bcebe8225089dc8652a60c26522b653ff 192.168.1.137:

   slots: ( slots) slave

   replicates 7e07bd4d8656672b0da7add910bfdba49106def3

M: 7e07bd4d8656672b0da7add910bfdba49106def3 192.168.1.133:

   slots:- ( slots) master

    additional replica(s)

M: 0b5efedf68451a48fa40270ff67e84c03faee56e 192.168.1.134:

   slots:- ( slots) master

    additional replica(s)

S: 5b82091b9078ebfb265eedd1b65bf7222a143cd7 192.168.1.135:

   slots: ( slots) slave

   replicates 0b5efedf68451a48fa40270ff67e84c03faee56e

S: e19150bf1bbc621dde7bd94d9efde3170f211591 192.168.1.136:

   slots: ( slots) slave

   replicates a0fcce870bed5b4d8bc81467e39d55e5ff4be7e8

[OK] All nodes agree about slots configuration.

>>> Check for open slots...

>>> Check slots coverage...

[OK] All  slots covered.

[root@redis-master src]# ps aux|grep redis-server  #查看redis服务的进程

[root@redis-master src]# kill - 24778   #暴力杀敌redis进程

[root@redis-master src]# redis-trib.rb check 192.168.1.133:6379  #再次检查,发现cluster只有五台机器,3主2从,没有了132

>>> Performing Cluster Check (using node 192.168.1.133:)

M: 7e07bd4d8656672b0da7add910bfdba49106def3 192.168.1.133:

   slots:- ( slots) master

    additional replica(s)

M: e19150bf1bbc621dde7bd94d9efde3170f211591 192.168.1.136:

   slots:- ( slots) master

    additional replica(s)

S: 7e9e756bcebe8225089dc8652a60c26522b653ff 192.168.1.137:

   slots: ( slots) slave

   replicates 7e07bd4d8656672b0da7add910bfdba49106def3

M: 0b5efedf68451a48fa40270ff67e84c03faee56e 192.168.1.134:

   slots:- ( slots) master

    additional replica(s)

S: 5b82091b9078ebfb265eedd1b65bf7222a143cd7 192.168.1.135:

   slots: ( slots) slave

   replicates 0b5efedf68451a48fa40270ff67e84c03faee56e

[OK] All nodes agree about slots configuration.

>>> Check for open slots...

>>> Check slots coverage...

[OK] All  slots covered.

[root@redis-master src]# systemctl start redis  #启动132上的redis服务

[root@redis-master src]# redis-trib.rb check 192.168.1.133:6379  #在查看cluster的信息,发现变成了6台,并且132变成了slave

>>> Performing Cluster Check (using node 192.168.1.133:)

M: 7e07bd4d8656672b0da7add910bfdba49106def3 192.168.1.133:

   slots:- ( slots) master

    additional replica(s)

M: e19150bf1bbc621dde7bd94d9efde3170f211591 192.168.1.136:

   slots:- ( slots) master

    additional replica(s)

S: a0fcce870bed5b4d8bc81467e39d55e5ff4be7e8 192.168.1.132:

   slots: ( slots) slave

   replicates e19150bf1bbc621dde7bd94d9efde3170f211591

S: 7e9e756bcebe8225089dc8652a60c26522b653ff 192.168.1.137:

   slots: ( slots) slave

   replicates 7e07bd4d8656672b0da7add910bfdba49106def3

M: 0b5efedf68451a48fa40270ff67e84c03faee56e 192.168.1.134:

   slots:- ( slots) master

    additional replica(s)

S: 5b82091b9078ebfb265eedd1b65bf7222a143cd7 192.168.1.135:

   slots: ( slots) slave

   replicates 0b5efedf68451a48fa40270ff67e84c03faee56e

[OK] All nodes agree about slots configuration.

>>> Check for open slots...

>>> Check slots coverage...

[OK] All  slots covered.

[root@redis-master src]# redis-cli -c -h 192.168.1.136 -p 6379  #到136上直接获取数据,确定切换为master,并且salve为132

192.168.1.136:> get k2

"v2"

192.168.1.136:> info replication

# Replication

role:master

connected_slaves:

slave0:ip=192.168.1.132,port=,state=online,offset=,lag=

master_replid:273f9539af4494673bfbaf71bb71e94e952c6865

master_replid2:a4fec1a5828ac30ba00db05d81a469eee725032b

master_repl_offset:

second_repl_offset:

repl_backlog_active:

repl_backlog_size:

repl_backlog_first_byte_offset:

repl_backlog_histlen:
四、redis cluster通过master水平扩容
1、加入138到cluster
[root@redis-master src]# redis-trib.rb add-node 192.168.1.138: 192.168.1.132: #将138加入集群,从132获取cluster元数据信息

>>> Adding node 192.168.1.138: to cluster 192.168.1.132:

>>> Performing Cluster Check (using node 192.168.1.132:)

S: a0fcce870bed5b4d8bc81467e39d55e5ff4be7e8 192.168.1.132:

   slots: ( slots) slave

   replicates e19150bf1bbc621dde7bd94d9efde3170f211591

S: 5b82091b9078ebfb265eedd1b65bf7222a143cd7 192.168.1.135:

   slots: ( slots) slave

   replicates 0b5efedf68451a48fa40270ff67e84c03faee56e

M: e19150bf1bbc621dde7bd94d9efde3170f211591 192.168.1.136:

   slots:- ( slots) master

    additional replica(s)

S: 7e9e756bcebe8225089dc8652a60c26522b653ff 192.168.1.137:

   slots: ( slots) slave

   replicates 7e07bd4d8656672b0da7add910bfdba49106def3

M: 7e07bd4d8656672b0da7add910bfdba49106def3 192.168.1.133:

   slots:- ( slots) master

    additional replica(s)

M: 0b5efedf68451a48fa40270ff67e84c03faee56e 192.168.1.134:

   slots:- ( slots) master

    additional replica(s)

[OK] All nodes agree about slots configuration.

>>> Check for open slots...

>>> Check slots coverage...

[OK] All  slots covered.

>>> Send CLUSTER MEET to node 192.168.1.138: to make it join the cluster.

[OK] New node added correctly.

[root@redis-master src]# redis-trib.rb check 192.168.1.132:6379  #检查cluster信息

>>> Performing Cluster Check (using node 192.168.1.132:)

S: a0fcce870bed5b4d8bc81467e39d55e5ff4be7e8 192.168.1.132:

slots: ( slots) slave

replicates e19150bf1bbc621dde7bd94d9efde3170f211591

M: 103de424c55593724ef254221a66bc68ba48ef62 192.168.1.138:6379  #加入成功,但是发现138并没有hash slots,这样无法写入数据

slots: ( slots) master

 additional replica(s)

S: 5b82091b9078ebfb265eedd1b65bf7222a143cd7 192.168.1.135:

slots: ( slots) slave

replicates 0b5efedf68451a48fa40270ff67e84c03faee56e

M: e19150bf1bbc621dde7bd94d9efde3170f211591 192.168.1.136:

slots:- ( slots) master

 additional replica(s)

S: 7e9e756bcebe8225089dc8652a60c26522b653ff 192.168.1.137:

slots: ( slots) slave

replicates 7e07bd4d8656672b0da7add910bfdba49106def3

M: 7e07bd4d8656672b0da7add910bfdba49106def3 192.168.1.133:

slots:- ( slots) master

 additional replica(s)

M: 0b5efedf68451a48fa40270ff67e84c03faee56e 192.168.1.134:

slots:- ( slots) master

 additional replica(s)

[OK] All nodes agree about slots configuration.

>>> Check for open slots...

>>> Check slots coverage...

[OK] All  slots covered.
2、reshard一些数据到138上(这一步不知道实验的时候为什么报错,没有解决)
[root@redis-master src]# redis-trib.rb reshard 192.168.1.132:6379  #使用reshard命令

>>> Performing Cluster Check (using node 192.168.1.132:)

M: 5c4ab42da4058339aa5ae10596f555702545d91a 192.168.1.132:6379

   slots:- ( slots) master

    additional replica(s)

M: 9eed259aaee23f53177efc854541c3df4d7d08a8 192.168.1.138:

   slots: ( slots) master

    additional replica(s)

S: c84b6383c8970a8bf4dd04893b8bad89104b1656 192.168.1.137:

   slots: ( slots) slave

   replicates f0cab6c760f6e4c9e5dc5ea227b165c7efc33163

S: bed6c13d89f5c6f6baecf45a70ff15c6c12b80c2 192.168.1.136:

   slots: ( slots) slave

   replicates 5c4ab42da4058339aa5ae10596f555702545d91a

M: f0cab6c760f6e4c9e5dc5ea227b165c7efc33163 192.168.1.133:

   slots:- ( slots) master

    additional replica(s)

S: 0c0739812a07c83e3d6d8bda4c9ccfd9f1f3ae14 192.168.1.135:

   slots: ( slots) slave

   replicates 4000b2e02bc64d8ae327393373c9358f802a1dac

M: 4000b2e02bc64d8ae327393373c9358f802a1dac 192.168.1.134:

   slots:- ( slots) master

    additional replica(s)

[OK] All nodes agree about slots configuration.

>>> Check for open slots...

>>> Check slots coverage...

[OK] All  slots covered.

How many slots do you want to move (from  to )? 4096      #相应移动的slots的个数,16384/4=4096 (Totel/master mumber)

What is the receiving node ID? 9eed259aaee23f53177efc854541c3df4d7d08a8  #移动到哪个master节点

Please enter all the source node IDs.

  Type 'all' to use all the nodes as source nodes for the hash slots.

  Type 'done' once you entered all the source nodes IDs.

Source node #:5c4ab42da4058339aa5ae10596f555702545d91a  #数据源节点

Source node #:f0cab6c760f6e4c9e5dc5ea227b165c7efc33163

Source node #:4000b2e02bc64d8ae327393373c9358f802a1dac

Source node #:done  #down表示结束

Ready to move  slots.

  Source nodes:
.......
[root@redis-master src]# redis-trib.rb check 192.168.1.132:6379
>>> Performing Cluster Check (using node 192.168.1.132:6379)
M: 5c4ab42da4058339aa5ae10596f555702545d91a 192.168.1.132:6379 #slots都为4096
slots:1365-5460 (4096 slots) master
1 additional replica(s)
M: 9eed259aaee23f53177efc854541c3df4d7d08a8 192.168.1.138:6379
slots:0-1364,5461-6826,10923-12287 (4096 slots) master
0 additional replica(s)
S: c84b6383c8970a8bf4dd04893b8bad89104b1656 192.168.1.137:6379
slots: (0 slots) slave
replicates f0cab6c760f6e4c9e5dc5ea227b165c7efc33163
S: bed6c13d89f5c6f6baecf45a70ff15c6c12b80c2 192.168.1.136:6379
slots: (0 slots) slave
replicates 5c4ab42da4058339aa5ae10596f555702545d91a
M: f0cab6c760f6e4c9e5dc5ea227b165c7efc33163 192.168.1.133:6379
slots:6827-10922 (4096 slots) master
1 additional replica(s)
S: 0c0739812a07c83e3d6d8bda4c9ccfd9f1f3ae14 192.168.1.135:6379
slots: (0 slots) slave
replicates 4000b2e02bc64d8ae327393373c9358f802a1dac
M: 4000b2e02bc64d8ae327393373c9358f802a1dac 192.168.1.134:6379
slots:12288-16383 (4096 slots) master
1 additional replica(s)
[OK] All nodes agree about slots configuration.
>>> Check for open slots...
>>> Check slots coverage...
[OK] All 16384 slots covered.
3、添加139作为slave
[root@redis-master src]# redis-trib.rb add-node --slave --master-id 9eed259aaee23f53177efc854541c3df4d7d08a8 192.168.1.139: 192.168.1.132:6379  #将139设置为138的slave

>>> Adding node 192.168.1.139: to cluster 192.168.1.132:

>>> Performing Cluster Check (using node 192.168.1.132:)

M: 5c4ab42da4058339aa5ae10596f555702545d91a 192.168.1.132:

   slots:- ( slots) master

    additional replica(s)

M: 9eed259aaee23f53177efc854541c3df4d7d08a8 192.168.1.138:

   slots:-,-,- ( slots) master

    additional replica(s)

S: c84b6383c8970a8bf4dd04893b8bad89104b1656 192.168.1.137:

   slots: ( slots) slave

   replicates f0cab6c760f6e4c9e5dc5ea227b165c7efc33163

S: bed6c13d89f5c6f6baecf45a70ff15c6c12b80c2 192.168.1.136:

   slots: ( slots) slave

   replicates 5c4ab42da4058339aa5ae10596f555702545d91a

M: f0cab6c760f6e4c9e5dc5ea227b165c7efc33163 192.168.1.133:

   slots:- ( slots) master

    additional replica(s)

S: 0c0739812a07c83e3d6d8bda4c9ccfd9f1f3ae14 192.168.1.135:

   slots: ( slots) slave

   replicates 4000b2e02bc64d8ae327393373c9358f802a1dac

M: 4000b2e02bc64d8ae327393373c9358f802a1dac 192.168.1.134:

   slots:- ( slots) master

    additional replica(s)

[OK] All nodes agree about slots configuration.

>>> Check for open slots...

>>> Check slots coverage...

[OK] All  slots covered.

>>> Send CLUSTER MEET to node 192.168.1.139: to make it join the cluster.

Waiting for the cluster to join.

>>> Configure node as replica of 192.168.1.138:.

[OK] New node added correctly.

[root@redis-master src]# redis-trib.rb check 192.168.1.132:

>>> Performing Cluster Check (using node 192.168.1.132:)

M: 5c4ab42da4058339aa5ae10596f555702545d91a 192.168.1.132:

   slots:- ( slots) master

    additional replica(s)

M: 9eed259aaee23f53177efc854541c3df4d7d08a8 192.168.1.138:

   slots:-,-,- ( slots) master

    additional replica(s)

S: c84b6383c8970a8bf4dd04893b8bad89104b1656 192.168.1.137:

   slots: ( slots) slave

   replicates f0cab6c760f6e4c9e5dc5ea227b165c7efc33163

S: bed6c13d89f5c6f6baecf45a70ff15c6c12b80c2 192.168.1.136:

   slots: ( slots) slave

   replicates 5c4ab42da4058339aa5ae10596f555702545d91a

M: f0cab6c760f6e4c9e5dc5ea227b165c7efc33163 192.168.1.133:

   slots:- ( slots) master

    additional replica(s)

S: 0c0739812a07c83e3d6d8bda4c9ccfd9f1f3ae14 192.168.1.135:

   slots: ( slots) slave

   replicates 4000b2e02bc64d8ae327393373c9358f802a1dac

S: 4fcafe4114c77db42b6742319fe6be42b1469f96 192.168.1.139:

   slots: ( slots) slave

   replicates 9eed259aaee23f53177efc854541c3df4d7d08a8

M: 4000b2e02bc64d8ae327393373c9358f802a1dac 192.168.1.134:

   slots:- ( slots) master

    additional replica(s)

[OK] All nodes agree about slots configuration.

>>> Check for open slots...

>>> Check slots coverage...

[OK] All  slots covered.
4、删除master(先用resharding将数据都移除到其他节点,确保为空之后,才能执行remove操作)
[root@redis-master src]# redis-trib.rb reshard 192.168.1.132:6379  #执行reshard子命令,从132节点上

>>> Performing Cluster Check (using node 192.168.1.138:)

M: 9eed259aaee23f53177efc854541c3df4d7d08a8 192.168.1.138:

   slots:-,-,- ( slots) master

    additional replica(s)

M: f0cab6c760f6e4c9e5dc5ea227b165c7efc33163 192.168.1.133:

   slots:- ( slots) master

    additional replica(s)

M: 4000b2e02bc64d8ae327393373c9358f802a1dac 192.168.1.134:

   slots:- ( slots) master

    additional replica(s)

S: 0c0739812a07c83e3d6d8bda4c9ccfd9f1f3ae14 192.168.1.135:

   slots: ( slots) slave

   replicates 4000b2e02bc64d8ae327393373c9358f802a1dac

S: 4fcafe4114c77db42b6742319fe6be42b1469f96 192.168.1.139:

   slots: ( slots) slave

   replicates 9eed259aaee23f53177efc854541c3df4d7d08a8

S: bed6c13d89f5c6f6baecf45a70ff15c6c12b80c2 192.168.1.136:

   slots: ( slots) slave

   replicates 5c4ab42da4058339aa5ae10596f555702545d91a

M: 5c4ab42da4058339aa5ae10596f555702545d91a 192.168.1.132:

   slots:- ( slots) master

    additional replica(s)

S: c84b6383c8970a8bf4dd04893b8bad89104b1656 192.168.1.137:

   slots: ( slots) slave

   replicates f0cab6c760f6e4c9e5dc5ea227b165c7efc33163

[OK] All nodes agree about slots configuration.

>>> Check for open slots...

>>> Check slots coverage...

[OK] All  slots covered.

How many slots do you want to move (from  to )? 1365   #问我们需要移走多少slots 4096/3=1365+1365+1366(Toalt/master_number-1)

What is the receiving node ID? f0cab6c760f6e4c9e5dc5ea227b165c7efc33163  #将这些slots移动到哪个节点上

Please enter all the source node IDs.

  Type 'all' to use all the nodes as source nodes for the hash slots.

  Type 'done' once you entered all the source nodes IDs.

Source node #:9eed259aaee23f53177efc854541c3df4d7d08a8  #从哪个节点移走这些slots,即需要删除的节点

Source node #:done

....

Do you want to proceed with the proposed reshard plan (yes/no)? yes #确认移动,可以看到将138上的slots移动到133上

Moving slot  from 192.168.1.138: to 192.168.1.133::

Moving slot  from 192.168.1.138: to 192.168.1.133::

......

[root@redis-master src]# redis-trib.rb reshard 192.168.1.132:6379  #再执行reshard子命令,从132节点上
>>> Performing Cluster Check (using node 192.168.1.138:6379)

M: 9eed259aaee23f53177efc854541c3df4d7d08a8 192.168.1.138:6379

   slots:0-1364,5461-6826,10923-12287 (4096 slots) master

   1 additional replica(s)

M: f0cab6c760f6e4c9e5dc5ea227b165c7efc33163 192.168.1.133:6379

   slots:6827-10922 (4096 slots) master

   1 additional replica(s)

M: 4000b2e02bc64d8ae327393373c9358f802a1dac 192.168.1.134:6379

   slots:12288-16383 (4096 slots) master

   1 additional replica(s)

S: 0c0739812a07c83e3d6d8bda4c9ccfd9f1f3ae14 192.168.1.135:6379

   slots: (0 slots) slave

   replicates 4000b2e02bc64d8ae327393373c9358f802a1dac

S: 4fcafe4114c77db42b6742319fe6be42b1469f96 192.168.1.139:6379

   slots: (0 slots) slave

   replicates 9eed259aaee23f53177efc854541c3df4d7d08a8

S: bed6c13d89f5c6f6baecf45a70ff15c6c12b80c2 192.168.1.136:6379

   slots: (0 slots) slave

   replicates 5c4ab42da4058339aa5ae10596f555702545d91a

M: 5c4ab42da4058339aa5ae10596f555702545d91a 192.168.1.132:6379

   slots:1365-5460 (4096 slots) master

   1 additional replica(s)

S: c84b6383c8970a8bf4dd04893b8bad89104b1656 192.168.1.137:6379

   slots: (0 slots) slave

   replicates f0cab6c760f6e4c9e5dc5ea227b165c7efc33163

[OK] All nodes agree about slots configuration.

>>> Check for open slots...

>>> Check slots coverage...

[OK] All 16384 slots covered.

How many slots do you want to move (from 1 to 16384)? 1365   #问我们需要移走多少slots 4096/3=1365+1365+1366(Toalt/master_number-1)

What is the receiving node ID? 5c4ab42da4058339aa5ae10596f555702545d91a  #将这些slots移动到哪个节点上

Please enter all the source node IDs.

  Type 'all' to use all the nodes as source nodes for the hash slots.

  Type 'done' once you entered all the source nodes IDs.

Source node #1:9eed259aaee23f53177efc854541c3df4d7d08a8  #从哪个节点移走这些slots,即需要删除的节点

Source node #2:done

....

Do you want to proceed with the proposed reshard plan (yes/no)? yes #确认移动,可以看到将138上的slots移动到132上

Moving slot 0 from 192.168.1.138:6379 to 192.168.1.134:6379:

Moving slot 1 from 192.168.1.138:6379 to 192.168.1.134:6379:

......
[root@redis-master src]# redis-trib.rb reshard 192.168.1.132:6379  #再移动一次

>>> Performing Cluster Check (using node 192.168.1.132:)

M: 5c4ab42da4058339aa5ae10596f555702545d91a 192.168.1.132:

   slots:- ( slots) master

    additional replica(s)

M: 9eed259aaee23f53177efc854541c3df4d7d08a8 192.168.1.138:

   slots:,- ( slots) master

    additional replica(s)

S: c84b6383c8970a8bf4dd04893b8bad89104b1656 192.168.1.137:

   slots: ( slots) slave

   replicates f0cab6c760f6e4c9e5dc5ea227b165c7efc33163

S: bed6c13d89f5c6f6baecf45a70ff15c6c12b80c2 192.168.1.136:

   slots: ( slots) slave

   replicates 5c4ab42da4058339aa5ae10596f555702545d91a

M: f0cab6c760f6e4c9e5dc5ea227b165c7efc33163 192.168.1.133:

   slots:-,-,- ( slots) master

    additional replica(s)

S: 0c0739812a07c83e3d6d8bda4c9ccfd9f1f3ae14 192.168.1.135:

   slots: ( slots) slave

   replicates 4000b2e02bc64d8ae327393373c9358f802a1dac

S: 4fcafe4114c77db42b6742319fe6be42b1469f96 192.168.1.139:

   slots: ( slots) slave

   replicates 9eed259aaee23f53177efc854541c3df4d7d08a8

M: 4000b2e02bc64d8ae327393373c9358f802a1dac 192.168.1.134:

   slots:- ( slots) master

    additional replica(s)

[OK] All nodes agree about slots configuration.

>>> Check for open slots...

>>> Check slots coverage...

[OK] All  slots covered.

How many slots do you want to move (from  to )?

What is the receiving node ID? 4000b2e02bc64d8ae327393373c9358f802a1dac

Please enter all the source node IDs.

  Type 'all' to use all the nodes as source nodes for the hash slots.

  Type 'done' once you entered all the source nodes IDs.

Source node #:9eed259aaee23f53177efc854541c3df4d7d08a8

Source node #:done

......

Do you want to proceed with the proposed reshard plan (yes/no)? yes

Moving slot  from 192.168.1.138: to 192.168.1.134::

Moving slot  from 192.168.1.138: to 192.168.1.134::

Moving slot  from 192.168.1.138: to 192.168.1.134::

.....

[root@redis-master src]# redis-trib.rb del-node  192.168.1.132: 9eed259aaee23f53177efc854541c3df4d7d08a8 #删除这个138

>>> Removing node 9eed259aaee23f53177efc854541c3df4d7d08a8 from cluster 192.168.1.132:

>>> Sending CLUSTER FORGET messages to the cluster...

>>> SHUTDOWN the node.

[root@redis-master src]# redis-trib.rb check 192.168.1.132:6379  #查看cluster,138已结没有了并且134有两个slave,这是因为当你清空了一个master的hashslot时,redis cluster就会自动将其slave挂载到其他master上去

>>> Performing Cluster Check (using node 192.168.1.132:)

M: 5c4ab42da4058339aa5ae10596f555702545d91a 192.168.1.132:

   slots:- ( slots) master

    additional replica(s)

S: c84b6383c8970a8bf4dd04893b8bad89104b1656 192.168.1.137:

   slots: ( slots) slave

   replicates f0cab6c760f6e4c9e5dc5ea227b165c7efc33163

S: bed6c13d89f5c6f6baecf45a70ff15c6c12b80c2 192.168.1.136:

   slots: ( slots) slave

   replicates 5c4ab42da4058339aa5ae10596f555702545d91a

M: f0cab6c760f6e4c9e5dc5ea227b165c7efc33163 192.168.1.133:

   slots:-,-,- ( slots) master

    additional replica(s)

S: 0c0739812a07c83e3d6d8bda4c9ccfd9f1f3ae14 192.168.1.135:

   slots: ( slots) slave

   replicates 4000b2e02bc64d8ae327393373c9358f802a1dac

S: 4fcafe4114c77db42b6742319fe6be42b1469f96 192.168.1.139:

   slots: ( slots) slave

   replicates 4000b2e02bc64d8ae327393373c9358f802a1dac

M: 4000b2e02bc64d8ae327393373c9358f802a1dac 192.168.1.134:

   slots:,- ( slots) master

    additional replica(s)  #两个slave

[OK] All nodes agree about slots configuration.

>>> Check for open slots...

>>> Check slots coverage...

[OK] All  slots covered.
遇到的报错:
1、redis-trib.rb 报错:
/usr/local/rvm/gems/ruby-2.4./gems/redis-4.0./lib/redis/client.rb::in `call': ERR Slot 0 is already busy (Redis::CommandError)

错误提示是

      slot插槽被占用了(这是 搭建集群前时,以前redis的旧数据和配置信息没有清理干净。)

解决方案是

          用redis-cli 登录到每个节点执行  flushall  和 cluster reset  就可以了
2、创建Redis-Cluster集群时遇到的问题
/usr/share/rubygems/rubygems/core_ext/kernel_require.rb::in `require': cannot load such file -- redis (LoadError)"

解决办法:

Ruby的redis接口没有安装,需要安装Redis接口,输入命令 " gem install redis " 进行安装
3、reshard的时候报错没有解决
部署redis4.0-cluster的更多相关文章
- Redis4.0 Cluster — Centos7
本文版权归博客园和作者吴双本人共同所有 转载和爬虫请注明原文地址 www.cnblogs.com/tdws 一.基础安装 wget http://download.redis.io/releases/ ...
- centos7多节点部署redis4.0.11集群
1.服务器集群服务器 redis节点node-i(192.168.0.168) 7001,7002node-ii(192.168.0.169) 7003,7004node-iii(192.168.0. ...
- redis4.0 cluster搭建
cd /root/tools wget http://pnxcvm0bq.bkt.clouddn.com/redis-4.0.9.tar.gz tar -zxvf redis-4.0.9.tar.gz ...
- redis-4.0.14 cluster 配置实战
1.操作系统配置 切换到root用户修改配置sysctl.conf vim /etc/sysctl.conf # 添加配置: vm.max_map_count= vm.overcommit_memor ...
- linux下redis4.0.2集群部署(利用Ruby脚本命令)
一.原生命令方式和Ruby脚本方式区别 利用Ruby脚本部署和用原生命令部署,节点准备的步骤都是一样的,节点启动后的握手,以及主从.槽分配,利用Ruby脚本一步就能完成,利用原生命令需要一步一步地执行 ...
- redis4.0.1集群安装部署
安装环境 序号 项目 值 1 OS版本 Red Hat Enterprise Linux Server release 7.1 (Maipo) 2 内核版本 3.10.0-229.el7.x86_64 ...
- CentOS7.6搭建redis4.0.1 cluster集群
1. 操作系统信息: $ uname -a Linux iZbp11d57wmumnwuihb2czZ -.el7.x86_64 # SMP Fri Feb :: UTC x86_64 x86_64 ...
- linux下redis4.0.2安装与部署
一.redis的介绍 Redis是当前比较热门的NOSQL系统之一,它是一个key-value存储系统.和Memcache类似,但很大程度补偿了Memcache的不足,它支持存储的value类型相对更 ...
- CentOs7.3 搭建 Redis-4.0.1 Cluster 集群服务
环境 VMware版本号:12.0.0 CentOS版本:CentOS 7.3.1611 三台虚拟机(IP):192.168.252.101,192.168.102..102,192.168.252. ...
- Redis(1.11)Redis4.0.11 cluster 分布式集群搭建
概念与了解:Redis(1.7)Redis高可用架构(理论篇) [0]试验环境 结构图如下: (这里试验没有那么多机器,就用3台机器搭建试验) redis1是redis集群的一个节点A,上面运行了两个 ...
随机推荐
- chm提取
Python读写CHM文件 7z 可以将chm解包为HTML
- Codeforces1100F. Ivan and Burgers(离线+线性基)
题目链接:传送门 思路: 按查询的右端点离线. 然后从左到右维护线性基. 每个基底更新为最右边的方案,可以让尽量多的查询享受到这个基底. 用ci维护后更新右端点为i的答案. 代码(析构1000ms,别 ...
- 使用 whereis/which/locate 查找文件
whereis命令 whereis只能用于搜索可执行文件 (-b) , 联机帮助文件 (-m) 和源代码文件 (-s) . 它只在一个数据库中查询(/var/lib/mlocate) . 这个数据库是 ...
- ubuntu16.04 安装java
1.从官网下载 jdk-8u191-linux-x64.tar.gz(https://www.oracle.com/technetwork/java/javase/downloads/jdk8-dow ...
- django 分页组件
一.仿django分页功能自己实现 urls.py 1 2 3 4 5 6 7 8 9 from django.conf.urls import url from django.contrib i ...
- 非常完善的两个微服务框架比较(SpringCloud与Dubbo)
微服务架构是互联网很热门的话题,是互联网技术发展的必然结果.它提倡将单一应用程序划分成一组小的服务,服务之间互相协调.互相配合,为用户提供最终价值. 虽然微服务架构没有公认的技术标准和规范或者草案,但 ...
- DataGrip for Mac破解步骤详解 亲测好用
https://blog.csdn.net/le945926/article/details/81912085
- 事件冒泡(event bubbling)与事件捕捉(event capturing)
事件捕捉: 单击<div>元素就会以下列顺序触发click 事件. Document => Element html => Element body => Element ...
- Linux文件同步
简介 文件实时同步对于运维是个很常见的需求. 如集群的机器,需要上传个文件,之前的步骤是每台服务器分别上传. 做文件同步以后,只上传一台,其他机器自动同步. 目前实现实时同步的主流方案有 rsync+ ...
- [Mybatis]Mybatis 常用标签及功能整理
Mybatis中生成动态SQL的标签有四类,分别是: if choose (when, otherwise) trim (where, set) foreach 1.if 当需要动态生成where条件 ...