【干货】利用MVC5+EF6搭建博客系统(二)测试添加数据、集成Autofac依赖注入
PS:如果图片模糊,鼠标右击复制图片网址,然后在浏览器中打开即可。
一、测试仓储层、业务层是否能实现对数据库表的操作
1、在52MVCBlog.IRepository程序集下创建IsysUserInfoRepository接口来继承IBaseRepository父接口
IsysUserInfoRepository接口代码:
using _52MVCBlog.IRepository.Base;

using _52MVCBlog.Model.Models;

using System;

using System.Collections.Generic;

using System.Linq;

using System.Text;

using System.Threading.Tasks;

namespace _52MVCBlog.IRepository

{

    public partial interface IsysUserInfoRepository : IBaseRepository<sysUserInfo>

    {

    }

}
2、在52MVCBlog.Repository程序集下创建sysUserInfoRepository类继承BaseRepository父类,以及 IsysUserInfoRepository接口
sysUserInfoRepository代码:
using _52MVCBlog.IRepository;

using _52MVCBlog.Model.Models;

using _52MVCBlog.Repository.Base;

using System;

using System.Collections.Generic;

using System.Linq;

using System.Text;

using System.Threading.Tasks;

namespace _52MVCBlog.Repository

{

    public partial class sysUserInfoRepository : BaseRepository<sysUserInfo>, IsysUserInfoRepository

    {

    }

}
3、在52MVCBlog.IService程序集下创建服务接口IsysUserInfoServices继承IBaseServices接口
IsysUserInfoServices接口代码:
using _52MVCBlog.IService.Base;

using _52MVCBlog.Model.Models;

using System;

using System.Collections.Generic;

using System.Linq;

using System.Text;

using System.Threading.Tasks;

namespace _52MVCBlog.IService

{

    public partial interface IsysUserInfoServices : IBaseServices<sysUserInfo>

    {

    }

}
4、在52MVCBlog.Service程序集下创建服务类sysUserInfoServices继承BaseServices,以及IsysUserInfoServices接口
sysUserInfoServices代码:
using _52MVCBlog.IService;

using _52MVCBlog.Model.Models;

using _52MVCBlog.Service.Base;

using System;

using System.Collections.Generic;

using System.Linq;

using System.Text;

using System.Threading.Tasks;

namespace _52MVCBlog.Service

{

    public partial class sysUserInfoServices : BaseServices<sysUserInfo>, IsysUserInfoServices

    {

    }

}
5、服务层的父类BaseServices中baseDal需要new一个仓储父类泛型
public IBaseRepository<TEntity> baseDal = new BaseRepository<TEntity>();
6、在UI层中MVC,添加HOME控制器并index下创建一个添加的实例
using _52MVCBlog.IService;

using _52MVCBlog.Model.Models;

using _52MVCBlog.Service;

using System;

using System.Collections.Generic;

using System.Linq;

using System.Web;

using System.Web.Mvc;

namespace _52MVCBlog.WebUI.Controllers

{

    public class HomeController : Controller

    {

        IsysUserInfoServices userInfoServices = new sysUserInfoServices();

        //

        // GET: /Home/

        public ActionResult Index()

        {

            try

            {

                for (int i = ; i < ; i++)

                {

                    userInfoServices.Add(new sysUserInfo()

                    {

                        uLoginName = "admin" + i,

                        uLoginPWD = "",

                        uRealName = "超级管理员" + i,

                        uCreateTime = DateTime.Now,

                        uUpdateTime = DateTime.Now,

                        uRemark = "测试添加功能"

                    });

                }

                userInfoServices.SaverChanges();

                return Content("添加数据成功");

            }

            catch (Exception ex)

            {

                return Content("错误提示:" + ex.Message);

            }

        }

    }

}
7、在WebUI的Web.config中添加数据库链接字符串(将52MVCBlog.Model程序集下面的AppConfig文件中的数据拷过来,并修改连接字符串,同时在Lib文件中引用EntityFramework.dll、EntityFramework.SqlServer)
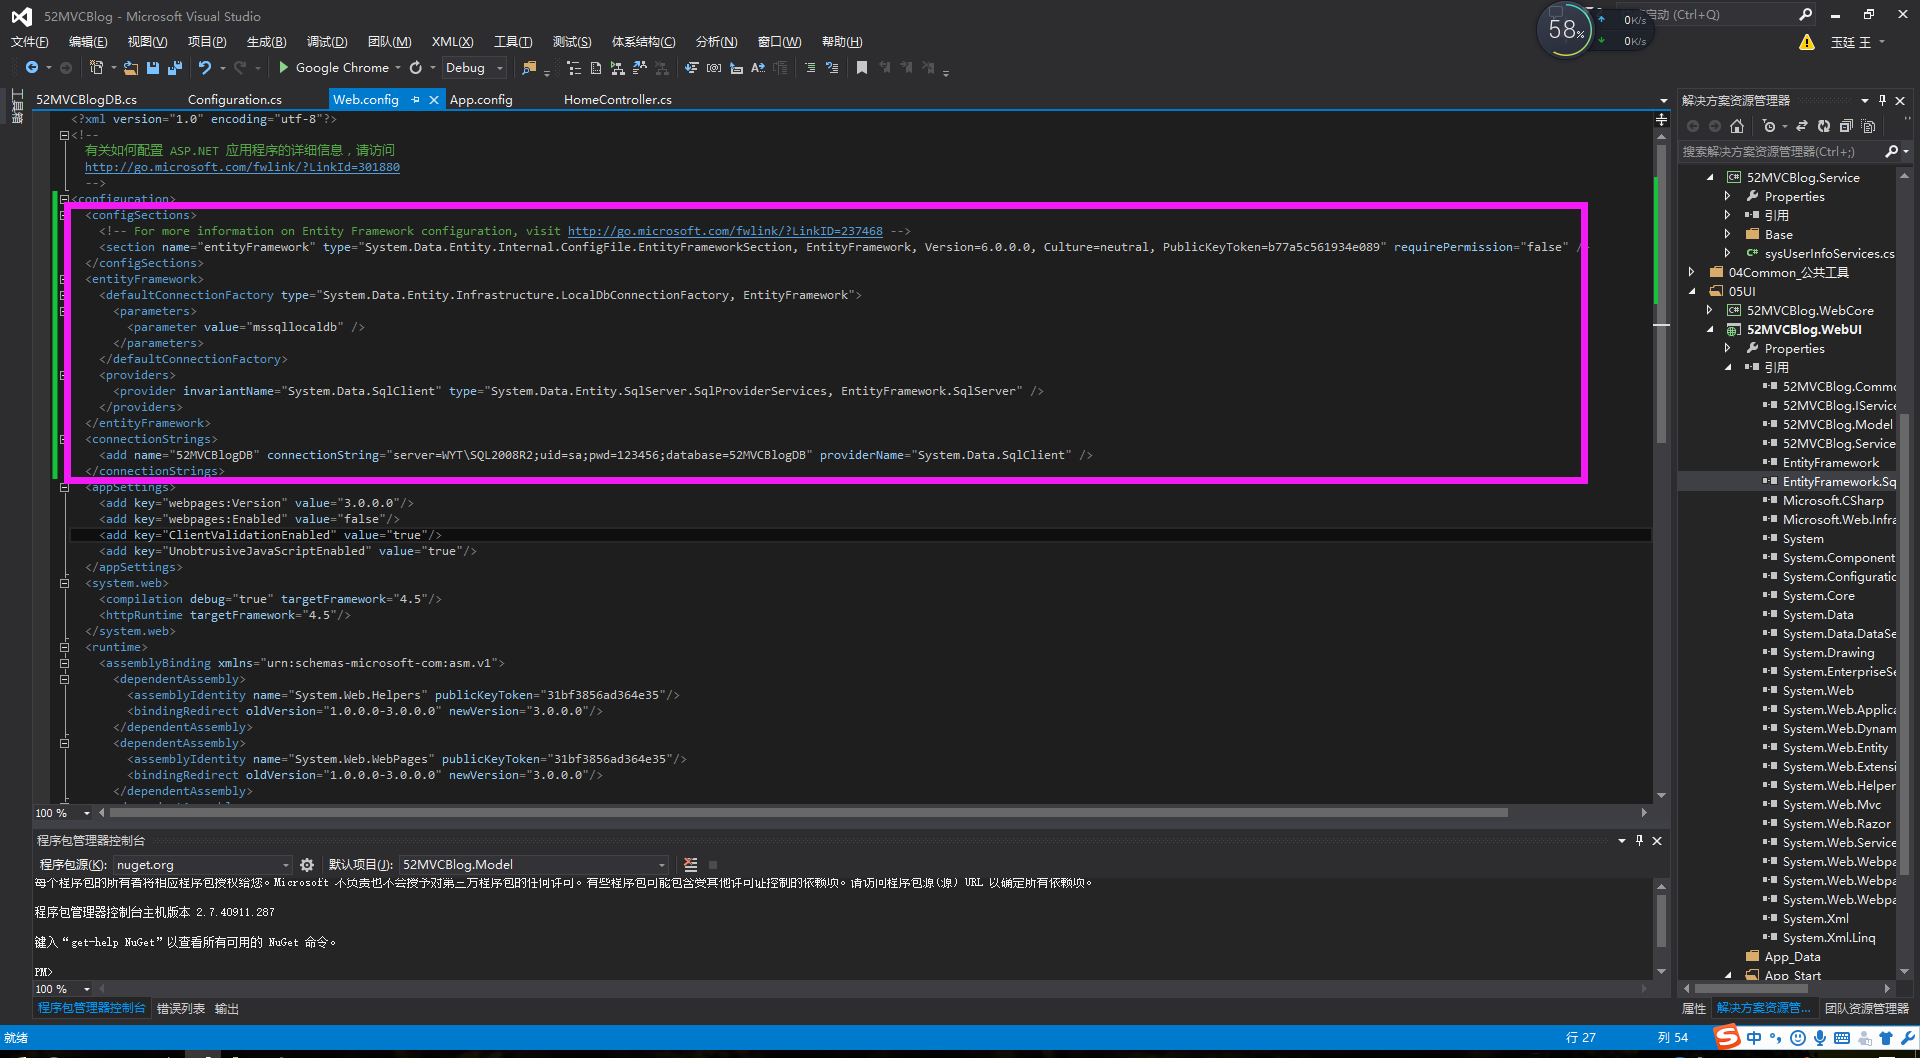
配置如下:
<?xml version="1.0" encoding="utf-8"?>

<!--

  有关如何配置 ASP.NET 应用程序的详细信息,请访问

  http://go.microsoft.com/fwlink/?LinkId=301880

  -->

<configuration>

  <configSections>

    <!-- For more information on Entity Framework configuration, visit http://go.microsoft.com/fwlink/?LinkID=237468 -->

    <section name="entityFramework" type="System.Data.Entity.Internal.ConfigFile.EntityFrameworkSection, EntityFramework, Version=6.0.0.0, Culture=neutral, PublicKeyToken=b77a5c561934e089" requirePermission="false" />

  </configSections>

  <entityFramework>

    <defaultConnectionFactory type="System.Data.Entity.Infrastructure.LocalDbConnectionFactory, EntityFramework">

      <parameters>

        <parameter value="mssqllocaldb" />

      </parameters>

    </defaultConnectionFactory>

    <providers>

      <provider invariantName="System.Data.SqlClient" type="System.Data.Entity.SqlServer.SqlProviderServices, EntityFramework.SqlServer" />

    </providers>

  </entityFramework>

  <connectionStrings>

    <add name="52MVCBlogDB" connectionString="server=WYT\SQL2008R2;uid=sa;pwd=123456;database=52MVCBlogDB" providerName="System.Data.SqlClient" />

  </connectionStrings>

  <appSettings>

    <add key="webpages:Version" value="3.0.0.0"/>

    <add key="webpages:Enabled" value="false"/>

    <add key="ClientValidationEnabled" value="true"/>

    <add key="UnobtrusiveJavaScriptEnabled" value="true"/>

  </appSettings>

  <system.web>

    <compilation debug="true" targetFramework="4.5"/>

    <httpRuntime targetFramework="4.5"/>

  </system.web>

  <runtime>

    <assemblyBinding xmlns="urn:schemas-microsoft-com:asm.v1">

      <dependentAssembly>

        <assemblyIdentity name="System.Web.Helpers" publicKeyToken="31bf3856ad364e35"/>

        <bindingRedirect oldVersion="1.0.0.0-3.0.0.0" newVersion="3.0.0.0"/>

      </dependentAssembly>

      <dependentAssembly>

        <assemblyIdentity name="System.Web.WebPages" publicKeyToken="31bf3856ad364e35"/>

        <bindingRedirect oldVersion="1.0.0.0-3.0.0.0" newVersion="3.0.0.0"/>

      </dependentAssembly>

      <dependentAssembly>

        <assemblyIdentity name="System.Web.Mvc" publicKeyToken="31bf3856ad364e35"/>

        <bindingRedirect oldVersion="1.0.0.0-5.2.3.0" newVersion="5.2.3.0"/>

      </dependentAssembly>

    </assemblyBinding>

  </runtime>

</configuration>
8、然后启动系统页面提示(启动后会自动创建数据库)
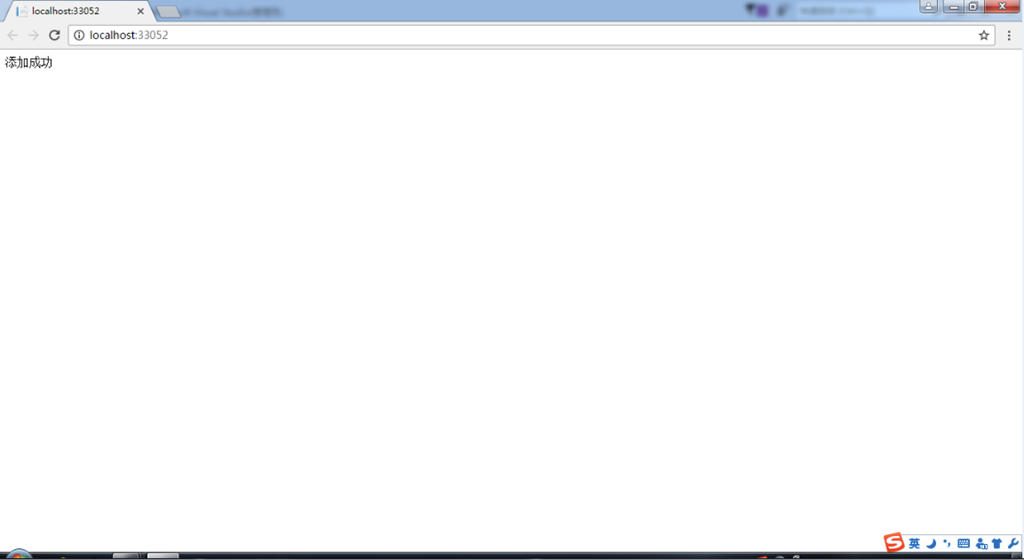
表示数据能够正常录入数据库中,查看数据库
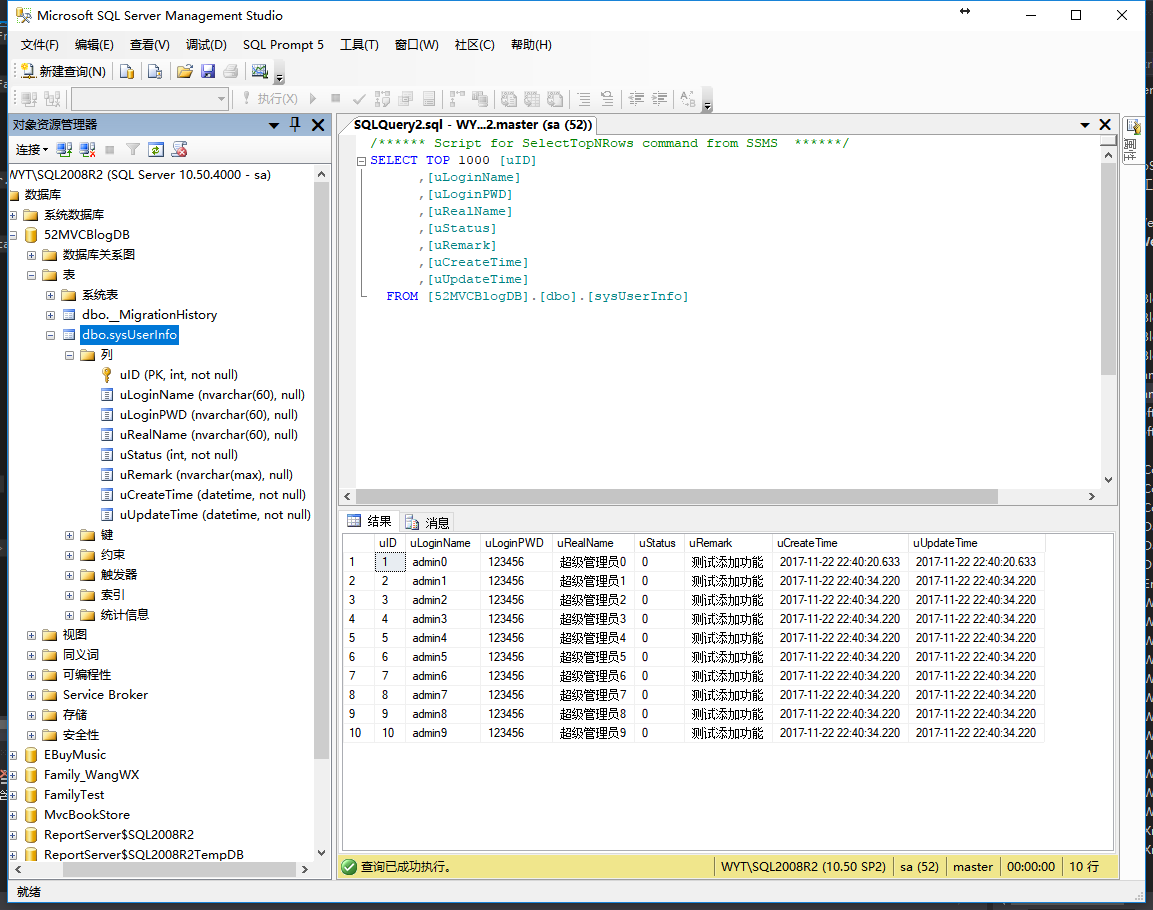
数据库中数据已经可以正常插入,另外对表中的字段约束也成功了。
二、使用Autofac依赖注入分离接口与实例之间的关系,达到解耦的目的
详细使用参照:AutoFac (控制反转IOC 与依赖注入DI)
1、使用NuGet管理工具下载Autofac与Autofac.MVC5,安装在webUI
2、然后在App_Start文件中创建AutofacConfig.cs文件
AutofacConfig代码:
using System;

using System.Collections.Generic;

using System.Linq;

using System.Web;

using Autofac;

using Autofac.Integration.Mvc;

using System.Reflection;

using System.Web.Mvc;

namespace _52MVCBlog.WebUI.App_Start

{

    public class AutofacConfig

    {

        /// <summary>

        /// 负责调用autofac框架实现业务逻辑层和数据仓储层程序集中的类型对象的创建

        /// 负责创建MVC控制器类的对象(调用控制器中的有参构造函数),接管DefaultControllerFactory的工作

        /// 将MVC默认的控制器工厂替换成AutoFac的工厂

        /// </summary>

        public static void Register()

        {

            //第一步: 构造一个AutoFac的builder容器

            //1.1实例化一个autofac的创建容器

            ContainerBuilder builder = new ContainerBuilder();

            //第二步:告诉AutoFac控制器工厂,控制器类的创建去哪些程序集中查找(默认控制器工厂是去扫描bin目录下的所有程序集)

            //2.1 从当前运行的bin目录下加载52MVCBlog.WebUI程序集

            Assembly controllerAss = Assembly.Load("52MVCBlog.WebUI");

            //2.2 告诉AutoFac控制器工厂,控制器的创建从controllerAss中查找

            //将MVC默认的控制器工厂替换成AutoFac的工厂

            //using Autofac.Integration.Mvc;

            builder.RegisterControllers(controllerAss);

            //第三步:告诉AutoFac容器,创建项目中的指定类的对象实例,以接口的形式存储(其实就是创建数据仓储层与业务逻辑层这两个程序集中所有类的对象实例,然后以其接口的形式保存到AutoFac容器内存中,当然如果有需要也可以创建其他程序集的所有类的对象实例,这个只需要我们指定就可以了)

            //3.1 加载数据仓储层52MVCBlog.Repository这个程序集。

            Assembly respAss = Assembly.Load("52MVCBlog.Repository");

            //3.2 反射扫描这个52MVCBlog.Repository.dll程序集中所有的类,到这个程序集中所有类的集合。

            Type[] rtypes= respAss.GetTypes();

            //3.3 告诉AutoFac容器,创建rtypes这个集合中所有类的对象实例,以其接口的形式保存

            builder.RegisterTypes(rtypes).AsImplementedInterfaces();

            //3.4 加载业务逻辑层52MVCBlog.Service这个程序集。

            Assembly serpAss = Assembly.Load("52MVCBlog.Service");

            //3.5 创建serAss中的所有类的instance以此类的实现接口存储

            builder.RegisterTypes(serpAss.GetTypes()).AsImplementedInterfaces();

            //第四步:创建一个真正的AutoFac的工作容器

            var container = builder.Build();

            //第五步:将当前容器中的控制器工厂替换掉MVC默认的控制器工厂。//using System.Web.Mvc;

            DependencyResolver.SetResolver(new AutofacDependencyResolver(container));

        }

    }

}
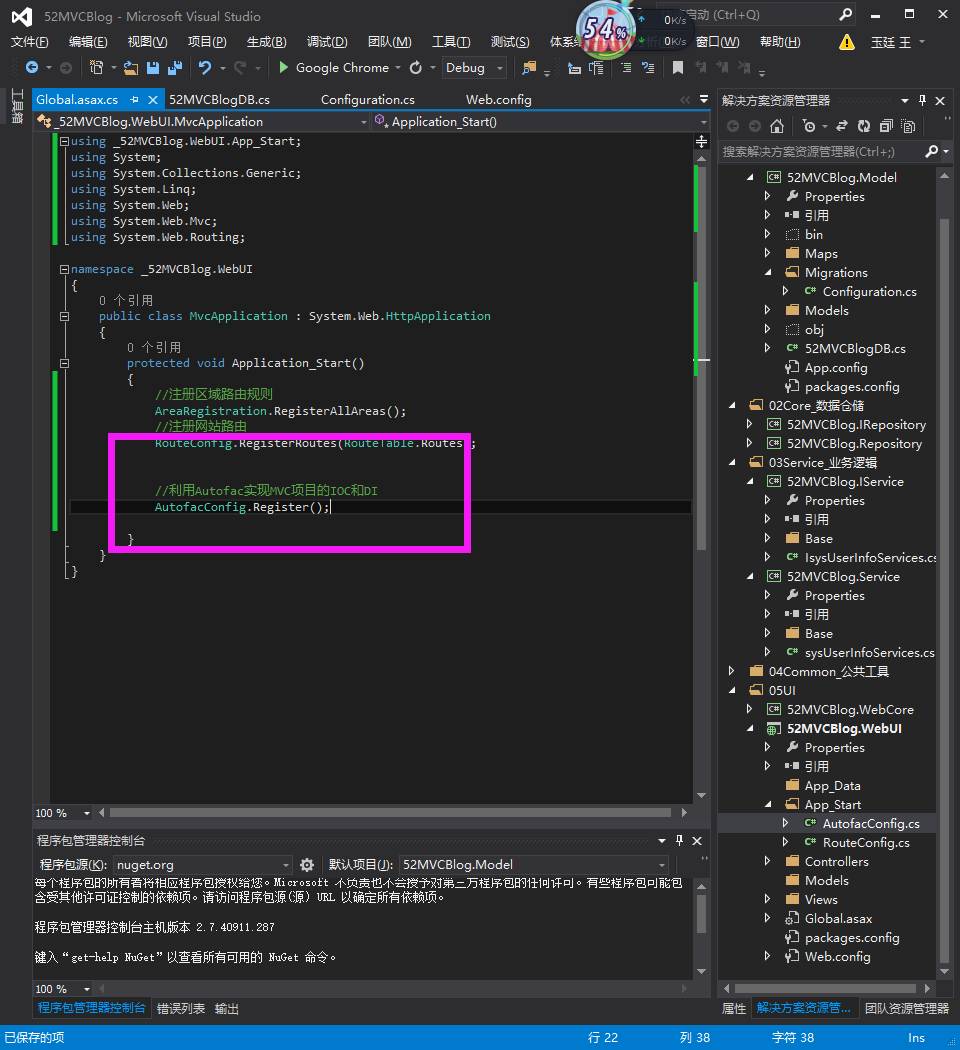
3、由于需要在系统启动之前来把所有的类创建好相应的对象
需要在Global文件下添加一个配置文件来实现MVC项目的IOC和DI
4、修改Repository程序集和Services程序集的生成路基到WebUI层的Bin目录下,也可以直接引用的方式。(这里不建议修改,还是引用的方便点,不然后期维护不好维护)
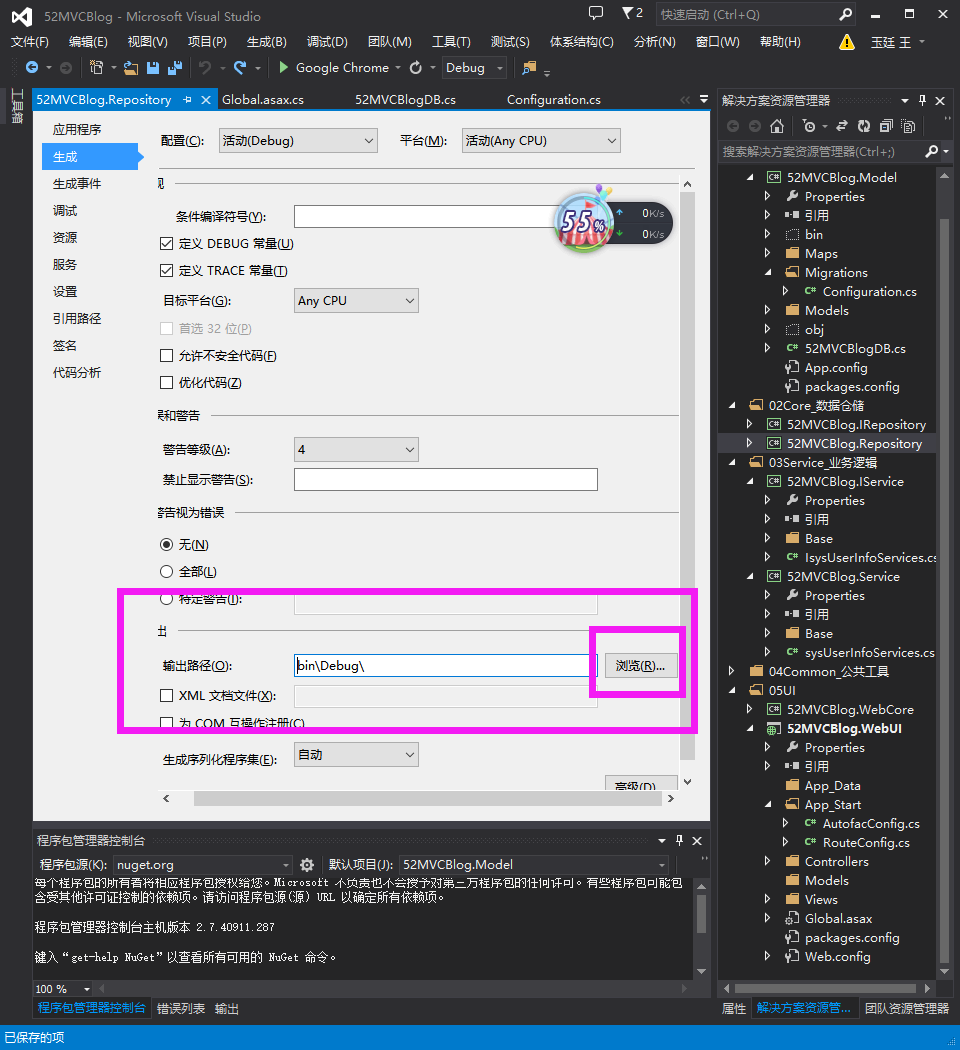
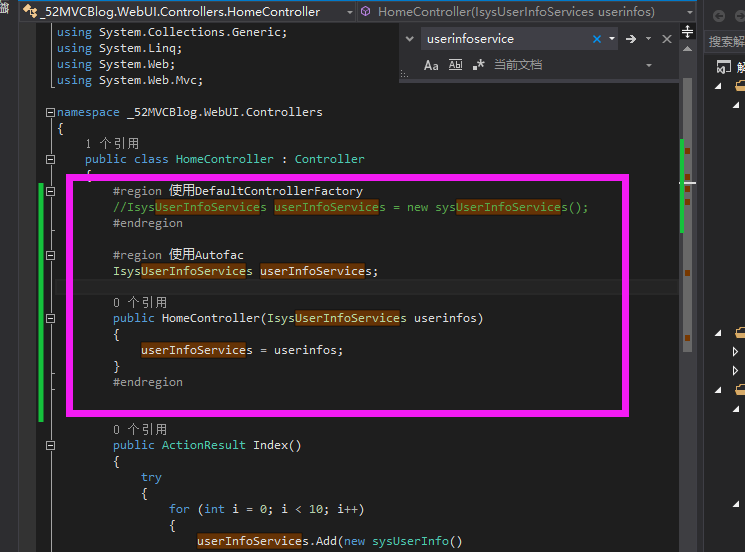
5、修改HomeController控制器下userinfoservice的生成方式,改为创建构造函数的时候来生成。
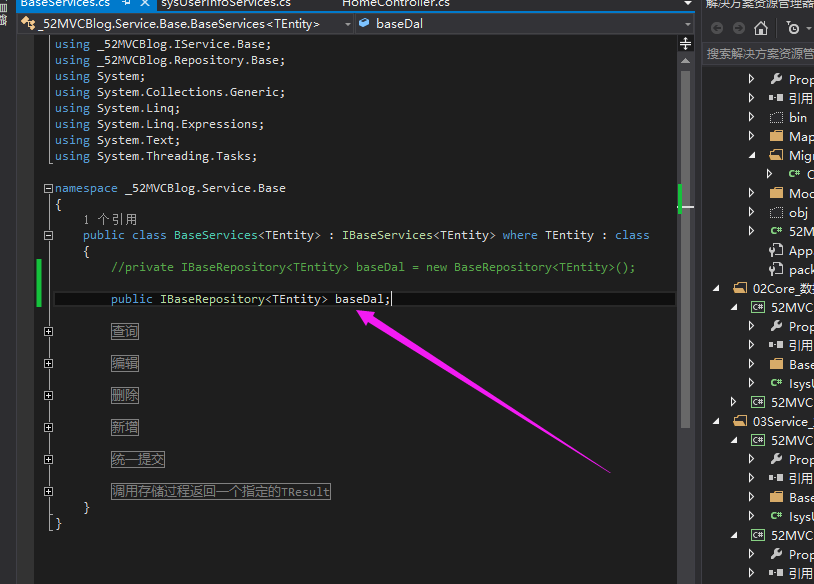
6、修改服务层sysUserInfoServices构造函数,使其创建的时候生成相应的对象因为sysUserInfoServices继承BaseServices,而BaseServices也可以使用构造函数生成

把dal复制给dal是为了能拿到sysUserInfoServices中自己特殊的方法。base.baseDal = dal;为拿到父类的公用方法。
BaseServices类中也修改为不需要new一个实例类
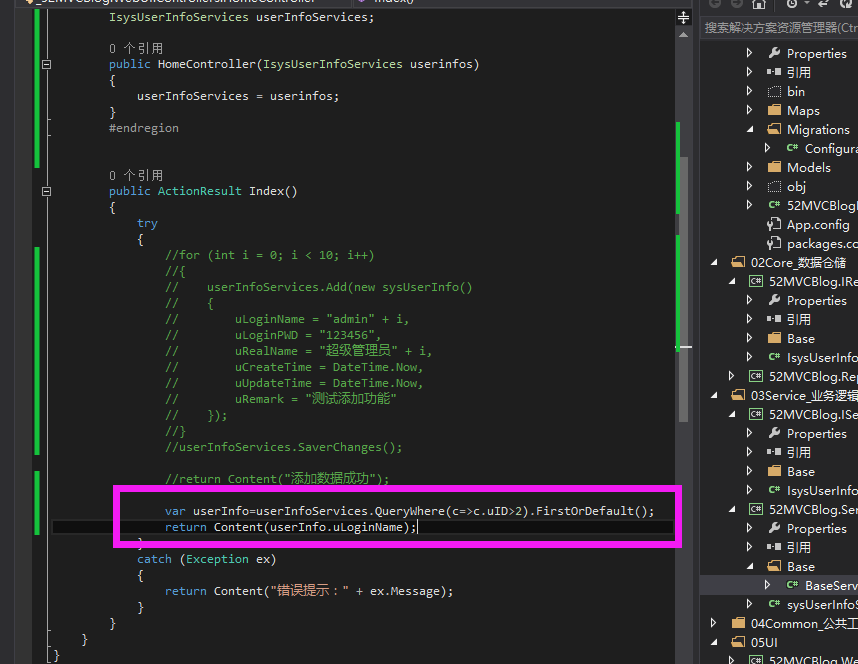
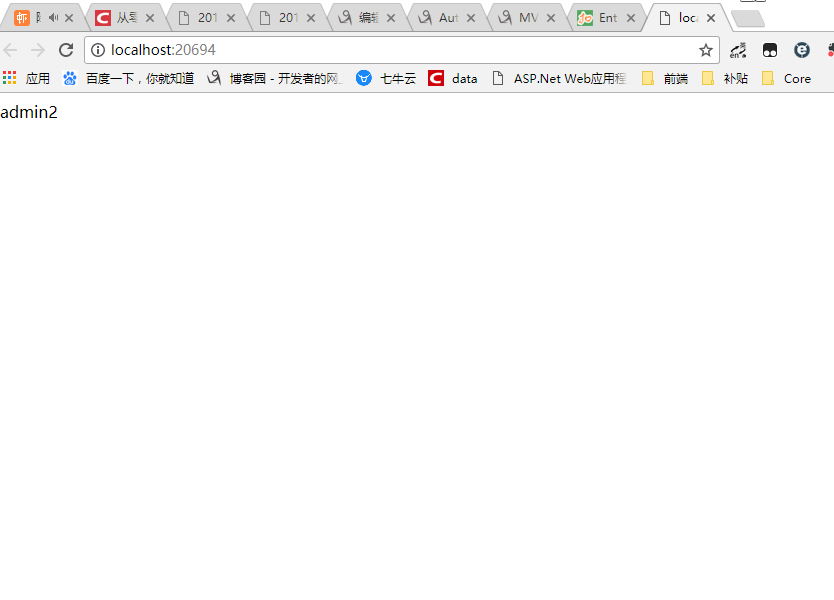
7、把homeController下改成查询数据,返回到页面。
8、BUG解决
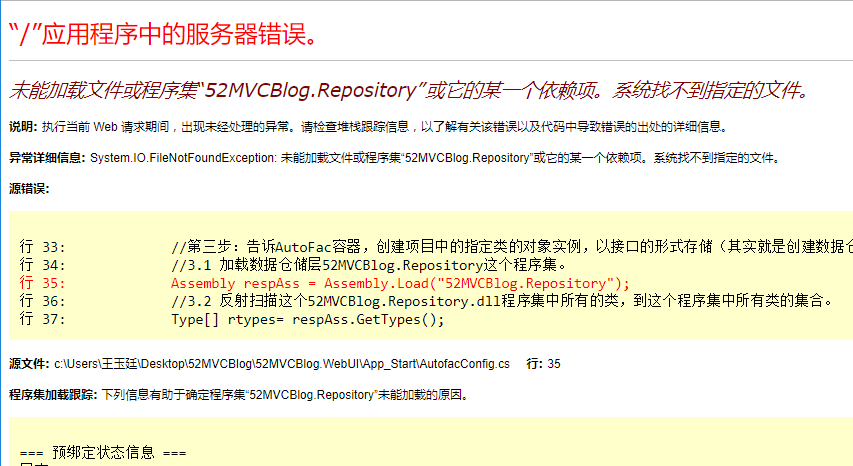
解决方案:52MVCBlog.WebUI添加52MVCBlog.Repository的引用
9、运行效果
~不知不觉到凌晨1点了,明天继续加油~
【干货】利用MVC5+EF6搭建博客系统(二)测试添加数据、集成Autofac依赖注入的更多相关文章
- 【干货】利用MVC5+EF6搭建博客系统(四)(上)前后台页面布局页面实现,介绍使用的UI框架以及JS组件
一.博客系统进度回顾以及页面设计 1.1页面设计说明 紧接前面基础基本完成了框架搭建,现在开始设计页面,前台页面设计我是模仿我博客园的风格来设计的,后台是常规的左右布局风格. 1.2前台页面风格 主页 ...
- 【干货】利用MVC5+EF6搭建博客系统(四)(下)前后台布局实现、发布博客以及展示
二.博客系统后台布局实现 2.1.这里所用的是MVC的布局页来实现的,后台主要分为三部分:导航.菜单.主要内容 代码实现: 这里把后台单独放在一个区域里面,所以我这里建立一个admin的区域 在布局页 ...
- 【干货】利用MVC5+EF6搭建博客系统(三)添加Nlog日志、缓存机制(MemoryCache、RedisCache)、创建控制器父类BaseController
PS:如果图片模糊,鼠标右击复制图片网址,然后在浏览器中打开即可. 一.回顾系统进度以及本章概要 目前博客系统已经数据库创建.以及依赖注入Autofac集成,接下来就是日志和缓存集成,这里日志用的是N ...
- 【干货】利用MVC5+EF6搭建博客系统(一)EF Code frist、实现泛型数据仓储以及业务逻辑
习MVC有一段时间了,决定自己写一套Demo了,写完源码再共享. PS:如果图片模糊,鼠标右击复制图片网址,然后在浏览器中打开即可. 一.框架搭建 二.创建数据库 1.创建一个空的EF code fr ...
- 利用MVC5+EF6搭建博客系统
https://www.cnblogs.com/wyt007/p/7880137.html
- Django快速搭建博客系统
Django快速搭建博客系统 一.开发环境 Windows 7(64bit) python 3.6 https://www.python.org/ Django 2.0 https://www. ...
- day14搭建博客系统项目
day14搭建博客系统项目 1.下载代码包 [root@web02 opt]# git clone https://gitee.com/lylinux/DjangoBlog.git 2.使用pid安装 ...
- 手把手教从零开始在GitHub上使用Hexo搭建博客教程(二)-Hexo参数设置
前言 前文手把手教从零开始在GitHub上使用Hexo搭建博客教程(一)-附GitHub注册及配置介绍了github注册.git相关设置以及hexo基本操作. 本文主要介绍一下hexo的常用参数设置. ...
- go语言打造个人博客系统(二)
go语言打造个人博客系统(二) 在上篇文章go语言打造个人博客系统(一)中,我们了解了go语言的优点和go语言的数据库操作,本次我们会完成博客系统的后端开发. 博客系统后端接口开发 路由测试 ht ...
随机推荐
- vs C++ scanf 不安全
项目->属性-> c/c++->预处理器->预处理器定义->加入下面这句: _CRT_SECURE_NO_DEPRECATE
- [译]使用explain API摆脱ElasticSearch集群RED苦恼(转)
"哔...哔...哗",PagerDuty的报警通知又来了. 可能是因为你又遭遇了节点宕机, 或者服务器机架不可用, 或者整个ElasticSearch集群重启了. 不管哪种情况, ...
- 《DevOps软件架构师行动指南》读后感
从软件架构师视角讲解了引入DevOps实践所需要拥有的技术能力,涵盖运维.部署流水线.监控.安全与审计以及质量关注,这是本书一开始内容简介的开头,本书的作者是伦恩·拜斯(Len Bass).英戈·韦伯 ...
- android-effect
1. 基本框架 2.初探
- 【腾讯Bugly干货分享】那些年,我们一起写过的“单例模式”
题记 度娘上对设计模式(Design pattern)的定义是:"一套被反复使用.多数人知晓的.经过分类编目的.代码设计经验的总结."它由著名的"四人帮",又称 ...
- feign调用spring clound eureka 注册中心服务
@RestController public class TestService { private TestApi computeClient; private static final Strin ...
- 剑指offer面试题23:从上到下打印二叉树(树的层序遍历)
题目:从上往下打印出二叉树的每个节点,同一层的结点按照从左往右的顺序打印. 解题思路:二叉树的层序遍历,在打印一个节点的时候,要把他的子节点保存起来打印第一层要把第二层的节点保存起来, 打印第二层要把 ...
- JVM之虚拟机类加载机制
有兴趣可以先参考前面的几篇JVM总结: JVM自动内存管理机制-Java内存区域(上) JVM自动内存管理机制-Java内存区域(下) JVM垃圾收集器与内存分配策略(一) 我们知道,在编写一 ...
- 全面了解移动端DNS域名劫持等杂症:原理、根源、HttpDNS解决方案等
1.引言 对于互联网,域名是访问的第一跳,而这一跳很多时候会“失足”(尤其是移动端网络),导致访问错误内容.失败连接等,让用户在互联网上畅游的爽快瞬间消失. 而对于这关键的第一跳,包括鹅厂在内的国 ...
- 使用token和redis怎样判断账户是否失效和异地登录
思路: 将token作为value,账户的id作为key 每次登录都去redis中查询该账户的登录是否过期,没有过期则删掉原来的id,token,将新生成token作为value存入redis中.过期 ...
