第十六节,使用函数封装库tf.contrib.layers
这一节,介绍TensorFlow中的一个封装好的高级库,里面有前面讲过的很多函数的高级封装,使用这个高级库来开发程序将会提高效率。
我们改写第十三节的程序,卷积函数我们使用tf.contrib.layers.conv2d(),池化函数使用tf.contrib.layers.max_pool2d()和tf.contrib.layers.avg_pool2d(),全连接函数使用tf.contrib.layers.fully_connected()。
一 tf.contrib.layers中的具体函数介绍
1.tf.contrib.layers.conv2d()函数的定义如下:
def convolution(inputs,

                num_outputs,

                kernel_size,

                stride=1,

                padding='SAME',

                data_format=None,

                rate=1,

                activation_fn=nn.relu,

                normalizer_fn=None,

                normalizer_params=None,

                weights_initializer=initializers.xavier_initializer(),

                weights_regularizer=None,

                biases_initializer=init_ops.zeros_initializer(),

                biases_regularizer=None,

                reuse=None,

                variables_collections=None,

                outputs_collections=None,

                trainable=True,

                scope=None):
常用的参数说明如下:
- inputs:形状为[batch_size, height, width, channels]的输入。
- num_outputs:代表输出几个channel。这里不需要再指定输入的channel了,因为函数会自动根据inpus的shpe去判断。
- kernel_size:卷积核大小,不需要带上batch和channel,只需要输入尺寸即可。[5,5]就代表5x5的卷积核,如果长和宽都一样,也可以只写一个数5.
- stride:步长,默认是长宽都相等的步长。卷积时,一般都用1,所以默认值也是1.如果长和宽都不相等,也可以用一个数组[1,2]。
- padding:填充方式,'SAME'或者'VALID'。
- activation_fn:激活函数。默认是ReLU。也可以设置为None
- weights_initializer:权重的初始化,默认为initializers.xavier_initializer()函数。
- weights_regularizer:权重正则化项,可以加入正则函数。biases_initializer:偏置的初始化,默认为init_ops.zeros_initializer()函数。
- biases_regularizer:偏置正则化项,可以加入正则函数。
- trainable:是否可训练,如作为训练节点,必须设置为True,默认即可。如果我们是微调网络,有时候需要冻结某一层的参数,则设置为False。
2.tf.contrib.layers.max_pool2d()函数的定义如下:
def max_pool2d(inputs,

               kernel_size,

               stride=2,

               padding='VALID',

               data_format=DATA_FORMAT_NHWC,

               outputs_collections=None,

               scope=None):
参数说明如下:
- inputs: A 4-D tensor of shape `[batch_size, height, width, channels]` if`data_format` is `NHWC`, and `[batch_size, channels, height, width]` if `data_format` is `NCHW`.
- kernel_size: A list of length 2: [kernel_height, kernel_width] of the pooling kernel over which the op is computed. Can be an int if both values are the same.
- stride: A list of length 2: [stride_height, stride_width].Can be an int if both strides are the same. Note that presently both strides must have the same value.
- padding: The padding method, either 'VALID' or 'SAME'.
- data_format: A string. `NHWC` (default) and `NCHW` are supported.
- outputs_collections: The collections to which the outputs are added.
- scope: Optional scope for name_scope.
3.tf.contrib.layers.avg_pool2d()函数定义
def avg_pool2d(inputs,

               kernel_size,

               stride=2,

               padding='VALID',

               data_format=DATA_FORMAT_NHWC,

               outputs_collections=None,

               scope=None):
参数说明如下:
- inputs: A 4-D tensor of shape `[batch_size, height, width, channels]` if`data_format` is `NHWC`, and `[batch_size, channels, height, width]` if `data_format` is `NCHW`.
- kernel_size: A list of length 2: [kernel_height, kernel_width] of the pooling kernel over which the op is computed. Can be an int if both values are the same.
- stride: A list of length 2: [stride_height, stride_width].Can be an int if both strides are the same. Note that presently both strides must have the same value.
- padding: The padding method, either 'VALID' or 'SAME'.
- data_format: A string. `NHWC` (default) and `NCHW` are supported.
- outputs_collections: The collections to which the outputs are added.
- scope: Optional scope for name_scope.
4.tf.contrib.layers.fully_connected()函数的定义如下:
def fully_connected(inputs,

                    num_outputs,

                    activation_fn=nn.relu,

                    normalizer_fn=None,

                    normalizer_params=None,

                    weights_initializer=initializers.xavier_initializer(),

                    weights_regularizer=None,

                    biases_initializer=init_ops.zeros_initializer(),

                    biases_regularizer=None,

                    reuse=None,

                    variables_collections=None,

                    outputs_collections=None,

                    trainable=True,

                    scope=None):
参数说明如下:
- inputs: A tensor of at least rank 2 and static value for the last dimension; i.e. `[batch_size, depth]`, `[None, None, None, channels]`.
- num_outputs: Integer or long, the number of output units in the layer.
- activation_fn: Activation function. The default value is a ReLU function.Explicitly set it to None to skip it and maintain a linear activation.
- normalizer_fn: Normalization function to use instead of `biases`. If `normalizer_fn` is provided then `biases_initializer` and
- `biases_regularizer` are ignored and `biases` are not created nor added.default set to None for no normalizer function
- normalizer_params: Normalization function parameters.
- weights_initializer: An initializer for the weights.
- weights_regularizer: Optional regularizer for the weights.
- biases_initializer: An initializer for the biases. If None skip biases.
- biases_regularizer: Optional regularizer for the biases.
- reuse: Whether or not the layer and its variables should be reused. To be able to reuse the layer scope must be given.
- variables_collections: Optional list of collections for all the variables or a dictionary containing a different list of collections per variable.
- outputs_collections: Collection to add the outputs.
- trainable: If `True` also add variables to the graph collection `GraphKeys.TRAINABLE_VARIABLES` (see tf.Variable).如果我们是微调网络,有时候需要冻结某一层的参数,则设置为False。
- scope: Optional scope for variable_scope.
二 改写cifar10分类
代码如下:
# -*- coding: utf-8 -*-
"""
Created on Thu May 3 12:29:16 2018 @author: zy
""" '''
建立一个带有全连接层的卷积神经网络 并对CIFAR-10数据集进行分类
1.使用2个卷积层的同卷积操作,滤波器大小为5x5,每个卷积层后面都会跟一个步长为2x2的池化层,滤波器大小为2x2
2.对输出的64个feature map进行全局平均池化,得到64个特征
3.加入一个全连接层,使用softmax激活函数,得到分类
''' import cifar10_input
import tensorflow as tf
import numpy as np def print_op_shape(t):
'''
输出一个操作op节点的形状
'''
print(t.op.name,'',t.get_shape().as_list()) '''
一 引入数据集
'''
batch_size = 128
learning_rate = 1e-4
training_step = 15000
display_step = 200
#数据集目录
data_dir = './cifar10_data/cifar-10-batches-bin'
print('begin')
#获取训练集数据
images_train,labels_train = cifar10_input.inputs(eval_data=False,data_dir = data_dir,batch_size=batch_size)
print('begin data') '''
二 定义网络结构
''' #定义占位符
input_x = tf.placeholder(dtype=tf.float32,shape=[None,24,24,3]) #图像大小24x24x
input_y = tf.placeholder(dtype=tf.float32,shape=[None,10]) #0-9类别 x_image = tf.reshape(input_x,[batch_size,24,24,3]) #1.卷积层 ->池化层 h_conv1 = tf.contrib.layers.conv2d(inputs=x_image,num_outputs=64,kernel_size=5,stride=1,padding='SAME', activation_fn=tf.nn.relu) #输出为[-1,24,24,64]
print_op_shape(h_conv1)
h_pool1 = tf.contrib.layers.max_pool2d(inputs=h_conv1,kernel_size=2,stride=2,padding='SAME') #输出为[-1,12,12,64]
print_op_shape(h_pool1) #2.卷积层 ->池化层 h_conv2 =tf.contrib.layers.conv2d(inputs=h_pool1,num_outputs=64,kernel_size=[5,5],stride=[1,1],padding='SAME', activation_fn=tf.nn.relu) #输出为[-1,12,12,64]
print_op_shape(h_conv2)
h_pool2 = tf.contrib.layers.max_pool2d(inputs=h_conv2,kernel_size=[2,2],stride=[2,2],padding='SAME') #输出为[-1,6,6,64]
print_op_shape(h_pool2) #3全连接层 nt_hpool2 = tf.contrib.layers.avg_pool2d(inputs=h_pool2,kernel_size=6,stride=6,padding='SAME') #输出为[-1,1,1,64]
print_op_shape(nt_hpool2)
nt_hpool2_flat = tf.reshape(nt_hpool2,[-1,64])
y_conv = tf.contrib.layers.fully_connected(inputs=nt_hpool2_flat,num_outputs=10,activation_fn=tf.nn.softmax)
print_op_shape(y_conv) '''
三 定义求解器
''' #softmax交叉熵代价函数
cost = tf.reduce_mean(-tf.reduce_sum(input_y * tf.log(y_conv),axis=1)) #求解器
train = tf.train.AdamOptimizer(learning_rate).minimize(cost) #返回一个准确度的数据
correct_prediction = tf.equal(tf.arg_max(y_conv,1),tf.arg_max(input_y,1))
#准确率
accuracy = tf.reduce_mean(tf.cast(correct_prediction,dtype=tf.float32)) '''
四 开始训练
'''
sess = tf.Session();
sess.run(tf.global_variables_initializer())
# 启动计算图中所有的队列线程 调用tf.train.start_queue_runners来将文件名填充到队列,否则read操作会被阻塞到文件名队列中有值为止。
tf.train.start_queue_runners(sess=sess) for step in range(training_step):
#获取batch_size大小数据集
image_batch,label_batch = sess.run([images_train,labels_train]) #one hot编码
label_b = np.eye(10,dtype=np.float32)[label_batch] #开始训练
train.run(feed_dict={input_x:image_batch,input_y:label_b},session=sess) if step % display_step == 0:
train_accuracy = accuracy.eval(feed_dict={input_x:image_batch,input_y:label_b},session=sess)
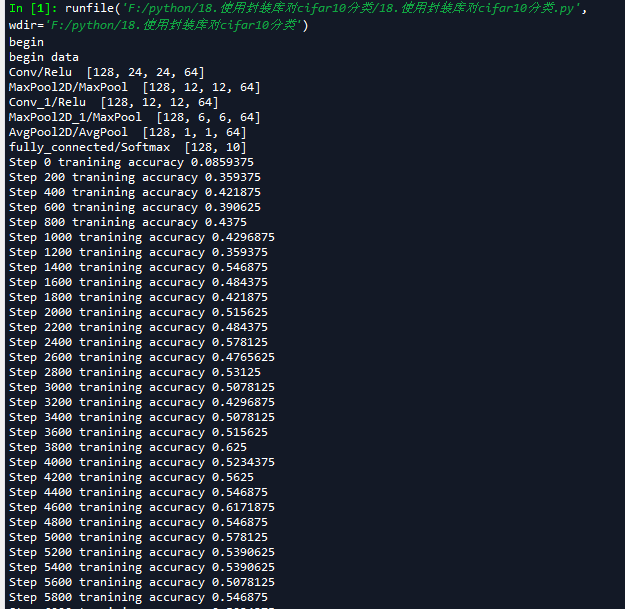
print('Step {0} tranining accuracy {1}'.format(step,train_accuracy))

第十六节,使用函数封装库tf.contrib.layers的更多相关文章
- 第三百三十六节,web爬虫讲解2—urllib库中使用xpath表达式—BeautifulSoup基础
第三百三十六节,web爬虫讲解2—urllib库中使用xpath表达式—BeautifulSoup基础 在urllib中,我们一样可以使用xpath表达式进行信息提取,此时,你需要首先安装lxml模块 ...
- centos shell脚本编程2 if 判断 case判断 shell脚本中的循环 for while shell中的函数 break continue test 命令 第三十六节课
centos shell脚本编程2 if 判断 case判断 shell脚本中的循环 for while shell中的函数 break continue test 命令 ...
- ASP.NET MVC深入浅出系列(持续更新) ORM系列之Entity FrameWork详解(持续更新) 第十六节:语法总结(3)(C#6.0和C#7.0新语法) 第三节:深度剖析各类数据结构(Array、List、Queue、Stack)及线程安全问题和yeild关键字 各种通讯连接方式 设计模式篇 第十二节: 总结Quartz.Net几种部署模式(IIS、Exe、服务部署【借
ASP.NET MVC深入浅出系列(持续更新) 一. ASP.NET体系 从事.Net开发以来,最先接触的Web开发框架是Asp.Net WebForm,该框架高度封装,为了隐藏Http的无状态模 ...
- 第一百二十六节,JavaScript,XPath操作xml节点
第一百二十六节,JavaScript,XPath操作xml节点 学习要点: 1.IE中的XPath 2.W3C中的XPath 3.XPath跨浏览器兼容 XPath是一种节点查找手段,对比之前使用标准 ...
- 第四百一十六节,Tensorflow简介与安装
第四百一十六节,Tensorflow简介与安装 TensorFlow是什么 Tensorflow是一个Google开发的第二代机器学习系统,克服了第一代系统DistBelief仅能开发神经网络算法.难 ...
- 第三百四十六节,Python分布式爬虫打造搜索引擎Scrapy精讲—Requests请求和Response响应介绍
第三百四十六节,Python分布式爬虫打造搜索引擎Scrapy精讲—Requests请求和Response响应介绍 Requests请求 Requests请求就是我们在爬虫文件写的Requests() ...
- 第三百二十六节,web爬虫,scrapy模块,解决重复ur——自动递归url
第三百二十六节,web爬虫,scrapy模块,解决重复url——自动递归url 一般抓取过的url不重复抓取,那么就需要记录url,判断当前URL如果在记录里说明已经抓取过了,如果不存在说明没抓取过 ...
- 大白话5分钟带你走进人工智能-第二十六节决策树系列之Cart回归树及其参数(5)
第二十六节决策树系列之Cart回归树及其参数(5) 上一节我们讲了不同的决策树对应的计算纯度的计算方法, ...
- m_Orchestrate learning system---二十六、动态给封装好的控件添加属性
m_Orchestrate learning system---二十六.动态给封装好的控件添加属性 一.总结 一句话总结:比如我现在封装好了ueditor控件,我外部调用这个控件,因为要写数据到数据库 ...
随机推荐
- Visual Studio2012调试时无法命中断点
今天在调试代码的时候发现在Debug模式下无法命中断点,然后一步步去检查原因,最后发现是在项目-->属性-->生成-->高级-->调试信息被设置为None,然后在选项中将其选择 ...
- python设计模式第二十二天【备忘录模式】
1.应用场景 (1)能保存对象的状态,并能够恢复到之前的状态 2.代码实现 #!/usr/bin/env python #! _*_ coding:UTF-8 _*_ class Originator ...
- Python自动化运维之pexpect从入门到精通
1. 应用场景 模拟ssh, telnet远程登录, 模拟ftp文件上传 2. 安装 参考资料: <pexpect实例分析>https://www.ibm.com/developerwor ...
- maven(win10)配置完环境变量后无法识别mvn -v命令
第一步:http://maven.apache.org/download.cgi官网下载 第二步:把压缩包解压缩到不含中文和空格的目录下 第三步:新建MAVEN_HOME环境变量,值为maven解压缩 ...
- 扒一扒开源世界有哪些licenses?
摘要:license,中文译为“许可证”.在开源世界里,license是具有法律效力的,通过选择相应的license,版权拥有者可以声称自己相应的权利,包括其他人使用.修改.引用.共享等一系列涉及版权 ...
- Maven问题:Failure to transfer org.apache.maven
Maven报错:Failure to transfer org.apache.maven 在创建Maven项目时,经常会在pom.xml的第一行处报错,提示信息如下: Failure to trans ...
- fftshift
说明:本文为转载http://blog.csdn.net/myathappy/article/details/51344618 Matlab fftshift 详解 一.实信号情况 因为实信号以fs为 ...
- 【C/C++】实现牛顿迭代
#include<bits/stdc++.h> using namespace std; /*(x+2)^2 +1 -2(x-1)^2+7 */ double f(double x){ - ...
- windows常用服务命令
windows运行打开服务命令的方法 :在开始->运行,输入以下命令 gpedit.msc-----组策略 sndrec32-------录音机 Nslookup-------IP地址侦测器 e ...
- 【BZOJ1999】【NOIP2007】树网的核 单调队列优化DP
题目描述 题目很长,大家自己去看吧. bzoj vijos 原题\(n\leq 300\) 加强版\(n\leq 500000\) 题解 这种东西当然要猜结论的啦,否则会比较麻烦. 结论1:如果有很多 ...