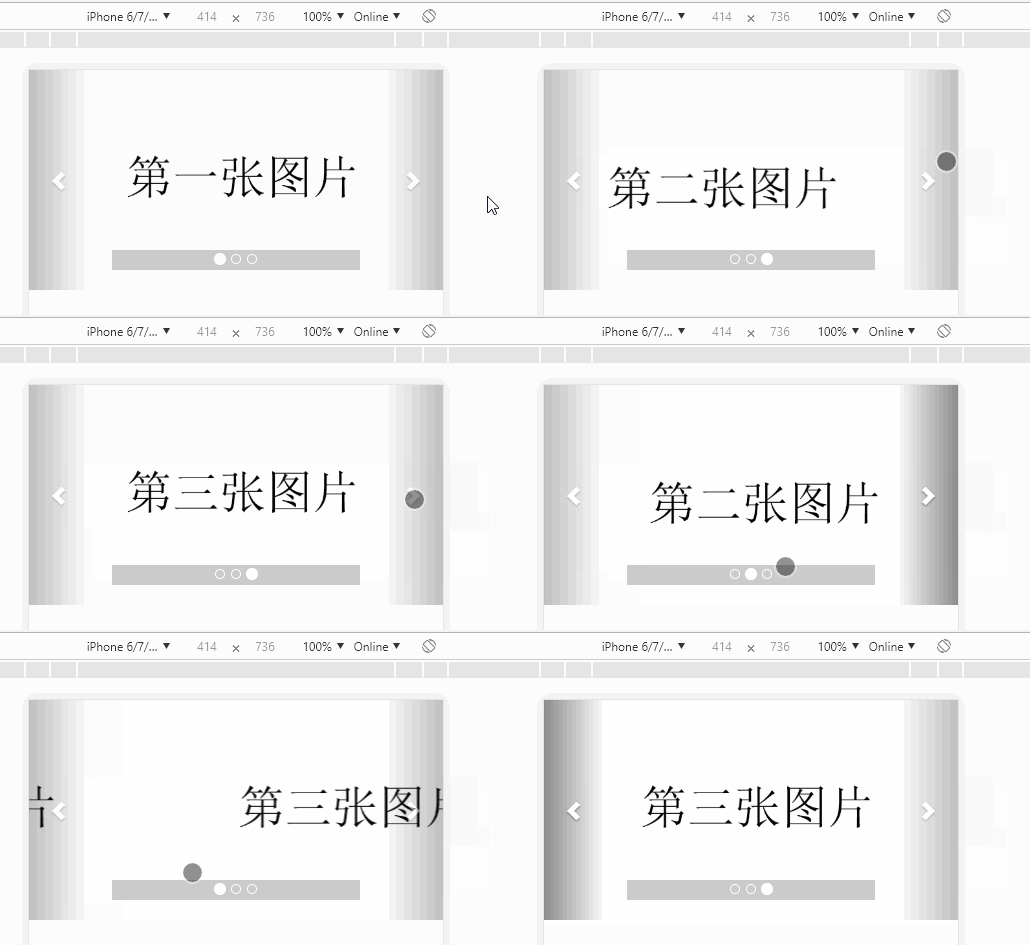
bootstrap轮播图组件
一、轮播图组件模板(官方文档)
    <div id="carousel-example-generic" class="carousel slide" data-ride="carousel">

        <!-- 指示器 -->

        <ol class="carousel-indicators">

          <li data-target="#carousel-example-generic" data-slide-to="0" class="active"></li>

          <li data-target="#carousel-example-generic" data-slide-to="1"></li>

          <li data-target="#carousel-example-generic" data-slide-to="2"></li>

        </ol>

        <!-- 轮播图片及说明文字 -->

        <div class="carousel-inner" role="listbox">

          <div class="item active">

            <img src="..." alt="图片1">

            <div class="carousel-caption">

              ...

            </div>

          </div>

          <div class="item">

            <img src="..." alt="图片2">

            <div class="carousel-caption">

              ...

            </div>

          </div>

        </div>

        <!-- 控制按钮:左右切换 -->

        <a class="left carousel-control" href="#carousel-example-generic" role="button" data-slide="prev">

          <span class="glyphicon glyphicon-chevron-left" aria-hidden="true"></span>

          <span class="sr-only">Previous</span>

        </a>

        <a class="right carousel-control" href="#carousel-example-generic" role="button" data-slide="next">

          <span class="glyphicon glyphicon-chevron-right" aria-hidden="true"></span>

          <span class="sr-only">Next</span>

        </a>

      </div>
二、分析轮播图组件结构
①carousel 轮播图的模块, slide是否加上滑动效果,data-ride="carousel" 初始化轮播图属性
②data-target="#carousel-example-generic" 控制目标轮播图,data-slide-to="数字" 控制的是轮播图当中的第几张 (索引),class="active" 当前选中的点
③role="listbox" 提供给屏幕阅读器使用,class="carousel-inner"需要轮播的容器,每一个容器里class="item"包括轮播图片img和图片的说明性文字carousel-caption
④left carousel-control是切换上一张的按钮,right carousel-control是切换下一张的按钮,其中的data-slide="next/prev"声明左滑还是右滑,aria-hidden和sr-only是提供给屏幕阅读器使用
三、精简版轮播图模板
<div id="carousel-example-generic" class="carousel slide" data-ride="carousel">

        <!-- 指示器 -->

        <ol class="carousel-indicators">

          <li data-target="#carousel-example-generic" data-slide-to="0" class="active"></li>

          <li data-target="#carousel-example-generic" data-slide-to="1"></li>

          <li data-target="#carousel-example-generic" data-slide-to="2"></li>

        </ol>

        <!-- 轮播图片及说明文字 -->

        <div class="carousel-inner" role="listbox">

          <div class="item active">

            <img src="..." alt="图片1">

          </div>

          <div class="item">

            <img src="..." alt="图片2">

          </div>

          <div class="item">

            <img src="..." alt="图片3">

          </div>

        </div>

        <!-- 控制按钮:左右切换 -->

        <a class="left carousel-control" href="#carousel-example-generic" role="button" data-slide="prev">

          <span class="glyphicon glyphicon-chevron-left"></span>

        </a>

        <a class="right carousel-control" href="#carousel-example-generic" role="button" data-slide="next">

          <span class="glyphicon glyphicon-chevron-right"></span>

        </a>

      </div>
四、例子:在PC端使用轮播图(高度固定,图片居中,容器铺满,使用背景图)
<div id="carousel-example-generic" class="carousel slide" data-ride="carousel">

        <!-- 指示器 -->

        <ol class="carousel-indicators">

          <li data-target="#carousel-example-generic" data-slide-to="0" class="active"></li>

          <li data-target="#carousel-example-generic" data-slide-to="1"></li>

          <li data-target="#carousel-example-generic" data-slide-to="2"></li>

        </ol>

        <!-- 轮播图片及说明文字 -->

        <div class="carousel-inner" role="listbox">

          <div class="item active">

            <a href="#" class="pc_imgBox" style="background-image: url('images/2-1.png')"></a>

          </div>

          <div class="item">

            <a href="#" class="pc_imgBox" style="background-image: url('images/2-2.png')"></a>

          </div>

          <div class="item">

            <a href="#" class="pc_imgBox" style="background-image: url('images/2-3.png')"></a>

          </div>

        </div>

        <!-- 控制按钮:左右切换 -->

        <a class="left carousel-control" href="#carousel-example-generic" role="button" data-slide="prev">

          <span class="glyphicon glyphicon-chevron-left"></span>

        </a>

        <a class="right carousel-control" href="#carousel-example-generic" role="button" data-slide="next">

          <span class="glyphicon glyphicon-chevron-right"></span>

        </a>

      </div>
        .pc_imgBox{

            display: block;

            height: 400px;

            width: 100%;

            background-size: cover;

            background-position:  center;

            background-repeat: no-repeat;

        }

        .carousel-indicators{

            background: #ccc;

        }

五、例子:在移动端使用轮播图(宽度自适应,高度自动变化,使用img引入图片)
<div id="carousel-example-generic" class="carousel slide" data-ride="carousel">

        <!-- 指示器 -->

        <ol class="carousel-indicators">

          <li data-target="#carousel-example-generic" data-slide-to="0" class="active"></li>

          <li data-target="#carousel-example-generic" data-slide-to="1"></li>

          <li data-target="#carousel-example-generic" data-slide-to="2"></li>

        </ol>

        <!-- 轮播图片及说明文字 -->

        <div class="carousel-inner" role="listbox">

          <div class="item active">

            <a href="#" class="pc_imgBox"><img src="data:images/1-1.png" alt=""></a>

          </div>

          <div class="item">

            <a href="#" class="m_imgBox"><img src="data:images/1-2.png" alt=""></a>

          </div>

          <div class="item">

            <a href="#" class="m_imgBox"><img src="data:images/1-3.png" alt=""></a>

          </div>

        </div>

        <!-- 控制按钮:左右切换 -->

        <a class="left carousel-control" href="#carousel-example-generic" role="button" data-slide="prev">

          <span class="glyphicon glyphicon-chevron-left"></span>

        </a>

        <a class="right carousel-control" href="#carousel-example-generic" role="button" data-slide="next">

          <span class="glyphicon glyphicon-chevron-right"></span>

        </a>

      </div>
        .m_imgBox{

            display: block;

            width: 100%;

        }

        .carousel-indicators{

            background: #ccc;

        }

六、例子:响应式的轮播图(利用媒体查询自适应PC端和移动端)
<div id="carousel-example-generic" class="carousel slide" data-ride="carousel">

        <!-- 指示器 -->

        <ol class="carousel-indicators">

          <li data-target="#carousel-example-generic" data-slide-to="0" class="active"></li>

          <li data-target="#carousel-example-generic" data-slide-to="1"></li>

          <li data-target="#carousel-example-generic" data-slide-to="2"></li>

        </ol>

        <!-- 轮播图片及说明文字 -->

        <div class="carousel-inner" role="listbox">

          <div class="item active">

            <a href="#" class="pc_imgBox hidden-xs" style="background-image: url('images/2-1.png')"></a>

            <a href="#" class="m_imgBox hidden-lg hidden-md hidden-sm"><img src="data:images/1-1.png" alt=""></a>

          </div>

          <div class="item">

            <a href="#" class="pc_imgBox hidden-xs" style="background-image: url('images/2-2.png')"></a>

            <a href="#" class="m_imgBox hidden-lg hidden-md hidden-sm"><img src="data:images/1-2.png" alt=""></a>

          </div>

          <div class="item">

            <a href="#" class="pc_imgBox hidden-xs" style="background-image: url('images/2-3.png')"></a>

            <a href="#" class="m_imgBox hidden-lg hidden-md hidden-sm"><img src="data:images/1-3.png" alt=""></a>

          </div>

        </div>

        <!-- 控制按钮:左右切换 -->

        <a class="left carousel-control" href="#carousel-example-generic" role="button" data-slide="prev">

          <span class="glyphicon glyphicon-chevron-left"></span>

        </a>

        <a class="right carousel-control" href="#carousel-example-generic" role="button" data-slide="next">

          <span class="glyphicon glyphicon-chevron-right"></span>

        </a>

      </div>
        .pc_imgBox{

            display: block;

            height: 400px;

            width: 100%;

            background-size: cover;

            background-position:  center;

            background-repeat: no-repeat;

        }

        .m_imgBox{

            display: block;

            width: 100%;

        }

        .carousel-indicators{

            background: #ccc;

        }

bootstrap轮播图组件的更多相关文章
- 第124天:移动web端-Bootstrap轮播图插件使用
Bootstrap JS插件使用 > 对于Bootstrap的JS插件,我们只需要将文档实例中的代码粘到我们自己的代码中> 然后作出相应的样式调整 Bootstrap中轮播图插件叫作Car ...
- 原生JS面向对象思想封装轮播图组件
原生JS面向对象思想封装轮播图组件 在前端页面开发过程中,页面中的轮播图特效很常见,因此我就想封装一个自己的原生JS的轮播图组件.有了这个需求就开始着手准备了,代码当然是以简洁为目标,轮播图的各个功能 ...
- bootstrap轮播图 两侧半透明阴影
用bootstrap轮播图:Carousel插件,图片两侧影音实在碍眼,想去掉,首先发现有css里由opacity: 0.5这个东西来控制,全部改成opacity: 0.0,发现指示箭头也看不见了. ...
- reactjs-swiper react轮播图组件基于swiper
react轮播图组件基于swiper demo地址:http://reactjs-ui.github.io/reactjs-swiper/simple.html 1. 下载安装 npm install ...
- 03 uni-app框架学习:轮播图组件的使用
1.轮播图组件的使用 参照官方文档 2.在页面上加入这个组件 3.在页面中引去css样式 并编写样式 ps:upx单位是什么 简单来说 就相当于小程序中的rpx 是一个自适应的单位 会根据屏幕宽度自动 ...
- Vue2 轮播图组件 slide组件
Vue2原生始轮播图组件,支持宽度自适应.高度设置.轮播时间设置.左右箭头按钮控制,圆点按钮切换,以及箭头.圆点按钮是否显示. <v-carousel :slideData="slid ...
- vue移动音乐app开发学习(三):轮播图组件的开发
本系列文章是为了记录学习中的知识点,便于后期自己观看.如果有需要的同学请登录慕课网,找到Vue 2.0 高级实战-开发移动端音乐WebApp进行观看,传送门. 完成后的页面状态以及项目结构如下: 一: ...
- Bootstrap 轮播图的使用和理解
<!DOCTYPE html> <html lang="zh-CN"> <head> <meta charset="utf-8& ...
- taro 自定义 轮播图组件
1.代码 components/MySwiper/index.js /** * 轮播图组件 */ import Taro, { Component } from '@tarojs/taro'; imp ...
随机推荐
- ubuntu 安装harbor仓库
一.介绍 Harbor,是一个英文单词,意思是港湾,港湾是干什么的呢,就是停放货物的,而货物呢,是装在集装箱中的,说到集装箱,就不得不提到Docker容器,因为docker容器的技术正是借鉴了集装箱的 ...
- AGC037
Contest page A Tag:贪心 猜想段的长度只会有$1$和$2$(感性理解,应该可以反证--),然后就可以DP/贪心了 B Tag:贪心.组合 考虑如何构造合法方案.从右往左考虑球,因为当 ...
- redis 5.0 CLUSTERDOWN The cluster is down
安装 redis 集群,设置值报错,错误信息:redis 5.0 CLUSTERDOWN The cluster is down. 这个是由于安装错误导致的,需要重新进行 修复一下. 命令如下: [ ...
- 2019 斗鱼java面试笔试题 (含面试题解析)
本人5年开发经验.18年年底开始跑路找工作,在互联网寒冬下成功拿到阿里巴巴.今日头条.斗鱼等公司offer,岗位是Java后端开发,因为发展原因最终选择去了斗鱼,入职一年时间了,之前面试了很多家公 ...
- python-pymysql防止sql注入攻击介绍
目录 pymysql sql 注入攻击 调用存储过程 pymysql pymysql 是一个第三方模块,帮我们封装了 建立表/用户认证/sql的执行/结果的获取 import pymysql # 步骤 ...
- CentOS - Eclipse安装Shelled
一,下载Shelled: https://sourceforge.net/projects/shelled/ 二,打开Eclipse,以离线方式安装: Help->Install New Sof ...
- 使用Prometheus监控Linux系统各项指标
首先在Linux系统上安装一个探测器node explorer, 下载地址https://prometheus.io/docs/guides/node-exporter/ 这个探测器会定期将linux ...
- 基于Text-CNN模型的中文文本分类实战 流川枫 发表于AI星球订阅
Text-CNN 1.文本分类 转眼学生生涯就结束了,在家待就业期间正好有一段空闲期,可以对曾经感兴趣的一些知识点进行总结. 本文介绍NLP中文本分类任务中核心流程进行了系统的介绍,文末给出一个基于T ...
- 二维码扫码登录原理及简单demo
扫码登录原理转载自: https://www.cnblogs.com/liyasong/p/saoma.html 需求介绍 首先,介绍下什么是扫码登录.现在,大部分同学手机上都装有qq和淘宝,天猫等这 ...
- Hive性能优化【严格模式、join优化、Map-Side聚合、JVM重用】
一.严格模式 通过设置以下参数开启严格模式: >set hive.mapred.mode=strict;[默认为nonstrict非严格模式] 查询限制: 1.对于分区表,必须添加where查询 ...
