Android Volley源码分析
今天来顺手分析一下谷歌的volley http通信框架。首先从github上 下载volley的源码,
然后新建你自己的工程以后 选择import module 然后选择volley。 最后还需要更改1个
配置文件
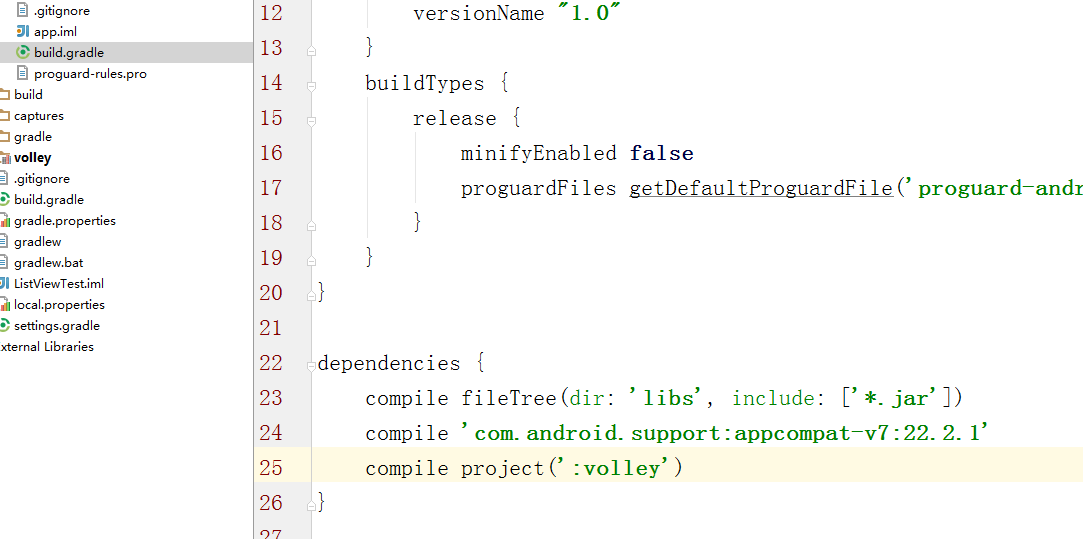
就是我选中的那句话。记得要加。不然会报错。把volley作为一个module 在你的项目中引用的原因是,因为我们要分析源码,需要测试我们心中所想。所以这么做是最方便的。
就相当于eclipse里面的工程依赖。
有关于volley 如何使用的教程 我就不在这写了,请自行谷歌,我们直接看源码。
 /*

  * Copyright (C) 2012 The Android Open Source Project

  *

  * Licensed under the Apache License, Version 2.0 (the "License");

  * you may not use this file except in compliance with the License.

  * You may obtain a copy of the License at

  *

  *      http://www.apache.org/licenses/LICENSE-2.0

  *

  * Unless required by applicable law or agreed to in writing, software

  * distributed under the License is distributed on an "AS IS" BASIS,

  * WITHOUT WARRANTIES OR CONDITIONS OF ANY KIND, either express or implied.

  * See the License for the specific language governing permissions and

  * limitations under the License.

  */

 package com.android.volley.toolbox;

 import android.content.Context;

 import android.content.pm.PackageInfo;

 import android.content.pm.PackageManager.NameNotFoundException;

 import android.net.http.AndroidHttpClient;

 import android.os.Build;

 import android.util.Log;

 import com.android.volley.Network;

 import com.android.volley.RequestQueue;

 import java.io.File;

 public class Volley {

     /**

      * Default on-disk cache directory.

      */

     private static final String DEFAULT_CACHE_DIR = "volley";

     /**

      * Creates a default instance of the worker pool and calls {@link RequestQueue#start()} on it.

      *

      * @param context A {@link Context} to use for creating the cache dir.

      * @param stack   An {@link HttpStack} to use for the network, or null for default.

      * @return A started {@link RequestQueue} instance.

      */

     public static RequestQueue newRequestQueue(Context context, HttpStack stack) {

         File cacheDir = new File(context.getCacheDir(), DEFAULT_CACHE_DIR);

         String userAgent = "volley/0";

         try {

             String packageName = context.getPackageName();

             PackageInfo info = context.getPackageManager().getPackageInfo(packageName, 0);

             userAgent = packageName + "/" + info.versionCode;

         } catch (NameNotFoundException e) {

         }

         /**

          * 注意android 2.3之前一般用httpcilent进行网络交互 2.3包括2.3以后才使用HttpURLConnection

          * 这里面 实际上hurlstack就是 HttpURLConnection的一个变种

          */

         if (stack == null) {

             if (Build.VERSION.SDK_INT >= 9) {

                 stack = new HurlStack();

             } else {

                 // Prior to Gingerbread, HttpUrlConnection was unreliable.

                 // See: http://android-developers.blogspot.com/2011/09/androids-http-clients.html

                 stack = new HttpClientStack(AndroidHttpClient.newInstance(userAgent));

             }

         }

         Network network = new BasicNetwork(stack);

         //从下面这行语句来看,我们的RequestQueue 是由一个硬盘缓存和BasicNetwork 来组成的

         RequestQueue queue = new RequestQueue(new DiskBasedCache(cacheDir), network);

         queue.start();

         return queue;

     }

     /**

      * Creates a default instance of the worker pool and calls {@link RequestQueue#start()} on it.

      *

      * @param context A {@link Context} to use for creating the cache dir.

      * @return A started {@link RequestQueue} instance.

      */

     public static RequestQueue newRequestQueue(Context context) {

         return newRequestQueue(context, null);

     }

 }
我们知道一般我们在使用volley的时候 第一句话就是
RequestQueue queue = Volley.newRequestQueue(this);

实际上他的调用主要过程就是上面的45-77行。

46-54行 主要是在构造volley的缓存目录,实际上你最后打印出来可以发现volley的缓存目录 一般都在data/data/你程序的包名/volley下。这么做有一个好处就是一般情况下别的app是无法清除你的缓存的。除非root。有一些网络或者是图片框架的 磁盘缓存喜欢放在sd卡上,但是这么做有的时候会被误删除 不是很安全。

59-70行 主要是在构造http请求类,注意70行的BasicNetwork这个类,他就是最终发送http请求的地方。他的构造函数实际上是接受一个接口
 /*

  * Copyright (C) 2011 The Android Open Source Project

  *

  * Licensed under the Apache License, Version 2.0 (the "License");

  * you may not use this file except in compliance with the License.

  * You may obtain a copy of the License at

  *

  *      http://www.apache.org/licenses/LICENSE-2.0

  *

  * Unless required by applicable law or agreed to in writing, software

  * distributed under the License is distributed on an "AS IS" BASIS,

  * WITHOUT WARRANTIES OR CONDITIONS OF ANY KIND, either express or implied.

  * See the License for the specific language governing permissions and

  * limitations under the License.

  */

 package com.android.volley.toolbox;

 import com.android.volley.AuthFailureError;

 import com.android.volley.Request;

 import org.apache.http.HttpResponse;

 import java.io.IOException;

 import java.util.Map;

 /**

  * An HTTP stack abstraction.

  */

 public interface HttpStack {

     /**

      * Performs an HTTP request with the given parameters.

      *

      * <p>A GET request is sent if request.getPostBody() == null. A POST request is sent otherwise,

      * and the Content-Type header is set to request.getPostBodyContentType().</p>

      *

      * @param request the request to perform

      * @param additionalHeaders additional headers to be sent together with

      *         {@link Request#getHeaders()}

      * @return the HTTP response

      */

     public HttpResponse performRequest(Request<?> request, Map<String, String> additionalHeaders)

         throws IOException, AuthFailureError;

 }
所以在这里你们就应该明白 我们可以自己构造喜欢的http请求实体类,只要他实现了HttpStack这个接口即可,甚至于连NetWork我们都可以自己定义一个实现类。扩展性非常好。
73行 透露了两个信息,一个是volley使用的硬盘缓存类是DiskBasedCache,另外就是告诉我们requestqueue是从哪来的。
我们来简单看一下这个DiskBasedCache 因为代码过多 我只说重要的。他首先规定了一个最大的缓存空间 。
  /**

      * Default maximum disk usage in bytes.

      */

     private static final int DEFAULT_DISK_USAGE_BYTES = 5 * 1024 * 1024;
然后我们来看看缓存是怎么被存入的
 /**

      * Puts the entry with the specified key into the cache.

      */

     @Override

     public synchronized void put(String key, Entry entry) {

         //这个地方在存入硬盘缓存的时候会先看看是否超过最大容量如果超过要删除

         pruneIfNeeded(entry.data.length);

         File file = getFileForKey(key);

         try {

             BufferedOutputStream fos = new BufferedOutputStream(new FileOutputStream(file));

             CacheHeader e = new CacheHeader(key, entry);

             boolean success = e.writeHeader(fos);

             if (!success) {

                 fos.close();

                 VolleyLog.d("Failed to write header for %s", file.getAbsolutePath());

                 throw new IOException();

             }

             fos.write(entry.data);

             fos.close();

             putEntry(key, e);

             return;

         } catch (IOException e) {

         }

         boolean deleted = file.delete();

         if (!deleted) {

             VolleyLog.d("Could not clean up file %s", file.getAbsolutePath());

         }

     }
这个地方要说一下 那个参数key 实际上就是我们request的cachekey 也就是url.put的操作其实很简单 我就不过多分析了,我们可以稍微看一下pruneIfNeed这个函数。
  /**

      * Map of the Key, CacheHeader pairs

      */

     private final Map<String, CacheHeader> mEntries =

             new LinkedHashMap<String, CacheHeader>(16, .75f, true);
这个mEntries就是存放我们硬盘缓存的地方,注意这边使用的是linkedHashMap 他的特点就是最近最少使用的在前面,所以你看下面的代码
在遍历删除时,好处就是删除的都是最少使用的。这个地方很多写硬盘缓存的人可能都想不到,可以学习一下。
 /**

      * Prunes the cache to fit the amount of bytes specified.

      *

      * @param neededSpace The amount of bytes we are trying to fit into the cache.

      */

     private void pruneIfNeeded(int neededSpace) {

         if ((mTotalSize + neededSpace) < mMaxCacheSizeInBytes) {

             return;

         }

         if (VolleyLog.DEBUG) {

             VolleyLog.v("Pruning old cache entries.");

         }

         long before = mTotalSize;

         int prunedFiles = 0;

         long startTime = SystemClock.elapsedRealtime();

         Iterator<Map.Entry<String, CacheHeader>> iterator = mEntries.entrySet().iterator();

         while (iterator.hasNext()) {

             Map.Entry<String, CacheHeader> entry = iterator.next();

             CacheHeader e = entry.getValue();

             boolean deleted = getFileForKey(e.key).delete();

             if (deleted) {

                 mTotalSize -= e.size;

             } else {

                 VolleyLog.d("Could not delete cache entry for key=%s, filename=%s",

                         e.key, getFilenameForKey(e.key));

             }

             iterator.remove();

             prunedFiles++;

             if ((mTotalSize + neededSpace) < mMaxCacheSizeInBytes * HYSTERESIS_FACTOR) {

                 break;

             }

         }

         if (VolleyLog.DEBUG) {

             VolleyLog.v("pruned %d files, %d bytes, %d ms",

                     prunedFiles, (mTotalSize - before), SystemClock.elapsedRealtime() - startTime);

         }

     }
然后我们接着来看 RequestQueue是怎么构造的。
  public RequestQueue(Cache cache, Network network) {

         this(cache, network, DEFAULT_NETWORK_THREAD_POOL_SIZE);

     }
 /**

      * Number of network request dispatcher threads to start.

      */

     private static final int DEFAULT_NETWORK_THREAD_POOL_SIZE = 4;
  public RequestQueue(Cache cache, Network network, int threadPoolSize) {

         this(cache, network, threadPoolSize,

                 new ExecutorDelivery(new Handler(Looper.getMainLooper())));

     }
  public RequestQueue(Cache cache, Network network, int threadPoolSize,

                         ResponseDelivery delivery) {

         mCache = cache;

         mNetwork = network;

         mDispatchers = new NetworkDispatcher[threadPoolSize];

         mDelivery = delivery;

     }
具体的构造调用链就是这样的,这个地方就出现了2个新类,一个是NetworkDispatcher 他实际上就是工作线程 用来发http请求的。另外还有一个就是ExecutorDelivery 他是传递结果的,就是解析出来的流数据 由他来传递,注意他的写法 实际上表明了
这个消息传递者实在主线程里工作的。
然后看看我们的start函数 这边我就不多分析了 注释里都有 比较好理解。另外着重解释一下 那两个队列
  //PriorityBlockingQueue:类似于LinkedBlockQueue,但其所含对象的排序不是FIFO,

    //而是依据对象的自然排序顺序或者是构造函数的Comparator决定的顺序.

    //对于volley而言 你可以重写request的getPriority方法 这个方法的返回值越高

    //在这个队列里的优先级就越高 就越排在前面 并非是FIFO队列

    private final PriorityBlockingQueue<Request<?>> mCacheQueue =

            new PriorityBlockingQueue<Request<?>>();

    /**

     * The queue of requests that are actually going out to the network.

     */

    private final PriorityBlockingQueue<Request<?>> mNetworkQueue =

            new PriorityBlockingQueue<Request<?>>();
/**

     * Starts the dispatchers in this queue.

     */

    public void start() {

        stop();  // Make sure any currently running dispatchers are stopped.

        // Create the cache dispatcher and start it.

        mCacheDispatcher = new CacheDispatcher(mCacheQueue, mNetworkQueue, mCache, mDelivery);

        //启动了一个线程 这个线程是缓存线程 所以缓存线程在volley中只有一个

        mCacheDispatcher.start();

        // Create network dispatchers (and corresponding threads) up to the pool size.

        //DEFAULT_NETWORK_THREAD_POOL_SIZE 这个默认值是4 所以mDispatchers的默认大小是4

        //这个地方就是在给这个数组赋值 赋值结束以后就直接启动了

        for (int i = 0; i < mDispatchers.length; i++) {

            NetworkDispatcher networkDispatcher = new NetworkDispatcher(mNetworkQueue, mNetwork,

                    mCache, mDelivery);

            mDispatchers[i] = networkDispatcher;

            networkDispatcher.start();

        }

        //所以这个函数结束的时候volley一共启动了5个子线程 () 这个地方要注意他们2是公用的mNetworkQueue这个队列

        //mCache 磁盘缓存 mDelivery用于分发处理好的结果  mDelivery就是ExecutorDelivery的对象

    }
当我们构造完这个队列以后,我们就会构造一个request 然后把这个request对象 add到这个队列里。然后就能看到服务器返回的数据。
那我们就来最终看看add函数 做了哪些操作。这个地方很多人搞不清mWaitingRequests是干嘛的,实际上他也是缓存,只不过他缓存的东西比较特殊。
  /**

      * 这个地方mWaitingRequests是一个哈希表,注意这个哈希表的key 为request的url,

      * 而value则是一个队列,他的作用是 如果请求的url是一样的,那么就把这些请求

      * 也就是request放到一个队列里面,举例来说,如果abc三条request的url是一样的,

      * 那么假设a是第一个被add的,那么后面的bc将会放到这个map里value里的队列里面

      * bc并不会得到真正的执行。真正执行的只有a

      * 这么做的好处 其实显而易见 ,比如我们界面上点击某个按钮我们不想让他点击的时候

      * 弹进度狂,只想在后台发请求,但是如果你这么做的话,如果用户连续点击误操作,

      * 就会一直发请求会浪费很多流量,而在这里 有这个hashmap的保护,多数情况下

      * 大部分的重复url请求会被屏蔽掉,只有一开始的才会得到执行

      */

     private final Map<String, Queue<Request<?>>> mWaitingRequests =

             new HashMap<String, Queue<Request<?>>>();
  /**

      * 实际上这个地方add函数并没有执行网络请求的任何操作,

      *

      */

     public <T> Request<T> add(Request<T> request) {

         // Tag the request as belonging to this queue and add it to the set of current requests.

         request.setRequestQueue(this);

         synchronized (mCurrentRequests) {

             mCurrentRequests.add(request);

         }

         // Process requests in the order they are added.

         request.setSequence(getSequenceNumber());

         request.addMarker("add-to-queue");

         // If the request is uncacheable, skip the cache queue and go straight to the network.

         //判断是否能缓存 不能缓存 就直接加入mNetworkQueue队列执行 能缓存的话就放在缓存队列里面

         //注意这个地方的标志位是我们手动可以设置的,也就是说你写的request想让他使用缓存机制就

         //使用默认的,不想使用缓存机制 可以手动设置shouldCache为false然后这条request 会直接进入

         //网络请求队列

         if (!request.shouldCache()) {

             mNetworkQueue.add(request);

             return request;

         }

         // Insert request into stage if there's already a request with the same cache key in flight.

         synchronized (mWaitingRequests) {

             String cacheKey = request.getCacheKey();

             if (mWaitingRequests.containsKey(cacheKey)) {

                 // There is already a request in flight. Queue up.

                 Queue<Request<?>> stagedRequests = mWaitingRequests.get(cacheKey);

                 if (stagedRequests == null) {

                     stagedRequests = new LinkedList<Request<?>>();

                 }

                 stagedRequests.add(request);

                 mWaitingRequests.put(cacheKey, stagedRequests);

                 if (VolleyLog.DEBUG) {

                     VolleyLog.v("Request for cacheKey=%s is in flight, putting on hold.", cacheKey);

                 }

             } else {

                 // Insert 'null' queue for this cacheKey, indicating there is now a request in

                 // flight.

                 mWaitingRequests.put(cacheKey, null);

                 mCacheQueue.add(request);

             }

             return request;

         }

     }
所以这个地方mWaitngRequests的作用就是 如果你在极短的时间内访问同一个url,volley是不会帮你每次都发请求的,只有最初的会得到请求,后面的是不会有任何操作的。
这个地方大家可以写一段代码去试试,我写过一个代码 就是add一个StringRequst的数组,数组大小为20,然后抓包看,实际上最终发的请求 走流量的也就是3-4个,其他都是
直接返回的结果,但是你如果更改了shouldCache的标志位 那就是直接发送请求,会请求20次,所以这个地方要注意。当然你在实际使用的时候 要不要使用这个机制 都是看实际效果的。
那假设 我们是使用的shouldcache默认值,然后这个request 被add了进来(在这之前相同url的request还没有被add) 那这个时候我们真正的缓存队列 mCacheQueue队列就
add了一个request值,所以这个时候我们去看看我们的缓存线程都干了些什么
  @Override

     public void run() {

         if (DEBUG) VolleyLog.v("start new dispatcher");

         Process.setThreadPriority(Process.THREAD_PRIORITY_BACKGROUND);

         // Make a blocking call to initialize the cache.

         mCache.initialize();

         //这里证明缓存线程是一直无限执行下去的

         while (true) {

             try {

                 // Get a request from the cache triage queue, blocking until

                 // at least one is available.

                 //从缓存队列里面取出一个request

                 final Request<?> request = mCacheQueue.take();

                 request.addMarker("cache-queue-take");

                 // If the request has been canceled, don't bother dispatching it.

                 if (request.isCanceled()) {

                     request.finish("cache-discard-canceled");

                     continue;

                 }

                 // Attempt to retrieve this item from cache.

                 Cache.Entry entry = mCache.get(request.getCacheKey());

                 //如果为空就放到请求队列中

                 if (entry == null) {

                     request.addMarker("cache-miss");

                     // Cache miss; send off to the network dispatcher.

                     mNetworkQueue.put(request);

                     continue;

                 }

                 // If it is completely expired, just send it to the network.

                 //如果entry不为空的话 判断这个缓存是否过期 如果过期也要放到网络请求队列中

                 if (entry.isExpired()) {

                     request.addMarker("cache-hit-expired");

                     request.setCacheEntry(entry);

                     mNetworkQueue.put(request);

                     continue;

                 }

                 //这下面的就说明不需要发网络请求  可以直接解析了

                 // We have a cache hit; parse its data for delivery back to the request.

                 request.addMarker("cache-hit");

                 Response<?> response = request.parseNetworkResponse(

                         new NetworkResponse(entry.data, entry.responseHeaders));

                 request.addMarker("cache-hit-parsed");

                 //判断是否过期以后还要判断是否需要刷新

                 if (!entry.refreshNeeded()) {

                     // Completely unexpired cache hit. Just deliver the response.

                     //不需要刷新就直接解析

                     mDelivery.postResponse(request, response);

                 } else {

                     //如果需要刷新的话则必须重新将这个request放到mNetworkQueue里面去请求一次

                     // Soft-expired cache hit. We can deliver the cached response,

                     // but we need to also send the request to the network for

                     // refreshing.

                     request.addMarker("cache-hit-refresh-needed");

                     request.setCacheEntry(entry);

                     // Mark the response as intermediate.

                     response.intermediate = true;

                     // Post the intermediate response back to the user and have

                     // the delivery then forward the request along to the network.

                     mDelivery.postResponse(request, response, new Runnable() {

                         @Override

                         public void run() {

                             try {

                                 mNetworkQueue.put(request);

                             } catch (InterruptedException e) {

                                 // Not much we can do about this.

                             }

                         }

                     });

                 }

             } catch (InterruptedException e) {

                 // We may have been interrupted because it was time to quit.

                 if (mQuit) {

                     return;

                 }

                 continue;

             }

         }

     }
这个地方注释也比较多,所以大概的流程就是 先判断是否有硬盘缓存,如果没有就直接放到network队列里去,如果有的话 还要判断是否过期,没过期就接着判断是否需要刷新。这边逻辑其实很简单。
所谓的 "过期" "刷新” 什么的 实际上就是对http协议里面的一些字段的判断罢了,这个地方大家在使用的时候一定要注意和你们服务器的情况结合来使用,否则这边volley的缓存机制 会失效。
比方说一个最简单的场景 很多公司图片缓存的时候 都是根据url来判断 本地是否有缓存图片的,但是volley在这个地方 不是使用的url来判断 他是使用http 协议里面 头部的那些信息来判断的。
这种写法很规范 很标准,但是缺陷就是对于那些不遵守http协议的服务器来说 这边代码是要自己重新写一遍的。
45-46行就是解析出response用的,调用的是虚方法
abstract protected Response<T> parseNetworkResponse(NetworkResponse response);
由此可见是由他的子类 来完成的 我们就看看子类stringrequest是怎么做的。
  @Override

     protected Response<String> parseNetworkResponse(NetworkResponse response) {

         String parsed;

         try {

             parsed = new String(response.data, HttpHeaderParser.parseCharset(response.headers));

         } catch (UnsupportedEncodingException e) {

             parsed = new String(response.data);

         }

         return Response.success(parsed, HttpHeaderParser.parseCacheHeaders(response));

     }、
然后我们接着看 如果缓存有效,那我们是如何解析出来然后传递消息的。
 /*

  * Copyright (C) 2011 The Android Open Source Project

  *

  * Licensed under the Apache License, Version 2.0 (the "License");

  * you may not use this file except in compliance with the License.

  * You may obtain a copy of the License at

  *

  *      http://www.apache.org/licenses/LICENSE-2.0

  *

  * Unless required by applicable law or agreed to in writing, software

  * distributed under the License is distributed on an "AS IS" BASIS,

  * WITHOUT WARRANTIES OR CONDITIONS OF ANY KIND, either express or implied.

  * See the License for the specific language governing permissions and

  * limitations under the License.

  */

 package com.android.volley;

 import android.os.Handler;

 import java.util.concurrent.Executor;

 /**

  * Delivers responses and errors.

  */

 public class ExecutorDelivery implements ResponseDelivery {

     /** Used for posting responses, typically to the main thread. */

     private final Executor mResponsePoster;

     /**

      * Creates a new response delivery interface.

      * @param handler {@link Handler} to post responses on

      */

     public ExecutorDelivery(final Handler handler) {

         // Make an Executor that just wraps the handler.

         mResponsePoster = new Executor() {

             @Override

             public void execute(Runnable command) {

                 handler.post(command);

             }

         };

     }

     /**

      * Creates a new response delivery interface, mockable version

      * for testing.

      * @param executor For running delivery tasks

      */

     public ExecutorDelivery(Executor executor) {

         mResponsePoster = executor;

     }

     @Override

     public void postResponse(Request<?> request, Response<?> response) {

         postResponse(request, response, null);

     }

     @Override

     public void postResponse(Request<?> request, Response<?> response, Runnable runnable) {

         request.markDelivered();

         request.addMarker("post-response");

         mResponsePoster.execute(new ResponseDeliveryRunnable(request, response, runnable));

     }

     @Override

     public void postError(Request<?> request, VolleyError error) {

         request.addMarker("post-error");

         Response<?> response = Response.error(error);

         mResponsePoster.execute(new ResponseDeliveryRunnable(request, response, null));

     }

     /**

      * A Runnable used for delivering network responses to a listener on the

      * main thread.

      */

     @SuppressWarnings("rawtypes")

     private class ResponseDeliveryRunnable implements Runnable {

         private final Request mRequest;

         private final Response mResponse;

         private final Runnable mRunnable;

         public ResponseDeliveryRunnable(Request request, Response response, Runnable runnable) {

             mRequest = request;

             mResponse = response;

             mRunnable = runnable;

         }

         @SuppressWarnings("unchecked")

         @Override

         public void run() {

             // If this request has canceled, finish it and don't deliver.

             if (mRequest.isCanceled()) {

                 mRequest.finish("canceled-at-delivery");

                 return;

             }

             // Deliver a normal response or error, depending.

             if (mResponse.isSuccess()) {

                 //这个地方就能看出来这是最终调用子类的方法去传递解析好的数据

                 mRequest.deliverResponse(mResponse.result);

             } else {

                 mRequest.deliverError(mResponse.error);

             }

             // If this is an intermediate response, add a marker, otherwise we're done

             // and the request can be finished.

             if (mResponse.intermediate) {

                 mRequest.addMarker("intermediate-response");

             } else {

                 mRequest.finish("done");

             }

             // If we have been provided a post-delivery runnable, run it.

             if (mRunnable != null) {

                 mRunnable.run();

             }

        }

     }

 }
实际上消息的传递 就是在77-119这个runnable里面做的。注意100行代码 那个deliverResponse实际上是一个虚方法。是留给子类来重写的。
我们就看一下stringrequest的这个方法吧
   //可以看到这request的子类 StringRequest 的deliverResponse 方法里面是一个回调

     //并没有真正的实现它

     @Override

     protected void deliverResponse(String response) {

         mListener.onResponse(response);

     }
private final Listener<String> mListener;
这个地方实际上就是回调了,留给我们自己写的。
比如
 new StringRequest(Request.Method.GET, url,

                    new Response.Listener<String>() {

                        @Override

                        public void onResponse(String response) {

                            // Display the first 500 characters of the response string.

                        }

                    }, new Response.ErrorListener() {

                @Override

                public void onErrorResponse(VolleyError error) {

                }

            }

            );
到此,缓存处理线程的流程就介绍完毕了,我们最后再看看实际上的工作线程NetWorkDispatcher
  @Override

     public void run() {

         Process.setThreadPriority(Process.THREAD_PRIORITY_BACKGROUND);

         while (true) {

             long startTimeMs = SystemClock.elapsedRealtime();

             Request<?> request;

             try {

                 // Take a request from the queue.

                 request = mQueue.take();

             } catch (InterruptedException e) {

                 // We may have been interrupted because it was time to quit.

                 if (mQuit) {

                     return;

                 }

                 continue;

             }

             try {

                 request.addMarker("network-queue-take");

                 // If the request was cancelled already, do not perform the

                 // network request.

                 if (request.isCanceled()) {

                     request.finish("network-discard-cancelled");

                     continue;

                 }

                 addTrafficStatsTag(request);

                 // Perform the network request.

                 //这个地方就是实际发请求的地方

                 NetworkResponse networkResponse = mNetwork.performRequest(request);

                 request.addMarker("network-http-complete");

                 // If the server returned 304 AND we delivered a response already,

                 // we're done -- don't deliver a second identical response.

                 if (networkResponse.notModified && request.hasHadResponseDelivered()) {

                     request.finish("not-modified");

                     continue;

                 }

                 // Parse the response here on the worker thread.

                 //这个地方要注意 networkResponse是交给request来解析的 但是我们的request会有很多子类

                 //parseNetworkResponse的方法重写以后在这里最终解析数据

                 Response<?> response = request.parseNetworkResponse(networkResponse);

                 request.addMarker("network-parse-complete");

                 // Write to cache if applicable.

                 // TODO: Only update cache metadata instead of entire record for 304s.

                 if (request.shouldCache() && response.cacheEntry != null) {

                     mCache.put(request.getCacheKey(), response.cacheEntry);

                     request.addMarker("network-cache-written");

                 }

                 // Post the response back.

                 request.markDelivered();

                 //回调传递数据

                 mDelivery.postResponse(request, response);

             } catch (VolleyError volleyError) {

                 volleyError.setNetworkTimeMs(SystemClock.elapsedRealtime() - startTimeMs);

                 parseAndDeliverNetworkError(request, volleyError);

             } catch (Exception e) {

                 VolleyLog.e(e, "Unhandled exception %s", e.toString());

                 VolleyError volleyError = new VolleyError(e);

                 volleyError.setNetworkTimeMs(SystemClock.elapsedRealtime() - startTimeMs);

                 mDelivery.postError(request, volleyError);

             }

         }

     }
这个地方也非常简单,主要是看32行 最终发请求,这个地方是交给basicnetwork来发送的,我们来看
  @Override

     public NetworkResponse performRequest(Request<?> request) throws VolleyError {

         long requestStart = SystemClock.elapsedRealtime();

         while (true) {

             HttpResponse httpResponse = null;

             byte[] responseContents = null;

             Map<String, String> responseHeaders = Collections.emptyMap();

             try {

                 // Gather headers.

                 Map<String, String> headers = new HashMap<String, String>();

                 addCacheHeaders(headers, request.getCacheEntry());

                 httpResponse = mHttpStack.performRequest(request, headers);

                 StatusLine statusLine = httpResponse.getStatusLine();

                 int statusCode = statusLine.getStatusCode();

                 responseHeaders = convertHeaders(httpResponse.getAllHeaders());

                 // Handle cache validation.

                 //自动上次请求后 请求的网页没有修改过 服务器返回网页时 就不会返回实际内容

                 if (statusCode == HttpStatus.SC_NOT_MODIFIED) {

                     Entry entry = request.getCacheEntry();

                     if (entry == null) {

                         return new NetworkResponse(HttpStatus.SC_NOT_MODIFIED, null,

                                 responseHeaders, true,

                                 SystemClock.elapsedRealtime() - requestStart);

                     }

                     // A HTTP 304 response does not have all header fields. We

                     // have to use the header fields from the cache entry plus

                     // the new ones from the response.

                     // http://www.w3.org/Protocols/rfc2616/rfc2616-sec10.html#sec10.3.5

                     entry.responseHeaders.putAll(responseHeaders);

                     return new NetworkResponse(HttpStatus.SC_NOT_MODIFIED, entry.data,

                             entry.responseHeaders, true,

                             SystemClock.elapsedRealtime() - requestStart);

                 }

                 // Some responses such as 204s do not have content.  We must check.

                 if (httpResponse.getEntity() != null) {

                   responseContents = entityToBytes(httpResponse.getEntity());

                 } else {

                   // Add 0 byte response as a way of honestly representing a

                   // no-content request.

                   responseContents = new byte[0];

                 }

                 // if the request is slow, log it.

                 long requestLifetime = SystemClock.elapsedRealtime() - requestStart;

                 logSlowRequests(requestLifetime, request, responseContents, statusLine);

                 if (statusCode < 200 || statusCode > 299) {

                     throw new IOException();

                 }

                 return new NetworkResponse(statusCode, responseContents, responseHeaders, false,

                         SystemClock.elapsedRealtime() - requestStart);

             } catch (SocketTimeoutException e) {

                 attemptRetryOnException("socket", request, new TimeoutError());

             } catch (ConnectTimeoutException e) {

                 attemptRetryOnException("connection", request, new TimeoutError());

             } catch (MalformedURLException e) {

                 throw new RuntimeException("Bad URL " + request.getUrl(), e);

             } catch (IOException e) {

                 int statusCode = 0;

                 NetworkResponse networkResponse = null;

                 if (httpResponse != null) {

                     statusCode = httpResponse.getStatusLine().getStatusCode();

                 } else {

                     throw new NoConnectionError(e);

                 }

                 VolleyLog.e("Unexpected response code %d for %s", statusCode, request.getUrl());

                 if (responseContents != null) {

                     networkResponse = new NetworkResponse(statusCode, responseContents,

                             responseHeaders, false, SystemClock.elapsedRealtime() - requestStart);

                     if (statusCode == HttpStatus.SC_UNAUTHORIZED ||

                             statusCode == HttpStatus.SC_FORBIDDEN) {

                         attemptRetryOnException("auth",

                                 request, new AuthFailureError(networkResponse));

                     } else {

                         // TODO: Only throw ServerError for 5xx status codes.

                         throw new ServerError(networkResponse);

                     }

                 } else {

                     throw new NetworkError(networkResponse);

                 }

             }

         }

     }
所以这个地方 我们要注意2点。
第一点,这个函数是最终我们发起请求的地方也是解析出response的地方,但是要注意他返回的是NetworkResponse。你回过头看45行发现通常是由子类的parseNetworkResponse
来把我们basicnetwork得到的networkresponse 解析成 Response<?> response 这个泛型的! 这个顺序要理清楚。比如你看strinrequst的这个方法
 @Override

     protected Response<String> parseNetworkResponse(NetworkResponse response) {

         String parsed;

         try {

             parsed = new String(response.data, HttpHeaderParser.parseCharset(response.headers));

         } catch (UnsupportedEncodingException e) {

             parsed = new String(response.data);

         }

         Log.v("burning", "parsed=" + parsed);

         return Response.success(parsed, HttpHeaderParser.parseCacheHeaders(response));

     }
再看看JSONrequest这个方法
  @Override

     protected Response<JSONObject> parseNetworkResponse(NetworkResponse response) {

         try {

             String jsonString = new String(response.data,

                     HttpHeaderParser.parseCharset(response.headers, PROTOCOL_CHARSET));

             return Response.success(new JSONObject(jsonString),

                     HttpHeaderParser.parseCacheHeaders(response));

         } catch (UnsupportedEncodingException e) {

             return Response.error(new ParseError(e));

         } catch (JSONException je) {

             return Response.error(new ParseError(je));

         }

     }
就能明白这个调用过程的先后顺序了。
50-52行 就是操作硬盘缓存的。实际上你看他调用链最终就是由networkresponse来解析出缓存所需要的entry 这个地方就是对http标准协议里 头部许多字段的解析了,
根据解析出来的值判断缓存是否需要刷新 是否过期等,在你自定义volley的时候 需要根据服务器的实际情况来重写这一部分
 public class HttpHeaderParser {

     /**

      * Extracts a {@link Cache.Entry} from a {@link NetworkResponse}.

      *

      * @param response The network response to parse headers from

      * @return a cache entry for the given response, or null if the response is not cacheable.

      */

     public static Cache.Entry parseCacheHeaders(NetworkResponse response) {

         long now = System.currentTimeMillis();

         Map<String, String> headers = response.headers;

         long serverDate = 0;

         long lastModified = 0;

         long serverExpires = 0;

         long softExpire = 0;

         long finalExpire = 0;

         long maxAge = 0;

         long staleWhileRevalidate = 0;

         boolean hasCacheControl = false;

         boolean mustRevalidate = false;

         String serverEtag = null;

         String headerValue;

         headerValue = headers.get("Date");

         if (headerValue != null) {

             serverDate = parseDateAsEpoch(headerValue);

         }

         headerValue = headers.get("Cache-Control");

         if (headerValue != null) {

             hasCacheControl = true;

             String[] tokens = headerValue.split(",");

             for (int i = 0; i < tokens.length; i++) {

                 String token = tokens[i].trim();

                 if (token.equals("no-cache") || token.equals("no-store")) {

                     return null;

                 } else if (token.startsWith("max-age=")) {

                     try {

                         maxAge = Long.parseLong(token.substring(8));

                     } catch (Exception e) {

                     }

                 } else if (token.startsWith("stale-while-revalidate=")) {

                     try {

                         staleWhileRevalidate = Long.parseLong(token.substring(23));

                     } catch (Exception e) {

                     }

                 } else if (token.equals("must-revalidate") || token.equals("proxy-revalidate")) {

                     mustRevalidate = true;

                 }

             }

         }

         headerValue = headers.get("Expires");

         if (headerValue != null) {

             serverExpires = parseDateAsEpoch(headerValue);

         }

         headerValue = headers.get("Last-Modified");

         if (headerValue != null) {

             lastModified = parseDateAsEpoch(headerValue);

         }

         serverEtag = headers.get("ETag");

         // Cache-Control takes precedence over an Expires header, even if both exist and Expires

         // is more restrictive.

         if (hasCacheControl) {

             softExpire = now + maxAge * 1000;

             finalExpire = mustRevalidate

                     ? softExpire

                     : softExpire + staleWhileRevalidate * 1000;

         } else if (serverDate > 0 && serverExpires >= serverDate) {

             // Default semantic for Expire header in HTTP specification is softExpire.

             softExpire = now + (serverExpires - serverDate);

             finalExpire = softExpire;

         }

         Cache.Entry entry = new Cache.Entry();

         entry.data = response.data;

         entry.etag = serverEtag;

         entry.softTtl = softExpire;

         entry.ttl = finalExpire;

         entry.serverDate = serverDate;

         entry.lastModified = lastModified;

         entry.responseHeaders = headers;

         return entry;

     }
第二点也是额外我想多讲的一点 对于basicnetwork的performrequest方法来说:
他们的超时策略是很重要的东西,这个对于我们app的定制化 和性能体验来说非常重要,
大家一定要弄明白。在volley中默认是会使用 默认的超时策略的。代码如下:
你看requst 这个类的构造方法
public Request(int method, String url, Response.ErrorListener listener) {

        mMethod = method;

        mUrl = url;

        mErrorListener = listener;

        setRetryPolicy(new DefaultRetryPolicy());

        mDefaultTrafficStatsTag = findDefaultTrafficStatsTag(url);

    }
我们就去看看volley 给我们提供的这个默认超时策略
 /*

  * Copyright (C) 2011 The Android Open Source Project

  *

  * Licensed under the Apache License, Version 2.0 (the "License");

  * you may not use this file except in compliance with the License.

  * You may obtain a copy of the License at

  *

  *      http://www.apache.org/licenses/LICENSE-2.0

  *

  * Unless required by applicable law or agreed to in writing, software

  * distributed under the License is distributed on an "AS IS" BASIS,

  * WITHOUT WARRANTIES OR CONDITIONS OF ANY KIND, either express or implied.

  * See the License for the specific language governing permissions and

  * limitations under the License.

  */

 package com.android.volley;

 /**

  * Default retry policy for requests.

  */

 public class DefaultRetryPolicy implements RetryPolicy {

     /** The current timeout in milliseconds. */

     private int mCurrentTimeoutMs;

     /** The current retry count. */

     private int mCurrentRetryCount;

     /** The maximum number of attempts. */

     private final int mMaxNumRetries;

     /** The backoff multiplier for the policy. */

     private final float mBackoffMultiplier;

     /** The default socket timeout in milliseconds */

     public static final int DEFAULT_TIMEOUT_MS = 2500;

     /** The default number of retries */

     public static final int DEFAULT_MAX_RETRIES = 1;

     /** The default backoff multiplier */

     public static final float DEFAULT_BACKOFF_MULT = 1f;

     /**

      * Constructs a new retry policy using the default timeouts.

      */

     public DefaultRetryPolicy() {

         this(DEFAULT_TIMEOUT_MS, DEFAULT_MAX_RETRIES, DEFAULT_BACKOFF_MULT);

     }

     /**

      * Constructs a new retry policy.

      * @param initialTimeoutMs The initial timeout for the policy.

      * @param maxNumRetries The maximum number of retries.

      * @param backoffMultiplier Backoff multiplier for the policy.

      */

     public DefaultRetryPolicy(int initialTimeoutMs, int maxNumRetries, float backoffMultiplier) {

         mCurrentTimeoutMs = initialTimeoutMs;

         mMaxNumRetries = maxNumRetries;

         mBackoffMultiplier = backoffMultiplier;

     }

     /**

      * Returns the current timeout.

      */

     @Override

     public int getCurrentTimeout() {

         return mCurrentTimeoutMs;

     }

     /**

      * Returns the current retry count.

      */

     @Override

     public int getCurrentRetryCount() {

         return mCurrentRetryCount;

     }

     /**

      * Returns the backoff multiplier for the policy.

      */

     public float getBackoffMultiplier() {

         return mBackoffMultiplier;

     }

     /**

      * Prepares for the next retry by applying a backoff to the timeout.

      * @param error The error code of the last attempt.

      */

     @Override

     public void retry(VolleyError error) throws VolleyError {

         mCurrentRetryCount++;

         mCurrentTimeoutMs += (mCurrentTimeoutMs * mBackoffMultiplier);

         if (!hasAttemptRemaining()) {

             throw error;

         }

     }

     /**

      * Returns true if this policy has attempts remaining, false otherwise.

      */

     protected boolean hasAttemptRemaining() {

         return mCurrentRetryCount <= mMaxNumRetries;

     }

 }
他规定了超时时间 超时以后尝试重连的次数等。我就随便分析一下 在超时策略里定义的超时时间 是怎么影响最终http请求的。
超时策略类里面 的这个函数
  /**

      * Returns the current timeout.

      */

     @Override

     public int getCurrentTimeout() {

         return mCurrentTimeoutMs;

     }
往下走反映到request里的这个函数
  public final int getTimeoutMs() {

         return mRetryPolicy.getCurrentTimeout();

     }
是final函数,我们来看看他被哪些类调用了
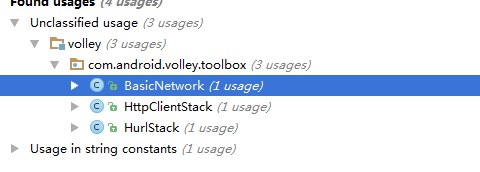
然后我们随便打开1个
 private HttpURLConnection openConnection(URL url, Request<?> request) throws IOException {

         HttpURLConnection connection = createConnection(url);

         int timeoutMs = request.getTimeoutMs();

         connection.setConnectTimeout(timeoutMs);

         connection.setReadTimeout(timeoutMs);

         connection.setUseCaches(false);

         connection.setDoInput(true);
到这调用链就分析完毕。
之所以要额外分析超时策略 是因为谷歌自带的超时策略 并不是很好用 他默认的超时时间是2.5s 如果你网络情况比较差 又在上传图片的话
这个2.5s超时策略是完全不够的,此时就会引发很多bug了。所以这个地方要单独出来讲一下。
至此,volley 的 大部分源码都分析完毕了。建议读者在看的时候 要多写demo 打日志 来验证想法,除此之外,要真正读懂volley源码
还需要在java 并发编程那边下点功夫~~
Android Volley源码分析的更多相关文章
- [Android]Volley源码分析(五)
前面几篇通过源码分析了Volley是怎样进行请求调度及请求是如何被实际执行的,这篇最后来看下请求结果是如何交付给请求者的(一般是Android的UI主线程). 类图:
- [Android]Volley源码分析(三)
上篇看了关于Request的源码,这篇接着来看下RequestQueue的源码. RequestQueue类图:
- [Android]Volley源码分析(二)
上一篇介绍了Volley的使用,主要接触了Request与RequestQueue这两个类,这篇就来了解一下这两个类的具体实现. Request类图:
- [Android]Volley源码分析(四)
上篇中有提到NetworkDispatcher是通过mNetwork(Network类型)来进行网络访问的,现在来看一下关于Network是如何进行网络访问的. Network部分的类图:
- [Android]Volley源码分析(一)
一. 如何使用Volley? 1. 首先定义一个RequestManager类,用来在Android程序启动时对Volley进行初始化.RequestManager为单例类,因为只有在程序启动时调用, ...
- Android Volley源码分析及扩展
转载请标明出处: http://www.cnblogs.com/why168888/p/6681232.html 本文出自:[Edwin博客园] Volley 介绍 Android系统中主要提供了两种 ...
- Volley源码分析(2)----ImageLoader
一:imageLoader 先来看看如何使用imageloader: public void showImg(View view){ ImageView imageView = (ImageView) ...
- Appium Android Bootstrap源码分析之启动运行
通过前面的两篇文章<Appium Android Bootstrap源码分析之控件AndroidElement>和<Appium Android Bootstrap源码分析之命令解析 ...
- Appium Android Bootstrap源码分析之命令解析执行
通过上一篇文章<Appium Android Bootstrap源码分析之控件AndroidElement>我们知道了Appium从pc端发送过来的命令如果是控件相关的话,最终目标控件在b ...
随机推荐
- sql openrowset
select * from openrowset('sqloledb','ip';'user';'pwd','exec 库..过程')
- lintcode:快乐数
快乐数 写一个算法来判断一个数是不是"快乐数". 一个数是不是快乐是这么定义的:对于一个正整数,每一次将该数替换为他每个位置上的数字的平方和,然后重复这个过程直到这个数变为1,或是 ...
- Java-马士兵设计模式学习笔记-桥接模式
一.概述 1.桥接模式的应用情况:(1)两个维度扩展(2)排列组合 二.代码 1.Gift.java public class Gift { protected GiftImpl giftImpl; ...
- C 语言文件操作
C 语言文件操作 1. 数据流: 程序与数据的交互以流的形式进行.fopen 即打开数据流,fclose 即刷新数据流. 所谓数据流,是一种抽象,表示这段数据像流一样,需要逐步接收,不 ...
- 267. Palindrome Permutation II
题目: Given a string s, return all the palindromic permutations (without duplicates) of it. Return an ...
- JBOSS内存溢出处理
JBOSS内存溢出处理 前几天公司一个项目的服务器坏了,就换了一个备份服务器顶替一下,但是没有跑一会就宕机了,一直报java.lang.OutOfMemoryError....一看到这里,就知道是内存 ...
- 关于Struts2的Validator的配置找不到DTD
看教材的时候写的DTD是 <!DOCTYPE validators PUBLIC "-//OpenSymphony Group//XWork Validator 1.0.3//EN&q ...
- javascript 中$符号是代表什么意思!
$符号在php中是表示变量的特征字符, 在js中它也有很多作用, 一般我们用来命名一个函数名称,获取id的 1. 首先可以用来表示变量, 比如变量 var s='asdsd'或var $s='asda ...
- android:screenOrientation的说明 固定屏幕显示方向
Activity在屏幕当中显示的方向.属性值可以是下表中列出的一个值: "unspecified" 默认值,由系统来选择方向.它的使用策略,以及由于选择时特定的上下文环境,可能会因 ...
- Android提供了5种方式存储数据:
--使用SharedPreferences存储数据: --文件存储数据: --SQLite数据库存储数据: --使用ContentProvider存储数据: --网络存储数据: 一:使用SharedP ...