Openstack 实现技术分解 (3) 开发工具 — VIM & dotfiles
目录
前文列表
Openstack 实现技术分解 (1) 开发环境 — Devstack 部署案例详解
Openstack 实现技术分解 (2) 虚拟机初始化工具 — Cloud-Init & metadata & userdata
扩展阅读
跟我一起学习VIM - vim插件合集
很全面的vimrc配置技巧
VIM set 指令
前言
VIM is the God of editors, EMACS is God’s editor, 这是一句非常经典的话, 可以看出 VIM 在 editors 圈的地位. 首先需要声明的是, 本人不参与任何 IDE 战争, IDE 的本质追求是提高开发效率, 能够称心如意撸代码就是你最好的选择. 但就 Openstack 开发而言, 我仍会极力推荐使用 VIM, 因为绝大多数的 Openstack 线上生产环境是极其严酷的, 不会纵容你安装和使用重量级 IDE.
那么如何能够快速搭建或者说同步自己的 VIM 编程环境到其他机器上呢?
VIM + dotfiles 就是最佳的组合.
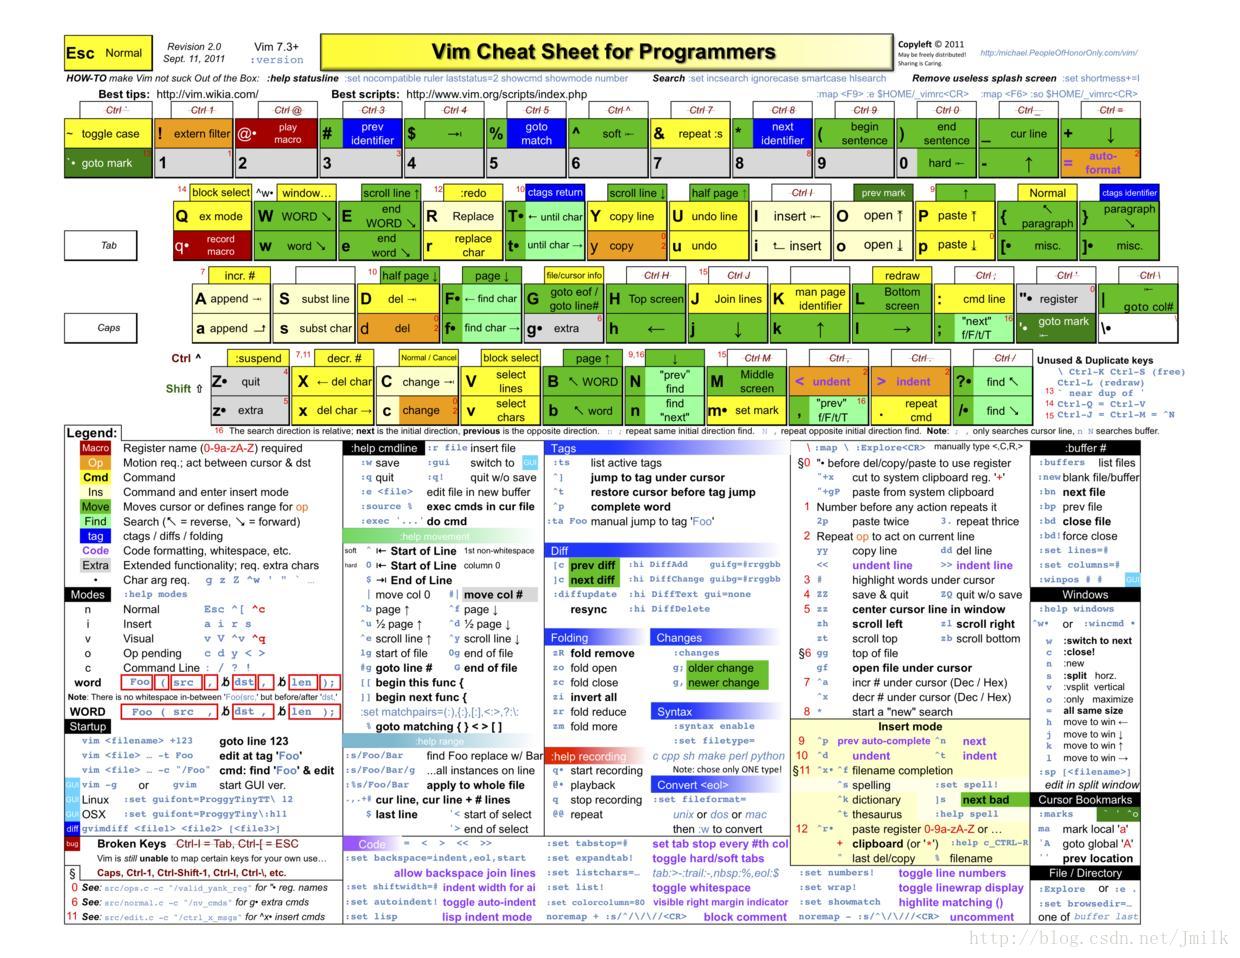
在正文之前先放张 VIM 的快捷键一览图, 大家不妨打印出来贴在自己工位上 : )
插件管理 Vundle
Vundle is short for Vim bundle and is a Vim plugin manager.
现在所统计的 VIM 扩展插件多达 4900 多种, 基本上能够很好的满足开发者们各种各样奇葩的要求. 同时, 如何友好的将这些插件应用到自己的开发环境中成为了刚需求. Vundle 就是为此而生的一个 VIM 插件管理工具. 在介绍如何使用 Vundle 之前, 还需要了解一个文件 .vimrc .
.vimrc 是 VIM 的配置文件, 绝对路径为 ~/.vimrc, 是整个 VIM 的灵魂, 拥有非常强大的自定义能力. Vundle 首先会读取 .vimrc 中以关键字 Plugin 开始的语句, 这条语句的值实际上就是插件项目在 Github 上的名称, 然后再实现对插件的 安装/卸载/更新 .
Set up Vundle by manual:
git clone https://github.com/VundleVim/Vundle.vim.git ~/.vim/bundle/Vundle.vimNOTE: 当然你也可以通过修改 .vimrc 来实现自动安装 Vundle
Configure Plugins: 这里给出 Vundle 的官方配置样例
set nocompatible              " 关闭兼容 vi 模式, 必须

filetype off                  " 必须

" 指定 Vundle 的源码路径

" set the runtime path to include Vundle and initialize

set rtp+=~/.vim/bundle/Vundle.vim

call vundle#begin()

" alternatively, pass a path where Vundle should install plugins

"call vundle#begin('~/some/path/here')

" let Vundle manage Vundle 安装 Vundle 插件

Plugin 'VundleVim/Vundle.vim'

" 下列列出了你所希望管理的 VIM 插件的样例

" The following are examples of different formats supported.

" Keep Plugin commands between vundle#begin/end.

" plugin on GitHub repo

Plugin 'tpope/vim-fugitive'

" plugin from http://vim-scripts.org/vim/scripts.html

Plugin 'L9'

" Git plugin not hosted on GitHub

Plugin 'git://git.wincent.com/command-t.git'

" git repos on your local machine (i.e. when working on your own plugin)

Plugin 'file:///home/gmarik/path/to/plugin'

" The sparkup vim script is in a subdirectory of this repo called vim.

" Pass the path to set the runtimepath properly.

Plugin 'rstacruz/sparkup', {'rtp': 'vim/'}

" Install L9 and avoid a Naming conflict if you've already installed a

" different version somewhere else.

Plugin 'ascenator/L9', {'name': 'newL9'}

" All of your Plugins must be added before the following line

call vundle#end()            " 必须

filetype plugin indent on    " 开启插件, 必须

" To ignore plugin indent changes, instead use:

"filetype plugin on

" 插件管理类型

" Brief help

" :PluginList       - lists configured plugins

" :PluginInstall    - installs plugins; append `!` to update or just :PluginUpdate

" :PluginSearch foo - searches for foo; append `!` to refresh local cache

" :PluginClean      - confirms removal of unused plugins; append `!` to auto-approve removal

" 查看帮助手册

" see :h vundle for more details or wiki for FAQ

" Put your non-Plugin stuff after this lineNOTE: 可以看出在语句 call vundle#begin() 和 call vundle#end() 之间就定义了需要安装的插件列表.
Install Plugins:
在定义好需要安装的插件列表之后, 只需要执行下面的指令就可以自动的完成所有插件的安装.
vim +PluginInstall +qall当然了, 在安装这些插件之前, 我们首先需要知道那些插件是做什么用的, 是否适合自己. 下面继续推荐几个常用的 VIM 插件, 不妨在之后再进行安装.
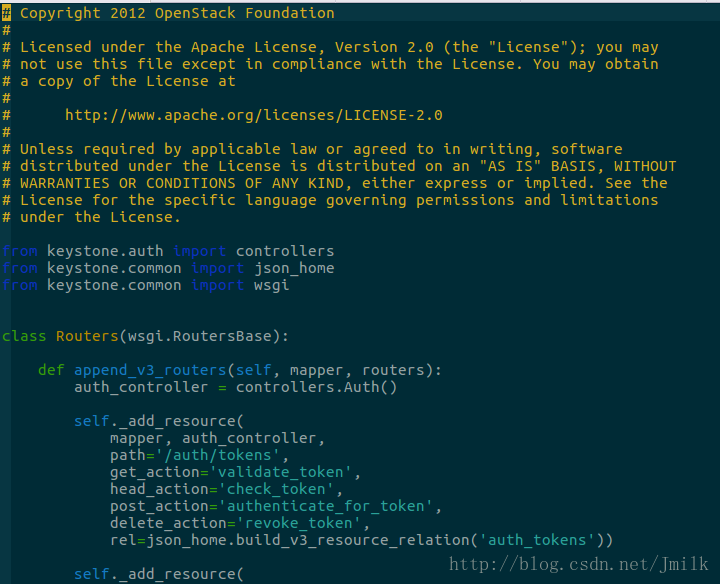
主题 Solarized

Solarized 具有阴阳(light/dark)两种风格鲜明的主题和灵活的自定义配色能力, 是最受欢迎的主题插件之一. 安装它只需要对 .vimrc 进行如下编辑:
- Installation:
...

" 添加 Solarized 主题插件

Plugin 'altercation/vim-colors-solarized'

...

" Solarized 配置

" Solarized =================================================

syntax enable

set background=dark                 " 使用阴主题

let g:solarized_termcolors=16

let g:solarized_visibility='high'

let g:solarized_contrast='high'

try

  colorscheme solarized   " 设定配色方案

catch /^Vim\%((\a\+)\)\=:E185/

endtry
NOTE 1: 上文已经提到了, 表示插件的 Plugin 'altercation/vim-colors-solarized' 配置语句必须放在call vundle#begin() 和 call vundle#end() 之间, 下面所有的插件同理, 所以不在赘述.
NOTE 2: 这里使用了阴主题 dark, 阳主题的值为 light.
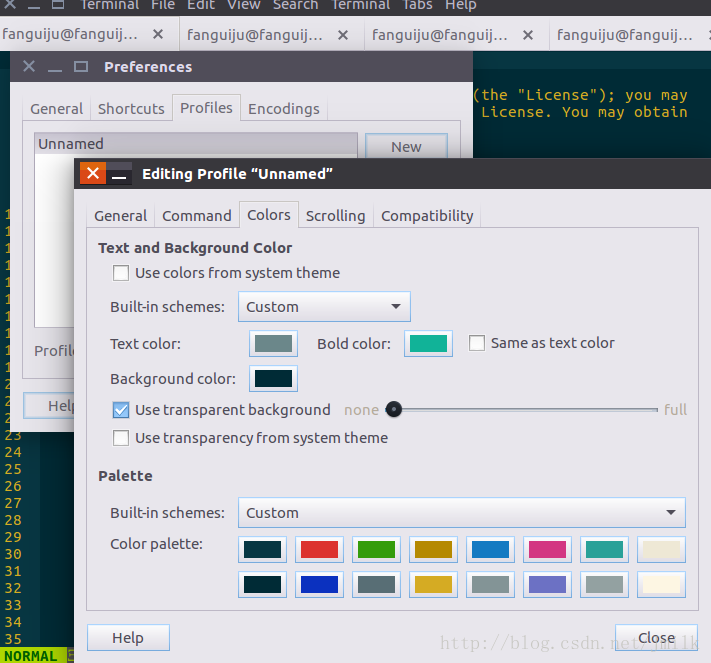
微调你喜欢的 Terminal 配色
效果:
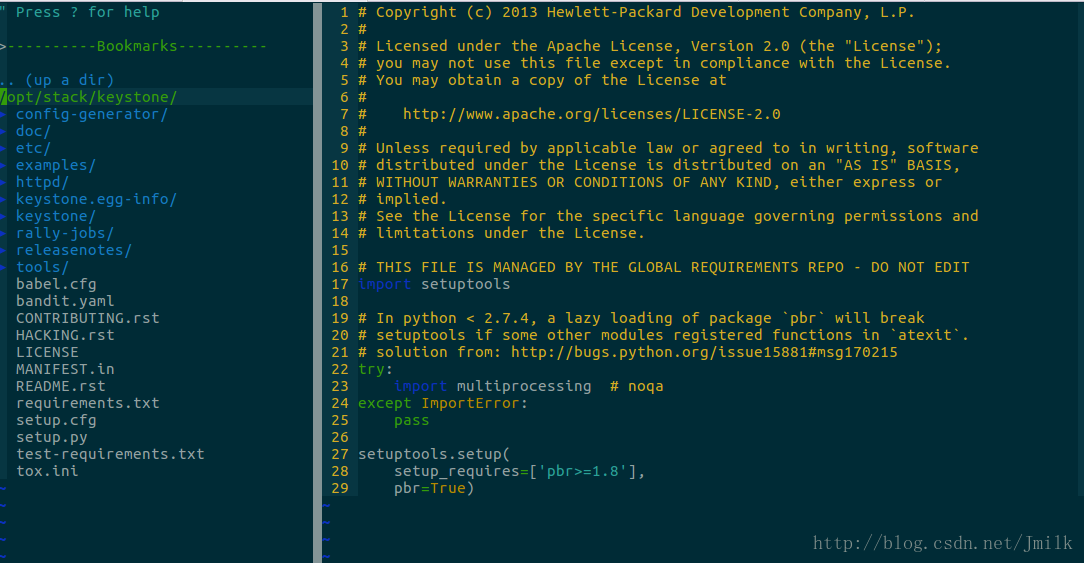
浏览项目目录结构 Nerdtree
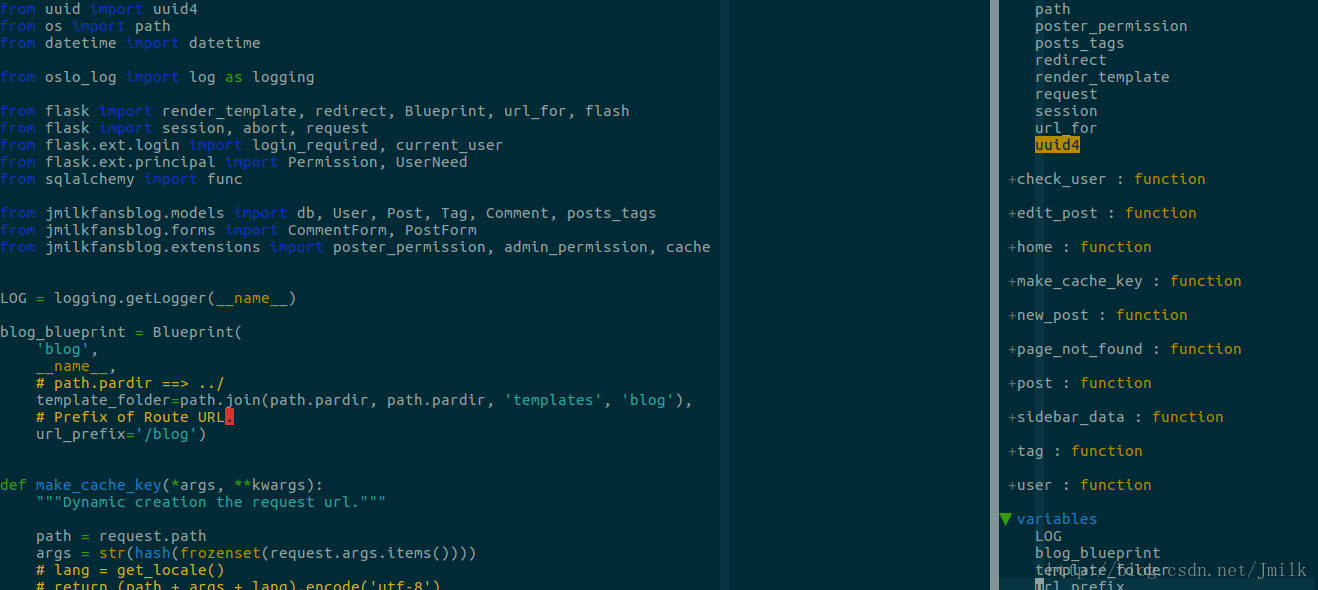
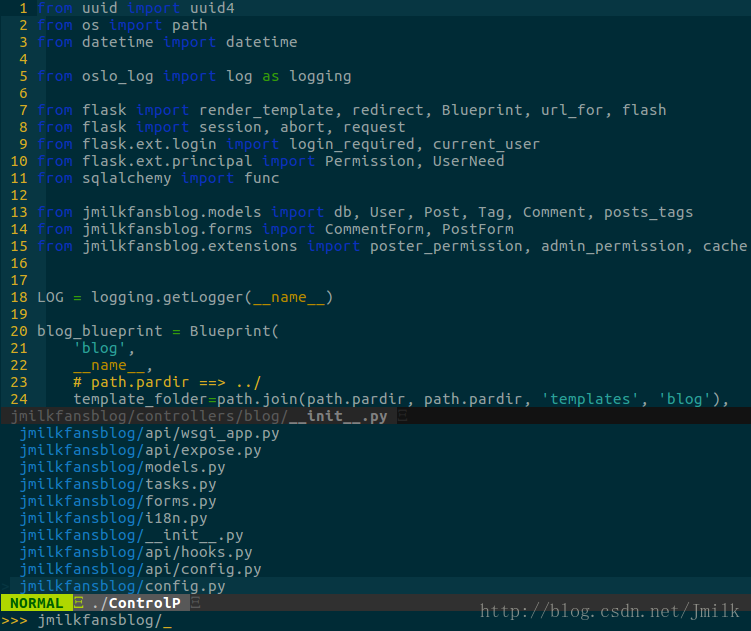
Nerdtree 提供的项目目录结构浏览功能, 极大的加强了开发者对整个项目目录结构的辨识和把控.
- Installation:
...

Plugin 'scrooloose/nerdtree'

...

" NERD Tree =================================================

let NERDChristmasTree=0

let NERDTreeWinSize=35

let NERDTreeChDirMode=2

let NERDTreeIgnore=['\~$', '\.pyc$', '\.swp$']

let NERDTreeShowBookmarks=1

let NERDTreeWinPos="left"

" Automatically open a NERDTree if no files where specified

autocmd vimenter * if !argc() | NERDTree | endif

" Close vim if the only window left open is a NERDTree

autocmd bufenter * if (winnr("$") == 1 && exists("b:NERDTreeType") && b:NERDTreeType == "primary") | q | endif

" Open a NERDTree

nmap <F2> :NERDTreeToggle<CR>
NOTE 1: 当关闭最后一个文件界面时会同时退出 Nerd tree, 避免多输入一个 :q
NOTE 2: 设置了快捷键 <F2> 来 Open/Close Nerd tree
- 效果:
Symbol 窗口 Tagbar
Symbol 窗口列出了当前文件中的 宏/全局变量/函数/类 的信息, 使用光标选择就能够跳转相应源代码的位置, 非常便捷.
- Installation:
...

Plugin 'majutsushi/tagbar'

...

" Tagbar =================================================

let g:tagbar_width=35

let g:tagbar_autofocus=1

nmap <F3> :TagbarToggle<CR> NOTE: 这里使用了快捷键 <F3> 来 Open/Close Tagbar
- 安装 ctags
因各人环境不同, 可能需要手动安装 ctags
sudo apt-get install exuberant-ctags- 效果
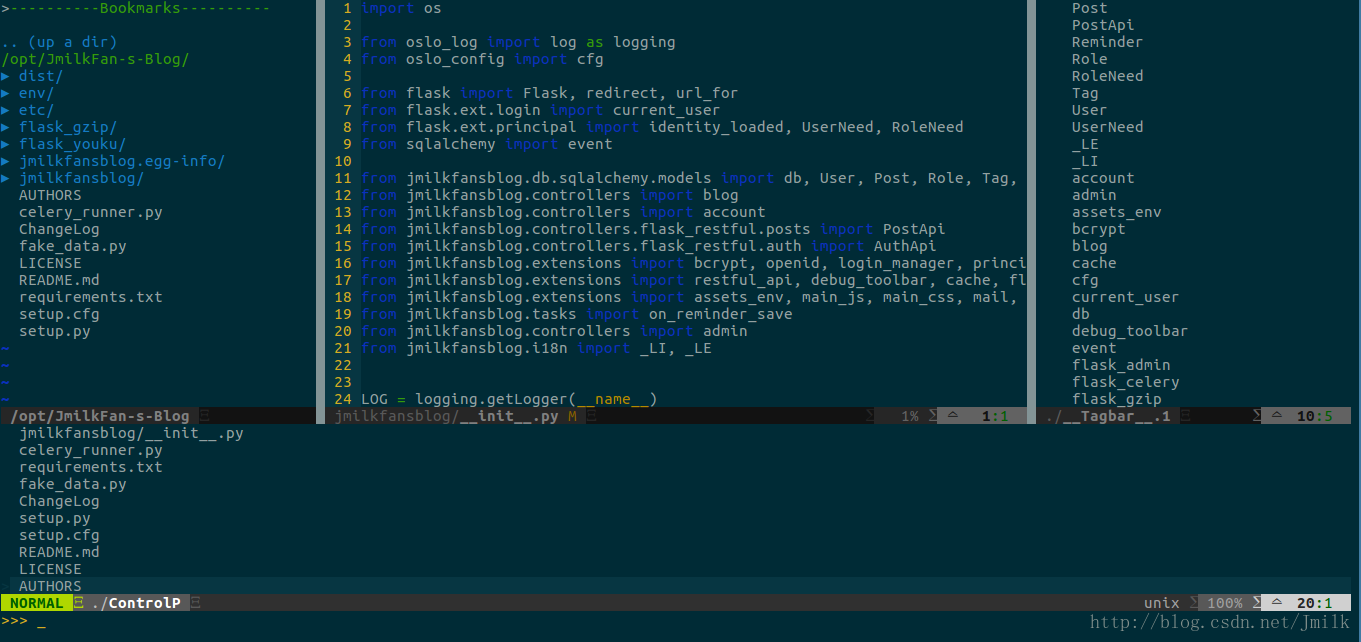
文件模糊查询 CtrlP
CtrlP 文件模糊查询插件, 又一大杀器, 让你在项目的文件海中自由穿梭.
- Installation:
...

Plugin 'kien/ctrlp.vim'

...

" Ctrlp =================================================

set wildignore+=*/tmp/*,*.so,*.swp,*.zip,*.png,*.jpg,*.jpeg,*.gif  " Ignore for MacOSX/Linux

let g:ctrlp_custom_ignore = {

    \ 'dir':  '\v[\/]\.(git|hg|svn|rvm)$',

    \ 'file': '\v\.(exe|so|dll|zip|tar|tar.gz|pyc)$',

    \ }

let g:ctrlp_match_window = 'bottom,order:btt,min:1,max:10,results:20'

let g:ctrlp_max_height = 30

"let g:ctrlp_user_command = [

"    \ '.git', 'cd %s && git ls-files . -co --exclude-standard',

"    \ 'find %s -type f'

"    \ ]

if executable('ag')

  " Use Ag over Grep

  set grepprg=ag\ --nogroup\ --nocolor

  " Use ag in CtrlP for listing files.

  let g:ctrlp_user_command = 'ag %s -l --nocolor -g ""'

  " Ag is fast enough that CtrlP doesn't need to cache

  let g:ctrlp_use_caching = 0

endif

let g:ctrlp_working_path_mode=0

let g:ctrlp_match_window_bottom=1

let g:ctrlp_max_height=15

let g:ctrlp_match_window_reversed=0

let g:ctrlp_mruf_max=500

let g:ctrlp_follow_symlinks=1

let g:ctrlp_map = '<leader>p'

let g:ctrlp_cmd = 'CtrlP'

nmap <leader>f :CtrlPMRU<CR>
NOTE 1: 这里使用了 ag 搜索来代替 find 指令搜索, 更加高效.
NOTE 2: 设置了 leader+f 快捷键来 Open/Close CtrlP
NOTE 3: leader 键类似于 Home 键, 是组合快捷键的基础, 一般设置为 , 号, 后文会给出该键的设置方法.
- 效果
代码补全 YouCompleteMe
代码补全必备插件.
- Installation:
...

Plugin 'Valloric/YouCompleteMe'

...

" YouCompleteMe =================================================

let g:ycm_autoclose_preview_window_after_completion=1
NOTE 1: 完成补全之后自动关闭预览窗口
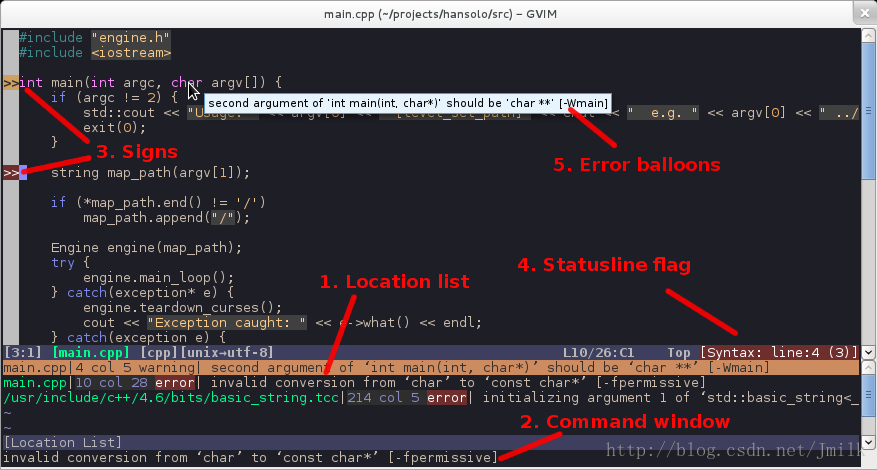
语法检查 Syntastic
- Installation:
...

Plugin 'scrooloose/syntastic'

...

" Syntastic =================================================

" configure syntastic syntax checking to check on open as well as save

let g:syntastic_check_on_open=1

let g:syntastic_html_tidy_ignore_errors=[" proprietary attribute \"ng-"]

let g:syntastic_always_populate_loc_list = 1

let g:syntastic_auto_loc_list = 1

let g:syntastic_check_on_wq = 0

set statusline+=%#warningmsg#

set statusline+=%{SyntasticStatuslineFlag()}

set statusline+=%* - 官方效果图
通用配置
VIM 的通用配置数不胜数, 这里列出常见的一些作为参考.
" General Config =================================================

set nocompatible                          " be iMproved, required

filetype off                              " required

set number                                " 显示行号

set ruler                                 " 打开状态栏标尺

set backspace=indent,eol,start            " Allow backspace in insert mode

set fileencodings=utf-8,gbk               " Set encoding of files

set history=1000                          " Number of things to remember in history

set showcmd                               " Show incomplete cmds down the bottom

set showmode                              " Show current mode down the bottom

set showmatch                             " 输入 )/} 时,光标会暂时的回到相匹配的 (/{

set gcr=a:blinkon0                        " Disable cursor blink

set novisualbell                          " No sounds

set noerrorbells                          " No noise

set autoread                              " Reload files changed outside vim

set laststatus=2                          " 显示状态栏

set statusline+=%{fugitive#statusline()}  " Git Hotness

set list listchars=tab:>.,trail:.         " Display tabs and trailing spaces visually

set linebreak                             " Wrap lines at convenient points

set nobackup

set nowb

set tabstop=4

set shiftwidth=4

set textwidth=80                          " Make it obvious where 80 characters is

highlight ColorColumn ctermbg=gray

set colorcolumn=80

set numberwidth=4

set fileformat=unix

set expandtab

set t_Co=256

set list

"set ignorecase

set incsearch                                   " 输入搜索内容时就显示搜索结果

au WinLeave * set nocursorline nocursorcolumn   " Highlight current line

au WinEnter * set cursorline cursorcolumn

set cursorline cursorcolumn                     " 突出当前行和列

" Persistent Undo

set undodir=~/.vim/backups

set undofile

" Search Options

set incsearch                   " Find the next match as we type the search

set hlsearch                    " 搜索时高亮显示被找到的文本

set viminfo='100,f1             " Save up to 100 marks, enable capital marks

" Indentation

set autoindent

set smartindent    " 开启新行时使用智能自动缩进

set smarttab

set shiftwidth=4   " 设定 << 和 >> 命令移动时的宽度为 4

set softtabstop=4  " 使得按退格键时可以一次删掉 4 个空格

set tabstop=4      " 设定 tab 长度为 4

set expandtab

" Folds

set foldmethod=indent           " Fold based on indent

set foldnestmax=3               " Deepest fold is 3 levels

set nofoldenable                " Dont fold by default

" Leader setting

let mapleader = ","             " Rebind <Leader> key

" Syntax Highlight

syntax on

" Run commands that require an interactive shell

nnoremap <Leader>r :RunInInteractiveShell<space>
最终效果
NOTE: 完整的 .vimrc 文件非常长, 感兴趣的小伙伴请移步到 JMilkFan’s Github
dotfiles
dotfiles(点文件) 顾名思义就是文件名前缀带 . 的文件, 因为这类文件在 Linux 中一般为与系统环境相关的隐藏文件(EG. .vimrc/.bashrc/.profile/.bash_profile), 所以在一定程度上 ditfiles 代表了 Linux 系统环境的个性化配置. 简而言之就是, 如果在另外一台计算机中同步了这些 dotfils 就能拥有与你自己的计算机一致的环境设置. 而且 dotfiles + Github 就能够实现只要有网络, 那么所有的计算机都能够变成自己熟悉且习惯的样子.
工作原理:
- 收集相关的 “dotfiles”
- 将这些 “dotfiles” 都放置到同一个目录 dotfiles 中
- 将 dotfiles 目录上传到 Github 或者任意网络存储设备上
- 在另外一台计算机上拉下 dotfiles 目录, 并以软链接的方式将 dotfiles 目录中对应的 “dotfiles”文件链接到系统中相应路径中
EXAMPLE:
- Set up Vundle by manual
git clone https://github.com/VundleVim/Vundle.vim.git ~/.vim/bundle/Vundle.vim- git clone dotfiles
jmilkfan@JmilkFan-Devstack:~$ git clone https://github.com/JmilkFan/dotfiles.git- 建立软链接
jmilkfan@JmilkFan-Devstack:~$ ln -s dotfiles/.vimrc ~/.vimrc- 安装插件
vim +PluginInstall +qall安装完之后就能够愉快的撸代码了 : )
NOTE: 这里只是一个仅含有 .vimrc 文件的 dotfiles, 实际上会含有更多的文件, 那么就需要使用到 Bash 来为我们快速的建立软链接了.
Troubleshooting
vim 版本不满足
$ vim ~/.vimrc

YouCompleteMe unavailable: requires Vim 7.4.1578+.解决:需要安装最新的 vim 版本
to Ubuntu:
sudo add-apt-repository ppa:jonathonf/vim

sudo apt update

sudo apt install vim
to CentOS
cd /etc/yum.repos.d/

wget  https://copr.fedorainfracloud.org/coprs/mcepl/vim8/repo/epel-7/mcepl-vim8-epel-7.repo

rpm --import  https://copr-be.cloud.fedoraproject.org/results/mcepl/vim8/pubkey.gpg

yum erase vim-minimal

yum update vim
The ycmd server SHUT DOWN (restart with ‘:YcmRestartServer’). YCM core library not detected; you need to compile YCM before using it.
解决:YCM 核心库未检测到,需要重新编译 YCM
to Ubuntu
sudo apt-get install gcc gcc-c++ cmake g++  python-dev

# python3 使用 python3-dev
to CentOS
yum install gcc gcc-c++ cmake g++ python-develpython ~/.vim/bundle/YouCompleteMe/install.py --clang-completerTagbar: Exuberant ctags not found at ‘/usr/local/bin/ctags’
to Ubuntu:
sudo apt-get install exuberant-ctagsto CentOS:
yum install ctags-etags$ find / -name ctags
/etc/alternatives/ctags
/var/lib/dpkg/alternatives/ctags
/usr/bin/ctags
$ ln -s /usr/bin/ctags /usr/local/bin/ctagsOpenstack 实现技术分解 (3) 开发工具 — VIM & dotfiles的更多相关文章
- Openstack 实现技术分解 (1) 开发环境 — Devstack 部署案例详解
目录 目录 前言 系统环境 Devstack 下载源码 配置文件 local.conf & localrc 简易的环境脚本 openrc 部署 Devstack 自动化部署流程 部署案例 单节 ...
- OpenStack 实现技术分解 (5) 应用开发 — 使用 OpenStackClients 进行二次开发
文件夹 文件夹 前文列表 參考阅读 前言 OpenStackClients 使用 OpenStackClients 获取 project_client object 的 demo 调用 project ...
- OpenStack 实现技术分解 (7) 通用库 — oslo_config
目录 目录 前文列表 扩展阅读 osloconfig argparse cfgpy class Opt class ConfigOpts CONF 对象的单例模式 前文列表 OpenStack 实现技 ...
- OpenStack 实现技术分解 (6) 通用库 — oslo_log
目录 目录 前文列表 扩展阅读 日志级别 oslolog 初始化设置 DEMO oslolog 的相关配置项 oslolog 的日志级别 oslolog 的使用技巧 推荐使用 LOGdebug 的地方 ...
- Openstack 实现技术分解 (4) 通用技术 — TaskFlow
目录 目录 前文列表 扩展阅读 简介 基本概念 实现样例 最后 前文列表 Openstack 实现技术分解 (1) 开发环境 - Devstack 部署案例详解 Openstack 实现技术分解 (2 ...
- Openstack 实现技术分解 (2) 虚拟机初始化工具 — Cloud-Init & metadata & userdata
目录 目录 前文列表 扩展阅读 系统环境 前言 Cloud-init Cloud-init 的配置文件 metadata userdata metadata 和 userdata 的区别 metada ...
- 只有文本编辑器才是王道, 什么ide都是evil的浮云, 看看linus linux的内核开发工具vim emacs
只有文本编辑器才是王道, 什么ide都是evil的浮云, 看看linus linux的内核开发工具vim emacs [ide is evil] (http://i.cnblogs.com/EditP ...
- react 前端项目技术选型、开发工具、周边生态
react 前端项目技术选型.开发工具.周边生态 声明:这不是一篇介绍 React 基础知识的文章,需要熟悉 React 相关知识 主架构:react, react-router, redux, re ...
- React 可视化开发工具 shadow-widget 的非可视开发方法
Shadow Widget 提倡在可视设计器中开发用户界面,输出转义标签,而非 JSX.许多童鞋可能不知道 SW 同样支持用 JSX 设计界面,开发体验比原生 React 编程好出很多,本文就介绍这方 ...
随机推荐
- webpack4导入jQuery的新方案
本文的目的 拒绝全局导入jQuery!! 拒绝script导入jQuery!! 找到一种只在当前js组件中引入jQuery,并且使用webpack切割打包的方案! 测试环境 以下测试在webpack3 ...
- 3U VPX 加固智能计算异构服务器
3U VPX 加固智能计算异构服务器 北京太速科技有限公司在线客服:QQ:448468544 公司网站:www.orihard.com联系电话:15084122580
- samba服务及vsftpd服务
如何配置多个网卡 第一步: 打开设置,选择网络驱动器添加 第二步: ip a 查看网卡是否添加成功 第三步: 打开刚添加的网卡配置文件(注意,你刚添加的网卡是没有配置文件的,需要去复制一份到/etc/ ...
- 【转】ubuntu或linux网卡配置/etc/network/interfaces
转自:https://www.cnblogs.com/qiuxiangmuyu/p/6343841.html 青蛙准备写一个系列文章,介绍一些Debian/Ubuntu里面常用的配置文件.当然,Lin ...
- SQLServer Transaction Isolation Level
基本用法 -- Syntax for SQL Server and Azure SQL Database SET TRANSACTION ISOLATION LEVEL { READ UNCOMMIT ...
- 记录手机端h5页面碰到的一些问题
关于input光标在手机端偏移 问题根本:不要使用line-height垂直居中. 解决方法:可直接定义height,然后高度由上下padding值撑开. 移动端清除input光标 ios input ...
- 前端每日实战:157# 视频演示如何用纯 CSS 创作一个棋盘错觉动画(实际上每一行都是平行的)
效果预览 按下右侧的"点击预览"按钮可以在当前页面预览,点击链接可以全屏预览. https://codepen.io/comehope/pen/VEyoGj 可交互视频 此视频是可 ...
- Python代码2转3、3转2的方法
众所周知,Python2和Python3不兼容. 那么,假如遇到了超大的工作量,我们是不是需要一行一行地手动去改呢? 当然不是. (一)2转3 Python3.7(顺便提一句,现在装3.7发现好像安装 ...
- JAVA笔记14-线程
一.概念 线程:是一个程序里面不同的执行路径,每一个分支都叫线程.到现在为止我们所讲的程序分支只有一个,即main方法,称作主线程. 进程:class文件,exe文件.程序的执行过程:程序放入代码区( ...
- 【NOIP2016提高A组模拟8.19】(雅礼联考day2)总结
第一题又有gcd,又有xor,本来想直接弃疗,不过后来想到了个水法: 当两个相邻的数满足条件时,那么他们的倍数也可能满足条件.然后没打,只打了个暴力. 正解就是各种结论,各种定理搞搞. 第二题,想都不 ...