使用YOLOv2进行图像检测
- 基本配置信息
tensorflow (1.4.0)
tensorflow-tensorboard (0.4.0)
Keras (2.1.5)
Python (3.6.0)
Anaconda 4.3.1 (64-bit)
Windows 7
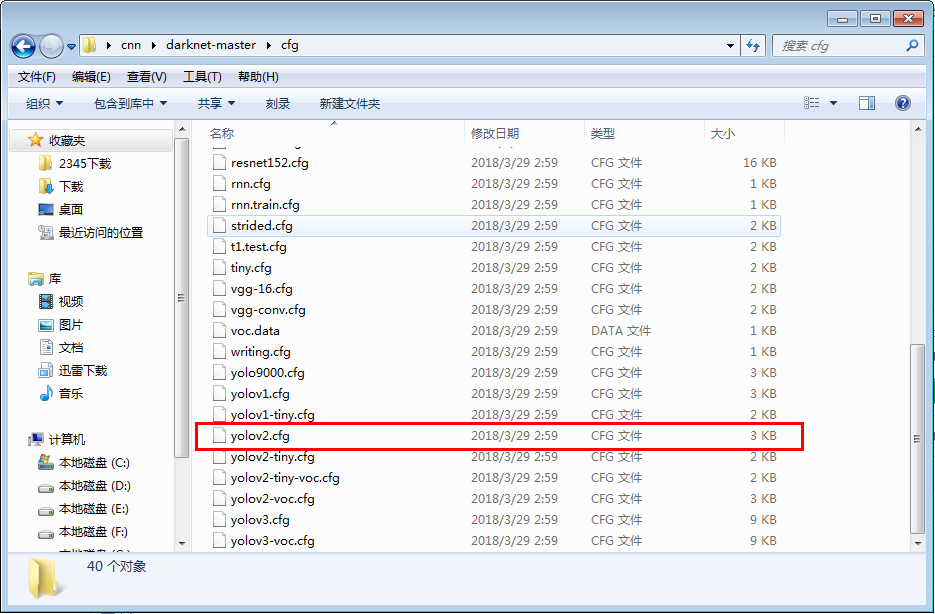
- darknet链接
https://github.com/pjreddie/darknet
下载后在cfg文件夹下找到yolov2的配置文件yolov2.cfg
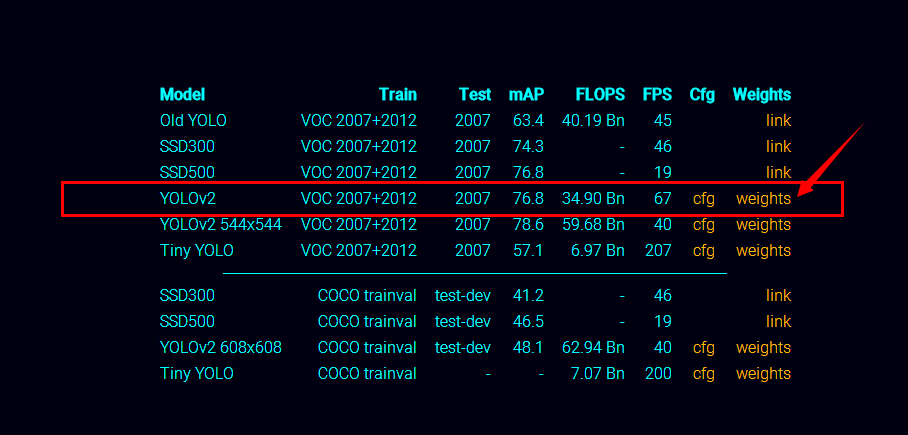
- yolov2权重文件链接
https://pjreddie.com/darknet/yolov2/
在页面中选择YOLOV2 weights下载
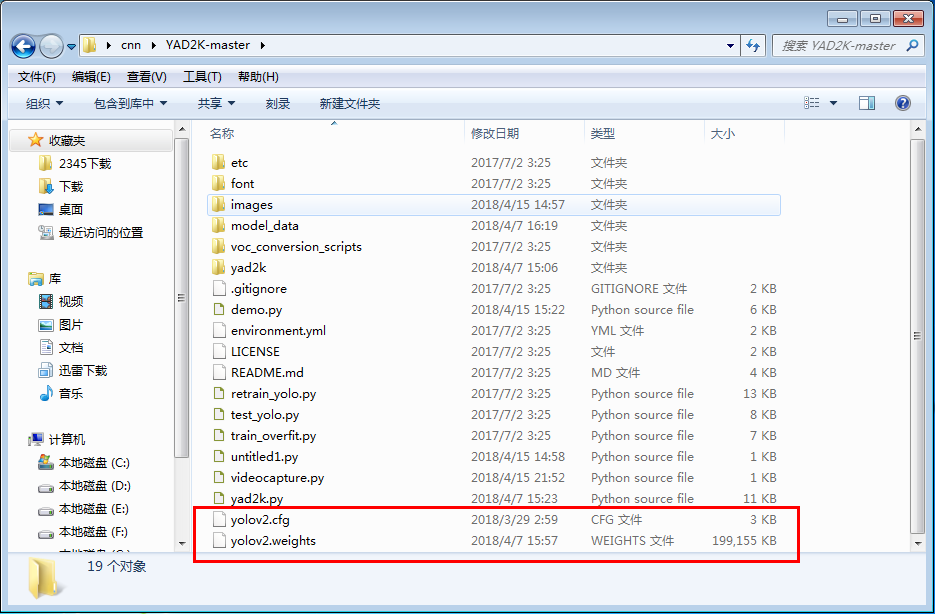
- yad2k 链接
https://github.com/allanzelener/YAD2K
下载完成后将之前下载好的yolov2.cfg文件,YOLOV2 weights文件拷贝到yad2k目录下
- 使用spyder 运行yad2k目录下的yad2k.py文件
在运行配置里设置运行时所需的参数信息
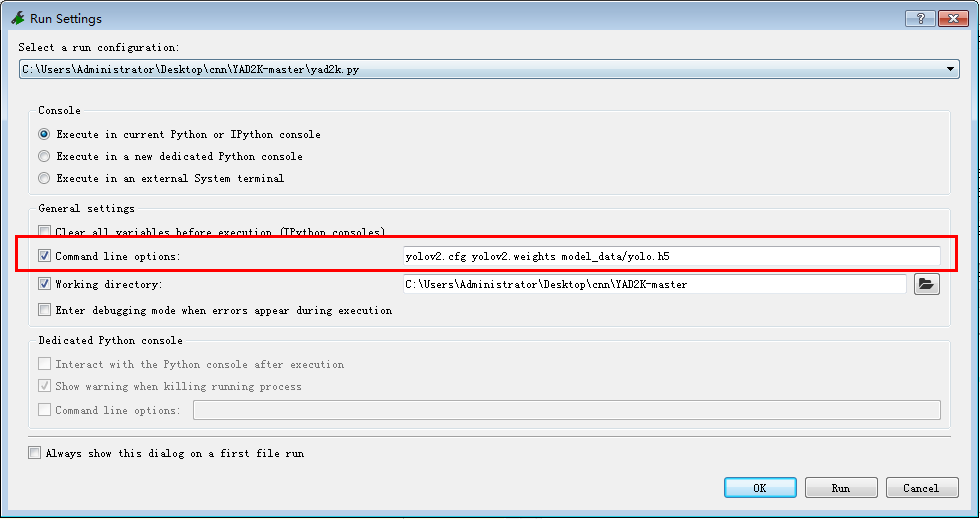
或使用命令行运行yad2k.py
python yad2k.py yolov2.cfg yolov2.weights model_data/yolo.h5
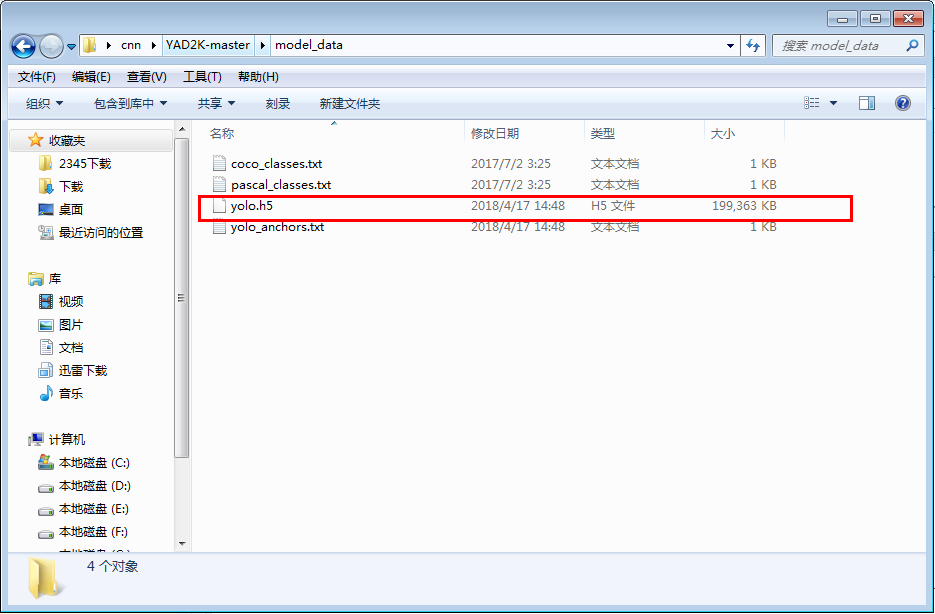
运行结果如图所示

生成的yolo.h5文件在model_data文件夹内
- 利用生成的权重信息,进行图像检测
使用opencv调用电脑摄像头,进行视频图像信息的检测
opencv版本
opencv-python (3.2.0)
在yad2k目录下创建自己的demo,参考https://www.jianshu.com/p/3e77cefeb49b
 import cv2

 import os

 import time

 import numpy as np

 from keras import backend as K

 from keras.models import load_model

 from yad2k.models.keras_yolo import yolo_eval, yolo_head

 class YOLO(object):

     def __init__(self):

         self.model_path = 'model_data/yolo.h5'

         self.anchors_path = 'model_data/yolo_anchors.txt'

         self.classes_path = 'model_data/coco_classes.txt'

         self.score = 0.3

         self.iou = 0.5

         self.class_names = self._get_class()

         self.anchors = self._get_anchors()

         self.sess = K.get_session()

         self.boxes, self.scores, self.classes = self.generate()

     def _get_class(self):

         classes_path = os.path.expanduser(self.classes_path)

         with open(classes_path) as f:

             class_names = f.readlines()

         class_names = [c.strip() for c in class_names]

         return class_names

     def _get_anchors(self):

         anchors_path = os.path.expanduser(self.anchors_path)

         with open(anchors_path) as f:

             anchors = f.readline()

             anchors = [float(x) for x in anchors.split(',')]

             anchors = np.array(anchors).reshape(-1, 2)

         return anchors

     def generate(self):

         model_path = os.path.expanduser(self.model_path)

         assert model_path.endswith('.h5'), 'Keras model must be a .h5 file.'

         self.yolo_model = load_model(model_path)

         # Verify model, anchors, and classes are compatible

         num_classes = len(self.class_names)

         num_anchors = len(self.anchors)

         # TODO: Assumes dim ordering is channel last

         model_output_channels = self.yolo_model.layers[-1].output_shape[-1]

         assert model_output_channels == num_anchors * (num_classes + 5), \

             'Mismatch between model and given anchor and class sizes'

         print('{} model, anchors, and classes loaded.'.format(model_path))

         # Check if model is fully convolutional, assuming channel last order.

         self.model_image_size = self.yolo_model.layers[0].input_shape[1:3]

         self.is_fixed_size = self.model_image_size != (None, None)

         # Generate output tensor targets for filtered bounding boxes.

         # TODO: Wrap these backend operations with Keras layers.

         yolo_outputs = yolo_head(self.yolo_model.output, self.anchors, len(self.class_names))

         self.input_image_shape = K.placeholder(shape=(2, ))

         boxes, scores, classes = yolo_eval(yolo_outputs, self.input_image_shape, score_threshold=self.score, iou_threshold=self.iou)

         return boxes, scores, classes

     def detect_image(self, image):

         start = time.time()

         #image = cv2.imread(image)

         #cv2.imshow('image',image)

         y, x, _ = image.shape

         if self.is_fixed_size:  # TODO: When resizing we can use minibatch input.

             resized_image = cv2.resize(image, tuple(reversed(self.model_image_size)), interpolation=cv2.INTER_CUBIC)

             image_data = np.array(resized_image, dtype='float32')

         else:

             image_data = np.array(image, dtype='float32')

         image_data /= 255.

         image_data = np.expand_dims(image_data, 0)  # Add batch dimension.

         out_boxes, out_scores, out_classes = self.sess.run(

             [self.boxes, self.scores, self.classes],

             feed_dict={

                 self.yolo_model.input: image_data,

                 self.input_image_shape: [image.shape[0], image.shape[1]],

                 K.learning_phase(): 0

             })

         print('Found {} boxes for {}'.format(len(out_boxes), 'img'))

         for i, c in reversed(list(enumerate(out_classes))):

             predicted_class = self.class_names[c]

             box = out_boxes[i]

             score = out_scores[i]

             label = '{} {:.2f}'.format(predicted_class, score)

             top, left, bottom, right = box

             top = max(0, np.floor(top + 0.5).astype('int32'))

             left = max(0, np.floor(left + 0.5).astype('int32'))

             bottom = min(y, np.floor(bottom + 0.5).astype('int32'))

             right = min(x, np.floor(right + 0.5).astype('int32'))

             print(label, (left, top), (right, bottom))

             cv2.rectangle(image, (left, top), (right, bottom), (255, 0, 0), 2)

             cv2.putText(image, label, (left, int(top - 4)), cv2.FONT_HERSHEY_SIMPLEX, 0.5, (0, 0, 255), 1, cv2.LINE_AA)

         end = time.time()

         print(end - start)

         return image

     def close_session(self):

         self.sess.close()

 def detect_vedio(yolo):

     camera = cv2.VideoCapture(0)

     while True:

         res, frame = camera.read()

         if not res:

             break

         image = yolo.detect_image(frame)

         cv2.imshow("detection", image)

         if cv2.waitKey(1) & 0xFF == ord('q'):

             break

     yolo.close_session()

 def detect_img(img, yolo):

     image = cv2.imread(img)

     r_image = yolo.detect_image(image)

     cv2.namedWindow("detection")

     while True:

         cv2.imshow("detection", r_image)

         if cv2.waitKey(110) & 0xff == 27:

                 break

     yolo.close_session()

 if __name__ == '__main__':

     yolo = YOLO()

     detect_vedio(yolo)
使用YOLOv2进行图像检测的更多相关文章
- 『科学计算』图像检测微型demo
这里是课上老师给出的一个示例程序,演示图像检测的过程,本来以为是传统的滑窗检测,但实际上引入了selectivesearch来选择候选窗,所以看思路应该是RCNN的范畴,蛮有意思的,由于老师的注释写的 ...
- 第五讲_图像识别之图像检测Image Detection
第五讲_图像识别之图像检测Image Detection 目录 物体检测 ILSVRC竞赛200类(每个图片多个标签):输出类别+Bounding Box(x,y,w,h) PASCAL VOC 20 ...
- 图像检测之sift and surf---sift中的DOG图 surf hessian
http://www.cnblogs.com/tornadomeet/archive/2012/08/17/2644903.html http://www.cnblogs.com/slysky/arc ...
- [1] YOLO 图像检测 及训练
YOLO(You only look once)是流行的目标检测模型之一, 原版 Darknet 使用纯 C 编写,不需要安装额外的依赖包,直接编译即可. CPU环境搭建 (ubuntu 18.04) ...
- C#图像检测开源项目
AForge.NET AForge.NET is an open source C# framework designed for developers and researchers in the ...
- 基于YOLO-V2的行人检测(自训练)附pytorch安装方法
声明:本文是别人发表在github上的项目,并非个人原创,因为那个项目直接下载后出现了一些版本不兼容的问题,故写此文帮助解决.(本人争取在今年有空的时间,自己实现基于YOLO-V4的行人检测) 项目链 ...
- 图像检测算法Halcon 10的使用
安装完成HALCON之后,在VS项目中添加动态链接库配置项目,并修改此项目属性的包含目录.库目录和链接器.
- 使用CNN做电影评论的负面检测——本质上感觉和ngram或者LSTM同,因为CNN里图像检测卷积一般是3x3,而文本分类的话是直接是一维的3、4、5
代码如下: from __future__ import division, print_function, absolute_import import tensorflow as tf impor ...
- 一文带你学会使用YOLO及Opencv完成图像及视频流目标检测(上)|附源码
计算机视觉领域中,目标检测一直是工业应用上比较热门且成熟的应用领域,比如人脸识别.行人检测等,国内的旷视科技.商汤科技等公司在该领域占据行业领先地位.相对于图像分类任务而言,目标检测会更加复杂一些,不 ...
随机推荐
- 【Python】 SQLAlchemy的初步使用
SQLAlchemy 在很多Python的web框架中都整合进了SQLAlchemy这个主要发挥ORM作用的模块.所谓ORM,就是把复杂的SQL语句给包装成更加面向对象,易于理解的样子.在操作数据库的 ...
- 内部办公网与IDC机房的GRE隧道配置实践
背景 公司内网与机房服务器为了实现用内网IP通信的功能,故使用了linux的IP gre隧道的方式.使得公司内部可以直接通过路由直连的方式访问机房服务器. 拓扑图如下: 注:拓扑中的外网IP为虚构的I ...
- 阿里云ECS的CPU100%排查
一.背景和现象 初创公司,架构lanmp,web前端和后端分开服务器,业务驱动主要是nginx和apache,nginx主要是处理静态文件和反向代理,前后端.搜索引擎.缓存.队列等附加的服务都是用do ...
- Python 自学 之 String 常见操作
这是在Python 3.5.3版本下测试的.# Author Taylor_Manitoname ="my name is alex"#capitalized 大写的print(& ...
- SuSE的命令安装软件 zypper
转自:http://blog.csdn.net/s_k_yliu/article/details/6674079 SuSE的命令安装软件 zypper,yast2 redhat yum debain ...
- 设计模式NO.3
设计模式NO.3 本次博客内容为第三次设计模式的练习.根据老师的要求完成下列题目: 题目1 某商品管理系统的商品名称存储在一个字符串数组中,现需要自定义一个双向迭代器(MyIterator)实现对该商 ...
- SCOI2010 序列操作
2421 序列操作 http://codevs.cn/problem/2421/ 2010年省队选拔赛四川 题目描述 Description lxhgww最近收到了一个01序列,序列里面包含了n个 ...
- Python习题(第一课)
想了想其他的太简单了,还是不放了,剩三题吧. 一.完美立方 编写一个程序,对任给的正整数N (N≤100),寻找所有的四元组(a, b, c, d),使得a^3= b^3 + c^3 + d^3,其中 ...
- vue 手机端开发 小商铺 添加购物车 以及结算 功能
这个功能绕了我一天!!! 对 就是这个功能 一系列相关联的 四处相关联 现在加班 没时间更 过两天在更
- Mego(06) - 关系数据库建模
框架中提供了多种数据注释以便可以全面的描述数据库结构特性. 自增列 可以使用注释声明指定列是数据库自增列,同时能指定自增的起始及步长. public class Blog { [Identity(, ...