从零开始 CentOs 7 搭建论坛BBS Discuz_X3.2
由于公司项目需要一个互动平台,可以发起活动,发消息留言,讨论过后发现这竟然是一个论坛的功能。
于是就不打算耗费功夫开发相关功能,直接另外搭一套BBS算球。。。
一直觉得搭建BBS不是一件难事,目前有很多成熟的产品都支持直接建站,找了一些资料看了后发现还是需要很多知识和架构的,下面是详细的搭建过程
重新安装了一台CentOs 7虚拟机,安装过程资料很多,大家去搜索下
系统配置相关
系统版本:CentOS-7-x86_64-Minimal-1503-01.iso
主机名: BBS
IP: 10.10.10.14 这是虚拟机自动分配
防火墙: firewall 已经关闭
关闭 SELINUX
下面列出建站需要的服务支持
1. Apache 服务
2. Mysql 安装
3. Php 安装
4. 服务配置
5. Discuz! 安装
服务安装
1、安装 Apache
a、使用 yum 搜索相关软件
[root@BBS ~]# yum search httpd

已加载插件:fastestmirror

Loading mirror speeds from cached hostfile

 * base: mirrors.163.com

 * extras: mirrors.163.com

 * updates: mirrors.163.com

======================================================== N/S matched: httpd ========================================================

libmicrohttpd-devel.i686 : Development files for libmicrohttpd

libmicrohttpd-devel.x86_64 : Development files for libmicrohttpd

libmicrohttpd-doc.noarch : Documentation for libmicrohttpd

httpd.x86_64 : Apache HTTP Server

httpd-devel.x86_64 : Development interfaces for the Apache HTTP server

httpd-manual.noarch : Documentation for the Apache HTTP server

httpd-tools.x86_64 : Tools for use with the Apache HTTP Server

libmicrohttpd.i686 : Lightweight library for embedding a webserver in applications

libmicrohttpd.x86_64 : Lightweight library for embedding a webserver in applications

mod_auth_mellon.x86_64 : A SAML 2.0 authentication module for the Apache Httpd Server

mod_dav_svn.x86_64 : Apache httpd module for Subversion server
b、进行 httpd 软件安装
yum install httpd.x86_64
系统就会开始安装,这时下面会列举很多 httpd 服务的依赖,直接 y 同意安装,这个安装看网速,一般会很快
c、安装成功后查看 httpd 状态
[root@BBS ~]# systemctl status httpd.service

httpd.service - The Apache HTTP Server

   Loaded: loaded (/usr/lib/systemd/system/httpd.service; disabled)

   Active: inactive (dead)
dead 说明服务没有启动,启动这个服务:systemctl start httpd.service
[root@BBS ~]# systemctl status httpd.service

httpd.service - The Apache HTTP Server

   Loaded: loaded (/usr/lib/systemd/system/httpd.service; disabled)

   Active: active (running) since 四 2015-11-05 17:47:08 CST; 6s ago

 Main PID: 19288 (httpd)

   Status: "Processing requests..."
Loaded-disabled不是随机启动状态,这个需要修改:systemctl enable httpd.service
d、进行服务器相关配置,很多资料建议修改 Listen 端口为 8080,默认是 80,其实不需要修改,如果有修改配置需要重启服务。此处默认端口配置。
vi /etc/httpd/conf/httpd.conf
#
# Listen: Allows you to bind Apache to specific IP addresses and/or
# ports, instead of the default. See also the <VirtualHost>
# directive.
#
# Change this to Listen on specific IP addresses as shown below to
# prevent Apache from glomming onto all bound IP addresses.
#
#Listen 12.34.56.78:80
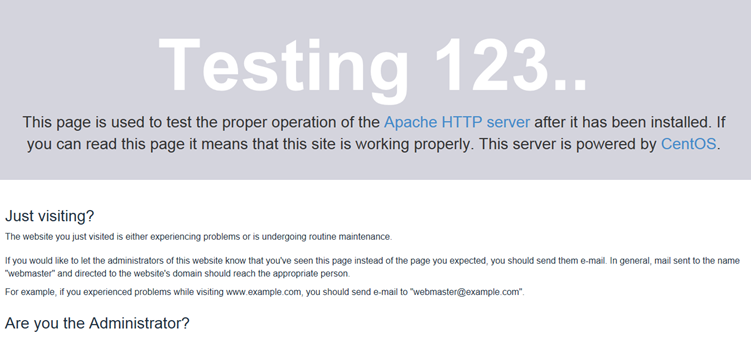
Listen 80e、测试我们的服务器是否安装完成,打开 IE,输入本机 IP 加上端口号即可访问服务器管理页面 。
本机是 10.10.10.14,所以我的地址为:http://10.10.10.14/
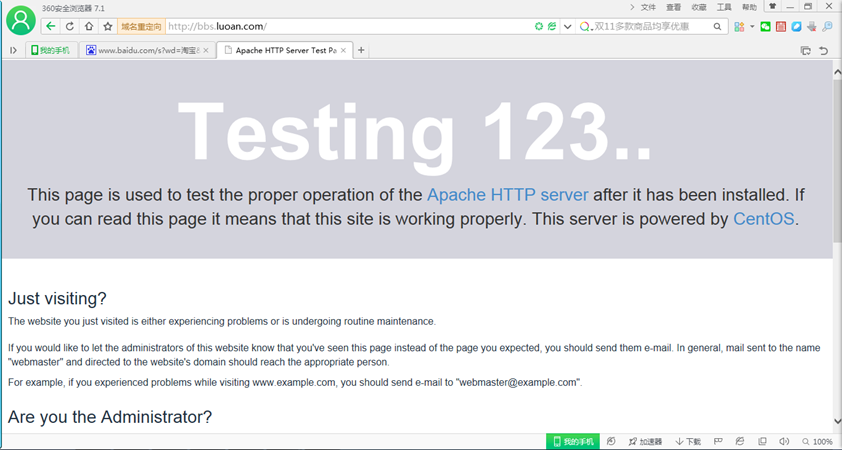
如果想要地址栏显示为网址形式的话,同样可以修改配置文件的数据项 ServerName,我设置成公司缩写luoan,保存重启服务生效。
#

# ServerName gives the name and port that the server uses to identify itself.

# This can often be determined automatically, but we recommend you specify

# it explicitly to prevent problems during startup.

#

# If your host doesn't have a registered DNS name, enter its IP address here.

#

ServerName bbs.luoan.com:80
这样是不是更像那么回事了,哈哈,对了,上面网址要浏览器能解析的话需要另外配置DNS服务器或者修改本地hosts,详细后续会将搭建DNS服务器篇发布出来。
OK,这下服务器就安装完成了。
2、安装 Mysql
进入系统搜索时才发现 CentOs 7 里面的库已经不支持 mysql 安装了,由于下载又要到官网很麻烦,就大概看了下库里面存在哪种数据库,经过查资料找到了一个叫 mariadb 的东西,据说是 mysql 原班人马出来另立的数据库,由于担心sun 会将 mysql 闭源什么的,这都是好人啊
那就暂定用这个数据库了
[root@bbs ~]# yum install MariaDB-server MariaDB-client已加载插件:fastestmirror
Loading mirror speeds from cached hostfile
* base: mirrors.163.com
* extras: mirrors.163.com
* updates: mirrors.163.com
软件包 1:mariadb-5.5.44-1.el7_1.x86_64 已安装并且是最新版本
软件包 1:mariadb-libs-5.5.44-1.el7_1.x86_64 已安装并且是最新版本等待他一直安装完成后就可以启动 mariadb 服务了。
[root@bbs ~]# systemctl start mariadb.service

[root@bbs ~]# systemctl enable mariadb.service
执行完这个命令下面就可以直接使用 mysql 命令了,跟 mysql 操作完全一样,至于里面细节就不去管他了,也用不到。
[root@bbs ~]# mysql

Welcome to the MariaDB monitor.  Commands end with ; or \g.

Your MariaDB connection id is 3

Server version: 5.5.44-MariaDB MariaDB Server

Copyright (c) 2000, 2015, Oracle, MariaDB Corporation Ab and others.

Type 'help;' or '\h' for help. Type '\c' to clear the current input statement.

MariaDB [(none)]> show databases;

+--------------------+

| Database           |

+--------------------+

| information_schema |

| mysql              |

| performance_schema |

| test               |

+--------------------+

4 rows in set (0.00 sec)
下面还要设置 mysql 的密码权限,默认密码为空,此处新密码设置为 root
[root@bbs ~]# mysql_secure_installation

/usr/bin/mysql_secure_installation:行379: find_mysql_client: 未找到命令

NOTE: RUNNING ALL PARTS OF THIS SCRIPT IS RECOMMENDED FOR ALL MariaDB

      SERVERS IN PRODUCTION USE!  PLEASE READ EACH STEP CAREFULLY!

In order to log into MariaDB to secure it, we'll need the current

password for the root user.  If you've just installed MariaDB, and

you haven't set the root password yet, the password will be blank,

so you should just press enter here.

Enter current password for root (enter for none):

OK, successfully used password, moving on...

Setting the root password ensures that nobody can log into the MariaDB

root user without the proper authorisation.

Set root password? [Y/n] y

New password:

Re-enter new password:

Password updated successfully!

Reloading privilege tables..

 ... Success!

By default, a MariaDB installation has an anonymous user, allowing anyone

to log into MariaDB without having to have a user account created for

them.  This is intended only for testing, and to make the installation

go a bit smoother.  You should remove them before moving into a

production environment.

Remove anonymous users? [Y/n] y

 ... Success!

Normally, root should only be allowed to connect from 'localhost'.  This

ensures that someone cannot guess at the root password from the network.

Disallow root login remotely? [Y/n] n

 ... skipping.

By default, MariaDB comes with a database named 'test' that anyone can

access.  This is also intended only for testing, and should be removed

before moving into a production environment.

Remove test database and access to it? [Y/n] y

 - Dropping test database...

 ... Success!

 - Removing privileges on test database...

 ... Success!

Reloading the privilege tables will ensure that all changes made so far

will take effect immediately.

Reload privilege tables now? [Y/n] y

 ... Success!

Cleaning up...

All done!  If you've completed all of the above steps, your MariaDB

installation should now be secure.

Thanks for using MariaDB!
是不是so easy!!!
3、安装 PHP
同样的模式,先搜索一下看看存在哪些包
[root@bbs ~]# yum search php

已加载插件:fastestmirror

Loading mirror speeds from cached hostfile

 * base: mirrors.163.com

 * extras: mirrors.163.com

 * updates: mirrors.163.com

========================================================= N/S matched: php =========================================================

graphviz-php.x86_64 : PHP extension for graphviz

php.x86_64 : PHP scripting language for creating dynamic web sites

php-bcmath.x86_64 : A module for PHP applications for using the bcmath library

php-cli.x86_64 : Command-line interface for PHP

php-common.x86_64 : Common files for PHP

php-dba.x86_64 : A database abstraction layer module for PHP applications

php-devel.x86_64 : Files needed for building PHP extensions

php-embedded.x86_64 : PHP library for embedding in applications

php-enchant.x86_64 : Enchant spelling extension for PHP applications

php-fpm.x86_64 : PHP FastCGI Process Manager

php-gd.x86_64 : A module for PHP applications for using the gd graphics library

php-intl.x86_64 : Internationalization extension for PHP applications

php-ldap.x86_64 : A module for PHP applications that use LDAP

php-mbstring.x86_64 : A module for PHP applications which need multi-byte string handling

php-mysql.x86_64 : A module for PHP applications that use MySQL databases

php-mysqlnd.x86_64 : A module for PHP applications that use MySQL databases

php-odbc.x86_64 : A module for PHP applications that use ODBC databases

php-pdo.x86_64 : A database access abstraction module for PHP applications

php-pear.noarch : PHP Extension and Application Repository framework

php-pgsql.x86_64 : A PostgreSQL database module for PHP

php-process.x86_64 : Modules for PHP script using system process interfaces

php-pspell.x86_64 : A module for PHP applications for using pspell interfaces

php-recode.x86_64 : A module for PHP applications for using the recode library

php-snmp.x86_64 : A module for PHP applications that query SNMP-managed devices

php-soap.x86_64 : A module for PHP applications that use the SOAP protocol

php-xml.x86_64 : A module for PHP applications which use XML

php-xmlrpc.x86_64 : A module for PHP applications which use the XML-RPC protocol

rrdtool-php.x86_64 : PHP RRDtool bindings

uuid-php.x86_64 : PHP support for Universally Unique Identifier library

php-pecl-memcache.x86_64 : Extension to work with the Memcached caching daemon
查看后面的一些注释发现我们可能需要这几个包,不要问我为什么知道这些报需要装,因为知道,所以知道,这是男人的直觉 额
当然你可以选择 yum –y php* 全部安装,应该没问题。
[root@bbs ~]# yum -y install php php-bcmath php-cli php-common php-gd php-ldap php-mbstring php-mysql php-mysqlnd php-pear php-pdo php-xml php-xmlrpc
执行命令发现有冲突发现确实引用了两个连接数据库的包那就去掉一个。因为官方建议用后面一个包 mysqlnd。
[root@bbs ~]# yum -y install php php-bcmath php-cli php-common php-gd php-ldap php-mbstring php-mysqlnd php-pear php-pdo php-xml php-xmlrpc
OK 安装完成。
#重启MariaDB:systemctl restart mariadb.service
#重启apache:systemctl restart httpd.service
4、服务配置
a、编辑 Apache 服务器的配置文件
[root@bbs ~]# vi /etc/httpd/conf/httpd.conf修改下面这些属性
#修改允许.htaccess

AllowOverride All

# 修改页面支持属性

DirectoryIndex index.html index.htm Default.html Default.htm index.php

# 新增支持 . pl 脚本

AddHandler cgi-script .cgi .pl
systemctl restart httpd.service #重启apache
b、配置 php
[root@bbs ~]# vi /etc/php.ini修改下面参数:
# 改为 date.timezone = PRC

[Date]

; Defines the default timezone used by the date functions

; http://php.net/date.timezone

date.timezone = RPC

# 新增禁用的函数,需要使用时再放开

; This directive allows you to disable certain functions for security reasons.

; It receives a comma-delimited list of function names. This directive is

; *NOT* affected by whether Safe Mode is turned On or Off.

; http://php.net/disable-functions

disable_functions = passthru,exec,system,chroot,scandir,chgrp,chown,shell_exec,proc_open,proc_get_status,ini_alter,ini_alter,ini_restore,dl,openlog,syslog,readlink,symlink,popepassthru,stream_socket_server,escapeshellcmd,dll,popen,disk_free_space,checkdnsrr,checkdnsrr,getservbyname,getservbyport,disk_total_space,posix_ctermid,posix_get_last_error,posix_getcwd,posix_getegid,posix_geteuid,posix_getgid,posix_getgrgid,posix_getgrnam,posix_getgroups,posix_getlogin,posix_getpgid,posix_getpgrp,posix_getpid,posix_getppid,posix_getpwnam,posix_getpwuid,posix_getrlimit,posix_getsid,posix_getuid,posix_isatty,posix_kill,posix_mkfifo,posix_setegid,posix_seteuid,posix_setgid,posix_setpgid,posix_setsid,posix_setuid,posix_strerror,posix_times,posix_ttyname,posix_uname

# 支持php短标签

; short_open_tag

;   Default Value: On

;   Development Value: Off

;   Production Value: Off

short_open_tag = On

# 设置表示允许访问当前目录(即PHP脚本文件所在之目录)和/tmp/目录,可以防止php木马跨站,如果改了之后安装程序有问题(例如:织梦内容管理系统),可以注销此行,或者直接写上程序的目录/data/www.osyunwei.com/:/tmp/

open_basedir = .:/tmp/
#重启MariaDB:systemctl restart mariadb.service
#重启apache:systemctl restart httpd.service
c、进行php页面测试
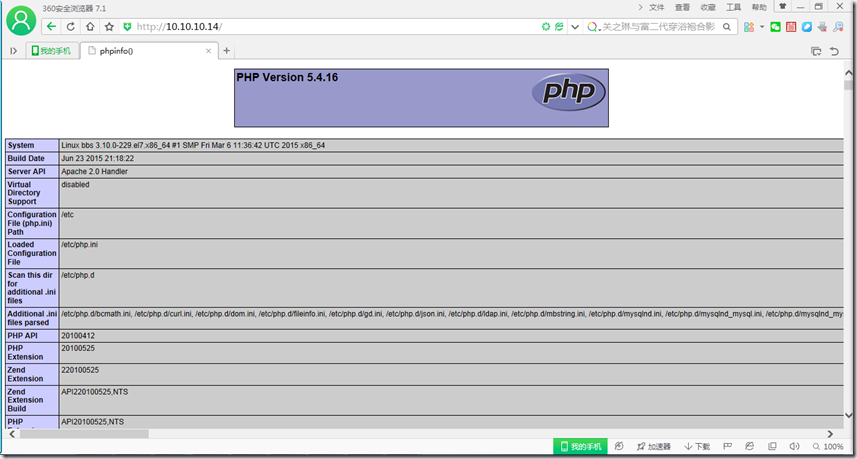
[root@bbs html]# cd /var/www/html

[root@bbs html]# vi index.php
里面的内容很简单,但是我看到别人的教程还是写错了,我也被坑了,出了个空白页面 - -
<?php

phpinfo();

?>
在客户端浏览器输入服务器IP地址,可以看到如下图所示相关的配置信息
5、安装 discuz
a、这个程序系统没有集成,需要自己下载,去官方论坛上找了个discuz3.2x的中文简体版下载地址
产品介绍
Discuz! X3.2 在继承和完善 Discuz! X3.1 的基础上,针对社区移动端进行了新的尝试。推出微信登录、微社区等功能。安全稳定的程序为站长提供更加可靠的保障。
下载地址
简体中文GBK
http://download.comsenz.com/DiscuzX/3.2/Discuz_X3.2_SC_GBK.zip
繁体中文 BIG5
http://download.comsenz.com/DiscuzX/3.2/Discuz_X3.2_TC_BIG5.zip
简体 UTF8
http://download.comsenz.com/DiscuzX/3.2/Discuz_X3.2_SC_UTF8.zip
繁体 UTF8
http://download.comsenz.com/DiscuzX/3.2/Discuz_X3.2_TC_UTF8.zip下面我们就直接使用 wget 下载下来安装,如果没有这个命令,使用 yum 安装就行了,我下载的是GBK的包,如果出现乱码请下载UTF8的。
[root@bbs download]# yum -y install wget

[root@bbs download]# wget http://download.comsenz.com/DiscuzX/3.2/Discuz_X3.2_SC_GBK.zip

--2015-11-06 17:45:41--  http://download.comsenz.com/DiscuzX/3.2/Discuz_X3.2_SC_GBK.zip

正在解析主机 download.comsenz.com (download.comsenz.com)... 101.227.130.115

正在连接 download.comsenz.com (download.comsenz.com)|101.227.130.115|:80... 已连接。

已发出 HTTP 请求,正在等待回应... 200 OK

长度:12402802 (12M) [application/zip]

正在保存至: “Discuz_X3.2_SC_GBK.zip”

100%[==========================================================================================>] 12,402,802  7.74MB/s 用时 1.5s

2015-11-06 17:45:43 (7.74 MB/s) - 已保存 “Discuz_X3.2_SC_GBK.zip” [12402802/12402802])
OK 下载完成。
直接解压文件,由于是个zip包 ,坑爹 linux 肯定没工具解,直接安装 yum -y install unzip
[root@bbs download]# unzip Discuz_X3.2_SC_GBK.zip

[root@bbs download]# ls -l

总用量 12120

-rw-r--r--.  1 root root 12402802 6月   9 10:58 Discuz_X3.2_SC_GBK.zip

drwxr-xr-x.  2 root root       97 6月   9 10:21 readme

drwxr-xr-x. 12 root root     4096 6月   9 10:21 upload

drwxr-xr-x.  4 root root       68 6月   9 10:21 utility
OK,解压成功,出来了3个目录。
b、将 upload 目录转移到web请求目录下
[root@bbs download]# cp -R ./upload /var/www/htmlc、进去upload给予几个目录权限访问
[root@bbs download]# chown apache:apache -R ./upload[root@bbs upload]# chmod -R 777 config
[root@bbs upload]# chmod -R 777 data
[root@bbs upload]# chmod -R 777 uc_client
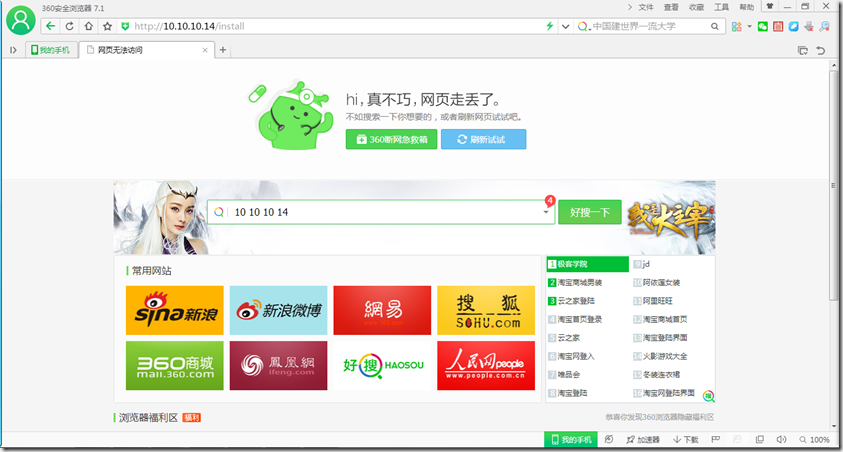
[root@bbs upload]# chmod -R 777 uc_serverd、打开浏览器开始安装论坛,这一步网上都是说什么站点的根目录,然后域名加上 install 就可以访问了,我根本没有站点,所以尝试了很久未知所以然,找不到入口该是多蛋疼,蛋碎了
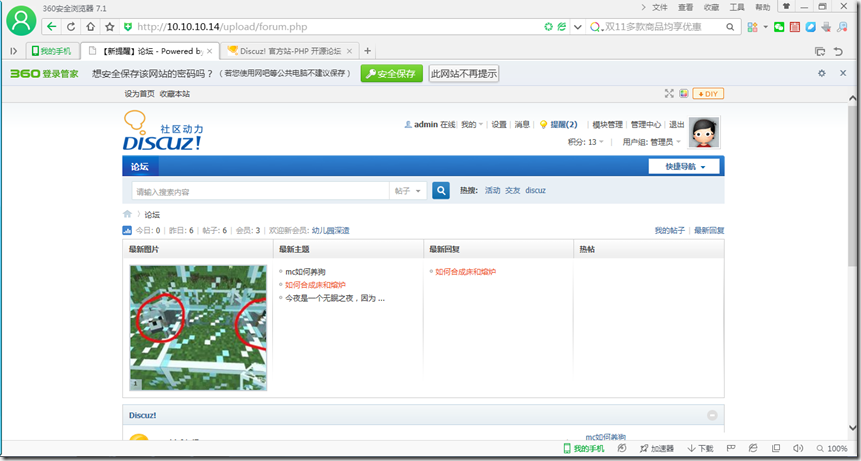
又去查看资料具体入口跳转的php页面,发现是 forum.php,这下简单了,在upload 目录下有这个页面。直接访问果然出来。看浏览器的解析结果分析,如果自己在根目录下的一层文件夹需要添加在路径上。
http://10.10.10.14/upload/forum.php
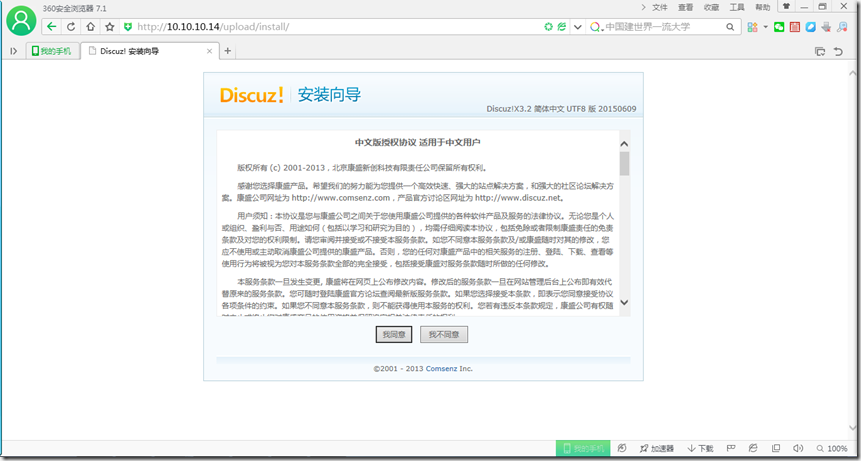
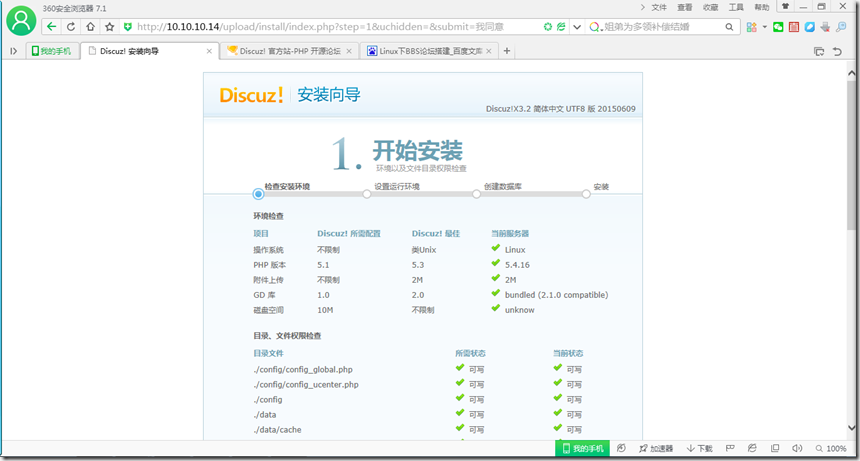
e、开始安装论坛,点击“我同意”后,进去系统检测页面。如果一切提示OK,就继续下一步,如果提示有错误,就先去解决,一般都是上面第【c】步让你给文件权限的问题,既然上面都执行了 这里一般不会报错。一直下一步,下一步设置管理员密码,就成功安装了。
从零开始 CentOs 7 搭建论坛BBS Discuz_X3.2的更多相关文章
- Apache的安装部署 2(加密认证 ,网页重写 ,搭建论坛)
一.http和https的基本理论知识1. 关于https: HTTPS(全称:Hypertext Transfer Protocol Secure,超文本传输安全协议),是以安全为目标的HTTP通道 ...
- Centos 7 搭建蓝鲸V4.1.16社区版
第一次搭建蓝鲸平台,参考了蓝鲸社区的官方搭建文档. 友情链接:蓝鲸智云社区版V4.1.16用户手册 搭建时遇到了不少的坑,这里做一个详细的安装梳理 主机硬件要求 官方的推荐如下: 在本地用VMware ...
- CentOS下搭建LAMP环境详解
前言:在这里将介绍如何在CentOS下搭建LAMP环境(全部使用源码编译安装),用于web服务器开发. •LAMP: Linux + Apache + PHP + Mysql. •系统: CentOS ...
- Windows下搭建论坛
Windows下搭建论坛 真正的O基础架构,一步一步走向成功 转载请注明原作者出处 环境准备篇 安装集成包软件 解压后如下 以管理员身份运行setup的批处理 选择推荐的apache版本 选择推荐的m ...
- CentOs上搭建git服务器
CentOs上搭建git服务器 首先安装setuptools wget http://pypi.python.org/packages/source/s/setuptools/setuptools-0 ...
- Centos下搭建 nginx+uwsgi+python
python做web应用最麻烦的还是配置服务器了,此话不假,光中间件就有好几种选择,fastcgi.wsgi.uwsgi,难 免让人眼花缭乱. 而听说uwsgi的效率是fastcgi和wsgi的10倍 ...
- 从零开始用 Flask 搭建一个网站(一)
前言 笔者之前未接触过 Python,只是略懂一点前端,所以说从零开始也相差无几吧.Flask 是一个轻量级的基于 Python 的框架,但是扩展性非常良好(Github 上 22000 多个 sta ...
- 从零开始用 Flask 搭建一个网站(三)
从零开始用 Flask 搭建一个网站(二) 介绍了有关于数据库的运用,接下来我们在完善一下数据在前端以及前端到后端之间的交互.本节涉及到前端,因此也会讲解一下 jinja2 模板.jQuery.aja ...
- 从零开始用 Flask 搭建一个网站(二)
从零开始用 Flask 搭建一个网站(一) 介绍了如何搭建 Python 环境,以及 Flask 应用基本项目结构.我们要搭建的网站是管理第三方集成的控制台,类似于 Slack. 本篇主要讲解数据如何 ...
随机推荐
- react-devtool 消息处理渲染 源码理解
react-devtools 有chrome插件版,但在chrome 插件下的通信调试不够透明,且chrome 的插件特别是开发工具界面几乎无法调试. 看到了react-devtools 也提供ele ...
- JSP页面、包含
JSP页面概念: html称为静态页面,而与相对的JSP称为动态页面(一个特殊的servlet)二者的区别在于,html只能定义css,js.但是在JSP中除了html可以定义的文件外,还可以定义Ja ...
- turtle模块绘图
import turtle #运动命令 # forward(d) 向前移动d长度 # backward(d) 向后移动d长度 # right(d) 向右转动多少度 #left(d) 向左转动多少度 # ...
- asp.net无限递归
private void button1_Click(object sender, EventArgs e) { DialogResult dialogResult = folderBrowserDi ...
- 在绘图的时候import matplotlib.pyplot as plt报错:ImportError: No module named '_tkinter', please install the python-tk package
在绘图的时候import matplotlib.pyplot as plt报错:ImportError: No module named '_tkinter', please install the ...
- vue2.x入坑总结—回顾对比angularJS/React的一统
从感性的角度讲,我是不屑于用VUE,觉得react套件用起来更顺手,但是vue现在越来火,所以也不得入vue(杂烩汤)的坑.vue/anguarJS/React,三者对关系现在就是: https:// ...
- 切换用户后,/etc/profile的配置不起效
遇到的问题 在配置linux的时候,发现一个问题:su root切换到root用户后,/etc/profile 中配置的PATH不起效果. 问题分析和疑问 是不是~/.profile,~/.bashr ...
- SpringBoot 注解
@RestController和@RequestMapping注解 我们的Example类上使用的第一个注解是 @RestController .这被称为一个构造型(stereotype)注解.它为阅 ...
- 31 Python中 sys.argv[]的用法简明解释(转)
Python中 sys.argv[]的用法简明解释 因为是看书自学的python,开始后不久就遇到了这个引入的模块函数,且一直在IDLE上编辑了后运行,试图从结果发现它的用途,然而结果一直都是没结果, ...
- Intel Code Challenge Final Round (Div. 1 + Div. 2, Combined)
C 模拟 题意:给的是一个矩形,然后√2 的速度走,如果走到边上就正常反射,走到角上,暂停反射,我们知道要不循环要不暂停,记录走到的点最短时间 /*************************** ...