tensorflow 1.0 学习:用别人训练好的模型来进行图像分类
谷歌在大型图像数据库ImageNet上训练好了一个Inception-v3模型,这个模型我们可以直接用来进来图像分类。
下载地址:https://storage.googleapis.com/download.tensorflow.org/models/inception_dec_2015.zip
下载完解压后,得到几个文件:
其中的classify_image_graph_def.pb 文件就是训练好的Inception-v3模型。
imagenet_synset_to_human_label_map.txt是类别文件。
随机找一张图片:如
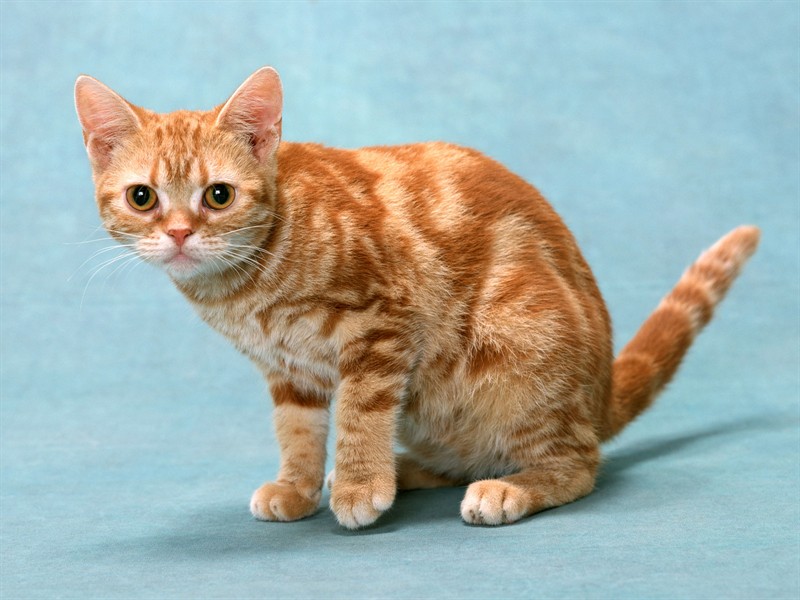
对这张图片进行识别,看它属于什么类?
代码如下:先创建一个类NodeLookup来将softmax概率值映射到标签上。
然后创建一个函数create_graph()来读取模型。
最后读取图片进行分类识别:
# -*- coding: utf-8 -*-

import tensorflow as tf

import numpy as np

import re

import os

model_dir='D:/tf/model/'

image='d:/cat.jpg'

#将类别ID转换为人类易读的标签

class NodeLookup(object):

  def __init__(self,

               label_lookup_path=None,

               uid_lookup_path=None):

    if not label_lookup_path:

      label_lookup_path = os.path.join(

          model_dir, 'imagenet_2012_challenge_label_map_proto.pbtxt')

    if not uid_lookup_path:

      uid_lookup_path = os.path.join(

          model_dir, 'imagenet_synset_to_human_label_map.txt')

    self.node_lookup = self.load(label_lookup_path, uid_lookup_path)

  def load(self, label_lookup_path, uid_lookup_path):

    if not tf.gfile.Exists(uid_lookup_path):

      tf.logging.fatal('File does not exist %s', uid_lookup_path)

    if not tf.gfile.Exists(label_lookup_path):

      tf.logging.fatal('File does not exist %s', label_lookup_path)

    # Loads mapping from string UID to human-readable string

    proto_as_ascii_lines = tf.gfile.GFile(uid_lookup_path).readlines()

    uid_to_human = {}

    p = re.compile(r'[n\d]*[ \S,]*')

    for line in proto_as_ascii_lines:

      parsed_items = p.findall(line)

      uid = parsed_items[0]

      human_string = parsed_items[2]

      uid_to_human[uid] = human_string

    # Loads mapping from string UID to integer node ID.

    node_id_to_uid = {}

    proto_as_ascii = tf.gfile.GFile(label_lookup_path).readlines()

    for line in proto_as_ascii:

      if line.startswith('  target_class:'):

        target_class = int(line.split(': ')[1])

      if line.startswith('  target_class_string:'):

        target_class_string = line.split(': ')[1]

        node_id_to_uid[target_class] = target_class_string[1:-2]

    # Loads the final mapping of integer node ID to human-readable string

    node_id_to_name = {}

    for key, val in node_id_to_uid.items():

      if val not in uid_to_human:

        tf.logging.fatal('Failed to locate: %s', val)

      name = uid_to_human[val]

      node_id_to_name[key] = name

    return node_id_to_name

  def id_to_string(self, node_id):

    if node_id not in self.node_lookup:

      return ''

    return self.node_lookup[node_id]

#读取训练好的Inception-v3模型来创建graph

def create_graph():

  with tf.gfile.FastGFile(os.path.join(

      model_dir, 'classify_image_graph_def.pb'), 'rb') as f:

    graph_def = tf.GraphDef()

    graph_def.ParseFromString(f.read())

    tf.import_graph_def(graph_def, name='')

#读取图片

image_data = tf.gfile.FastGFile(image, 'rb').read()

#创建graph

create_graph()

sess=tf.Session()

#Inception-v3模型的最后一层softmax的输出

softmax_tensor= sess.graph.get_tensor_by_name('softmax:0')

#输入图像数据,得到softmax概率值(一个shape=(1,1008)的向量)

predictions = sess.run(softmax_tensor,{'DecodeJpeg/contents:0': image_data})

#(1,1008)->(1008,)

predictions = np.squeeze(predictions)

# ID --> English string label.

node_lookup = NodeLookup()

#取出前5个概率最大的值(top-5)

top_5 = predictions.argsort()[-5:][::-1]

for node_id in top_5:

  human_string = node_lookup.id_to_string(node_id)

  score = predictions[node_id]

  print('%s (score = %.5f)' % (human_string, score))

sess.close()
最后输出:
tiger cat (score = 0.40316)
Egyptian cat (score = 0.21686)
tabby, tabby cat (score = 0.21348)
lynx, catamount (score = 0.01403)
Persian cat (score = 0.00394)
tensorflow 1.0 学习:用别人训练好的模型来进行图像分类的更多相关文章
- 三分钟快速上手TensorFlow 2.0 (中)——常用模块和模型的部署
本文学习笔记参照来源:https://tf.wiki/zh/basic/basic.html 前文:三分钟快速上手TensorFlow 2.0 (上)——前置基础.模型建立与可视化 tf.train. ...
- 三分钟快速上手TensorFlow 2.0 (上)——前置基础、模型建立与可视化
本文学习笔记参照来源:https://tf.wiki/zh/basic/basic.html 学习笔记类似提纲,具体细节参照上文链接 一些前置的基础 随机数 tf.random uniform(sha ...
- tensorflow 1.0 学习:模型的保存与恢复(Saver)
将训练好的模型参数保存起来,以便以后进行验证或测试,这是我们经常要做的事情.tf里面提供模型保存的是tf.train.Saver()模块. 模型保存,先要创建一个Saver对象:如 saver=tf. ...
- tensorflow 1.0 学习:用CNN进行图像分类
tensorflow升级到1.0之后,增加了一些高级模块: 如tf.layers, tf.metrics, 和tf.losses,使得代码稍微有些简化. 任务:花卉分类 版本:tensorflow 1 ...
- tensorflow 1.0 学习:模型的保存与恢复
将训练好的模型参数保存起来,以便以后进行验证或测试,这是我们经常要做的事情.tf里面提供模型保存的是tf.train.Saver()模块. 模型保存,先要创建一个Saver对象:如 saver=tf. ...
- TensorFlow 同时调用多个预训练好的模型
在某些任务中,我们需要针对不同的情况训练多个不同的神经网络模型,这时候,在测试阶段,我们就需要调用多个预训练好的模型分别来进行预测. 调用单个预训练好的模型请点击此处 弄明白了如何调用单个模型,其实调 ...
- tensorflow 2.0 学习(四)
这次的mnist学习加入了测试集,看看学习的准确率,代码如下 # encoding: utf-8 import tensorflow as tf import matplotlib.pyplot as ...
- Tensorflow 2.0 学习资源
我从换了新工作才开始学习使用Tensorflow,感觉实在太难用了,sess和graph对 新手很不友好,各种API混乱不堪,这些在tf2.0都有了重大改变,2.0大量使用keras的 api,初步使 ...
- tensorflow 1.0 学习:十图详解tensorflow数据读取机制
本文转自:https://zhuanlan.zhihu.com/p/27238630 在学习tensorflow的过程中,有很多小伙伴反映读取数据这一块很难理解.确实这一块官方的教程比较简略,网上也找 ...
随机推荐
- OpenCV函数学习:alignPtr对齐指针
转载地址:https://www.tuicool.com/articles/q2QrQr 在某些架构上,只有能被指定数(如4,16)整除的内存地址才能够被访问,否则程序会crash,或者出现错误的结果 ...
- Codeforces 1155F Delivery Oligopoly dp(看题解)
看别人写的才学会的... 我们考虑刚开始的一个点, 然后我们枚举接上去的一条一条链, dp[mask]表示当前已经加进去点的状态是mask所需的最少边数. 反正就是很麻烦的一道题, 让我自己写我是写不 ...
- 解决使用redis作为session缓存 报错 Error: no such key 的问题
spring的issue https://github.com/spring-projects/spring-session/issues/954 原答案是 Updated my codes to 2 ...
- SQL语句练习题【主供自己学习、记忆】
1.这是我在面试中遇到的一道sql题,没有答出来,o(╥﹏╥)o 这是我刚才在网上查找函数之后写的SQL语句,能得到这个结果.[谁有不同的方法,欢迎底下评论留言哈] select (DATENAME( ...
- python+matplotlib+绘制不同图标类型
#==================================================================#首先需要导入两个文件import matplotlib.pypl ...
- python:os.path模块常用方法
os.path模块主要用于文件的属性获取,在编程中经常用到,以下是该模块的几种常用方法.更多的方法可以去查看官方文档:http://docs.python.org/library/os.path.ht ...
- SpringBoot报错:Failed to load ApplicationContext(javax.websocket.server.ServerContainer not available)
引起条件: WebSocket+单元测试,单元测试报错! 解决方法: SpringBootTest增加webEnvironment参数. https://docs.spring.io/spring-b ...
- vue事件修饰符
阻止单击事件冒泡 <a v-on:click.stop="doThis"></a>提交事件不再重载页面<form v-on:submit.preven ...
- 【CSS 第五天】背景,边框
总结一下今天所学习的内容,如下: 背景 属性 例子或作用 background background: #00FF00 url(bgimage.gif) no-repeat fixed top; ba ...
- 3-1.Hadoop单机模式安装
Hadoop单机模式安装 一.实验介绍 1.1 实验内容 hadoop三种安装模式介绍 hadoop单机模式安装 测试安装 1.2 实验知识点 下载解压/环境变量配置 Linux/shell 测试Wo ...