Appium Windows服务端GUI详解
Appium Windows服务端GUI各项的解释,从官方扒过来的,界面图标和最新版本有点不太一样,其他还是比较简单易懂的
Parameter Guide
Main Window
- Android Button: Displays the
Android settings. - Settings Button: Displays the
General settings. - Developer Button: Displays the
Developer settings. - About Button: Displays the
Appium version information. - Inspector Button: Launches the
Appium Inspector. - Launch / Stop Button: Launches
or stops the Appium server. - Clear Button: Clears the display
of all log output.
Android Settings
- Application
- App Path: The path to the
Android application (.apk)
you wish to test. - Choose Button: Used to choose
the path to your application. - Package: Java package of the
Android app to run (e.g.com.example.android.myApp). - Wait for Package: Package name
for the Android activity to wait for. - Launch Activity: Activity name
for the Android activity to launch from your package
(e.g.MainActivity). - Wait for Activity: Activity name
for the Android activity to wait for. - Full Reset: Reset app state by
uninstalling app instead of clearing app data and also remove the
app after the session is complete. - No Reset: Prevent the device
from being reset. - Use Browser: Launch the
specified Android browser (e.g.Chrome). - Intent Action: Intent action
which will be used to start the activity. - Intent Category: Intent category
which will be used to start the activity. - Intent Flags: Flags that will be
used to start the activity. - Intent Arguments: Additional
intent arguments that will be used to start the activity.
- App Path: The path to the
- Launch Device
- Launch AVD: Name of the AVD to
launch. - Device Ready Timeout: Timeout in
seconds while waiting for device to become ready. - Arguments: Additional emulator
arguments to launch the avd.
- Launch AVD: Name of the AVD to
- Capabilities
- Platform Name: Name of the
mobile platform. - Automation Name: Name of the
automation tool (Appium or Selendroid). - Platform Version: Version of the
mobile platform. - Device Name: Name of the mobile
device to use. - Language: Language for the
Android device. - Locale: Locale for the Android
device.
- Platform Name: Name of the
- Advanced
- SDK Path: Path to Android
SDK. - Coverage Class: Fully qualified
instrumentation class. - Bootstrap Port: Port to use on
device to talk to Appium. - Selendroid Port: Local port used
for communication with Selendroid. - Chromedriver Port: Port upon
which ChromeDriver will run.
- SDK Path: Path to Android
Preference Guide
Preferences can be accessed by clicking on the appropriate button
in the main window.
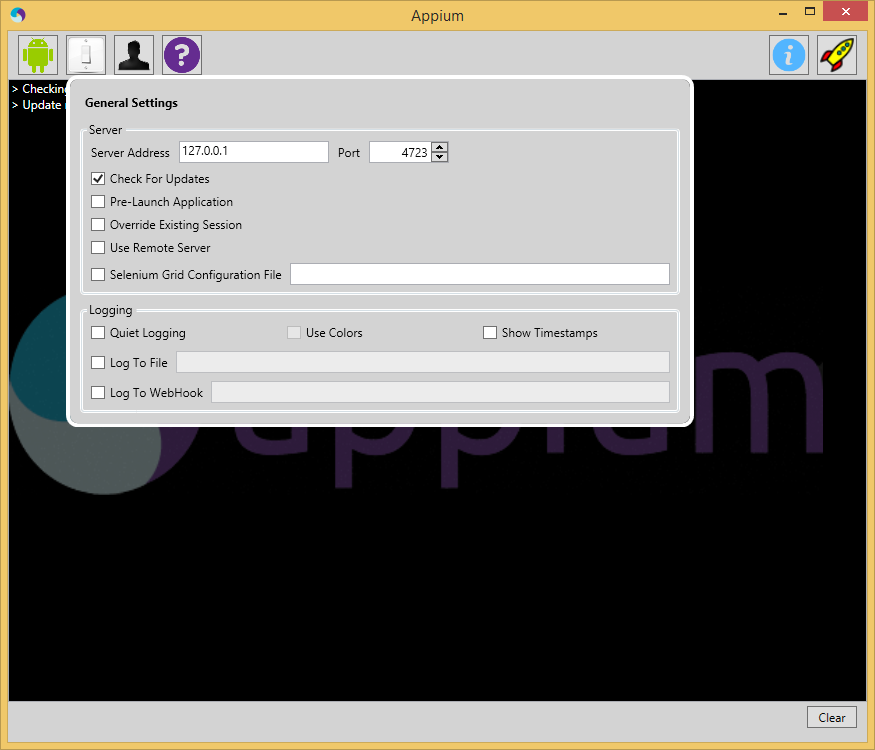
General Settings
- Server
- Server Address: The IP address
on which you want the Appium server to run (127.0.0.1 is
localhost). - Port: The port on which the
Appium server will listen for WebDriver commands (4723 is the
default). - Check For Updates: Appium will
automatically check for updates when starting. - Pre-launch Application: Appium
will prelaunch the application before beginning to listen for
WebDriver commands. - Override Existing Session: Any
existing Appium sessions will be overridden. - Use Remote Server: Used to
connect Appium Inpector to a server that is already running. - Selenium Grid Configuration
File: Path to the configuration file for Selenium
Grid.
- Server Address: The IP address
- Logging
- Quiet Logging: Don't use verbose
logging output. - Use Colors: Use colors in
console output. - Show Timestamps: Show timestamps
in console output. - Log to File: Send log output to
this file. - Log to WebHook: Send log output
to this HTTP listener.
- Quiet Logging: Don't use verbose
Developer Settings
- Enabled: If checked, developer
settings will be observed. - Use External NodeJS Binary:
Appium will use the version of NodeJS supplied here instead of the
one that ships with the application. - Use External Appium Package:
Appium will use the version of the Appium package supplied here
instead of the one bundled with the application. - NodeJS Debug Port: Port on which
the NodeJS debugger will run. - Break on Application Start: The
NodeJS debug server will break at the application start.
(equivalent to supplying the debug-brk switch to node) - Custom Server Flags: Custom
flags to be used when starting the Appium server. This should only
be used if there is an option that cannot be adjusted using the
Appium UI.
Inspector /
Recorder
Inspector can be accessed by clicking the magnifying glass next to
the launch button once the Appium server has launched. Appium must
be running with an app open for inspector to work. Otherwise, it
will not work.
The Inspector can be use to connect to an external Appium server.
This can be specified in the General Settings.
Appium Windows服务端GUI详解的更多相关文章
- nfs服务端配置文件详解
配置参数语法 配置文件路径 /etc/exports 可以使用#进行注释说明 一个完整的配置实例至少需要3个参数 1.被共享的目录 必须是存在的目录 2.向谁共享 可以指定主机或网络范围,支持通配符* ...
- RabbitMQ服务端配置详解
RabbitMQ支持三种配置方式: 1) 读取环境变量中配置, 这包括shell中环境变量和rabbitmq-env.conf/rabbitmq-env-conf.bat文件中配置的环境变量 可配置如 ...
- RabbitMQ服务端配置详解(转自:http://www.cnblogs.com/zhen-rh/p/6884297.html)
RabbitMQ支持三种配置方式: 1) 读取环境变量中配置, 这包括shell中环境变量和rabbitmq-env.conf/rabbitmq-env-conf.bat文件中配置的环境变量 可配置如 ...
- NodeJS+Express+mySQL服务端开发详解
随着NodeJS的发展,现在已经被很多人熟知,NodeJS已经成为了前端开发人员必备的技能.本文不会对NodeJS过多介绍 如果你感兴趣可以访问NodeJS 官网, 维基百科 本文是利用NodeJS+ ...
- 反射实现Model修改前后的内容对比 【API调用】腾讯云短信 Windows操作系统下Redis服务安装图文详解 Redis入门学习
反射实现Model修改前后的内容对比 在开发过程中,我们会遇到这样一个问题,编辑了一个对象之后,我们想要把这个对象修改了哪些内容保存下来,以便将来查看和追责. 首先我们要创建一个User类 1 p ...
- 使用rsync在windows(服务端)与linux(客户端)之间同步
说明: 1.cwRsyncServer服务端 系统:Windows7 IP地址:192.168.0.110 2.Rsync客户端 系统:CentOS 6.7 IP地址:192.168.0.141 实现 ...
- Redis for Windows(C#缓存)配置文件详解
Redis for Windows(C#缓存)配置文件详解 前言 在上一篇文章中主要介绍了Redis在Windows平台下的下载安装和简单使用http://www.cnblogs.com/aehy ...
- [转帖]Windows注册表内容详解
Windows注册表内容详解 来源:http://blog.sina.com.cn/s/blog_4d41e2690100q33v.html 对 windows注册表一知半解 不是很清晰 这里学习一下 ...
- Windows WMIC命令使用详解2
Windows WMIC命令使用详解(附实例) https://blog.csdn.net/aflyeaglenku/article/details/77878525 第一次执行WMIC命令时,Win ...
随机推荐
- dac verilog ad5601
首先从官网下载数据手册.DAC有串行有并行,ad5601是串行,(需要好多时钟沿的移位内部转换为并行在输出). 按照手册的时序编写程序, 关注下芯片的波特率范围 看看手册的数据传输那些事有效的数据位 ...
- java Vamei快速教程08 继承
作者:Vamei 出处:http://www.cnblogs.com/vamei 欢迎转载,也请保留这段声明.谢谢! 继承(inheritance)是面向对象的重要概念.继承是除组合(composit ...
- iOS开发:自定义带下划线文本的UIButton
Uiunderlinedbutton.h代码 @interface UIUnderlinedButton : UIButton { } + (UIUnderlinedButton *) underli ...
- java模式
模式(Pattern) 模式(Pattern)的概念最早由建筑大师Christopher Alexander于二十世纪七十年代提出,应用于建筑领域,八十年代中期由Ward Cunningham和Ken ...
- POJ 3614 Sunscreen(贪心,区间单点匹配)
把牛的SPF看作一个区间,防晒霜看作点.一个点可以匹配C[i]次,问最大匹配数.可以用图论做. 也可以贪心.贪心的思想是,把区间和点排序以后,考虑最左边的点,加入和这个点相交的区间, 并排除出界的区间 ...
- 【HDU1542】Atlantis (扫描线的经典运用)
点此看题面 大致题意: 给你\(N\)个矩形,请你求出它们覆盖的面积(重叠的面积只算一次). 扫描线 这道题是一道典型的求矩形面积并问题,是扫描线的一个经典运用.这里就不赘述了. 代码 #includ ...
- 2013.10.26工作Fighting(1)
1.今天虽然花费了六个小时来解决一个功能,最后用一行代码来搞定了. ----遇到问题,解决的办法总是比问题多. 2.给你分配有难度的任务,应该是激动.这样才能挑战自我,学得到很多兴奋的新东西. --- ...
- C# 常用函数和方法集汇总
1.DateTime 数字型 System.DateTime currentTime=new System.DateTime(); 1.1 取当前年月日时分秒 currentTime=System.D ...
- UITableView 优化总结
最近在微博上看到一个很好的开源项目VVeboTableViewDemo,是关于如何优化UITableView的.加上正好最近也在优化项目中的类似朋友圈功能这块,思考了很多关于UITableView的优 ...
- 学习笔记(六): Regularization for Simplicity
目录 Overcrossing? L₂ Regularization Lambda Examining L2 regularization Check Understanding Glossay Ov ...