(转)CGMA - Organic World Building in UE4: week 6
原文:丢失,这篇是艺术家博客上发现的,小道整理笔记中,临时放于效果案例目录。
|
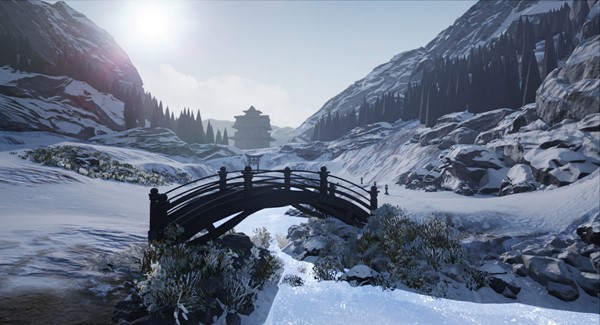
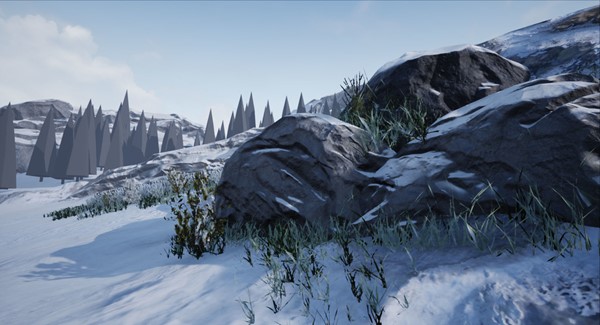
In this week we focused on creating the grass and flora to decorate your map. I used a bunch of Megascan assets I got from some time ago that I thought they worked well for the scene. We also created some roots we can use in our environment. I wanted to share with you some tips and advice I got during this week on creating foliage. This is how the scene looks with some foliage on:
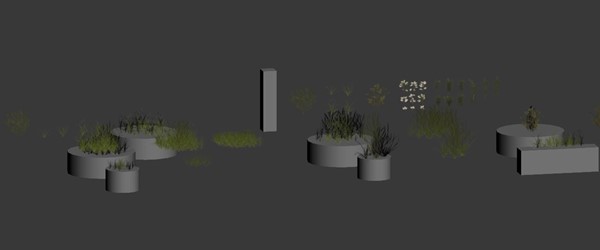
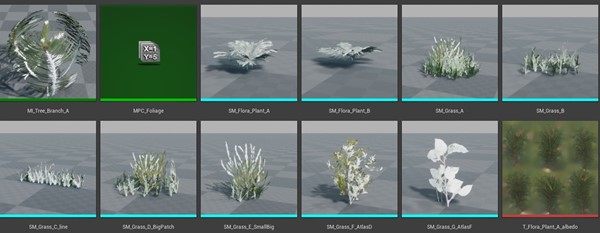
Foliage I brake down the assets so that they can be used in different situations and can blend with the environment different. These are some of the foliage I created for this scene:
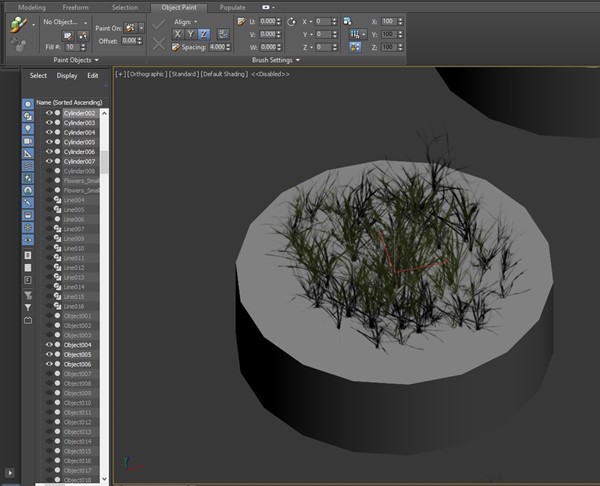
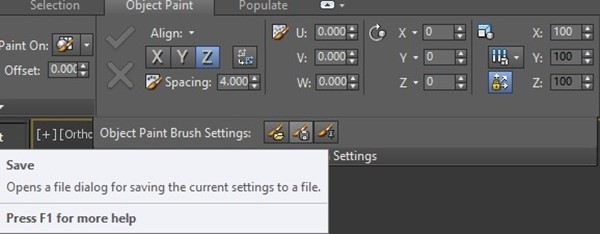
As you can see, I have some big patches and some small patches. Also, different kinds of grass i grabbed from my references and some flowers I could use to break up the repetition when painting foliage. It's important to arrange the grass planes so that they go around a circle instead of a box. To speed up the workflow I used the Object Paint mode inside 3ds Max to paint different grass planes with different variations. I can then adjust them manually if I don't like the result but I found this was a good way to start creating the assets.
I would just play with the settings and find something I like that works for what I'm looking for. After that, I can save the preset and use it in the rest of the assets I want to create.
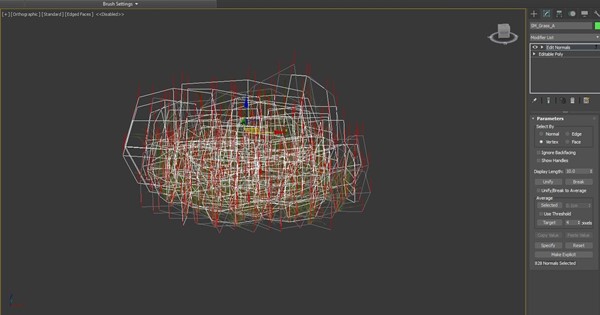
After that's done, I would adjust the vertex normals so they can blend nicely with the ground. I do that by using the Edit Normals tool and move them so that they can point upwards.
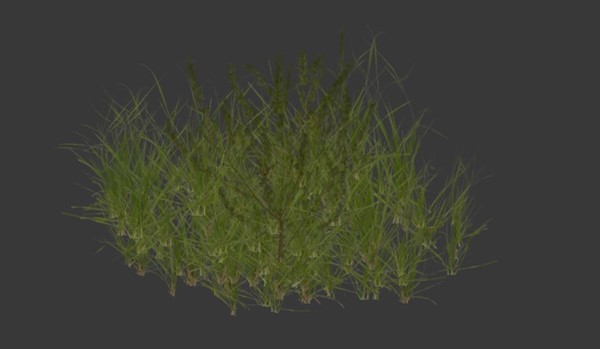
This is how the asset looks with the vertex normals changed:
This is how the asset looks without the vertex normals changed:
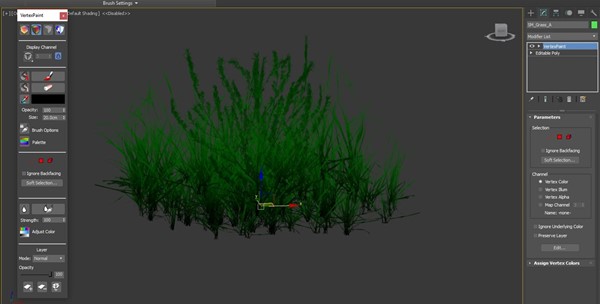
As you can see, the asset can blend nicely with the light when you change the normals. You can also transfer the vertex normals of a sphere and make it look nicer, which is something I may do to tweak the scene later on. Finally, you want to add some vertex colors to mask the vertices you don't want to move when applying a vertex offset to simulate wind in the environment.
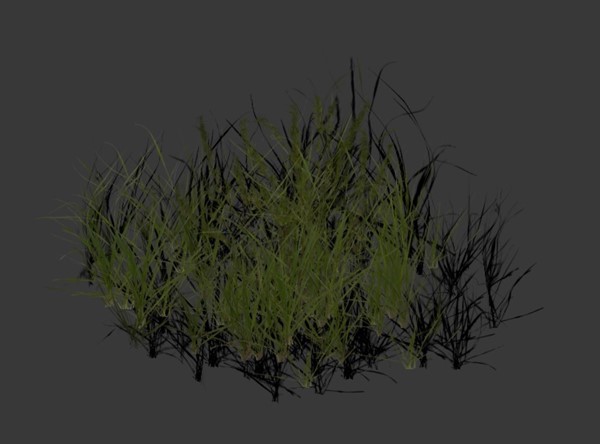
In this case, I painted green on the vertices I wanted to be affected by the wind and black for the vertices I wanted to stay still. You want to have enough variations to have big, medium and small shapes. That way you can have really cool transitions in your environments and apply the same principle of Primary, Secondary and Tertiary shapes with all the assets you create.
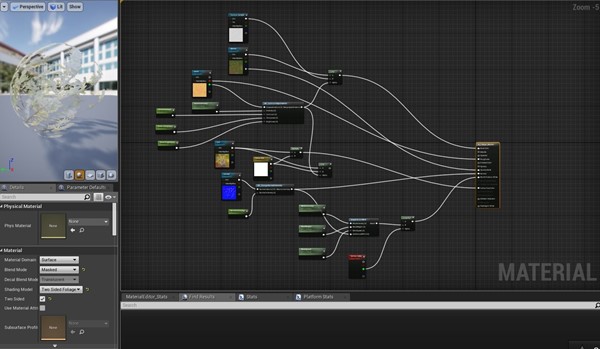
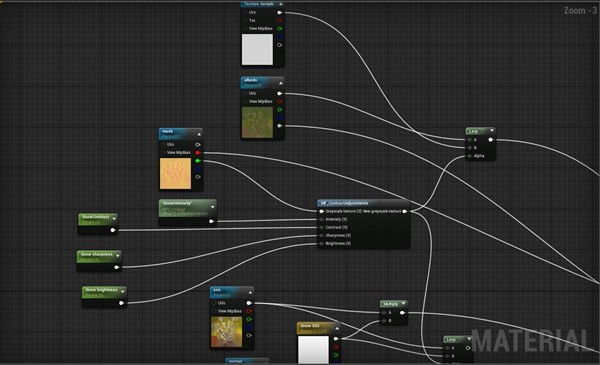
For the Material, I'm using 4 textures: Albedo with opacity, SSS color, normals and a mask texture with roughness, height and spec map.
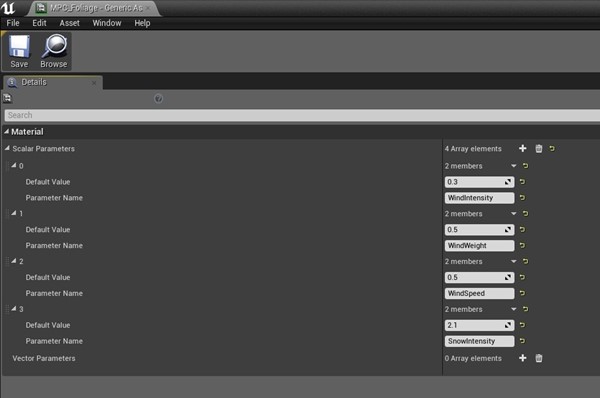
As you can see I'm using a Material parameter collection to change the values instead of using a common Parameter. The reason is that I want to iterate on all the assets at once to have an overall look of the scene. I can later change each material instance indivitualy but this is a good way to add global parameters to your scene. It can be used to change the roughness of all your assets in a rainy day or add a snow parameter on top. Really powerful stuff. This is how my Material Parameter Collection looks like:
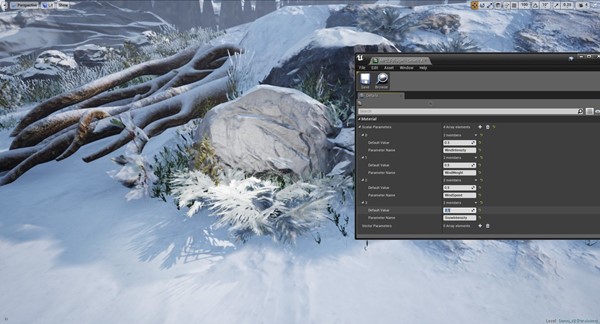
That way I can change global parameters in the scene like the snow: Snow intensity at 2.1:
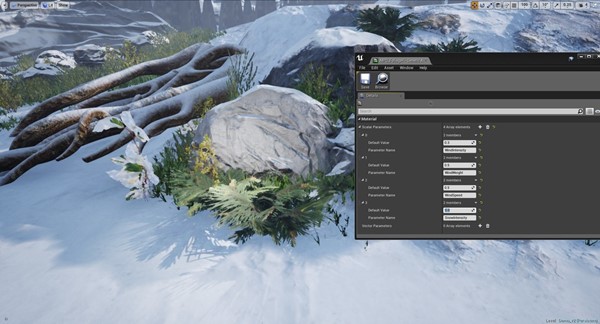
Snow intensity at 0:
I still need to change the textures so it can look nicer with the snow but it is a good start. Roots A great thing about the course is that Anthony teaches us how to create roots for your scene. They can make it look really believable and add an extra layer of complexity to the scene.
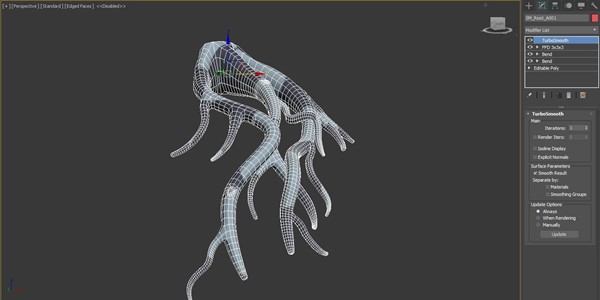
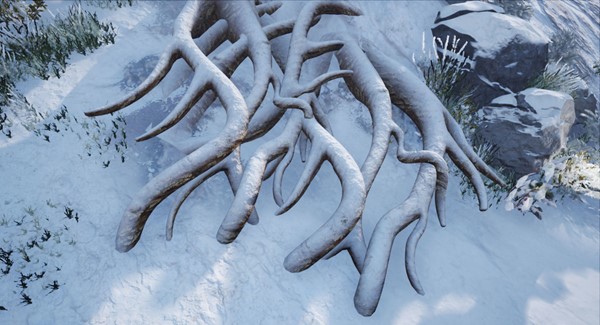
The way you create the roots is by using splines and then add some geometry and connect the vertices. You don't necessarily need to make a high poly model since the textures can do the work and also you can also smooth the mesh and add extra little details like bumps in the geometry to help sell the asset. Here is a video when I show the process since it can be easier be explained there than a text: After that is done, it is just a matter of UV the mesh so you can then apply some tiling materials on it and use an FFD modifier to rotate the mesh and create different variations. You can also use bones and skin the mesh to manipulate the roots individually. This is how the mesh looks with the materials applied:
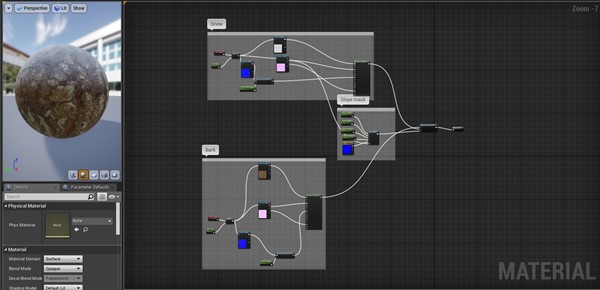
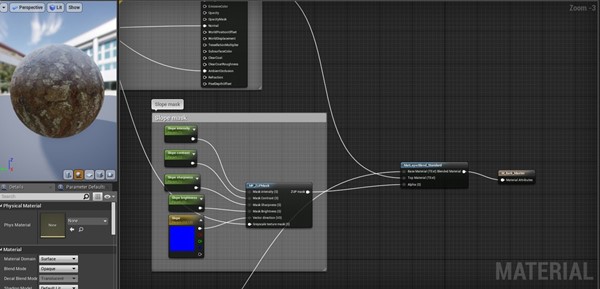
Here is how the material graph looks, it is simply blending 2 different materials using the slope shader:
Biggest takeaways:
|
(转)CGMA - Organic World Building in UE4: week 6的更多相关文章
- UDKtoUE4Tool-UDKUE3资源移植UE4工具
UDKtoUE4Tool UDKtoUE4Tool 是一个把UE3/UDK资源包(T3D格式)转换成UE4(T3D格式)的工具.作者Matt3D使用C#实现,未来考虑发布到Unreal Marketp ...
- [UE4]The global shader cache file missing 运行错误解决办法
UE4项目在VS中对项目代码编译时报如错,找了好久在UE4论坛上查到了别人的解决方案,贴出来仅供大家参考. 看到一位开发者解释出错的原因如下: There are a number of build ...
- Ubuntu 15.04 编译UE4 for Linux版
源 起 Unreal Engine 4 是全球最先进的Realtime Illumination & Physical 引擎: 长期以来,UE4都只有Windows版和Mac版,今年终于向Li ...
- Aery的UE4 C++游戏开发之旅(4)加载资源&创建对象
目录 资源的硬引用 硬指针 FObjectFinder<T> / FClassFinder<T> 资源的软引用 FSoftObjectPaths.FStringAssetRef ...
- 【UE4】虚幻引擎技术直播汇总(含中英文直播)
B站虚幻引擎官方账号 中文直播 [中文直播]第35期 | 使用GIS在UE中创造真实地球风貌 | Epic 周澄清 [中文直播]第34期 | 包教包会的Epic MegaGrants申请之道 | Ep ...
- UE4新手引导之下载和安装虚幻4游戏引擎
1) 进入虚幻4的官方主页(https://www.unrealengine.com/) 这里你可以获得关于虚幻4的最新资讯,包括版本更新.博客更新.新闻和商城等.自2015年起,该引擎已经提供免费下 ...
- UE4新手引导入门教程
请大家去这个地址下载:file:///D:/UE4%20Doc/虚幻4新手引导入门教程.pdf
- Building the Testing Pipeline
This essay is a part of my knowledge sharing session slides which are shared for development and qua ...
- BZOJ 4742: [Usaco2016 Dec]Team Building
4742: [Usaco2016 Dec]Team Building Time Limit: 10 Sec Memory Limit: 128 MBSubmit: 21 Solved: 16[Su ...
随机推荐
- init/loadView/viewDidLoad/initWithNibName/awakeFromNib/initWithCoder的用法
init/loadView/viewDidLoad/viewDidUnload 这么细节的东西想来大家都不在意,平时也不会去关系,但是在面试时却常常被提到,所以了解viewController的生命周 ...
- one or more listeners failed to start问题解决思路
今日搭建一个web应用的时候总是遇到tomcat报错:one or more listeners failed to start. Full detail balabale....而且还没有其他提示, ...
- spring boot从redis取缓存发生java.lang.ClassCastException异常
目录树 异常日志信息 错误原因 解决方法 异常日志信息 2018-09-24 15:26:03.406 ERROR 13704 --- [nio-8888-exec-8] o.a.c.c.C.[.[. ...
- Python 基础 变量和数据类型
python 数据类型 一,整数,可以出来任意大小的整数. 如 1, 100, -8080,0 等等. 二,浮点数,浮点数也可以被成为小数. 三,字符串,字符串是以'' 或"". ...
- HDU Ellipse(simpson积分)
Time Limit: 1000/1000 MS (Java/Others) Memory Limit: 32768/32768 K (Java/Others)Total Submission( ...
- 阿里云centOS7.4上MySql5.6安装
最近一个项目要部署在阿里云上,为了开发团队方便,我自费买了个ECS,先装个数据库给开发用. 因为之前都是在真机安装,与这次阿里云上的部署比起来,还是有点区别的. Mysql 1 安装mysql版本包 ...
- Webstorm新建vue类型文件设置
今天安装了Node.js,配置了vue需要的框架,发现原有的wenstorm新建文件的时候没有vue文件选项,因此,学习了一下webstorm如何配置创建vue文件 具体过程如下: 第一步,打开web ...
- mysql 导出行数据到txt文件,指定字符分割
select id,name, concat('tel:',phone) from user order by time INTO outfile 'user.txt' FIELDS terminat ...
- Linux上搭建svn资源库
一.安装 centos上安装 使用命令svn --version查看是否安装过svn: 如果出现 bash: svn: command not found 则显示没有安装 可以使用 yum in ...
- 基于OMAPL138的字符驱动_GPIO驱动AD9833(三)之中断申请IRQ
基于OMAPL138的字符驱动_GPIO驱动AD9833(三)之中断申请IRQ 0. 导语 学习进入到了下一个阶段,还是以AD9833为例,这次学习是向设备申请中断,实现触发,在未来很多场景,比如做用 ...

