如何使用 HTML5 Canvas 制作水波纹效果
今天,我们继续分享 JavaScript 实现的效果例子,这篇文章会介绍使用 JavaScript 实现水波纹效果。水波效果以图片为背景,点击图片任意位置都会触发。有时候,我们使用普通的 Javascript 就可以创建一个很有趣的解决功能。
Step 1. HTML
和以前一样,首先是 HTML 代码:
<!DOCTYPE html>
<html>
<head>
<meta charset=utf-8 />
<title>Water drops effect</title>
<link rel="stylesheet" href="css/main.css" type="text/css" />
<script src="js/vector2d.js" type="text/javascript" charset="utf-8"></script>
<script src="js/waterfall.js" type="text/javascript" charset="utf-8"></script>
</head>
<body>
<div class="example">
<h3><a href="#">Water drops effect</a></h3> <canvas id="water">HTML5 compliant browser required</canvas>
<div id="switcher">
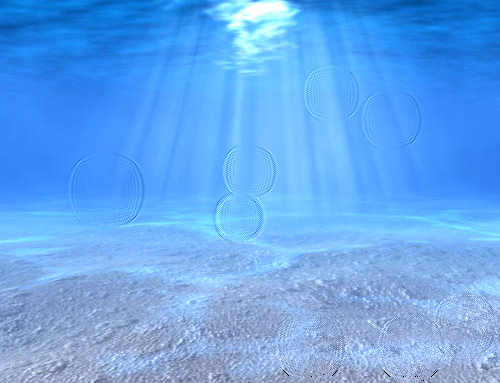
<img onclick='watereff.changePicture(this.src);' src="data_images/underwater1.jpg" />
<img onclick='watereff.changePicture(this.src);' src="data_images/underwater2.jpg" />
</div>
<div id="fps"></div>
</div>
</body>
</html>
Step 2. CSS
这是用到的 CSS 代码:
body{background:#eee;margin:0;padding:0}

.example{background:#FFF;width:600px;border:1px #000 solid;margin:20px auto;padding:15px;-moz-border-radius: 3px;-webkit-border-radius: 3px}

#water {

    width:500px;

    height:400px;

    display: block;

    margin:0px auto;

    cursor:pointer;

}

#switcher {

    text-align:center;

    overflow:hidden;

    margin:15px;

}

#switcher img {

    width:160px;

    height:120px;

}
Step 3. JS
下面是主要的 JavaScript 代码:
function drop(x, y, damping, shading, refraction, ctx, screenWidth, screenHeight){

    this.x = x;

    this.y = y;

    this.shading = shading;

    this.refraction = refraction;

    this.bufferSize = this.x * this.y;

    this.damping = damping;

    this.background = ctx.getImageData(0, 0, screenWidth, screenHeight).data;

    this.imageData = ctx.getImageData(0, 0, screenWidth, screenHeight);

    this.buffer1 = [];

    this.buffer2 = [];

    for (var i = 0; i < this.bufferSize; i++){

        this.buffer1.push(0);

        this.buffer2.push(0);

    }

    this.update = function(){

        for (var i = this.x + 1, x = 1; i < this.bufferSize - this.x; i++, x++){

            if ((x < this.x)){

                this.buffer2[i] = ((this.buffer1[i - 1] + this.buffer1[i + 1] + this.buffer1[i - this.x] + this.buffer1[i + this.x]) / 2) - this.buffer2[i];

                this.buffer2[i] *= this.damping;

            } else x = 0;

        }

        var temp = this.buffer1;

        this.buffer1 = this.buffer2;

        this.buffer2 = temp;

    }

    this.draw = function(ctx){

        var imageDataArray = this.imageData.data;

        for (var i = this.x + 1, index = (this.x + 1) * 4; i < this.bufferSize - (1 + this.x); i++, index += 4){

            var xOffset = ~~(this.buffer1[i - 1] - this.buffer1[i + 1]);

            var yOffset = ~~(this.buffer1[i - this.x] - this.buffer1[i + this.x]);

            var shade = xOffset * this.shading;

            var texture = index + (xOffset * this.refraction  + yOffset * this.refraction * this.x) * 4;

            imageDataArray[index] = this.background[texture] + shade;

            imageDataArray[index + 1] = this.background[texture + 1] + shade;

            imageDataArray[index + 2] = 50 + this.background[texture + 2] + shade;

        }

        ctx.putImageData(this.imageData, 0, 0);

    }

}

var fps = 0;

var watereff = {

    // variables

    timeStep : 20,

    refractions : 2,

    shading : 3,

    damping : 0.99,

    screenWidth : 500,

    screenHeight : 400,

    pond : null,

    textureImg : null,

    interval : null,

    backgroundURL : 'data_images/underwater1.jpg',

    // initialization

    init : function() {

        var canvas = document.getElementById('water');

        if (canvas.getContext){

            // fps countrt

            fps = 0;

            setInterval(function() {

                document.getElementById('fps').innerHTML = fps / 2 + ' FPS';

                fps = 0;

            }, 2000);

            canvas.onmousedown = function(e) {

                var mouse = watereff.getMousePosition(e).sub(new vector2d(canvas.offsetLeft, canvas.offsetTop));

                watereff.pond.buffer1[mouse.y * watereff.pond.x + mouse.x ] += 200;

            }

            canvas.onmouseup = function(e) {

                canvas.onmousemove = null;

            }

            canvas.width  = this.screenWidth;

            canvas.height = this.screenHeight;

            this.textureImg = new Image(256, 256);

            this.textureImg.src = this.backgroundURL;

            canvas.getContext('2d').drawImage(this.textureImg, 0, 0);

            this.pond = new drop(

                this.screenWidth,

                this.screenHeight,

                this.damping,

                this.shading,

                this.refractions,

                canvas.getContext('2d'),

                this.screenWidth, this.screenHeight

            );

            if (this.interval != null){

                clearInterval(this.interval);

            }

            this.interval = setInterval(watereff.run, this.timeStep);

        }

    },

    // change image func

    changePicture : function(url){

        this.backgroundURL = url;

        this.init();

    },

    // get mouse position func

    getMousePosition : function(e){

        if (!e){

            var e = window.event;

        }

        if (e.pageX || e.pageY){

            return new vector2d(e.pageX, e.pageY);

        } else if (e.clientX || e.clientY){

            return new vector2d(e.clientX, e.clientY);

        }

    },

    // loop drawing

    run : function(){

        var ctx = document.getElementById('water').getContext('2d');

        watereff.pond.update();

        watereff.pond.draw(ctx);

        fps++;

    }

}

window.onload = function(){

    watereff.init();

}
正如你所看到的,这里使用 Vector2D 函数,这个函数在 vector2d.js 里提供了。另一个很难的方法是使用纯数学实现,感兴趣的可以自己实验一下。
本文链接:如何使用 HTML5 Canvas 制作水波纹效果
编译来源:梦想天空 ◆ 关注前端开发技术 ◆ 分享网页设计资源
如何使用 HTML5 Canvas 制作水波纹效果的更多相关文章
- canvas实现水波纹效果
本文将会从水波的基本原理开始,详细讲解在canvas中模拟水波扩散,分析并计算水波的能量分布,并通过振幅模拟水波对图像的折射效果,最后实现水波特效. 水波基本原理 首先复习一波高中物理知识. 波是指振 ...
- css 滚动视差 之 水波纹效果
核心属性: background-attachment 这个属性就牛逼了, 它可以定义背景图片是相对视口固定, 还是随着视口滚动, 加上这个属性网页瞬间就从屌丝变成 高大上. 我们来看个例子: htm ...
- canvas水波纹效果
先看效果 演示效果 自然界中水波纹效果十分麻烦,我这里只是根据水波纹的几个特性,在理想环境下模拟水波纹的扩散效果. 这里应用到的属性有:扩散.波动.折射. 扩散:很好理解,水波纹会从触发原点开始向周围 ...
- html5 +css3 点击后水波纹扩散效果 兼容移动端
<!DOCTYPE html> <html> <head> <meta http-equiv="Content-Type" content ...
- 酷!使用 jQuery & Canvas 制作相机快门效果
在今天的教程中,我们将使用 HTML5 的 Canvas 元素来创建一个简单的摄影作品集,它显示了一组精选照片与相机快门的效果.此功能会以一个简单的 jQuery 插件形式使用,你可以很容易地整合到任 ...
- android自定义控件(4)-自定义水波纹效果
一.实现单击出现水波纹单圈效果: 照例来说,还是一个自定义控件,观察这个效果,发现应该需要重写onTouchEvent和onDraw方法,通过在onTouchEvent中获取触摸的坐标,然后以这个坐标 ...
- 自定义view实现水波纹效果
水波纹效果: 1.标准正余弦水波纹: 2.非标准圆形液柱水波纹: 虽说都是水波纹,但两者在实现上差异是比较大的,一个通过正余弦函数模拟水波纹效果,另外一个会运用到图像的混合模式(PorterDuffX ...
- Android 颜色渲染(七) RadialGradient 环形渲染实现水波纹效果
利用环形渲染我们可以做到什么? 其实很多都是非常常见的,比如上一篇实现的帮帮糖效果, 彩色的热气球,比如这里要讲到的水波纹效果,或者也可以理解为扩散色渲染效果 首先看一下效果图: 轻触屏幕,即可看到对 ...
- Android 自定义view实现水波纹效果
http://blog.csdn.net/tianjian4592/article/details/44222565 在实际的开发中,很多时候还会遇到相对比较复杂的需求,比如产品妹纸或UI妹纸在哪看了 ...
随机推荐
- Orlion个人博客 | 全栈工程师之路-www.orlion.ga
自己用wordpress+bootstrap搭建了一个博客,网址http://www.orlion.ga,用来记录博主学习和成长,主要关注JAVA.LANMP.前端与客户端(Android).算法与数 ...
- MySQL5.6忘记root密码(win平台)
1.首先net stop mysql服务,并且切换到任务管理器,有与mysql有关的,最好关闭进程. 2.运行CMD命令切换到MySql安装bin目录,下面是我的mysql安装目录 cd C:\Pr ...
- 基于纯 CSS3 技术实现美观的标签云效果
标签云是博客的标配功能,能够清晰的呈现博客的各个关键词和主题.在这个效果中,您将学习如何使用 CSS3 技术创建一个效果精美的标签云效果. 作为实验项目,使用了 CSS3 渐变,阴影和最重要的的 CS ...
- 炫!一组单元素实现的 CSS 加载进度提示效果
之前的文章个大家分享过各种类型的加载效果(Loading Effects),这里再给大家奉献一组基于单个元素实现的 CSS 加载动画集合.这些加载效果都是基于一个 DIV 元素实现的,十分强悍. 温馨 ...
- 怎么让composer加速
composer install 为什么这么慢? 下面是一个composer install(在没有composer cache的情况下)做的所有事情: [vagrant@localhost comp ...
- CSS魔法堂:hasLayout原来是这样!
前言 过去一直听说旧版本IE下很多诡异bug均由一个神秘角色引起的,那就是hasLayout.趁着最近突然发神经打算好好学习CSS,顺便解答多年来的疑惑. hasLayout到底是何方神圣? hasL ...
- PyQt写的五子棋
技术路线 GUI的实现 使用PyQt技术作为基础.PyQt是一个支持多平台的客户端开发SDK,使用它实现的客户端可以运行在目前几乎所有主流平台之上. 使用PyQt,Qt设计器实现UI,通过pyuic4 ...
- Windows Phone中扩展WebBrowser使其支持绑定html内容
在WP开发中,有时候会用到WebBrowser控件来展示一些html内容,这个控件有很多局限性,比如不支持绑定内容,这样的MVVM模式中就无法进行内容的绑定.为了实现这个目的,需要扩展一下,具体代码如 ...
- SQL Server论坛楼层计算触发器
代码: USE suya_dev GO IF EXISTS( SELECT * FROM sys.triggers WHERE name = N'BBS_Post_before_insert' ) D ...
- 从C#到Objective-C,循序渐进学习苹果开发(5)--利用XCode来进行IOS的程序开发
本随笔系列主要介绍从一个Windows平台从事C#开发到Mac平台苹果开发的一系列感想和体验历程,本系列文章是在起步阶段逐步积累的,希望带给大家更好,更真实的转换历程体验.前面几篇随笔主要介绍C#和O ...