spring 5.x 系列第9篇 —— 整合mongodb (xml配置方式)
源码Gitub地址:https://github.com/heibaiying/spring-samples-for-all
一、说明
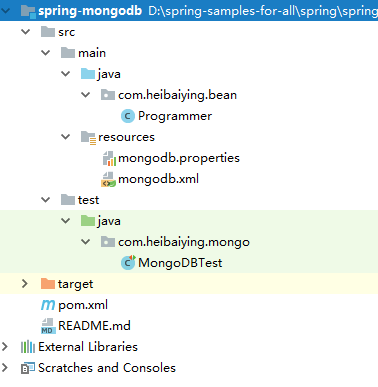
1.1 项目结构说明
配置文件位于resources下,项目以单元测试的方式进行测试。
1.2 依赖说明
除了spring的基本依赖外,需要导入mongodb整合依赖包
 <!--spring mongodb 整合依赖-->
<dependency>
    <groupId>org.springframework.data</groupId>
    <artifactId>spring-data-mongodb</artifactId>
    <version>2.1.3.RELEASE</version>
</dependency>
二、spring mongodb
2.1 新建配置文件
mongo.host=192.168.200.228
mongo.port=27017
# 数据库名称. 默认是'db'.
mongo.dbname=database
# 每个主机允许的连接数
mongo.connectionsPerHost=10
# 线程队列数,它和上面connectionsPerHost值相乘的结果就是线程队列最大值。如果连接线程排满了队列就会抛出异常
mongo.threadsAllowedToBlockForConnectionMultiplier=5
# 连接超时的毫秒 0是默认值且无限大。
mongo.connectTimeout=1000
# 最大等待连接的线程阻塞时间 默认是120000 ms (2 minutes).
mongo.maxWaitTime=1500
# 保持活动标志,控制是否有套接字保持活动超时 官方默认为true 且不建议禁用
mongo.socketKeepAlive=true
# 用于群集心跳的连接的套接字超时。
mongo.socketTimeout=1500
2.2 整合配置
<?xml version="1.0" encoding="UTF-8"?>
<beans xmlns="http://www.springframework.org/schema/beans"
       xmlns:xsi="http://www.w3.org/2001/XMLSchema-instance"
       xmlns:context="http://www.springframework.org/schema/context"
       xmlns:mongo="http://www.springframework.org/schema/data/mongo"
       xsi:schemaLocation=
               "http://www.springframework.org/schema/context
          http://www.springframework.org/schema/context/spring-context.xsd
          http://www.springframework.org/schema/data/mongo http://www.springframework.org/schema/data/mongo/spring-mongo.xsd
          http://www.springframework.org/schema/beans
          http://www.springframework.org/schema/beans/spring-beans.xsd">

    <!--扫描配置文件-->
    <context:property-placeholder location="classpath:mongodb.properties"/>

    <!--定义用于访问MongoDB的MongoClient实例-->
    <mongo:mongo-client host="${mongo.host}" port="${mongo.port}">
        <mongo:client-options
                connections-per-host="${mongo.connectionsPerHost}"
                threads-allowed-to-block-for-connection-multiplier="${mongo.threadsAllowedToBlockForConnectionMultiplier}"
                connect-timeout="${mongo.connectTimeout}"
                max-wait-time="${mongo.maxWaitTime}"
                socket-keep-alive="${mongo.socketKeepAlive}"
                socket-timeout="${mongo.socketTimeout}"
        />
    </mongo:mongo-client>

    <!--定义用于连接到数据库的连接工厂-->
    <mongo:db-factory dbname="${mongo.dbname}" mongo-ref="mongoClient"/>

    <!--实际操作mongodb的template,在代码中注入-->
    <bean id="anotherMongoTemplate" class="org.springframework.data.mongodb.core.MongoTemplate">
        <constructor-arg name="mongoDbFactory" ref="mongoDbFactory"/>
    </bean>

</beans>
2.3 测试整合
/**
 * @author : heibaiying
 * @description : MongoDB 查询
 */
@RunWith(SpringRunner.class)
@ContextConfiguration(locations = "classpath:mongodb.xml")
public class MongoDBTest {

    @Autowired
    private MongoTemplate mongoTemplate;

    @Test
    public void insert() {
        // 单条插入
        mongoTemplate.insert(new Programmer("xiaoming", 12, 5000.21f, new Date()));
        List<Programmer> programmers = new ArrayList<Programmer>();
        // 批量插入
        programmers.add(new Programmer("xiaohong", 21, 52200.21f, new Date()));
        programmers.add(new Programmer("xiaolan", 34, 500.21f, new Date()));
        mongoTemplate.insert(programmers, Programmer.class);
    }

    // 条件查询
    @Test
    public void select() {
        Criteria criteria = new Criteria();
        criteria.andOperator(where("name").is("xiaohong"), where("age").is(21));
        Query query = new Query(criteria);
        Programmer one = mongoTemplate.findOne(query, Programmer.class);
        System.out.println(one);
    }

    // 更新数据
    @Test
    public void MUpdate() {
        UpdateResult updateResult = mongoTemplate.updateMulti(query(where("name").is("xiaoming")), update("age", 35), Programmer.class);
        System.out.println("更新记录数:" + updateResult.getModifiedCount());
    }

    // 删除指定数据
    @Test
    public void delete() {
        DeleteResult result = mongoTemplate.remove(query(where("name").is("xiaolan")), Programmer.class);
        System.out.println("影响记录数:" + result.getDeletedCount());
        System.out.println("是否成功:" + result.wasAcknowledged());
    }

}
附:源码Gitub地址:https://github.com/heibaiying/spring-samples-for-all
spring 5.x 系列第9篇 —— 整合mongodb (xml配置方式)的更多相关文章
- spring 5.x 系列第10篇 —— 整合mongodb (代码配置方式)
源码Gitub地址:https://github.com/heibaiying/spring-samples-for-all 一.说明 1.1 项目结构说明 配置文件位于com.heibaiying. ...
- spring 5.x 系列第13篇 —— 整合RabbitMQ (xml配置方式)
源码Gitub地址:https://github.com/heibaiying/spring-samples-for-all 一.说明 1.1 项目结构说明 本用例关于rabbitmq的整合提供简单消 ...
- spring 5.x 系列第11篇 —— 整合memcached (xml配置方式)
文章目录 一.说明 1.1 XMemcached客户端说明 1.2 项目结构说明 1.3 依赖说明 二.spring 整合 memcached 2.1 单机配置 2.2 集群配置 2.3 存储基本类型 ...
- spring 5.x 系列第17篇 —— 整合websocket (xml配置方式)
源码Gitub地址:https://github.com/heibaiying/spring-samples-for-all 一.说明 1.1 项目结构说明 项目模拟一个简单的群聊功能,为区分不同的聊 ...
- spring 5.x 系列第15篇 —— 整合dubbo (xml配置方式)
文章目录 一. 项目结构说明 二.项目依赖 三.公共模块(dubbo-common) 四. 服务提供者(dubbo-provider) 4.1 productService是服务的提供者( 商品数据用 ...
- spring 5.x 系列第1篇 —— springmvc基础 (xml配置方式)
文章目录 一.搭建hello spring工程 1.1 项目搭建 1.2 相关配置讲解 二.配置自定义拦截器 三.全局异常处理 四.参数绑定 4.1 参数绑定 4.2 关于日期格式转换的三种方法 五. ...
- spring 5.x 系列第14篇 —— 整合RabbitMQ (代码配置方式)
源码Gitub地址:https://github.com/heibaiying/spring-samples-for-all 一.说明 1.1 项目结构说明 本用例关于rabbitmq的整合提供简单消 ...
- spring 5.x 系列第12篇 —— 整合memcached (代码配置方式)
文章目录 一.说明 1.1 XMemcached客户端说明 1.2 项目结构说明 1.3 依赖说明 二.spring 整合 memcached 2.1 单机配置 2.2 集群配置 2.3 存储基本类型 ...
- spring 5.x 系列第18篇 —— 整合websocket (代码配置方式)
源码Gitub地址:https://github.com/heibaiying/spring-samples-for-all 一.说明 1.1 项目结构说明 项目模拟一个简单的群聊功能,为区分不同的聊 ...
随机推荐
- hdu1180奇怪的楼梯……bfs迷阵……wa该16二级,我太渣滓
#include<iostream> #include<queue> #include<cstring> using namespace std; int row, ...
- c#-WPF string,color,brush之间的转换
原文:c#-WPF string,color,brush之间的转换 String转换成Color string-"ffffff" Color color = (Color)Colo ...
- sdut 5-1 继承和派生
5-1 继承与派生 Time Limit: 1000MS Memory limit: 65536K 题目描写叙述 通过本题目的练习能够掌握继承与派生的概念.派生类的定义和用法.当中派生类构造函数的定义 ...
- FFmpeg来源简单分析:结构会员管理系统-AVClass
===================================================== FFmpeg章列表: [架构图] FFmpeg源码结构图 - 解码 FFmpeg源码结构图 ...
- debian9 安装 odoo11 笔记用 部分内容转载前辈的,在此感谢
1先创建个odoo用户 sudo adduser odoo 2:给root 权限: sudo vi /etc/sudoers 修改文件参考如下: # User privilege specificat ...
- XF 表视图添加和删除行
using System;using Xamarin.Forms;using Xamarin.Forms.Xaml; [assembly: XamlCompilation (XamlCompilati ...
- NPOI在无Office环境下,对Office文件的操作
在做项目的时候,经常会遇到对 Office的操作,但有时候会没有Office环境,因此给大家介绍一个思路,在没有Office环境下,对Office的处理. NPOI,顾名思义,就是POI的.NET版本 ...
- byte[] 左移和右移
public static class ex { public static byte[] RightShift(this byte[] ba, int n) { ) { return ba.Left ...
- 【Python】Camera拍照休眠唤醒测试
#!/usr/bin/python # -*- coding: UTF-8 -*- import os import sys import time rebootCount = int(input(& ...
- EnterpriseLibrary 6.0 AOP 使用问题
因为EnterPrise Library 6.0改动了模块的功能类不再自动从Unity创建了,也就是引导也不依赖Unity容器组件,需要先使用静态方法注册一下 private static void ...