tensorflow学习笔记(10) mnist格式数据转换为TFrecords
本程序
(1)mnist的图片转换成TFrecords格式
(2) 读取TFrecords格式
- # coding:utf-8
- # 将MNIST输入数据转化为TFRecord的格式
- # http://blog.csdn.net/u014182497/article/details/74376224
- import tensorflow as tf
- from tensorflow.examples.tutorials.mnist import input_data
- import numpy as np
- from PIL import Image
- #把传入的value转化为整数型的属性,int64_list对应着 tf.train.Example 的定义
- def _int64_feature(value):
- return tf.train.Feature(int64_list=tf.train.Int64List(value=[value]))
- #把传入的value转化为字符串型的属性,bytes_list对应着 tf.train.Example 的定义
- def _bytes_feature(value):
- return tf.train.Feature(bytes_list=tf.train.BytesList(value=[value]))
- def genmnsit_tfreords():
- #读取MNIST数据
- mnist = input_data.read_data_sets("./mnist_data", dtype=tf.uint8, one_hot=True)
- #训练数据的图像,可以作为一个属性来存储
- images = mnist.train.images
- #训练数据所对应的正确答案,可以作为一个属性来存储
- labels = mnist.train.labels
- #训练数据的图像分辨率,可以作为一个属性来存储
- pixels = images.shape[0]
- #训练数据的个数
- num_examples = mnist.train.num_examples
- #指定要写入TFRecord文件的地址
- filename = "./output.tfrecords"
- #创建一个write来写TFRecord文件
- writer = tf.python_io.TFRecordWriter(filename)
- for index in range(num_examples):
- #把图像矩阵转化为字符串
- image_raw = images[index].tostring()
- #将一个样例转化为Example Protocol Buffer,并将所有的信息写入这个数据结构
- example = tf.train.Example(features=tf.train.Features(feature={
- #'pixels': _int64_feature(pixels),
- 'label': _int64_feature(np.argmax(labels[index])),
- 'image_raw': _bytes_feature(image_raw)}))
- #将 Example 写入TFRecord文件
- writer.write(example.SerializeToString())
- writer.close()
- #读取TFRecord文件中的数据
- def read_tfrecords():
- #创建一个reader来读取TFRecord文件中的样例
- reader = tf.TFRecordReader()
- #通过 tf.train.string_input_producer 创建输入队列
- filename_queue = tf.train.string_input_producer(["./output.tfrecords"])
- #从文件中读取一个样例
- _, serialized_example = reader.read(filename_queue)
- #解析读入的一个样例
- features = tf.parse_single_example(
- serialized_example,
- features={
- #这里解析数据的格式需要和上面程序写入数据的格式一致
- 'image_raw': tf.FixedLenFeature([], tf.string),
- 'label': tf.FixedLenFeature([], tf.int64),
- })
- #tf.decode_raw可以将字符串解析成图像对应的像素数组
- images = tf.decode_raw(features['image_raw'], tf.uint8)
- images = tf.reshape(images, [28, 28, 1])
- #tf.cast可以将传入的数据转化为想要改成的数据类型
- labels = tf.cast(features['label'], tf.int32)
- sess = tf.Session()
- #启动多线程处理输入数据
- coord = tf.train.Coordinator()
- threads = tf.train.start_queue_runners(sess=sess, coord=coord)
- num_preprocess_threads = 1
- batch_size = 1
- min_queue_examples = 50
- images_batch, label_batch = tf.train.shuffle_batch(
- [images, labels],
- batch_size=batch_size,
- num_threads=num_preprocess_threads,
- capacity=min_queue_examples + 3 * batch_size,
- min_after_dequeue=min_queue_examples)
- image = tf.reshape(images_batch, [28, 28])
- with tf.Session() as sess:
- init = tf.global_variables_initializer()
- sess.run(init)
- coord = tf.train.Coordinator()
- threads = tf.train.start_queue_runners(sess=sess, coord=coord)
- # 每次运行可以读取TFRecord文件中的一个样例。当所有样例都读完之后,再次样例中的程序会重头读取
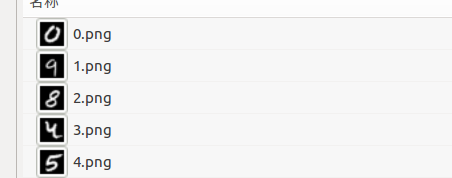
- for i in range(5):
- data, label = sess.run([image, label_batch])
- result = Image.fromarray(data)
- result.save(str(i) + '.png')
- pass
- pass
- coord.request_stop()
- coord.join(threads)
- if __name__ == '__main__':
- genmnsit_tfreords()
- read_tfrecords()
tensorflow学习笔记(10) mnist格式数据转换为TFrecords的更多相关文章
- 深度学习-tensorflow学习笔记(2)-MNIST手写字体识别
深度学习-tensorflow学习笔记(2)-MNIST手写字体识别超级详细版 这是tf入门的第一个例子.minst应该是内置的数据集. 前置知识在学习笔记(1)里面讲过了 这里直接上代码 # -*- ...
- 深度学习-tensorflow学习笔记(1)-MNIST手写字体识别预备知识
深度学习-tensorflow学习笔记(1)-MNIST手写字体识别预备知识 在tf第一个例子的时候需要很多预备知识. tf基本知识 香农熵 交叉熵代价函数cross-entropy 卷积神经网络 s ...
- tensorflow学习笔记三:实例数据下载与读取
一.mnist数据 深度学习的入门实例,一般就是mnist手写数字分类识别,因此我们应该先下载这个数据集. tensorflow提供一个input_data.py文件,专门用于下载mnist数据,我们 ...
- tensorflow学习笔记————分类MNIST数据集
在使用tensorflow分类MNIST数据集中,最容易遇到的问题是下载MNIST样本的问题. 一般是通过使用tensorflow内置的函数进行下载和加载, from tensorflow.examp ...
- TensorFlow学习笔记(MNIST报错修正 适用Tensorflow1.3)
在Tensorflow实战Google框架下的深度学习这本书的MNIST的图像识别例子中,每次都要报错 错误如下: Only call `sparse_softmax_cross_entropy_ ...
- tensorflow学习笔记——使用TensorFlow操作MNIST数据(2)
tensorflow学习笔记——使用TensorFlow操作MNIST数据(1) 一:神经网络知识点整理 1.1,多层:使用多层权重,例如多层全连接方式 以下定义了三个隐藏层的全连接方式的神经网络样例 ...
- tensorflow学习笔记——使用TensorFlow操作MNIST数据(1)
续集请点击我:tensorflow学习笔记——使用TensorFlow操作MNIST数据(2) 本节开始学习使用tensorflow教程,当然从最简单的MNIST开始.这怎么说呢,就好比编程入门有He ...
- Tensorflow学习笔记No.10
多输出模型 使用函数式API构建多输出模型完成多标签分类任务. 数据集下载链接:https://pan.baidu.com/s/1JtKt7KCR2lEqAirjIXzvgg 提取码:2kbc 1.读 ...
- TensorFlow学习笔记——LeNet-5(训练自己的数据集)
在之前的TensorFlow学习笔记——图像识别与卷积神经网络(链接:请点击我)中了解了一下经典的卷积神经网络模型LeNet模型.那其实之前学习了别人的代码实现了LeNet网络对MNIST数据集的训练 ...
随机推荐
- du和df命令的区别
du和df命令都被用于获得文件系统大小的信息:df用于报告文件系统的总块数及剩余块数,du -s /<filesystem>用于报告文件系统使用的块数.但是,我们可以发现从df命令算出的文 ...
- LWIP移植
- winfrom 窗口起始位置为屏幕中央
窗口起始位置为屏幕中央 this.StartPosition = System.Windows.Forms.FormStartPosition.CenterScreen; 获取鼠标触发事件光标位置 t ...
- mysql数据库以加索引方式提高性能
数据库查询速率慢的情况下可以给对应的表加上对应的索引,能够有效的提高查询效率,mysql数据库添加索引的SQL入下: ALTER TABLE `table_name` ADD INDEX index_ ...
- Android开发7——android.database.CursorIndexOutOfBoundsException:Index -1 requested
android中数据库处理使用cursor时,游标不是放在为0的下标,而是放在为-1的下标处开始的. 也就是说返回给cursor查询结果时,不能够马上从cursor中提取值. 下面的代码会返回错误Us ...
- Xilinx IP核的根目录地址,有datasheet 和仿真相关的资料
C:\Xilinx\14.7\ISE_DS\ISE\coregen\ip\xilinx\dsp\com\xilinx\ip Xilinx IP核的根目录地址,有datasheet 和仿真相关的资料
- [na]win PPTP场景与搭建
这也是在不成熟时期的一种对windows远程访问的好奇. 现在看来没啥用了. 现在一般都用linux的openvpn+gg方案了 远程访问方案: ,端口映射 ,vpn 实现这种远程访问的协议:pptp ...
- C#判断窗体是否存在重复打开
foreach (Form f in Application.OpenForms) { f.Name //是打开窗体的Text //以下判断....... } Form2 F2 ; if(F2 == ...
- 在 Chrome 开发者工具中调试 node.js
命令行工具 devtool ,它可以在 Chrome 的开发者工具中运行 Node.js 程序. 下面的记录显示了在一个 HTTP 服务器中设置断点的情况. 该工具基于 Electron 将 Node ...
- CCEaseElasticOut调整速度和振幅
pSprite->setAnchorPoint(CCPoint(,)); pSprite->setPosition(CCPoint(,)); CCFiniteTimeAction* pAc ...