[转载]架构指南 : Java1.7+Eclipse luna + Maven 3.2.5 +spring 4.1.4
1、 环境配置
a) Java 1.7
b) Eclipse luna
c) Maven3.2.5
d) spring 4.1.4
2、 创建maven工程
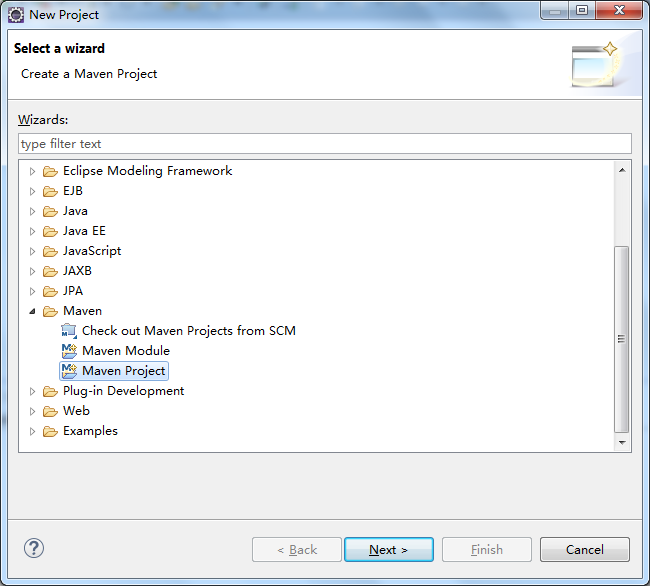
a) 打开eclipse,file->new->project->Maven->Maven Project
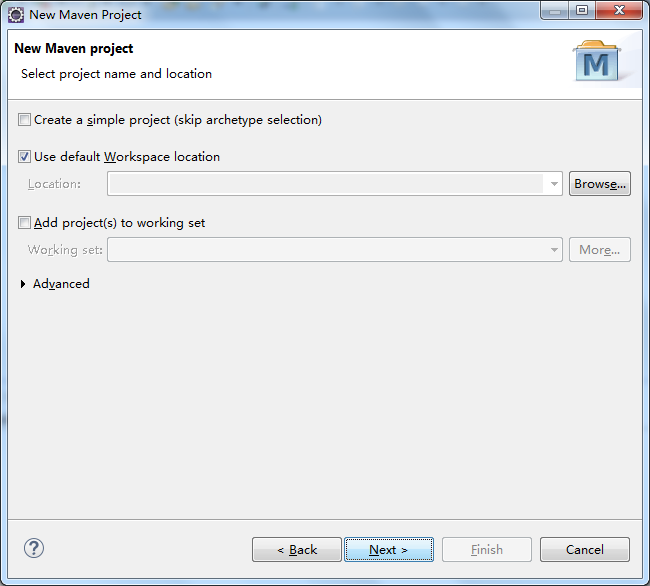
b) 下一步
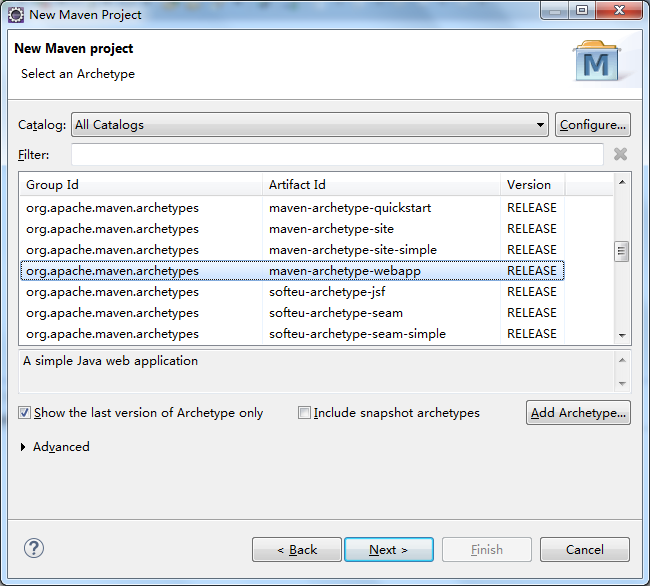
c) 选择创建的工程为webapp,下一步
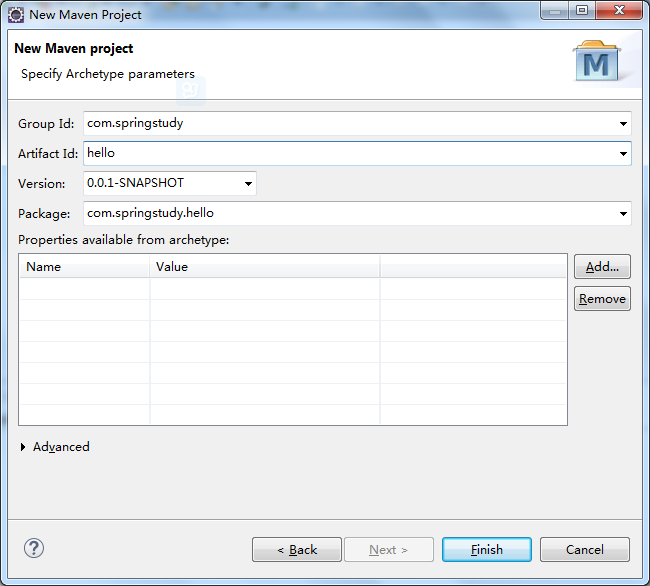
d) 填写项目的group id和artifact id。一般情况下,group id写域名的倒序,artifact id写项目名称即可。最后点完成。
e) 最初建好后,项目目录结构如下
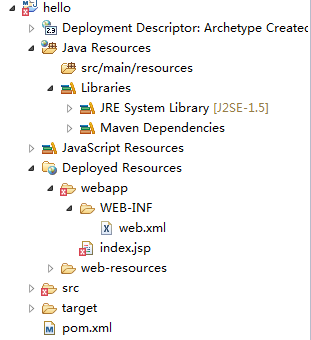
f) 一般的项目目录中,在java Resources目录下,还有src/main/java,src/main/test/java,src/main/test/resources这三个source folder,需要手动创建。在下面的步骤中会讲到如何补齐这三个目录。
3、 修改项目基本设置
a) 右键此项目名称->Properties->Java Build path,点击source标签。
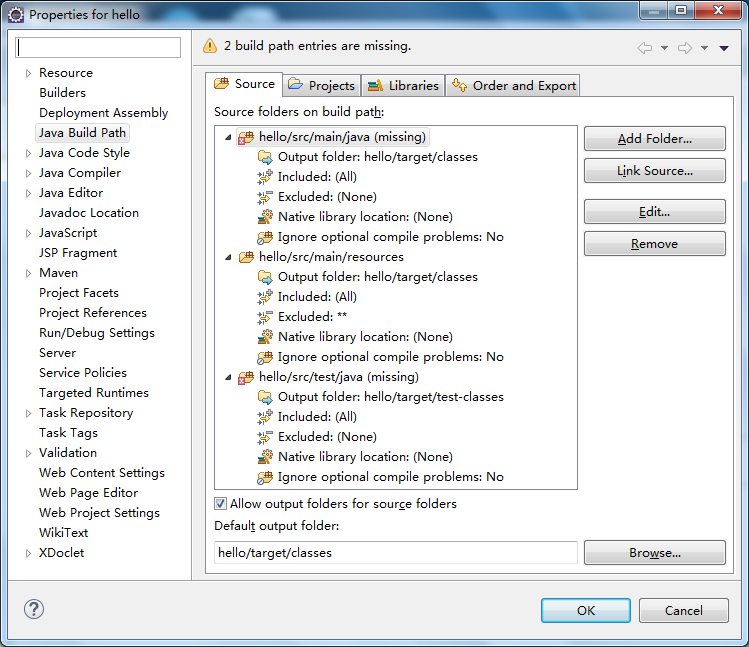
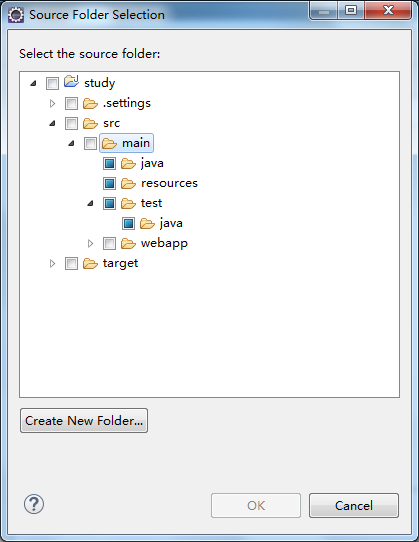
b) 提示 hello/src/main/java (missing)和hello/src/test/java (missing)。一般的项目目录中,在java Resources目录下,还会有src/main/test/resources这个source folder。将missing的先删除,再重新创建,缺少的直接创建。点右键操作按键进行删除和添加。
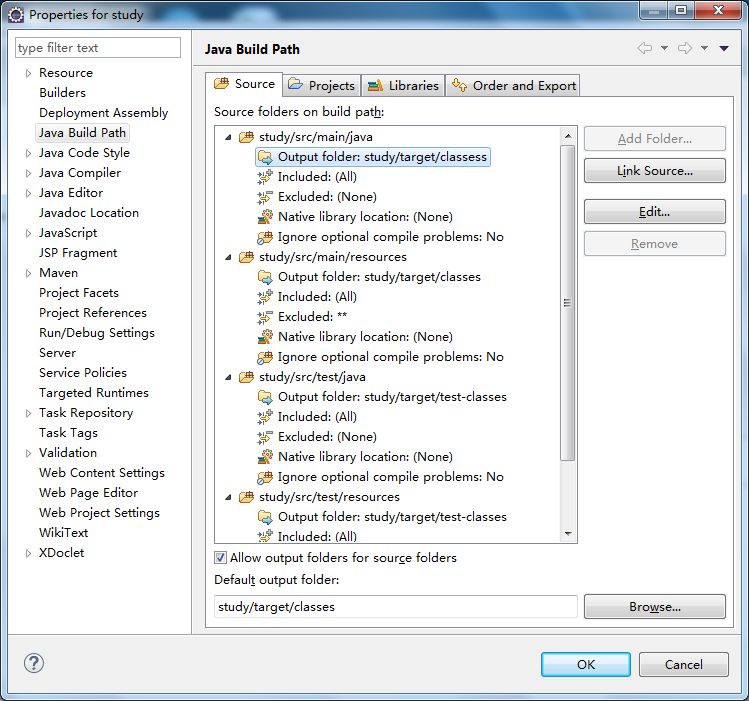
c) 修改完整,效果如下图
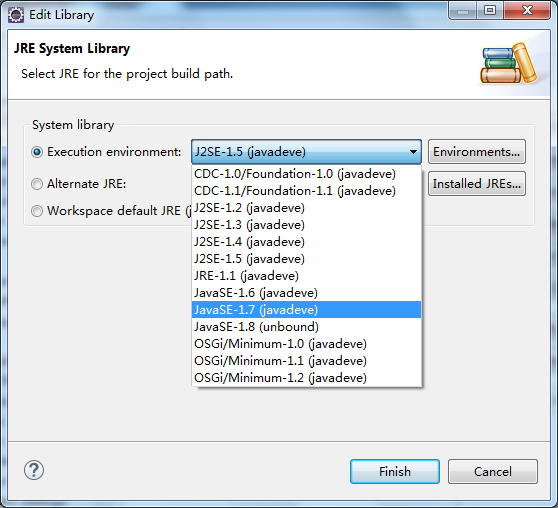
d) 接下来再修改libraries的配置,jre使用1.7版本。选中JRE System Library->edit ,更换版本。
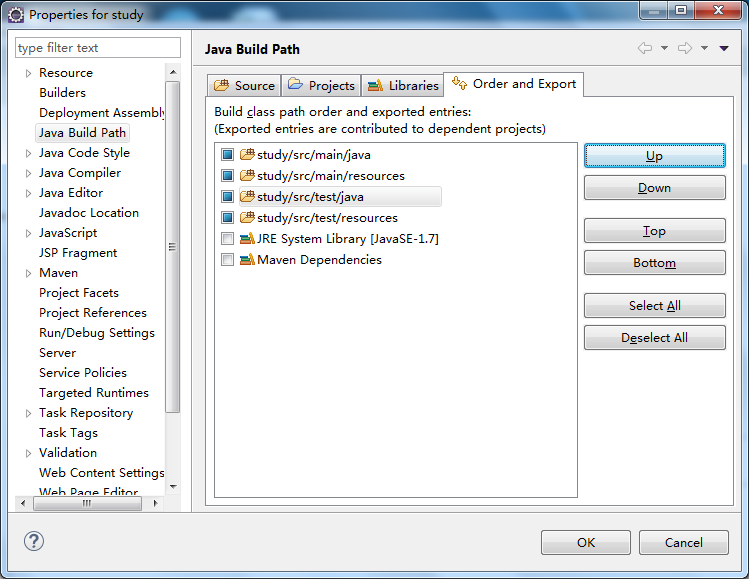
e) 再修改一下order and export里的配置,主要是调整这四个目录的显示顺序,调为自己喜欢的顺序即可
f) 接下来再修改project facets,先将java修改为1.7。
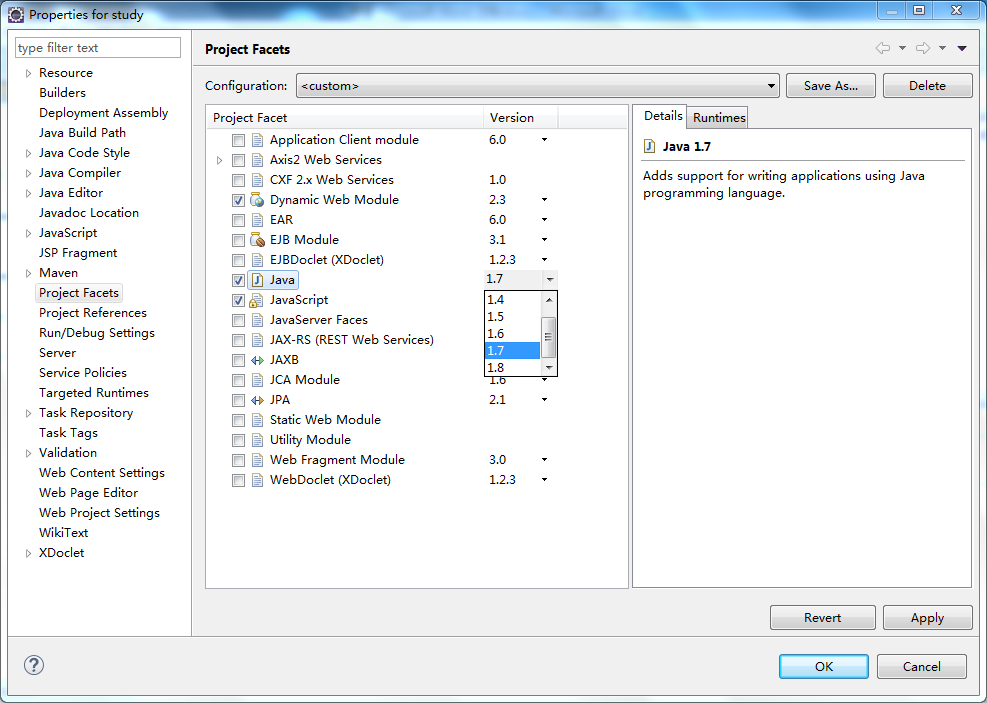
Dynamic Web Module无法在这里直接修改为3.0,需要打开工程目录下有一个.settings文件夹,打开org.eclipse.wst.common.project.facet.core.xml,做如下修改:
<installed facet="jst.web" version="3.0"/>
重启eclipe就可以看到更改生效了。
4、 Eclipse中maven的配置
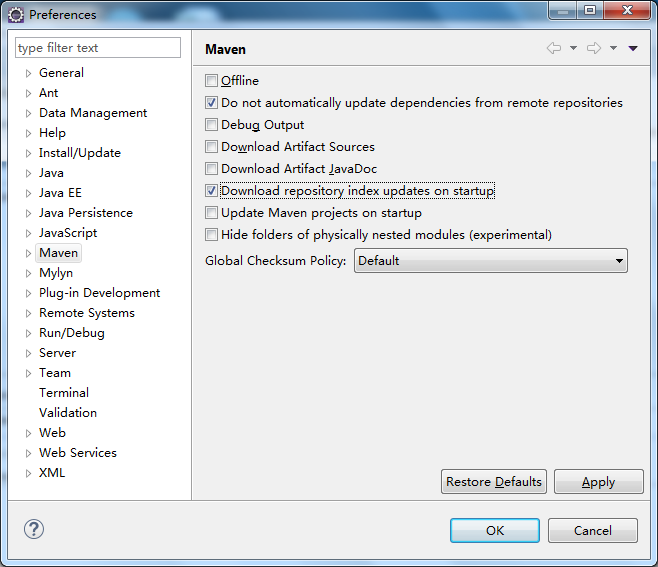
a) window->properties->maven,勾选 download repository index updates on startup
5、 简单Spring mvc的配置
a) 打开项目中的pom.xml文件,并点击Dependencies标签,点击add添加新的依赖
b) 如果知道依赖的group id和artifact id,可以直接填写,如果不清楚,可以输入关键字进行查询,或是到http://search.maven.org网站查询
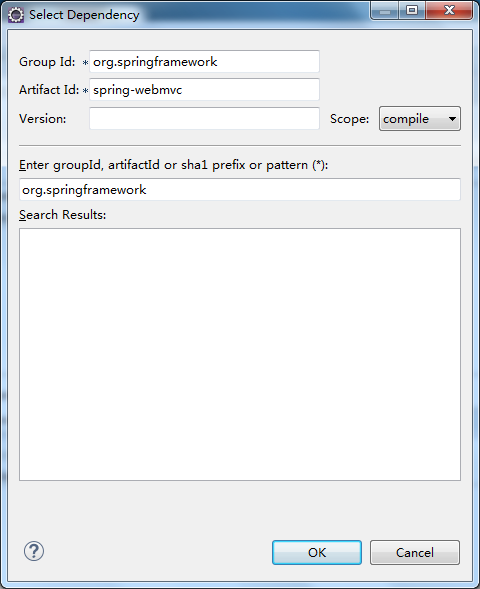
c) 需要添加的依赖有:spring-webmvc,版本为4.1.4. RELEASE。完整的POM.XML文件内容如下:
<project xmlns="http://maven.apache.org/POM/4.0.0" xmlns:xsi="http://www.w3.org/2001/XMLSchema-instance"

  xsi:schemaLocation="http://maven.apache.org/POM/4.0.0 http://maven.apache.org/maven-v4_0_0.xsd">

  <modelVersion>4.0.0</modelVersion>

  <groupId>com.springstudy</groupId>

  <artifactId>study</artifactId>

  <packaging>war</packaging>

  <version>0.0.1-SNAPSHOT</version>

  <name>study Maven Webapp</name>

  <url>http://maven.apache.org</url>

  <properties>

                   <spring.version>4.1.4.RELEASE</spring.version>

         </properties>

  <dependencies>

    <dependency>

      <groupId>junit</groupId>

      <artifactId>junit</artifactId>

      <version>3.8.1</version>

      <scope>test</scope>

    </dependency>

    <dependency>

    <groupId>org.springframework</groupId>

    <artifactId>spring-webmvc</artifactId>

    <version>${spring.version}</version>

    </dependency>

  </dependencies>

  <build>

    <finalName>study</finalName>

  </build>

</project>
d) 打开src/main/webapp/WEB-INF/web.xml文件,最终修改如如下内容:
<?xml version="1.0" encoding="UTF-8"?>

<web-app xmlns:xsi="http://www.w3.org/2001/XMLSchema-instance"

         xmlns="http://java.sun.com/xml/ns/javaee" xmlns:web="http://java.sun.com/xml/ns/javaee/web-app_2_5.xsd"

         xsi:schemaLocation="http://java.sun.com/xml/ns/javaee http://java.sun.com/xml/ns/javaee/web-app_2_5.xsd"

         id="study" version="2.5">

         <display-name>Archetype Created Web Application</display-name>

         <description>sprintMVC环境搭建</description>

         <!-- 加载Spring配置文件 -->

         <context-param>

                   <param-name>contextConfigLocation</param-name>

                   <param-value>classpath:/configs/spring-*.xml</param-value>

         </context-param>

         <!-- Spring监听 -->

         <listener>

                   <listener-class>org.springframework.web.context.ContextLoaderListener</listener-class>

         </listener>

         <!-- Spring MVC配置 -->

         <servlet>

                   <servlet-name>Dispatcher</servlet-name>

                   <servlet-class>org.springframework.web.servlet.DispatcherServlet</servlet-class>

                   <!-- 自定义spring mvc的配置文件名称和路径 -->

                   <init-param>

                            <param-name>contextConfigLocation</param-name>

                            <param-value>classpath:configs/spring-servlet.xml</param-value>

                   </init-param>

                   <load-on-startup>1</load-on-startup>

         </servlet>

         <!-- spring mvc 请求后缀 -->

         <servlet-mapping>

                   <servlet-name>Dispatcher</servlet-name>

                   <url-pattern>/</url-pattern>

         </servlet-mapping>

         <welcome-file-list>

                   <welcome-file>index.jsp</welcome-file>

         </welcome-file-list>

</web-app>
e) 在Java Resources/scr/main/resources目录下,创建configs文件夹,以便存放在web.xml中声明的配置路径
f) 在Java Resources/scr/main/resources/configs目录下,创建spring-servlet.xml,内容如下:
<?xml version="1.0" encoding="UTF-8"?>

<beans xmlns="http://www.springframework.org/schema/beans"

         xmlns:xsi="http://www.w3.org/2001/XMLSchema-instance" xmlns:jee="http://www.springframework.org/schema/jee"

         xmlns:context="http://www.springframework.org/schema/context" xmlns:p="http://www.springframework.org/schema/p"

         xmlns:mvc="http://www.springframework.org/schema/mvc" xmlns:util="http://www.springframework.org/schema/util"

         xsi:schemaLocation="http://www.springframework.org/schema/beans

                                           http://www.springframework.org/schema/beans/spring-beans-4.1.xsd

                                                   http://www.springframework.org/schema/context

                                                   http://www.springframework.org/schema/context/spring-context-4.0.xsd

                                                   http://www.springframework.org/schema/jee

                                                        http://www.springframework.org/schema/jee/spring-jee-4.1.xsd

                                                        http://www.springframework.org/schema/mvc

                                                   http://www.springframework.org/schema/mvc/spring-mvc-4.1.xsd

                                                   http://www.springframework.org/schema/util

                                                   http://www.springframework.org/schema/util/spring-util-4.1.xsd">

         <context:annotation-config/>

         <context:component-scan base-package="com.springstudy.controller" />

         <mvc:annotation-driven />

         <mvc:resources mapping="/styles/**" location="/styles/" />

         <mvc:resources mapping="/scripts/**" location="/scripts/" />

         <mvc:resources mapping="/images/**" location="/images/" />

         <bean

                   class="org.springframework.web.servlet.view.InternalResourceViewResolver">

                   <property name="prefix" value="/WEB-INF/views/" />

                   <property name="suffix" value=".jsp" />

         </bean>

</beans>
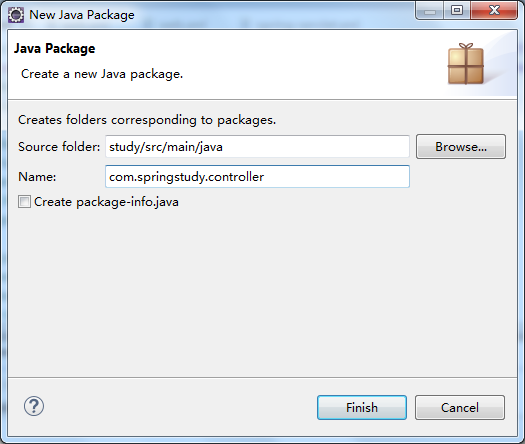
g) 创建controller包,在spring-servlet.xml文件中,<context:component-scan base-package="com.springstudy.controller" />已经指定了路径
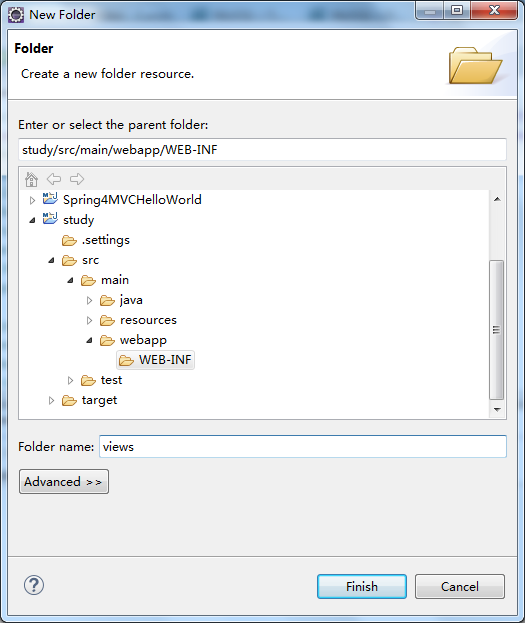
h) 在src/main/webapp/WEB-INF目录下,创建views文件,在spring-servlet.xml文件中,<property name="prefix" value="/WEB-INF/views/" />已指定了视图文件路径
i) 创建第一个controller文件HelloController.java,完整的文件内容如下:
package com.springstudy.controller;

import org.springframework.stereotype.Controller;

import org.springframework.web.bind.annotation.RequestMapping;

import org.springframework.web.servlet.ModelAndView;

@Controller

public class HelloController {

         @RequestMapping("/hello")

         public ModelAndView hello(){

                   ModelAndView mv =new ModelAndView();

                   mv.addObject("spring", "spring mvc");

                   mv.setViewName("hello");

                   return mv;

         }

}
j) 添加src/main/webapp/WEB-INF/views/hello.jsp文件,内容如下:
<!DOCTYPE html>

<html>

         <head>

                   <meta charset="utf-8">

                   <title>sprint hello</title>

         </head>

         <body>hello ${spring}!

         </body>

</html>
6、 将项目发布到tomcat
a) 在eclipse中添加tomcat 7
b) 在tomcat添加完成后,双击,设置overview选项卡中Server Locations的设置。
i. 将 Use Tomcat installation(takes control of Tomcat installation)选中
ii. 将Deploy path的内容改为:webapps
iii. 保存
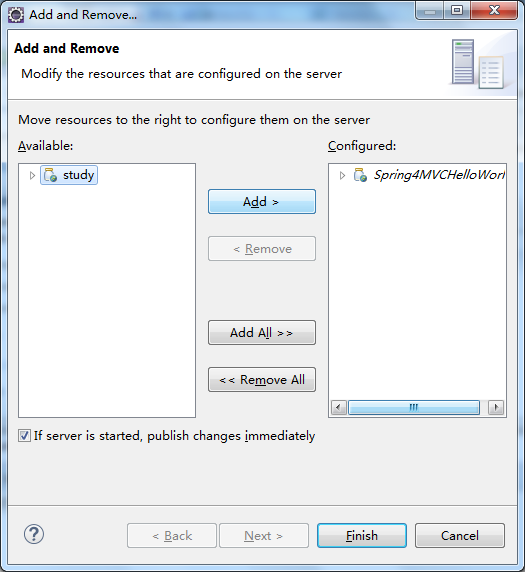
c) 右键tomcat,Add and Remove… ,添加study
d) 启动tomcat
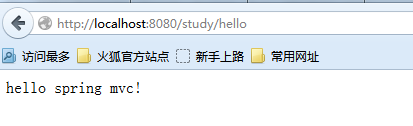
e) 浏览器打开http://localhost:8080/study/hello,访问成功!如下图
[转载]架构指南 : Java1.7+Eclipse luna + Maven 3.2.5 +spring 4.1.4的更多相关文章
- 简单MVC项目搭建--Java1.7+Eclipse luna + Maven 3.2.5 +spring 4.1.4
转载请注明出处:http://www.cnblogs.com/mybest/p/4265872.html 1. 环境配置 a) Java 1.7 b) Eclipse ...
- eclipse luna maven搭建spring mvc
1. 环境配置 a) Java 1.7 b) Eclipse luna c) Maven3.2.5 d) Spring 4.1.4 2. ...
- eclipse luna maven失效的原因
昨天发现单位里的eclipse中的maven直接不显示了,不能在 Windows-Preference 中显示maven 也不能新建maven工程,也不能maven-update,连STS(Sprin ...
- eclipse搭建maven project的spring4 spring mvc mybatis
一,先确定已经安装好了Eclipse Java EE IDE for Web Developers我用的是如下版本 Version: Neon.3 Release (4.6.3)Build id: 2 ...
- 剑指架构师系列-持续集成之Maven+Nexus+Jenkins+git+Spring boot
1.Nexus与Maven 先说一下这个Maven是什么呢?大家都知道,Java社区发展的非常强大,封装各种功能的Jar包满天飞,那么如何才能方便的引入我们项目,为我所用呢?答案就是Maven,只需要 ...
- Spring boot 梳理 - 配置eclipse集成maven,并开发Spring boot hello
@RestController @EnableAutoConfiguration public class App { @RequestMapping("/hello") publ ...
- eclipse构建maven+scala+spark工程 转载
转载地址:http://jingpin.jikexueyuan.com/article/47043.html 本文先叙述如何配置eclipse中maven+scala的开发环境,之后,叙述如何实现sp ...
- 转载Eclipse中Maven WEB工程tomcat项目添加调试
转载地址: http://blog.csdn.net/free4294/article/details/38260581 一.建立一个maven WEB项目 1.file->new->o ...
- eclipse里maven项目An error occurred while filtering resources解决办法(转载)
转自:http://liyanjie918.blog.163.com/blog/static/20227290201581143110105/ 在使用eclipse构建maven项目时,突然出现错误提 ...
随机推荐
- C#在线更新程序[下载程序、解压缩程序、控制台程序]
[1]下载文件 using System;using System.Collections.Generic;using System.Linq;using System.Text;using Syst ...
- 二模 (8) day2
第一题: 题目描述: 有 n 个炸弹,有些炸弹牵了一根单向引线(也就是说引线只有在这一端能被炸弹点燃),只要引爆了这个炸弹,用引线连接的下一个炸弹也会爆炸.每个炸弹还有个得分,当这个炸弹被引爆后就能得 ...
- Ibatis.Net 数据库操作(四)
一.查询select 还记得第一篇示例中的是如何读出数据库里的3条数据吗? 就是调用了一个QueryForList方法,从方法名就知道,查询返回列表. 1.QueryForList 返回List< ...
- windbg调试C#代码(一)
用windbg调试C#代码是比较麻烦的,因为windbg是针对OS层级的,而C#被CLR隔了一层,很多原生的命令如查看局部变量dv.查看变量类型dt等在CLR的环境中都不能用了.必须使用针对CLR的扩 ...
- [开发笔记]-VS2012打开解决方案崩溃或点击项目崩溃
下午在使用VS2012建立Service服务项目时,只要一切换到设计视图页面中,VS就崩溃重启,从网上找了一种方法来解决,测试可行.但导致该问题的原因未知. 解决方案: 步骤1:开始-->所有程 ...
- RM报表预览,只有固定的1个订单页面
明明选了多个记录,预览时,只显示最后一个. 原因: 主项数据的数据集选了报表自带的虚拟数据集了.
- wp8.1 C#技巧: 计时器
public MainPage() { this.InitializeComponent(); this.timer = new DispatcherTimer();//新建委托时间实例 timer. ...
- JVM-类文件结构
无关性的基石 I> "平台无关性"实现在操作系统的应用层上:sun公司以及其他虚拟机提供商发布了许多可以运行在各种不同平台上的虚拟机,这些虚拟机都可以载入和执行同一种平台无关 ...
- C#判断IP地址是否合法函数-使用正则表达式-2个 (转)
public bool IsCorrenctIP(string ip){ string pattrn=@"(/d{1,2}|1/d/d|2[0-4]/d|25[0-5])/.(/d{1,2} ...
- 聚簇(Cluster)和聚簇表(Cluster Table)
聚簇(Cluster)和聚簇表(Cluster Table) 时间:2010-03-13 23:12来源:OralanDBA.CN 作者:AlanSawyer 点击:157次 1.创建聚簇 icmad ...