ES--07
61.索引管理_快速上机动手实战创建、修改以及删除索引
课程大纲
1、为什么我们要手动创建索引?
2、创建索引
创建索引的语法
PUT /my_index
{
"settings": { ... any settings ... },
"mappings": {
"type_one": { ... any mappings ... },
"type_two": { ... any mappings ... },
...
}
}
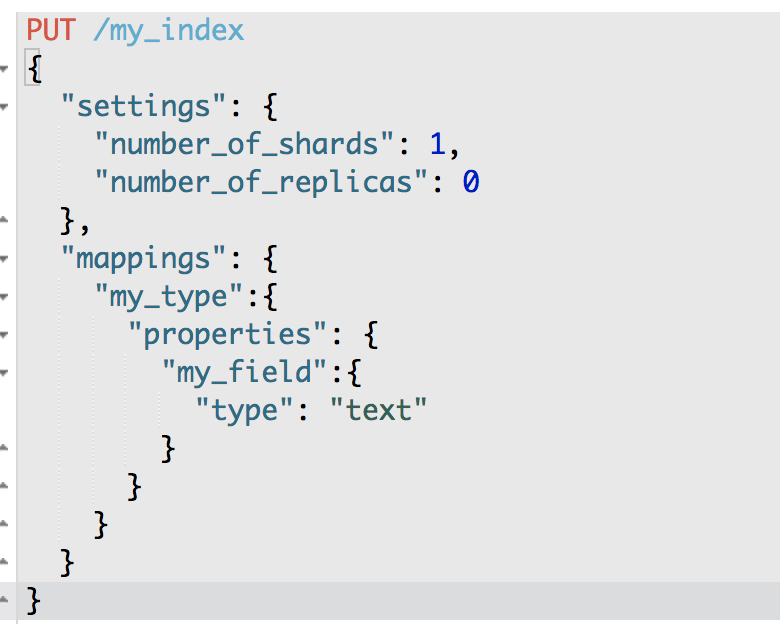
创建索引的示例
PUT /my_index
{
"settings": {
"number_of_shards": 1,
"number_of_replicas": 0
},
"mappings": {
"my_type": {
"properties": {
"my_field": {
"type": "text"
}
}
}
}
}
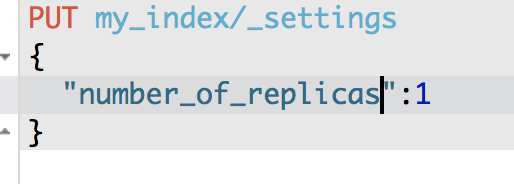
3、修改索引
analysis设置分词器
es_std 分词器的名称
PUT /my_index/_settings
{
"number_of_replicas": 1
}
4、删除索引
DELETE /my_index
DELETE /index_one,index_two
DELETE /index_*
DELETE /_all
elasticsearch.yml
action.destructive_requires_name: true
62.索引管理_快速上机动手实战修改分词器以及定制自己的分词器
课程大纲
1、默认的分词器
standard
standard tokenizer:以单词边界进行切分
standard token filter:什么都不做
lowercase token filter:将所有字母转换为小写
stop token filer(默认被禁用):移除停用词,比如a the it等等
2、修改分词器的设置
启用english停用词token filter
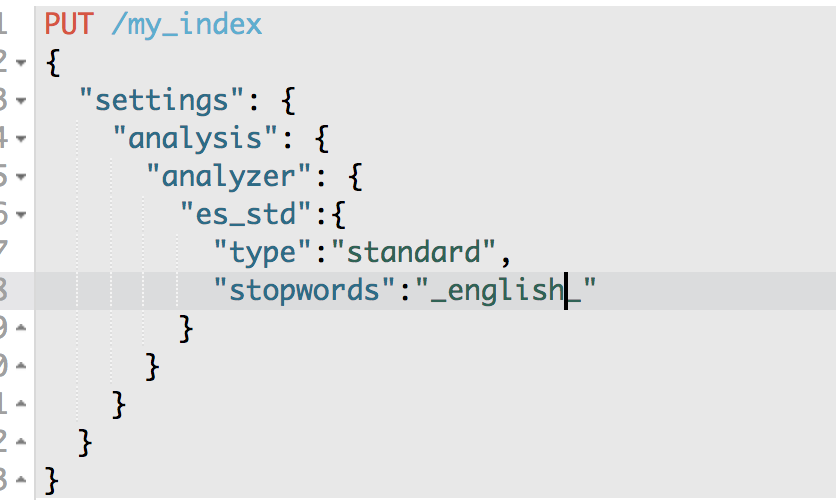
PUT /my_index
{
"settings": {
"analysis": {
"analyzer": {
"es_std": {
"type": "standard",
"stopwords": "_english_"
}
}
}
}
}
GET /my_index/_analyze
{
"analyzer": "standard",
"text": "a dog is in the house"
}
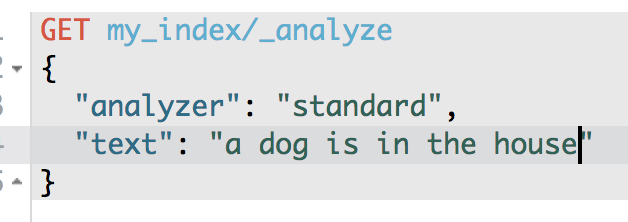
使用标准分词器 将每个单词全部分词
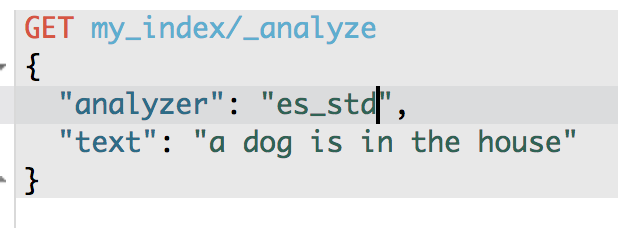
使用es_std分词器 只分出 dog 和house
GET /my_index/_analyze
{
"analyzer": "es_std",
"text":"a dog is in the house"
}
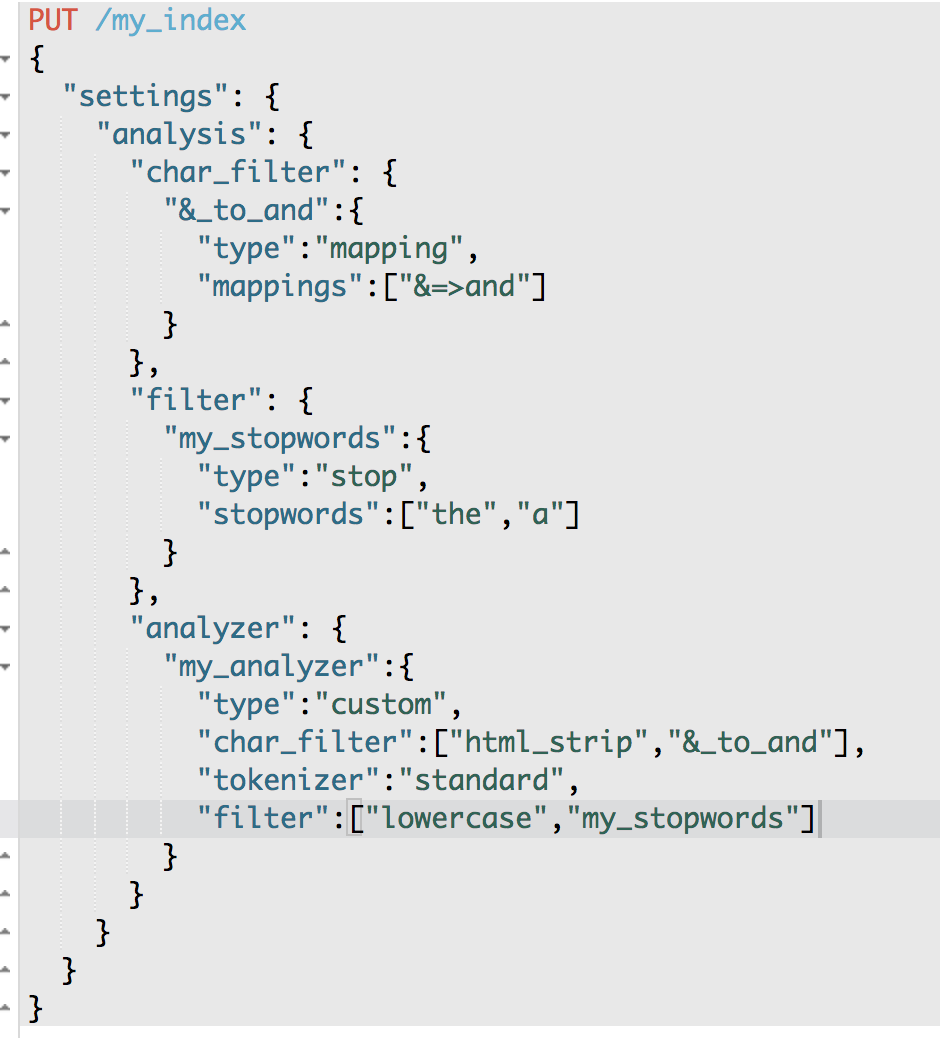
3、定制化自己的分词器
PUT /my_index
{
"settings": {
"analysis": {
"char_filter": {
"&_to_and": {
"type": "mapping",
"mappings": ["&=> and"]
}
},
"filter": {
"my_stopwords": {
"type": "stop",
"stopwords": ["the", "a"]
}
},
"analyzer": {
"my_analyzer": {
"type": "custom",
"char_filter": ["html_strip", "&_to_and"],
"tokenizer": "standard",
"filter": ["lowercase", "my_stopwords"]
}
}
}
}
}
GET /my_index/_analyze
{
"text": "tom&jerry are a friend in the house, <a>, HAHA!!",
"analyzer": "my_analyzer"
}

使用my_analyzer分词后的结果为 tomandjerry are friend in house haha
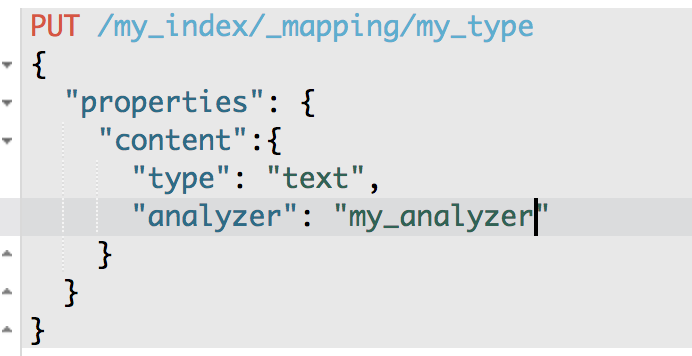
设置在index中使用自定义的分词器
PUT /my_index/_mapping/my_type
{
"properties": {
"content": {
"type": "text",
"analyzer": "my_analyzer"
}
}
}
63.索引管理_内核级知识点:深入探秘type底层数据结构
课程大纲
type,是一个index中用来区分类似的数据的,类似的数据,但是可能有不同的fields,而且有不同的属性来控制索引建立、分词器
field的value,在底层的lucene中建立索引的时候,全部是opaque bytes类型,不区分类型的
lucene是没有type的概念的,在document中,实际上将type作为一个document的field来存储,即_type,es通过_type来进行type的过滤和筛选
一个index中的多个type,实际上是放在一起存储的,因此一个index下,不能有多个type重名,而类型或者其他设置不同的,因为那样是无法处理的
{
"ecommerce": {
"mappings": {
"elactronic_goods": {
"properties": {
"name": {
"type": "string",
},
"price": {
"type": "double"
},
"service_period": {
"type": "string"
}
}
},
"fresh_goods": {
"properties": {
"name": {
"type": "string",
},
"price": {
"type": "double"
},
"eat_period": {
"type": "string"
}
}
}
}
}
}
{
"name": "geli kongtiao",
"price": 1999.0,
"service_period": "one year"
}
{
"name": "aozhou dalongxia",
"price": 199.0,
"eat_period": "one week"
}
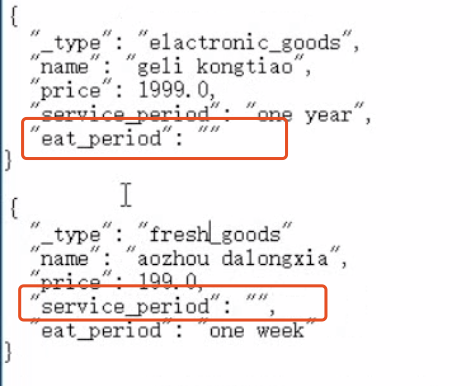
在底层的存储是这样子的。。。。
{
"ecommerce": {
"mappings": {
"_type": {
"type": "string",
"index": "not_analyzed"
},
"name": {
"type": "string"
}
"price": {
"type": "double"
}
"service_period": {
"type": "string"
}
"eat_period": {
"type": "string"
}
}
}
}
{
"_type": "elactronic_goods",
"name": "geli kongtiao",
"price": 1999.0,
"service_period": "one year",
"eat_period": ""
}
{
"_type": "fresh_goods",
"name": "aozhou dalongxia",
"price": 199.0,
"service_period": "",
"eat_period": "one week"
}
最佳实践,将类似结构的type放在一个index下,这些type应该有多个field是相同的
假如说,你将两个type的field完全不同,放在一个index下,那么就每条数据都至少有一半的field在底层的lucene中是空值,会有严重的性能问题
64.索引管理_mapping root object深入剖析
课程大纲
1、root object
就是某个type对应的mapping json,包括了properties,metadata(_id,_source,_type),settings(analyzer),其他settings(比如include_in_all)
PUT /my_index
{
"mappings": {
"my_type": {
"properties": {}
}
}
}
2、properties
修改properties
type,index,analyzer
PUT /my_index/_mapping/my_type
{
"properties": {
"title": {
"type": "text"
}
}
}
3、_source
好处
(1)查询的时候,直接可以拿到完整的document,不需要先拿document id,再发送一次请求拿document
(2)partial update基于_source实现
(3)reindex时,直接基于_source实现,不需要从数据库(或者其他外部存储)查询数据再修改
(4)可以基于_source定制返回field
(5)debug query更容易,因为可以直接看到_source
如果不需要上述好处,可以禁用_source
PUT /my_index/_mapping/my_type2
{
"_source": {"enabled": false}
}
4、_all
将所有field打包在一起,作为一个_all field,建立索引。没指定任何field进行搜索时,就是使用_all field在搜索。
禁用_all
PUT /my_index/_mapping/my_type3
{
"_all": {"enabled": false}
}
也可以在field级别设置include_in_all field,设置是否要将field的值包含在_all field中
PUT /my_index/_mapping/my_type4
{
"properties": {
"my_field": {
"type": "text",
"include_in_all": false
}
}
}
5、标识性metadata
_index,_type,_id
document的metadata
.索引管理_定制化自己的dynamic mapping策略
课程大纲
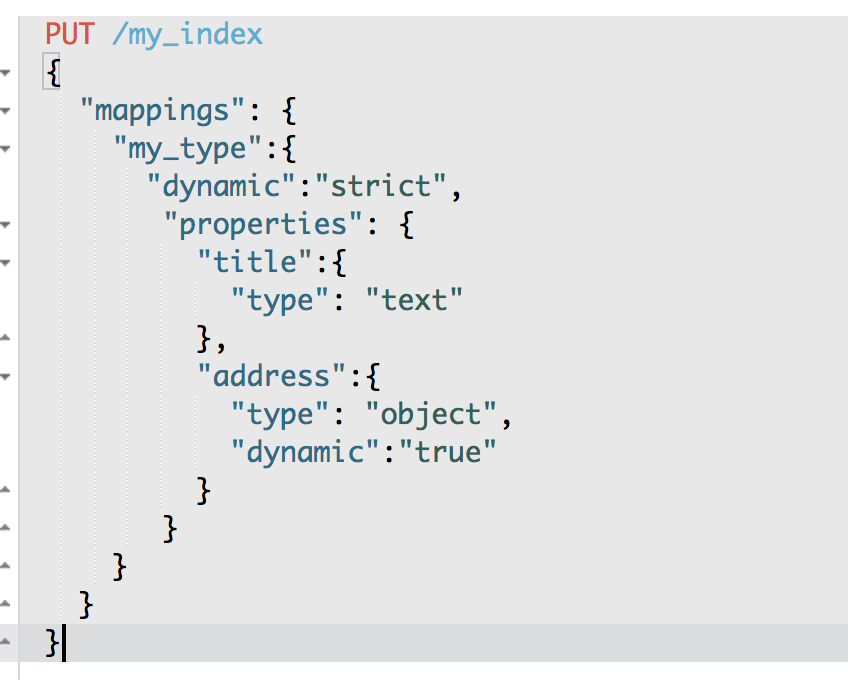
1、定制dynamic策略
true:遇到陌生字段,就进行dynamic mapping
false:遇到陌生字段,就忽略
strict:遇到陌生字段,就报错
PUT /my_index
{
"mappings": {
"my_type": {
"dynamic": "strict",
"properties": {
"title": {
"type": "text"
},
"address": {
"type": "object",
"dynamic": "true"
}
}
}
}
}
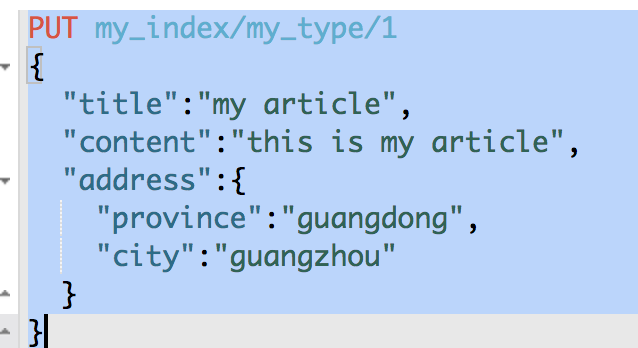
PUT /my_index/my_type/1
{
"title": "my article",
"content": "this is my article",
"address": {
"province": "guangdong",
"city": "guangzhou"
}
}
{
"error": {
"root_cause": [
{
"type": "strict_dynamic_mapping_exception",
"reason": "mapping set to strict, dynamic introduction of [content] within [my_type] is not allowed"
}
],
"type": "strict_dynamic_mapping_exception",
"reason": "mapping set to strict, dynamic introduction of [content] within [my_type] is not allowed"
},
"status": 400
}
PUT /my_index/my_type/1
{
"title": "my article",
"address": {
"province": "guangdong",
"city": "guangzhou"
}
}
GET /my_index/_mapping/my_type
{
"my_index": {
"mappings": {
"my_type": {
"dynamic": "strict",
"properties": {
"address": {
"dynamic": "true",
"properties": {
"city": {
"type": "text",
"fields": {
"keyword": {
"type": "keyword",
"ignore_above": 256
}
}
},
"province": {
"type": "text",
"fields": {
"keyword": {
"type": "keyword",
"ignore_above": 256
}
}
}
}
},
"title": {
"type": "text"
}
}
}
}
}
}
2、定制dynamic mapping策略
(1)date_detection
默认会按照一定格式识别date,比如yyyy-MM-dd。但是如果某个field先过来一个2017-01-01的值,就会被自动dynamic mapping成date,后面如果再来一个"hello world"之类的值,就会报错。可以手动关闭某个type的date_detection,如果有需要,自己手动指定某个field为date类型。
PUT /my_index/_mapping/my_type
{
"date_detection": false
}
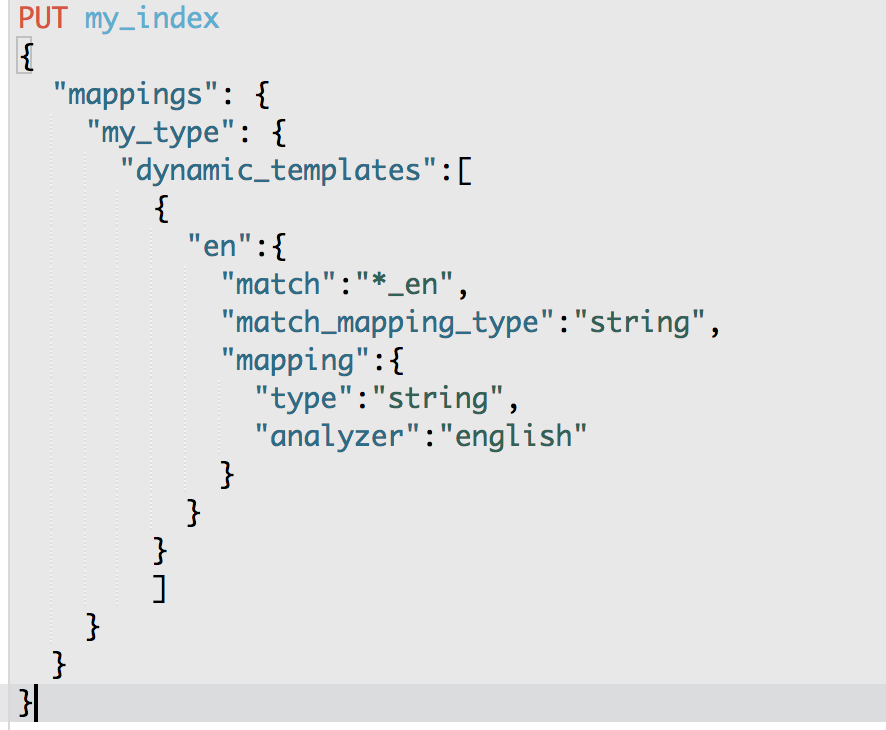
(2)定制自己的dynamic mapping template(type level)
PUT /my_index
{
"mappings": {
"my_type": {
"dynamic_templates": [
{ "en": {
"match": "*_en",
"match_mapping_type": "string",
"mapping": {
"type": "string",
"analyzer": "english"
}
}}
]
}}}
PUT /my_index/my_type/1
{
"title": "this is my first article"
}
PUT /my_index/my_type/2
{
"title_en": "this is my first article"
}
title没有匹配到任何的dynamic模板,默认就是standard分词器,不会过滤停用词,is会进入倒排索引,用is来搜索是可以搜索到的
title_en匹配到了dynamic模板,就是english分词器,会过滤停用词,is这种停用词就会被过滤掉,用is来搜索就搜索不到了
(3)定制自己的default mapping template(index level)
PUT /my_index
{
"mappings": {
"_default_": {
"_all": { "enabled": false }
},
"blog": {
"_all": { "enabled": true }
}
}
}
66.索引管理_复杂上机实验:基于scoll+bulk+索引别名实现零停机重建索引
课程大纲
1、重建索引
一个field的设置是不能被修改的,如果要修改一个Field,那么应该重新按照新的mapping,建立一个index,然后将数据批量查询出来,重新用bulk api写入index中
批量查询的时候,建议采用scroll api,并且采用多线程并发的方式来reindex数据,每次scoll就查询指定日期的一段数据,交给一个线程即可
(1)一开始,依靠dynamic mapping,插入数据,但是不小心有些数据是2017-01-01这种日期格式的,所以title这种field被自动映射为了date类型,实际上它应该是string类型的
PUT /my_index/my_type/3
{
"title": "2017-01-03"
}
{
"my_index": {
"mappings": {
"my_type": {
"properties": {
"title": {
"type": "date"
}
}
}
}
}
}
(2)当后期向索引中加入string类型的title值的时候,就会报错
PUT /my_index/my_type/4
{
"title": "my first article"
}
{
"error": {
"root_cause": [
{
"type": "mapper_parsing_exception",
"reason": "failed to parse [title]"
}
],
"type": "mapper_parsing_exception",
"reason": "failed to parse [title]",
"caused_by": {
"type": "illegal_argument_exception",
"reason": "Invalid format: \"my first article\""
}
},
"status": 400
}
(3)如果此时想修改title的类型,是不可能的 field 不能修改
PUT /my_index/_mapping/my_type
{
"properties": {
"title": {
"type": "text"
}
}
}
{
"error": {
"root_cause": [
{
"type": "illegal_argument_exception",
"reason": "mapper [title] of different type, current_type [date], merged_type [text]"
}
],
"type": "illegal_argument_exception",
"reason": "mapper [title] of different type, current_type [date], merged_type [text]"
},
"status": 400
}
(4)此时,唯一的办法,就是进行reindex,也就是说,重新建立一个索引,将旧索引的数据查询出来,再导入新索引
(5)如果说旧索引的名字,是old_index,新索引的名字是new_index,终端java应用,已经在使用old_index在操作了,难道还要去停止java应用,修改使用的index为new_index,才重新启动java应用吗?这个过程中,就会导致java应用停机,可用性降低
(6)所以说,给java应用一个别名,这个别名是指向旧索引的,java应用先用着,java应用先用goods_index alias来操作,此时实际指向的是旧的my_index
PUT /my_index/_alias/goods_index
(7)新建一个index,调整其title的类型为string
PUT /my_index_new
{
"mappings": {
"my_type": {
"properties": {
"title": {
"type": "text"
}
}
}
}
}

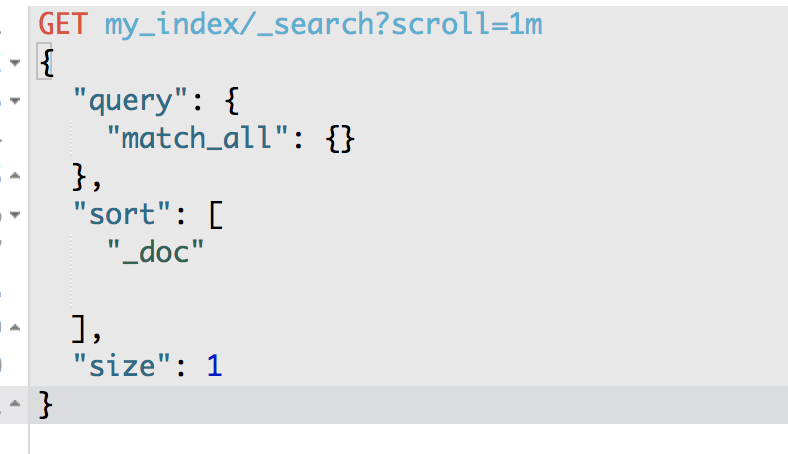
(8)使用scroll api将数据批量查询出来
GET /my_index/_search?scroll=1m
{
"query": {
"match_all": {}
},
"sort": ["_doc"],
"size": 1
}
{
"_scroll_id": "DnF1ZXJ5VGhlbkZldGNoBQAAAAAAADpAFjRvbnNUWVZaVGpHdklqOV9zcFd6MncAAAAAAAA6QRY0b25zVFlWWlRqR3ZJajlfc3BXejJ3AAAAAAAAOkIWNG9uc1RZVlpUakd2SWo5X3NwV3oydwAAAAAAADpDFjRvbnNUWVZaVGpHdklqOV9zcFd6MncAAAAAAAA6RBY0b25zVFlWWlRqR3ZJajlfc3BXejJ3",
"took": 1,
"timed_out": false,
"_shards": {
"total": 5,
"successful": 5,
"failed": 0
},
"hits": {
"total": 3,
"max_score": null,
"hits": [
{
"_index": "my_index",
"_type": "my_type",
"_id": "2",
"_score": null,
"_source": {
"title": "2017-01-02"
},
"sort": [
0
]
}
]
}
}
(9)采用bulk api将scoll查出来的一批数据,批量写入新索引
POST /_bulk
{ "index": { "_index": "my_index_new", "_type": "my_type", "_id": "2" }}
{ "title": "2017-01-02" }
(10)反复循环8~9,查询一批又一批的数据出来,采取bulk api将每一批数据批量写入新索引
(11)将goods_index alias切换到my_index_new上去,java应用会直接通过index别名使用新的索引中的数据,java应用程序不需要停机,零提交,高可用
POST /_aliases
{
"actions": [
{ "remove": { "index": "my_index", "alias": "goods_index" }},
{ "add": { "index": "my_index_new", "alias": "goods_index" }}
]
}
(12)直接通过goods_index别名来查询,是否ok
GET /goods_index/my_type/_search
2、基于alias对client透明切换index
PUT /my_index_v1/_alias/my_index
client对my_index进行操作
reindex操作,完成之后,切换v1到v2
POST /_aliases
{
"actions": [
{ "remove": { "index": "my_index_v1", "alias": "my_index" }},
{ "add": { "index": "my_index_v2", "alias": "my_index" }}
]
}
67.内核原理探秘_倒排索引组成结构以及其索引 不 可变原因揭秘
课程大纲
倒排索引,是适合用于进行搜索的
倒排索引的结构
(1)包含这个关键词的document list
(2)包含这个关键词的所有document的数量:IDF(inverse document frequency)
(3)这个关键词在每个document中出现的次数:TF(term frequency)
(4)这个关键词在这个document中的次序
(5)每个document的长度:length norm
(6)包含这个关键词的所有document的平均长度

倒排索引不可变的好处
(1)不需要锁,提升并发能力,避免锁的问题
(2)数据不变,一直保存在os cache中,只要cache内存足够
(3)filter cache一直驻留在内存,因为数据不变
(4)可以压缩,节省cpu和io开销
倒排索引不可变的坏处:每次都要重新构建整个索引
68.内核原理探秘_深度图解剖析document写入原理(buffer,segment,commit)
课程大纲
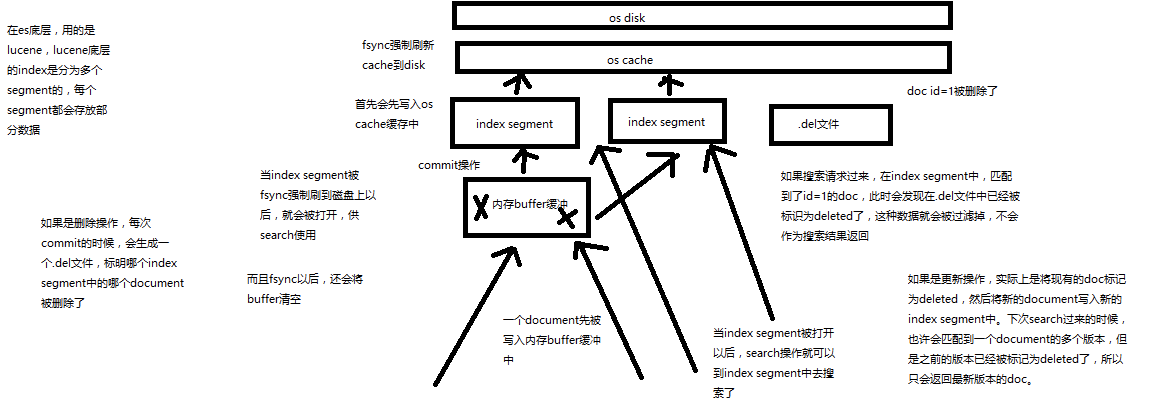
(1)数据写入buffer
(2)commit point
(3)buffer中的数据写入新的index segment commit操作
(4)等待在os cache中的index segment被fsync强制刷到磁盘上
(5)新的index sgement被打开,供search使用
(6)buffer被清空
每次commit point时,会有一个.del文件,标记了哪些segment中的哪些document被标记为deleted了
搜索的时候,会依次查询所有的segment,从旧的到新的,比如被修改过的document,在旧的segment中,会标记为deleted,在新的segment中会有其新的数据
69.内核原理探秘_优化写入流程实现NRT近实时(filesystem cache,refresh)
课程大纲
现有流程的问题,每次都必须等待fsync将segment刷入磁盘,才能将segment打开供search使用,这样的话,从一个document写入,到它可以被搜索,可能会超过1分钟!!!这就不是近实时的搜索了!!!主要瓶颈在于fsync实际发生磁盘IO写数据进磁盘,是很耗时的。
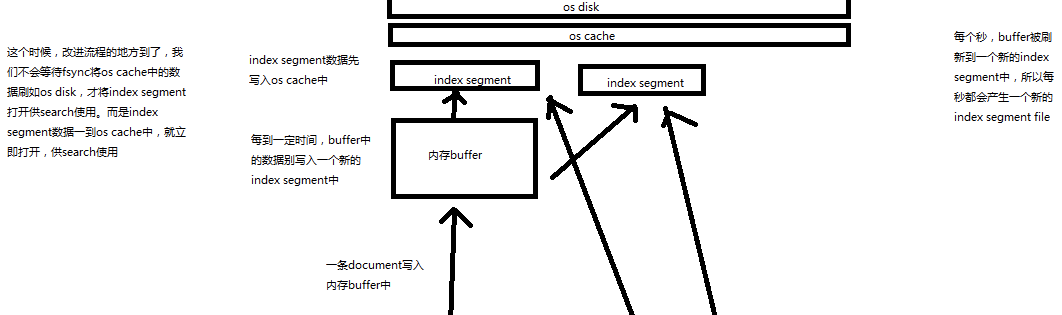
写入流程别改进如下:
(1)数据写入buffer
(2)每隔一定时间,buffer中的数据被写入segment文件,但是先写入os cache
(3)只要segment写入os cache,那就直接打开供search使用,不立即执行commit
数据写入os cache,并被打开供搜索的过程,叫做refresh,默认是每隔1秒refresh一次。也就是说,每隔一秒就会将buffer中的数据写入一个新的index segment file,先写入os cache中。所以,es是近实时的,数据写入到可以被搜索,默认是1秒。
POST /my_index/_refresh,可以手动refresh,一般不需要手动执行,没必要,让es自己搞就可以了
比如说,我们现在的时效性要求,比较低,只要求一条数据写入es,一分钟以后才让我们搜索到就可以了,那么就可以调整refresh interval
PUT /my_index
{
"settings": {
"refresh_interval": "30s"
}
}
commit。。。稍后就会讲。。。
70.内核原理探秘_继续优化写入流程实现durability可靠存储(translog,flush)
课程大纲
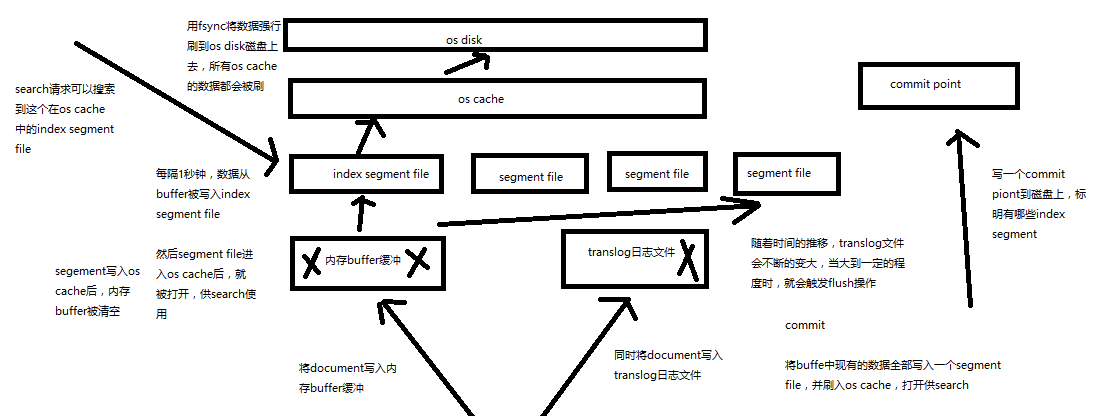
再次优化的写入流程 最终版本
(1)数据写入buffer缓冲和translog日志文件
(2)每隔一秒钟,buffer中的数据被写入新的segment file,并进入os cache,此时segment被打开并供search使用
(3)buffer被清空
(4)重复1~3,新的segment不断添加,buffer不断被清空,而translog中的数据不断累加
(5)当translog长度达到一定程度的时候,commit操作发生
(5-1)buffer中的所有数据写入一个新的segment,并写入os cache,打开供使用
(5-2)buffer被清空
(5-3)一个commit ponit被写入磁盘,标明了所有的index segment
(5-4)filesystem cache中的所有index segment file缓存数据,被fsync强行刷到磁盘上
(5-5)现有的translog被清空,创建一个新的translog
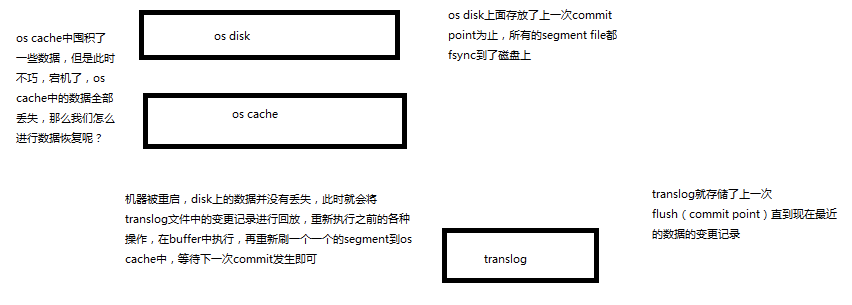
基于translog和commit point,如何进行数据恢复
fsync+清空translog,就是flush,默认每隔30分钟flush一次,或者当translog过大的时候,也会flush
POST /my_index/_flush,一般来说别手动flush,让它自动执行就可以了
translog,每隔5秒被fsync一次到磁盘上。在一次增删改操作之后,当fsync在primary shard和replica shard都成功之后,那次增删改操作才会成功
但是这种在一次增删改时强行fsync translog可能会导致部分操作比较耗时,也可以允许部分数据丢失,设置异步fsync translog
PUT /my_index/_settings
{
"index.translog.durability": "async",
"index.translog.sync_interval": "5s"
}
最终版本的es写入流程
commit point + translog进行数据恢复
ES--07的更多相关文章
- ES 07 - Elasticsearch查询文档的六种方法
目录 1 Query String Search(查询串检索) 2 Query DSL(ES特定语法检索) 3 Query Filter(过滤检索) 4 Full Text Search(全文检索) ...
- webpack-工程化工具
一.简介 1.webpack 是 facebook 公司发布的一款工程化工具,早期有 react 使用. 2.核心理念: 一切都是资源,是资源我们就能模块化打包加载. 3.webpack 默认支持 c ...
- 汇编语言debug命令与指令机器码
一.debug命令 二.标志信息 -r用这个指令,得到的信息右下角: NV UP EI PL NZ NA PO NC 这些符号代表的就是标志寄存器里常用标志位的值.这个是符号值对应表: 溢出标志OF( ...
- ES 05 - 通过Kibana管理Elasticsearch集群服务
目录 1 检查集群的健康状况 2 查看集群中的节点个数 3 查看集群中的索引 4 简单的索引操作 4.1 创建索引 4.2 删除索引 在本篇文章之前, 需要完成: ① 启动Elasticsearch服 ...
- ES 04 - 安装Kibana插件(6.6.0版本)
目录 1 Kibana是什么 2 安装并启动Kibana 2.1 准备安装包 2.2 修改配置文件 2.3 启动Kibana并验证 2.4 关闭Kibana服务 3 Kibana功能测试 3.1 关于 ...
- ES 02 - 部署Elasticsearch单机服务 + 部署中的常见问题
目录 1 准备工作 1.1 安装JDK 1.2 下载安装包 1.3 创建elastic用户 2 启动ES服务 2.1 修改配置文件 2.2 启动服务 3 验证ES服务是否可用 4 关闭与重启服务 4. ...
- ElasticSearch6(二)-- Java API连接es
此ElasticSearch系列基于最新版的6.2.4版本. 一.pom.xml依赖 <dependencies> <dependency> <groupId>ju ...
- es的mapping设置
自定义mapping的api PUT test_index { "mappings": { #mappings关键字 "doc": { #type " ...
- es 高级
事务处理 _settings _refresh _flush 慢查询 存储模块 mmap local simplefs 缓存 IO 调节 热点线程 suggesters _suggest 端点 插件 ...
- OpenGL ES学习资料总结
从今年春节后开始学习OpenGL ES,发现网上资料很有限,而且良莠不齐,所以整理了一下我学习时用到的资料和一些心得. 1. OpenGL ES1.x参考资料 把NEHE的教程移植到了Android上 ...
随机推荐
- ubuntu安装docker{ubuntu16.04下安装docker}
一.开始安装 第一步: 由于apt官方库里的docker版本可能比较旧,所以先卸载可能存在的旧版本: $ sudo apt-get remove docker docker-engine d ...
- Svn 安装、配置、使用指南
Svn 安装.配置.使用指南 Svn 是 Subversion 的简称,是一个开放源代码的版本控制系统,它采用了分支管理系统. 1. 安装配置 1.1. 安装 svn 1.2. 创建 svn 仓库 1 ...
- SoapUI 学习总结-01 环境配置
遇到的问题 1,怎么SoapUI的Request URL不支持大写怎么办? 问题:在SoapUI的Request URL中,每次输入的URL中含有的大写字母会自动转换为小写字母,导致请求不了对应的地址 ...
- Codeforces Global Round 2 Solution
这场题目设置有点问题啊,难度:Div.2 A->Div.2 B->Div.2 D->Div.2 C->Div.2 D->Div.1 D-> Div.1 E-> ...
- 程序员买房指南——LZ的三次买房和一次卖房经历
引言 买房,一直是程序员群体绕不开的一个话题,尤其是到了一定年纪和人生阶段以后,买房这件事会变得越来越迫切. 为什么LZ一上来就说,买房是程序员绕不开的一个话题? 其实原因很简单,由于程序员这个职业的 ...
- 关于PHP自动捕捉处理错误和异常的尝试
之所以想着做错误和异常的自动处理是因为: 用的公司自己的框架写API,没有异常和错误相关功能, 而每次操作都进行try...catch,有点繁琐不说,感觉还很鸡肋,即使我catch到了,还是得写代码进 ...
- php的接口,抽象类,trait(转载,合并)
一. 抽象类abstract class 1 .抽象类是指在 class 前加了 abstract 关键字且存在抽象方法(在类方法 function 关键字前加了 abstract 关键字)的类. 2 ...
- poj2778(AC自动机+矩阵快速幂)
题意:给你n个字符串,问你长度为m的字符串且字符串中不含有那n个子串的字符串的数量 解题思路:这道题一开始就不太懂,还以为是组合数学的题目,后面看了别人的博客,才知道这是属于AC自动机的另一种用法,是 ...
- 修改chrome的安装目录
进入默认安装目录,然后把application文件夹复制出来,把文件夹改名为“Chrome浏览器”之类的.然后进入这个文件夹,新建一个文件夹,名字叫做est_profile 在chrome.exe目录 ...
- ORM基础之ORM介绍和基础操作
一.ORM介绍 1.ORM概念 对象关系映射(Object Relational Mapping,简称ORM)模式是一种为了解决面向对象与关系数据库存在的互不匹配的现象的技术. 简单的说,ORM是通过 ...