vue脚手架引入swiper
方法一:
下载swiper:
npm install swiper --save-dev
swiper4.0使用入口:http://www.swiper.com.cn/usage/index.html;
html:

<div class="swiper-container">
<div class="swiper-wrapper">
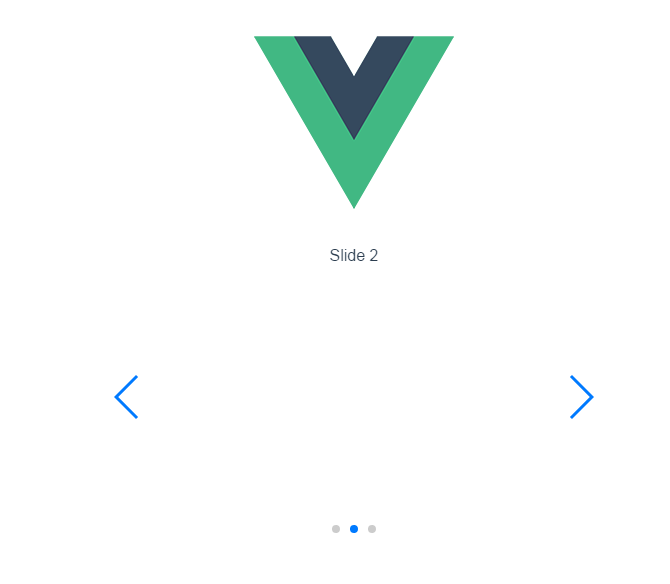
<div class="swiper-slide">Slide 1</div>
<div class="swiper-slide">Slide 2</div>
<div class="swiper-slide">Slide 3</div>
</div>
<!-- 如果需要分页器 -->
<div class="swiper-pagination"></div> <!-- 如果需要导航按钮 -->
<div class="swiper-button-prev"></div>
<div class="swiper-button-next"></div> <!-- 如果需要滚动条 -->
<div class="swiper-scrollbar"></div>
</div>
在需要使用swiper的组件里引入swiper,swiper的初始化放在mounted里(可以把官网例子的启动 var mySwiper = 删掉);
js:
<script>

import Swiper from 'swiper';

export default {

  name: 'HelloWorld',

  data () {

    return {

      msg: 'Welcome to Your Vue.js App'

    }

  },

  mounted(){

     new Swiper ('.swiper-container', {

    loop: true,

    // 如果需要分页器

    pagination: '.swiper-pagination',

    // 如果需要前进后退按钮

    nextButton: '.swiper-button-next',

    prevButton: '.swiper-button-prev',

    // 如果需要滚动条

    scrollbar: '.swiper-scrollbar',

  })

  }

}

</script>
css:
在main.js里引入css
import 'swiper/dist/css/swiper.css';
然后我们在用到swiper的组件里写点样式
<style scoped>

 .swiper-container {

        width: 500px;

        height: 300px;

        margin: 20px auto;

    }

</style>
-----------------------------------我是分割线-----------------------------------------------------------
方法二:
1.安装vue-cli
参考地址:https://github.com/vuejs/vue-cli
如果不使用严格语法需要在后三项打no;(加了挺头疼的,老是报错,但是对自己的代码规范性也是有很大的帮助的)
2.swiper下载示例代码
参考地址:http://www.swiper.com.cn/usage/index.html
一:单个组件使用:
3.在刚下载好的vue-cli里的helloworld.vue进行代码编写。
3.1html部分:
 1 <template>

 2   <div class="hello">

 3     <div class="swiper-container">

 4     <div class="swiper-wrapper">

 5         <div class="swiper-slide">Slide 1</div>

 6         <div class="swiper-slide">Slide 2</div>

 7         <div class="swiper-slide">Slide 3</div>

 8     </div>

 9     <!-- 如果需要分页器 -->

10     <div class="swiper-pagination"></div>

11

12     <!-- 如果需要导航按钮 -->

13     <div class="swiper-button-prev"></div>

14     <div class="swiper-button-next"></div>

15

16     <!-- 如果需要滚动条 -->

17     <div class="swiper-scrollbar"></div>

18 </div>

19   </div>

20 </template>
3.2 js部分:
这里使用import引入swiper.js文件;
swiper的启动放在mounted里执行;
<script>

import'../assets/js/swiper.min.js'

export default {

  name: 'HelloWorld',

  data () {

    return {

      msg: 'Welcome to Your Vue.js App'

    }

  },

  mounted(){

     var mySwiper = new Swiper ('.swiper-container', {

    loop: true,

    // 如果需要分页器

    pagination: '.swiper-pagination',

    // 如果需要前进后退按钮

    nextButton: '.swiper-button-next',

    prevButton: '.swiper-button-prev',

    // 如果需要滚动条

    scrollbar: '.swiper-scrollbar',

  })

  }

}

</script>
3.3css部分:
 1 <style scoped>

 2 @import'../assets/css/swiper.min.css';

 3     body {

 4         margin: 0;

 5         padding: 0;

 6     }

 7     .swiper-container {

 8         width: 500px;

 9         height: 300px;

10         margin: 20px auto;

11     }

12

13

14     </style>
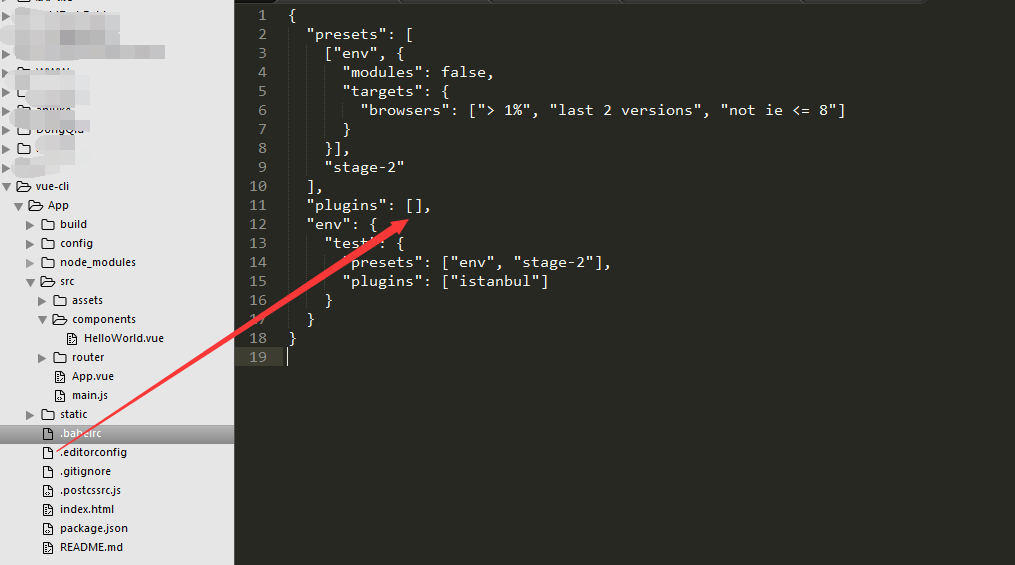
4.看似大工告成,这时候会报错:
Uncaught TypeError: Cannot assign to read only property 'exports' of object '#<Object>'
这个错误查文档说是:
在webpack打包的时候,可以在js文件中混用require和export。但是不能混用import 以及module.exports。
因为webpack 2中不允许混用import和module.exports
我们只需要吧.babelrc文件里的第11行代码插件项"plugins": ["transform-runtime"],中的transform-runtime删掉即可;
 1 {

 2   "presets": [

 3     ["env", {

 4       "modules": false,

 5       "targets": {

 6         "browsers": ["> 1%", "last 2 versions", "not ie <= 8"]

 7       }

 8     }],

 9     "stage-2"

10   ],

11   "plugins": [],

12   "env": {

13     "test": {

14       "presets": ["env", "stage-2"],

15       "plugins": ["istanbul"]

16     }

17   }

18 }
5.好了问题解决;
二:全局使用:
6.当然也可以全局使用swiper;代码如下;
还是在刚才的helloworld.vue进行代码编写;只是去掉js和css文件的引入!
helloworld.vue代码:
 1 <template>

 2   <div class="hello">

 3     <div class="swiper-container">

 4     <div class="swiper-wrapper">

 5         <div class="swiper-slide">Slide 1</div>

 6         <div class="swiper-slide">Slide 2</div>

 7         <div class="swiper-slide">Slide 3</div>

 8     </div>

 9     <!-- 如果需要分页器 -->

10     <div class="swiper-pagination"></div>

11

12     <!-- 如果需要导航按钮 -->

13     <div class="swiper-button-prev"></div>

14     <div class="swiper-button-next"></div>

15

16     <!-- 如果需要滚动条 -->

17     <div class="swiper-scrollbar"></div>

18 </div>

19   </div>

20 </template>

21

22 <script>

23

24 export default {

25   name: 'HelloWorld',

26   data () {

27     return {

28       msg: 'Welcome to Your Vue.js App'

29     }

30   },

31   mounted(){

32      var mySwiper = new Swiper ('.swiper-container', {

33     loop: true,

34     // 如果需要分页器

35     pagination: '.swiper-pagination',

36     // 如果需要前进后退按钮

37     nextButton: '.swiper-button-next',

38     prevButton: '.swiper-button-prev',

39     // 如果需要滚动条

40     scrollbar: '.swiper-scrollbar',

41   })

42   }

43 }

44 </script>

45

46 <!-- Add "scoped" attribute to limit CSS to this component only -->

47 <style scoped>

48

49     body {

50         margin: 0;

51         padding: 0;

52     }

53     .swiper-container {

54         width: 500px;

55         height: 300px;

56         margin: 20px auto;

57     }

58

59

60     </style>
main.js文件代码:

常见报错解决:
Uncaught TypeError: Cannot assign to read only property 'exports' of object '#<Object>'
.babelrc文件里的插件项"plugins": ["transform-runtime"],中的transform-runtime删掉即可;
.
vue脚手架引入swiper的更多相关文章
- vue脚手架使用swiper /引入js文件/引入css文件
1.安装vue-cli 参考地址:https://github.com/vuejs/vue-cli 如果不使用严格语法需要在后三项打no:(加了挺头疼的,老是报错,但是对自己的代码规范性也是有很大的帮 ...
- vue引入swiper vue使用swiper vue脚手架使用swiper /引入js文件/引入css文件
vue引入swiper vue使用swiper vue脚手架使用swiper /引入js文件/引入css文件 ------------------------------------------- ...
- vue中引入swiper插件
这里我们使用npm的方式安装swiper插件. 1.npm install vue-awesome-swiper --save 2.在main.js文件中引入文件 import Vue from 'v ...
- vue中引入swiper(vue中的滑块组件vue-awesome-swiper)
第一步安装 npm install vue-awesome-swiper --save 第二部在main.js中引入 import VueAwesomeSwiper from 'vue-awesome ...
- vue脚手架引入MD5加密函数
可以在全局定义一个MD5的方法,然后引入到vue的脚手架中. 首先 npm install crypto --save 然后引用定义一个对象, import crypto from 'crypto'; ...
- vue脚手架中使用Vant,实现自动按需引入组件,并将px转换为rem
偶然间看到一款不错的移动端vue组件库Vant,照着官方文档敲了一下,感觉还是不错的.想着以后的项目中可能会运用到,特此记录下,方便之后使用. 现在很多的组件库为了减小代码包体积,都支持按需加载了.V ...
- angular4(2-2)angular脚手架引入第三方类库(swiper)
试了好多方法,npm install 方法失败了,下载到本地是可以使用的: 将swiper文件放到assets文件下: 项目目录下:(命令行) 因为ts并不能准确识别js语法,所以需要用ts中的int ...
- 【vue系列之一】使用vue脚手架工具搭建vue-webpack项目
对于Vue.js来说,如果你想要快速开始,那么只需要在你的html中引入一个<script>标签,加上CDN的地址即可.但是,这并不算是一个完整的vue实际应用.在实际应用中,我们必须要一 ...
- 前端MVC Vue2学习总结(二)——Vue的实例、生命周期与Vue脚手架(vue-cli)
一.Vue的实例 1.1.创建一个 Vue 的实例 每个 Vue 应用都是通过 Vue 函数创建一个新的 Vue 实例开始的: var vm = new Vue({ // 选项 }) 虽然没有完全遵循 ...
随机推荐
- 推荐一款很好用的调试js的eclipse插件
ie调试的话用 Companion.JS 一个插件 很好用的 不用配置,直接安装eclipse调试的话 可以用jsdt 可能需要配置下 网上有很多说明http://wokaours.blog.163. ...
- SELinux 初探
SELinux:Security Enhanced Linux.SELinux 是 NSA(美国国家安全局)开发设计,整合到 Linux 内核中的一个模块. 0. 基本概念 DAC(Discretio ...
- 并不对劲的bzoj4817:loj2001:p3703:[SDOI2017]树点涂色
题目大意 有一棵\(n\)(\(n\leq10^5\))个节点的树,每个点有颜色\(c\),一开始所有颜色互不相同 要进行\(m\)(\(m\leq10^5\))次操作,每次操作是以下三种中的一种: ...
- 洛谷P1527 矩阵乘法——二维树状数组+整体二分
题目:https://www.luogu.org/problemnew/show/P1527 整体二分,先把所有询问都存下来: 然后二分一个值,小于它的加到二维树状数组的前缀和里,判断一遍所有询问,就 ...
- 记重大失误(SQLserver数据回滚)ApexSQL
敲了一天代码,脑壳昏,更改数据时忘记加where条件,该数据库又未备份.修改了1800条数据..当时那个着急啊. 各种找解决方法,最后使用ApexSQL Log 完美解决.赞一个 ApexSQL L ...
- 安装phpwind报错
在安装phpwind时,下面的报错提示是什么原因呢? 答:数据库密码应设置为空
- 洛谷 P3357 最长k可重线段集问题【最大流】
pre:http://www.cnblogs.com/lokiii/p/8435499.html 和最长k可重区间集问题差不多,也就是价值的计算方法不一样,但是注意这里可能会有x0==x1的情况也就是 ...
- 【插件开发】—— 12 GEF入门
介绍 前面也简单的介绍了一下插件开发的相关知识,下面主要就介绍一下GEF的相关使用.由于最近使用到编辑器这部分的操作,因此就跳过其他的内容,先介绍下GEF的相关知识. 前文回顾 1 插件学习篇 2 简 ...
- Ocelot(六)- 架构图
简介 Ocelot是一个用.NET Core实现并且开源的API网关,它功能强大,包括了:路由.请求聚合.服务发现.认证.鉴权.限流熔断.并内置了负载均衡器与Service Fabric.Butter ...
- 比特币搬砖对冲策略Python源码
策略复制地址:https://www.fmz.com/strategy/21023 策略原理 比特币搬砖策略是入门程序化交易的基础策略.原理简单,是新手尝试程序化的好选择,在其黄金时期,比特币搬砖也带 ...