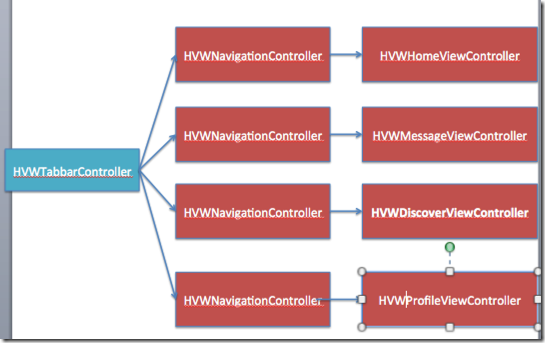
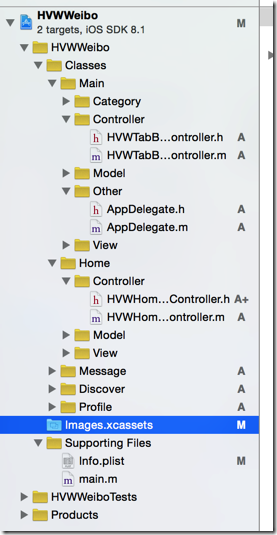
[iOS微博项目 - 1.0] - 搭建基本框架
 - (BOOL)application:(UIApplication *)application didFinishLaunchingWithOptions:(NSDictionary *)launchOptions {

     // Override point for customization after application launch.

     // 启动后显示状态栏

     UIApplication *app = [UIApplication sharedApplication];

     app.statusBarHidden = NO;

     // 设置window

     self.window = [[UIWindow alloc] init];

     self.window.frame = [UIScreen mainScreen].bounds;

     [self.window makeKeyAndVisible];

     return YES;

 }


 - (BOOL)application:(UIApplication *)application didFinishLaunchingWithOptions:(NSDictionary *)launchOptions {

     // Override point for customization after application launch.

     // 启动后显示状态栏

     UIApplication *app = [UIApplication sharedApplication];

     app.statusBarHidden = NO;

     // 设置window

     self.window = [[UIWindow alloc] init];

     self.window.frame = [UIScreen mainScreen].bounds;

     // 创建根控制器

     HVWTabBarViewController *tabVC = [[HVWTabBarViewController alloc] init];

     self.window.rootViewController = tabVC;

     [self.window makeKeyAndVisible];

     return YES;

 }
- (void)viewDidLoad {
[super viewDidLoad];
// Do any additional setup after loading the view.
// 添加子控制器
// 首页
HVWHomeViewController *homeVC = [[HVWHomeViewController alloc] init];
homeVC.view.backgroundColor = [UIColor redColor];
homeVC.title = @"首页";
[self addChildViewController:homeVC];
// 消息
HVWMessageViewController *messageVC = [[HVWMessageViewController alloc] init];
messageVC.view.backgroundColor = [UIColor blueColor];
messageVC.title = @"消息";
[self addChildViewController:messageVC];
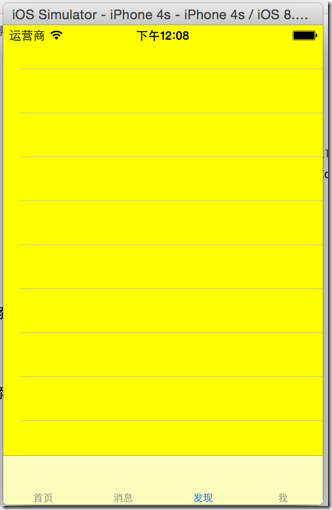
// 发现
HVWDiscoverViewController *discoverVC = [[HVWDiscoverViewController alloc] init];
discoverVC.view.backgroundColor = [UIColor yellowColor];
discoverVC.title = @"发现";
[self addChildViewController:discoverVC];
// 我
HVWProfileViewController *profileVC = [[HVWProfileViewController alloc] init];
profileVC.view.backgroundColor = [UIColor greenColor];
profileVC.title = @"我";
[self addChildViewController:profileVC];
}
 #ifndef HVWWeibo_HVWWeibo_Prefix_pch

 #define HVWWeibo_HVWWeibo_Prefix_pch

 // Include any system framework and library headers here that should be included in all compilation units.

 // You will also need to set the Prefix Header build setting of one or more of your targets to reference this file.

 // 判别是否iOS7或以上版本系统

 #define iOS7 ([UIDevice currentDevice].systemVersion.doubleValue >= 7.0)

 #endif
 #import "UIImage+Extension.h"

 @implementation UIImage (Extension)

 + (UIImage *) imageWithNamed:(NSString *) imageName {

     UIImage *image = nil;

     // 如果是iOS7或以上版本

     if (iOS7) {

         image = [UIImage imageNamed:[NSString stringWithFormat:@"%@_os7", imageName]];

     }

     // 如果是iOS6

     if (nil == image) {

         image = [UIImage imageNamed:imageName];

     }

     return image;

 }

 @end
#import "HVWTabBarViewController.h"
#import "HVWHomeViewController.h"
#import "HVWMessageViewController.h"
#import "HVWDiscoverViewController.h"
#import "HVWProfileViewController.h"
#import "UIImage+Extension.h" @interface HVWTabBarViewController () @end @implementation HVWTabBarViewController - (void)viewDidLoad {
[super viewDidLoad];
// Do any additional setup after loading the view. // 添加子控制器
// 首页
HVWHomeViewController *homeVC = [[HVWHomeViewController alloc] init];
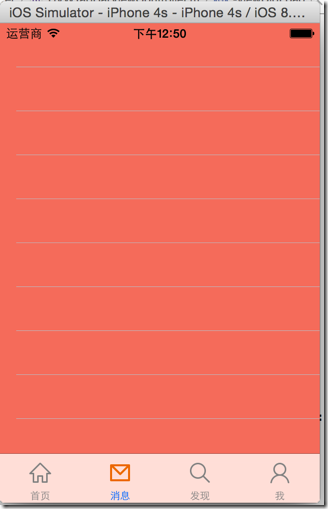
[self addChildViewController:homeVC WithTitle:@"首页" image:@"tabbar_home" seletectedImage:@"tabbar_home_selected"]; // 消息
HVWMessageViewController *messageVC = [[HVWMessageViewController alloc] init];
[self addChildViewController:messageVC WithTitle:@"消息" image:@"tabbar_message_center" seletectedImage:@"tabbar_message_center_selected"]; // 发现
HVWDiscoverViewController *discoverVC = [[HVWDiscoverViewController alloc] init];
[self addChildViewController:discoverVC WithTitle:@"发现" image:@"tabbar_discover" seletectedImage:@"tabbar_discover_selected"]; // 我
HVWProfileViewController *profileVC = [[HVWProfileViewController alloc] init];
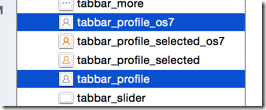
[self addChildViewController:profileVC WithTitle:@"我" image:@"tabbar_profile" seletectedImage:@"tabbar_profile_selected"]; } /** 添加tab子控制器 */
- (void) addChildViewController:(UIViewController *) viewController WithTitle:(NSString *) title image:(NSString *) imageName seletectedImage:(NSString *) selectedImageName { // 设置随机背景色
viewController.view.backgroundColor = [UIColor colorWithRed:arc4random_uniform()/255.0 green:arc4random_uniform()/255.0 blue:arc4random_uniform()/255.0 alpha:1.0]; // 设置标题
viewController.title = title;
// 设置图标
viewController.tabBarItem.image = [UIImage imageWithNamed:imageName]; // 被选中时图标
UIImage *selectedImage = [UIImage imageWithNamed:selectedImageName];
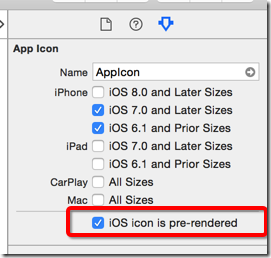
// 如果是iOS7,不要渲染被选中的tab图标(iOS7中会自动渲染成为蓝色)
if (iOS7) {
selectedImage = [selectedImage imageWithRenderingMode:UIImageRenderingModeAlwaysOriginal];
}
viewController.tabBarItem.selectedImage = selectedImage; // 添加子控制器
[self addChildViewController:viewController];
} @end
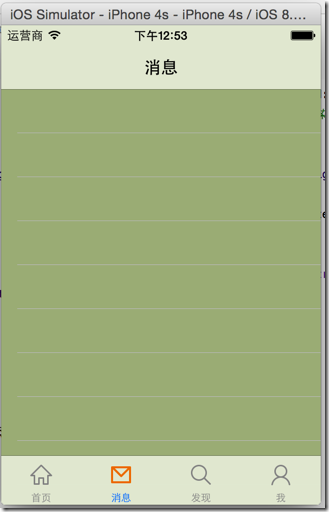
 /** 添加tab子控制器 */

 - (void) addChildViewController:(UIViewController *) viewController WithTitle:(NSString *) title image:(NSString *) imageName seletectedImage:(NSString *) selectedImageName {

     // 设置随机背景色

     viewController.view.backgroundColor = [UIColor colorWithRed:arc4random_uniform()/255.0 green:arc4random_uniform()/255.0  blue:arc4random_uniform()/255.0  alpha:1.0];

     // 设置标题,直接设置title可以同时设置tabBarItem和navigationItem的title

 //    viewController.tabBarItem.title = title;

 //    viewController.navigationItem.title = title;

     viewController.title = title;

     // 设置图标

     viewController.tabBarItem.image = [UIImage imageWithNamed:imageName];

     // 被选中时图标

     UIImage *selectedImage = [UIImage imageWithNamed:selectedImageName];

     // 如果是iOS7,不要渲染被选中的tab图标(iOS7中会自动渲染成为蓝色)

     if (iOS7) {

         selectedImage = [selectedImage imageWithRenderingMode:UIImageRenderingModeAlwaysOriginal];

     }

     viewController.tabBarItem.selectedImage = selectedImage;

     // 添加子控制器

     UINavigationController *nav = [[UINavigationController alloc] initWithRootViewController:viewController];

     [self addChildViewController:nav];

 }
 #import "HVWNavigationViewController.h"

 @interface HVWNavigationViewController ()

 @end

 @implementation HVWNavigationViewController

 - (void)viewDidLoad {

     [super viewDidLoad];

     // Do any additional setup after loading the view.

 }

 - (void)didReceiveMemoryWarning {

     [super didReceiveMemoryWarning];

     // Dispose of any resources that can be recreated.

 }

 /** 重写push方法 */

 - (void)pushViewController:(UIViewController *)viewController animated:(BOOL)animated {

     // 如果不是根控制器,隐藏TabBar

     if (self.viewControllers.count > ) {

         // 注意这里不是self(navigationController),是push出来的ViewContoller隐藏TabBar

         viewController.hidesBottomBarWhenPushed = YES;

     }

     // 最后一定要调用父类的方法

     [super pushViewController:viewController animated:animated];

 }

 @end
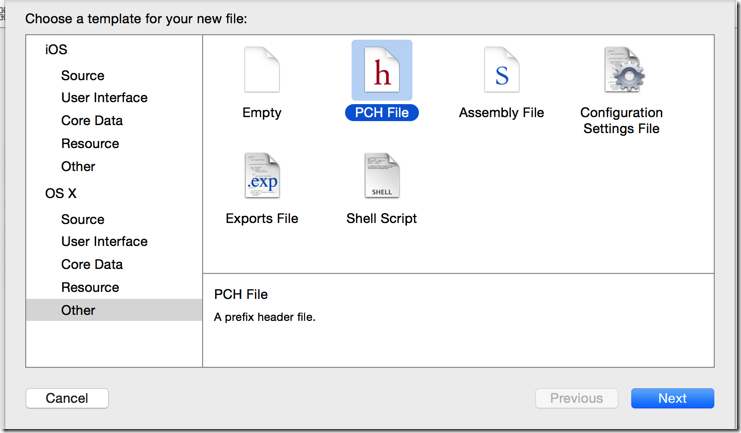
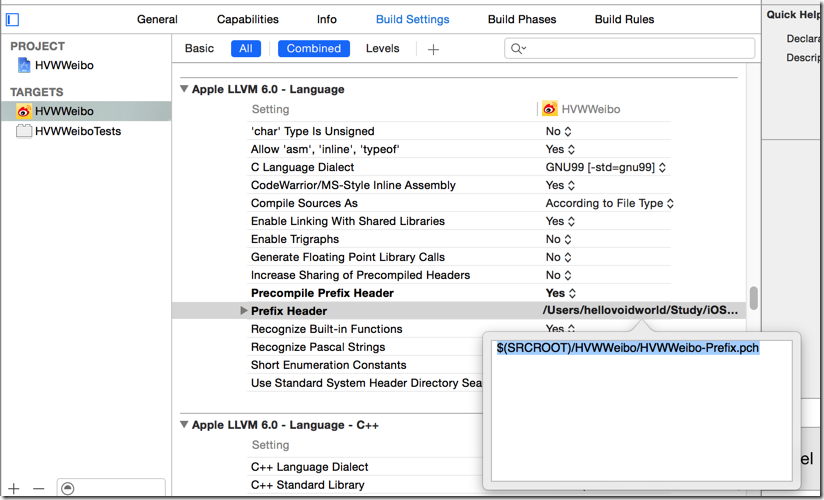
 //  HVWWeibo-Prefix.pch

 #ifndef HVWWeibo_HVWWeibo_Prefix_pch

 #define HVWWeibo_HVWWeibo_Prefix_pch

 // Include any system framework and library headers here that should be included in all compilation units.

 // You will also need to set the Prefix Header build setting of one or more of your targets to reference this file.

 #ifdef __OBJC__

     #import <UIKit/UIKit.h>

     #import <Foundation/Foundation.h>

     #import "UIImage+Extension.h"

 #endif

 // 测试用log

 #ifdef DEBUG

     #define HVWLog(...) NSLog(__VA_ARGS__)

 #else

     #define HVWLog(...)

 #endif

 // 判别是否iOS7或以上版本系统

 #define iOS7 ([UIDevice currentDevice].systemVersion.doubleValue >= 7.0)

 // 随机颜色

 #define RandomColor [UIColor colorWithRed:arc4random_uniform(256)/255.0 green:arc4random_uniform(256)/255.0  blue:arc4random_uniform(256)/255.0  alpha:1.0]

 #endif
 /** 寻找朋友按钮事件 */

 - (void) searchFriend {

     HVWLog(@"searchFriend");

 }

 //

 //  UIBarButtonItem+Extension.m

 //  HVWWeibo

 //

 //  Created by hellovoidworld on 15/1/31.

 //  Copyright (c) 2015年 hellovoidworld. All rights reserved.

 //

 #import "UIBarButtonItem+Extension.h"

 @implementation UIBarButtonItem (Extension)

 + (instancetype) itemWithImage:(NSString *) imageName hightlightedImage:(NSString *) highlightedImageName target:(id)target selector:(SEL)selector {

      UIBarButtonItem *item = [[self alloc] init];

     // 创建按钮

     UIButton *button = [UIButton buttonWithType:UIButtonTypeCustom];

     UIImage *image = [UIImage imageNamed:imageName];

     [button setImage:image forState:UIControlStateNormal];

     [button setImage:[UIImage imageNamed:highlightedImageName] forState:UIControlStateHighlighted];

     // 一定要设置frame,才能显示

     button.frame = CGRectMake(, , image.size.width, image.size.height);

     // 设置事件

     [button addTarget:target action:selector forControlEvents:UIControlEventTouchUpInside];

     item.customView = button;

     return item;

 }

 @end
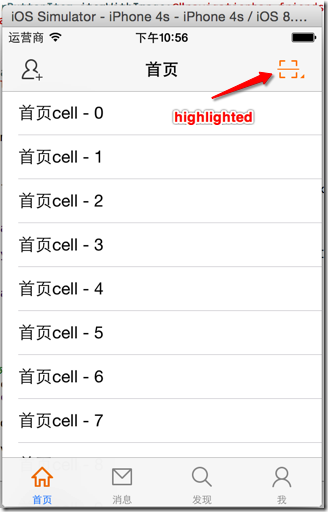
 //  HVWHomeViewController.m

 - (void)viewDidLoad {

     [super viewDidLoad];

     // 添加导航控制器按钮

     // 左边按钮

     self.navigationItem.leftBarButtonItem = [HVWBarButtonItem itemWithImage:@"navigationbar_friendsearch" hightlightedImage:@"navigationbar_friendsearch_highlighted" target:self selector:@selector(searchFriend)];

     // 右边按钮

     self.navigationItem.rightBarButtonItem = [HVWBarButtonItem itemWithImage:@"navigationbar_pop" hightlightedImage:@"navigationbar_pop_highlighted" target:self selector:@selector(pop)];

 }

 /** 左边导航栏按钮事件 */

 - (void) searchFriend {

     HVWLog(@"searchFriend");

 }

 /** 右边导航栏按钮事件 */

 - (void) pop {

     HVWLog(@"pop");

 }
 //  HVWNavigationViewController.m

 /** 重写push方法 */

 - (void)pushViewController:(UIViewController *)viewController animated:(BOOL)animated {

     // 如果不是根控制器,隐藏TabBar

     if (self.viewControllers.count > ) {

         // 注意这里不是self(navigationController),是push出来的ViewContoller隐藏TabBar

         viewController.hidesBottomBarWhenPushed = YES;

         // 加上“返回上一层”按钮和“直接回到根控制器”按钮

         viewController.navigationItem.leftBarButtonItem = [UIBarButtonItem itemWithImage:@"navigationbar_back" hightlightedImage:@"navigationbar_back_highlighted" target:self selector:@selector(back)];

         viewController.navigationItem.rightBarButtonItem = [UIBarButtonItem itemWithImage:@"navigationbar_more" hightlightedImage:@"navigationbar_more_highlighted" target:self selector:@selector(more)];

     }

     // 最后一定要调用父类的方法

     [super pushViewController:viewController animated:animated];

 }

 /** 返回上一层 */

 - (void) back {

     [self popViewControllerAnimated:YES];

 }

 /** 返回根控制器 */

 - (void) more {

     [self popToRootViewControllerAnimated:YES];

 }
[iOS微博项目 - 1.0] - 搭建基本框架的更多相关文章
- [iOS微博项目 - 3.0] - 手动刷新微博
github: https://github.com/hellovoidworld/HVWWeibo A.下拉刷新微博 1.需求 在“首页”界面,下拉到一定距离的时候刷新微博数据 刷新数据的时候使 ...
- [iOS微博项目 - 2.0] - OAuth授权3步
A.概念 OAUTH协议为用户资源的授权提供了一个安全的.开放而又简易的标准.与以往的授权方式不同之处是OAUTH的授权不会使第三方触及到用户的帐号信息(如用户名与密码),即第三方无需使用用 ...
- [iOS微博项目 - 4.0] - 自定义微博cell
github: https://github.com/hellovoidworld/HVWWeibo A.自定义微博cell基本结构 1.需求 创建自定义cell的雏形 cell包含:内容.工具条 内 ...
- 手动从0搭建ABP框架-ABP官方完整解决方案和手动搭建简化解决方案实践
本文主要讲解了如何把ABP官方的在线生成解决方案运行起来,并说明了解决方案中项目间的依赖关系.然后手动实践了如何从0搭建了一个简化的解决方案.ABP官方的在线生成解决方案源码下载参考[3],手动搭 ...
- [iOS微博项目 - 2.6] - 获取微博数据
github: https://github.com/hellovoidworld/HVWWeibo A.新浪获取微博API 1.读取微博API 2.“statuses/home_time ...
- [iOS微博项目 - 3.2] - 发送微博
github: https://github.com/hellovoidworld/HVWWeibo A.使用微博API发送微博 1.需求 学习发送微博API 发送文字微博 发送带有图片的微博 ...
- [iOS微博项目 - 3.1] - 发微博界面
github: https://github.com/hellovoidworld/HVWWeibo A.发微博界面:自定义UITextView 1.需求 用UITextView做一个编写微博的输 ...
- [iOS微博项目 - 1.7] - 版本新特性
A.版本新特性 1.需求 第一次使用新版本的时候,不直接进入app,而是展示新特性界面 github: https://github.com/hellovoidworld/HVWWeibo ...
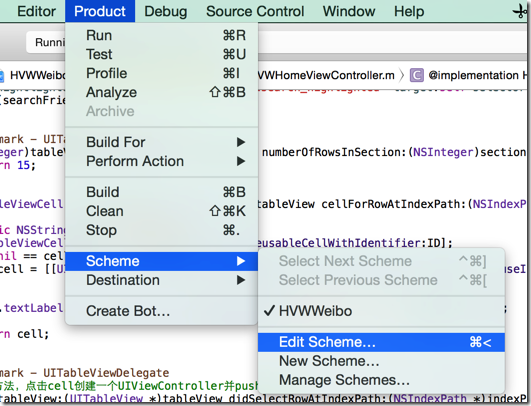
- [iOS微博项目 - 1.1] - 设置导航栏主题(统一样式)
A.导航栏两侧文字按钮 1.需求: 所有导航栏两侧的文字式按钮统一样式 普通样式:橙色 高亮样式:红色 不可用样式:亮灰 阴影:不使用 字体大小:15 github: https://github ...
随机推荐
- grunt + compass retina sprites
https://github.com/AdamBrodzinski/Retina-Sprites-for-Compass
- sdut 2847 Monitor (思维题)
题目 题意:给定a, b, x, y; 求使c, d; 使c:d = x :y; 且c<=a, d<=b, 而且c, d尽量大. 先求最小倍数, 再用最小倍数乘 x, y; #inclu ...
- HTMLayout界面CSSS样式解析笔记
HTMLayout学习笔记 by BBDXF 一.界面篇 学习界面需要有一定的HTML.CSS认知,如果你问为什么,那就当我白说. 由于界面库官方没有给一个完善的User guide,所有的学习都靠自 ...
- 分享一段H264视频和AAC音频的RTP封包代码
1. H264视频的RTP封包 static int h264_parse(Track *tr, uint8_t *data, size_t len) { h264_priv *priv = tr-& ...
- <十一>面向对象分析之UML核心元素之组件
组件
- Android启动activity的4种模式(standard、singleTop、singleTask、singleINstance)
在AndroidManifest.xml中配置activity时,android:launchMode属性会指定启动activity的模式,有四种: standard singleTop single ...
- css3属性及事例
在看网上别的前端大牛的作品时,总会有新的收获,我想很多人应该都知道box-shadow,但是不知道有没有接触过这个 box-shadow: 2px 2px 4px rgba(0,0,0,0.4) , ...
- jquery插件——日历控件
今天在网上有看到一个jquery插件——日历控件,不过之前也在柯乐义的网站上看到了(http://keleyi.com/ 推荐下) 这个插件看着比较大气,所以干脆也分享下,以后自己也好用一点儿 1.页 ...
- addView的误区
如果在代码中动态使用addView(v),那么v里头所有在xml里设置好的layout_xxx全部失效!
- [Everyday Mathematics]20150118
设 $X$ 是线性空间, $\phi_1,\cdots,\phi_n,\phi$ 是 $X$ 上的线性泛函, 试证: $$\bex \phi\in \span\sed{\phi_1,\cdots,\p ...