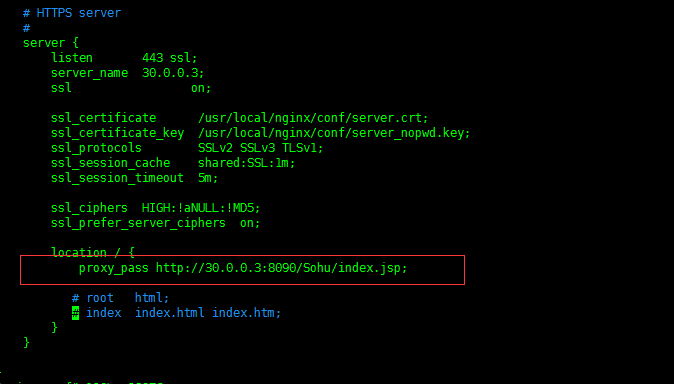
nginx配置https服务器
方法一
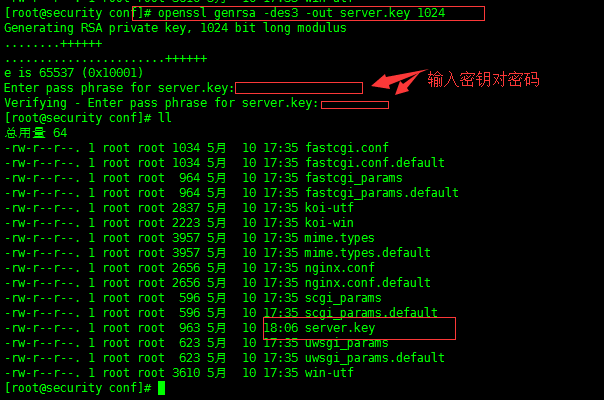
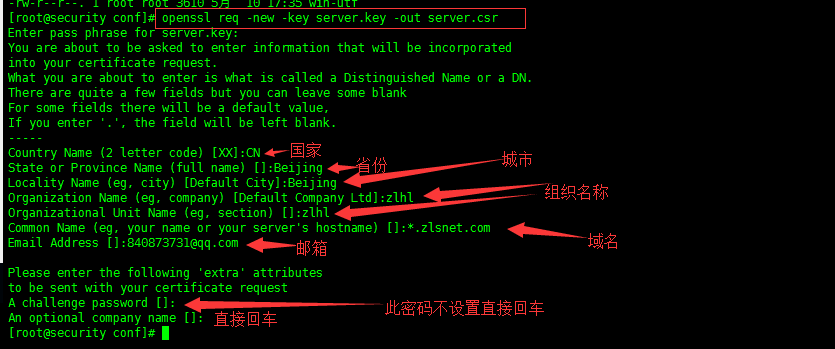
1、创建证书


quit :完整有序的停止nginx
kill -TERM 主进程号 :快速停止Nginx
平滑重启nginx:
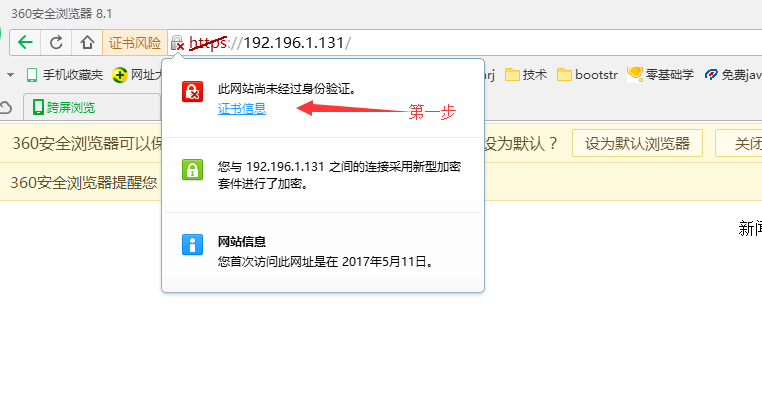
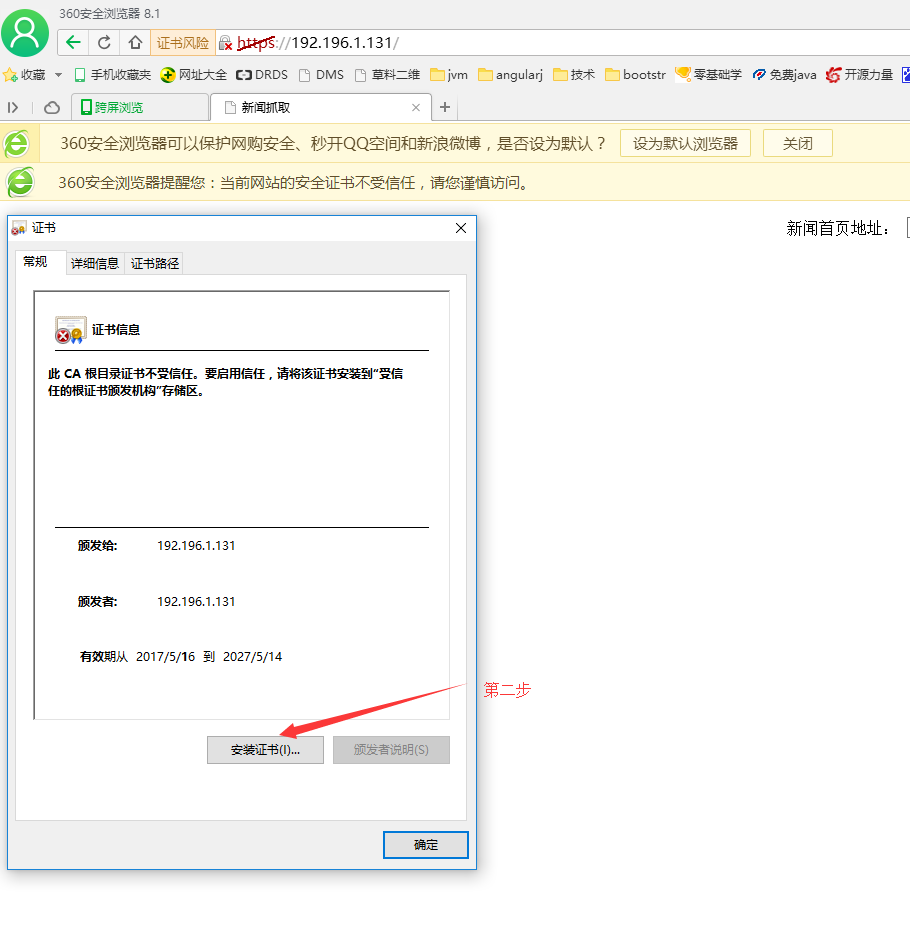
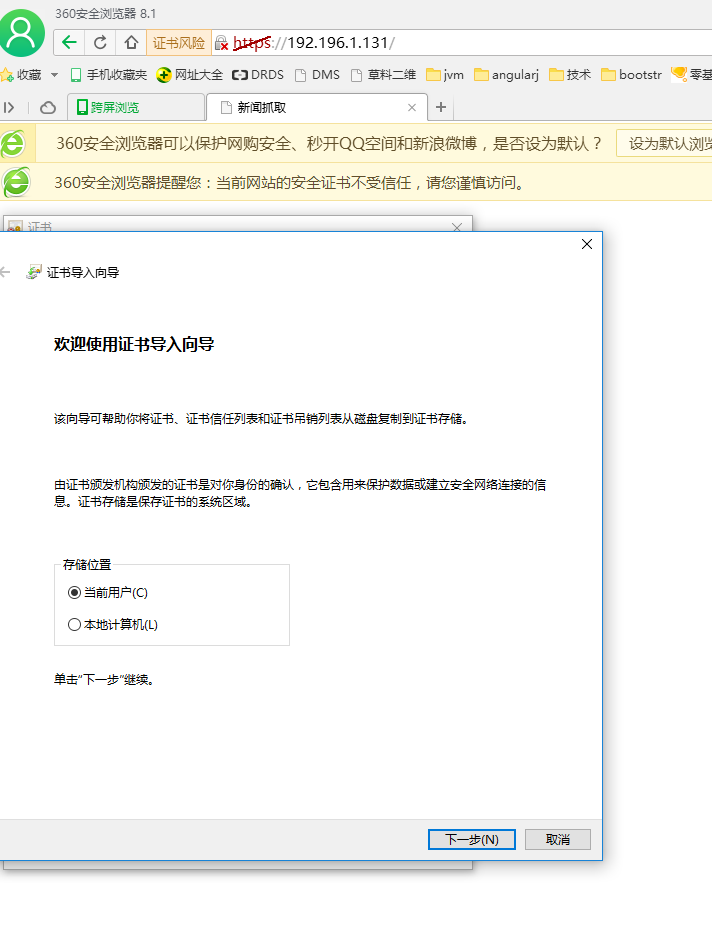
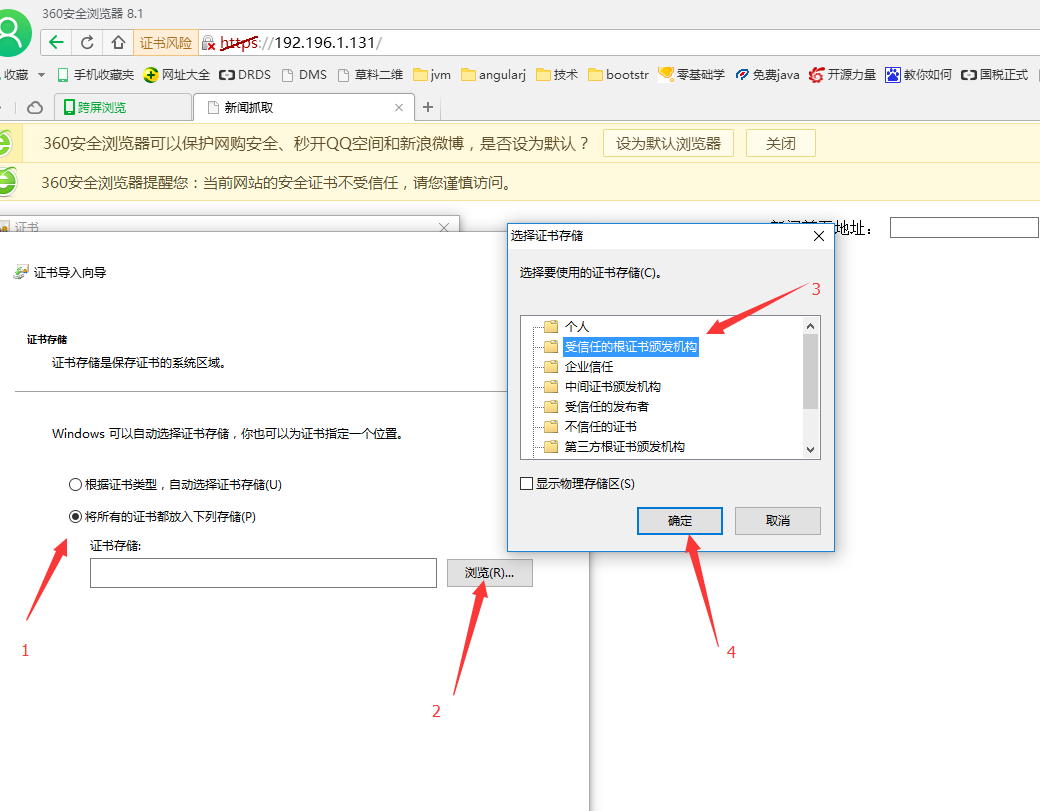
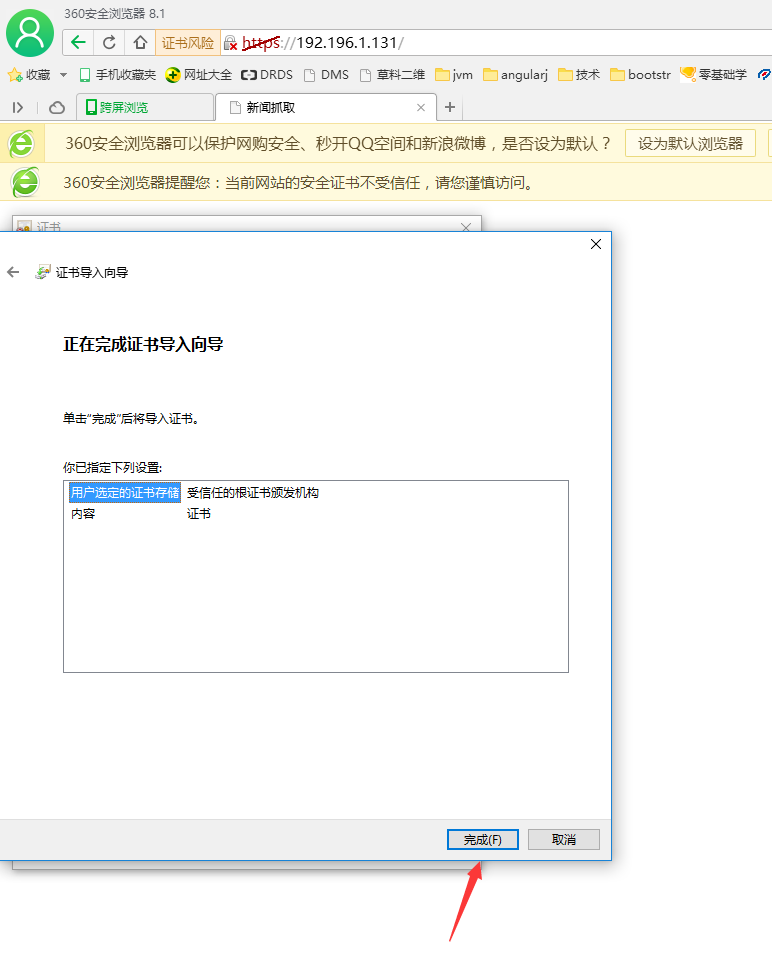
浏览器设置:

nginx配置https服务器的更多相关文章
- Nginx 配置 HTTPS 服务器
Nginx 配置 HTTPS 服务器 Chrome 浏览器地址栏标志着 HTTPS 的绿色小锁头从心理层面上可以给用户专业安全的心理暗示,本文简单总结一下如何在 Nginx 配置 HTTPS 服务器, ...
- windows下用nginx配置https服务器
1.安装nginx 先到nginx官网下在nginx http://nginx.org/en/download.html 将下载好的文件解压出来修改文件名为 nginx ,然后拷贝到C盘下,目录如下: ...
- Nginx 配置 HTTPS(多域名)
平常开发要求比较低, 依然在用 HTTP, 但到了微信小程序就不行了, 腾讯和苹果都对 API 提出了 HTTPS 的要求. 尤其是苹果, 不仅要求 HTTPS, 还要求 TLS 协议版本要在 1.2 ...
- Nginx配置Https
1.申请证书: https://console.qcloud.com/ssl?utm_source=yingyongbao&utm_medium=ssl&utm_campaign=qc ...
- 【转】Linux下nginx配置https协议访问的方法
一.配置nginx支持https协议访问,需要在编译安装nginx的时候添加相应的模块--with-http_ssl_module 查看nginx编译参数:/usr/local/nginx/sbin/ ...
- nginx配置https双向验证(ca机构证书+自签证书)
nginx配置https双向验证 服务端验证(ca机构证书) 客户端验证(服务器自签证书) 本文用的阿里云签发的免费证书实验,下载nginx安装ssl,文件夹有两个文件 这两个文件用于做服务器http ...
- centos6.8下配置https服务器
centos6.8下配置https服务器 1.1 环境 l 系统环境:内核环境为2.6.32版本 64位的CentOS release 6.8 (Final) [root@localhost ~] ...
- RedHat 6.6下安装nginx,配置HTTPS
1.安装依赖包 yum -y install pcre-devel openssl-devel zlib-devel 2.下载nginx安装包到服务器上,当前使用版本nginx-1.15.5.tar. ...
- nginx 配置https并自签名证书
2016-10-28 转载请注明出处:http://daodaoliang.com/ 作者: daodaoliang 版本: V1.0.1 邮箱: daodaoliang@yeah.net 参考链接: ...
随机推荐
- element,点击查看,实现tab切换:
点击查看,实现tab切换: 代码如下: <template> <div> <el-table :data="tableData" style=&quo ...
- ORA-01950:no privileges on tablespace 'USERS'
ORA-01950:no privileges on tablespace 'USERS' SQL>create user myuser identitied by password; SQL& ...
- xpath的基础使用
一.xpath简介 XPath 是一门在 XML 文档中查找信息的语言.XPath 用于在 XML 文档中通过元素和属性进行导航. XPath 使用路径表达式在 XML 文档中进行导航 XPath 包 ...
- python3 读取表格的数据
python3 读取表格的数据 xlrd1.1.0的下载网址:https://pypi.python.org/pypi/xlrd. xlrd1.1.0兼容python2和python3. python ...
- GM TECH2 Scanner Clone
Professional Diagnostic Tools gm tech 2 scanner china with multi-languages, TIS2000 Programming CD, ...
- linux 网卡配置文件详解2018-03-07
转自:https://www.cnblogs.com/ienino/p/7717092.html 配置文件位置:/etc/sysconfig/network-scripts/ifcfg-eth0 1. ...
- 爬虫(GET)——爬取多页的html
工具:python3 目标:将编写的代码封装,不同函数完成不同功能,爬取任意页数的html 新学语法:with open as 除了有更优雅的语法,with还可以很好的处理上下文环境产生的异常. # ...
- android apk反编译,重新打包,签名
apktool安装 Windows系统: 1. 首先确保系统安装有Java 2. 下载最新版本的apktool.jar https://ibotpeaches.github.io/Apktool/ 下 ...
- python 缺失值的向前填充
method='bfill'可实现按下方值填充
- python 读取文件使用chunksize后逐块迭代操作
chunkers=pd.read_csv('dd.csv',chunksize=10000) tot=pd.Series([]) for piece in chunkers: tot=tot.add( ...